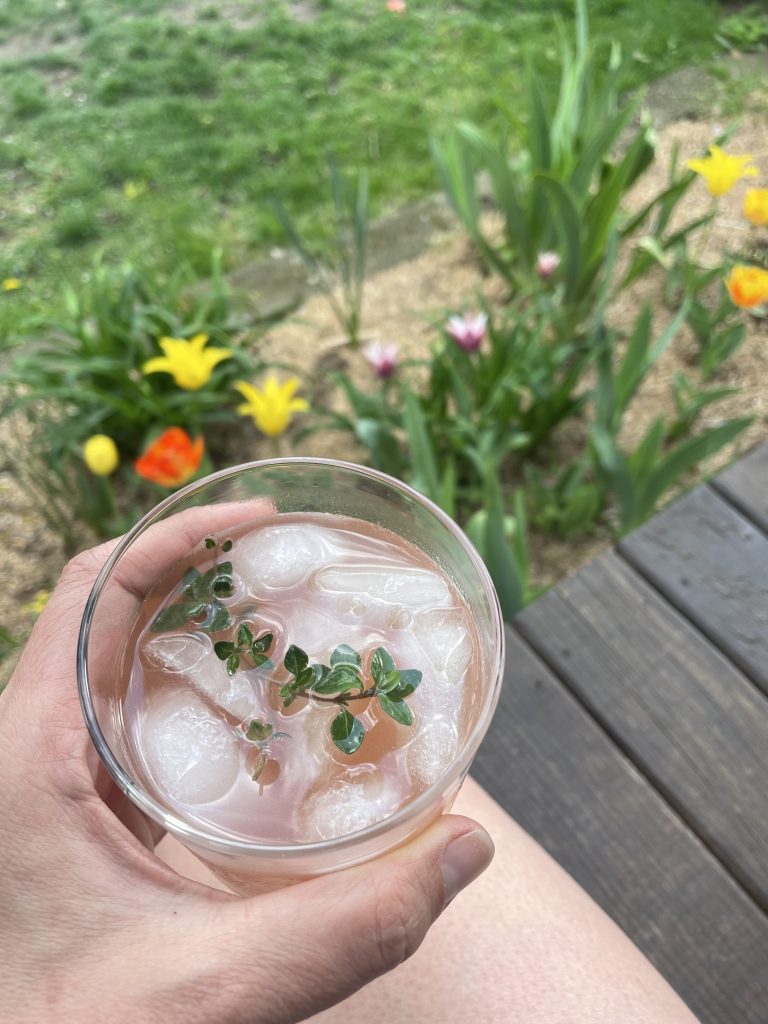
This rhubarb shrub makes a really nice and simple spring cocktail when you mix it with ice, gin, and soda water. I recommend adding a sprig of thyme for extra spring freshness. Rather than talk your ear off about it, I’ll just leave the recipe here, encourage you to give it a try, and walk back to my Saturday afternoon gin drink in the yard…..
Rhubarb Shrub
Makes about 2 cups
Ingredients
1 pound rhubarb (about 4-6 stalks), roughly chopped
1 cup sugar (maple sugar or 1/2 cup maple syrup work great too)
1 cup water
1 cup apple cider vinegar (I hear red wine vinegar or balsamic are good too, but I haven’t tried them)
Instructions
- Bring rhubarb, sugar and water to a boil in small saucepan. Reduce heat to low and simmer 20 minutes.
- Take off the heat and add the apple cider vinegar. Let cool.
- Strain through a fine mesh sieve (you could use a cheese cloth or clean towel if you need a finer mesh)
- Chill and Enjoy!
This should last just fine in the fridge for a month or so, but I dare you to resist drinking it for that long! I like to add a tablespoon or two to each drink, but you might like more or less.
]]>(Note: this post was originally published in February 2022, but I’ve given it a bit of a refresh for this years Super Bowl game and party)
In general, here are my strategies for picking the best (and lowest waste) super bowl (or, erm…. Saturday afternoon or Friday night movie night) snacks:
- Choose homemade snacks – homemade is almost always going to be lower waste than the pre-made alternative (in fact, if you can think of a single example that breaks this rule, tell me in the comments and I’ll figure out some sort of prize!). Think about a bag of potatoes vs frozen tater tots, potato skins or French fries and “naked” avocados, garlic and tomatoes vs the plastic tub of remade guacamole
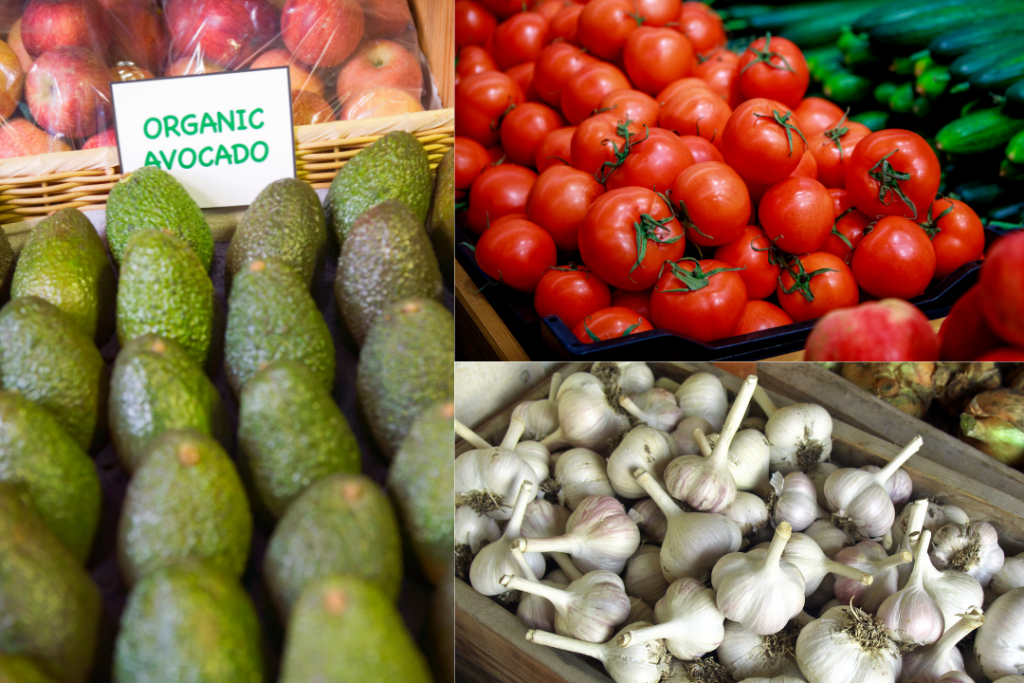
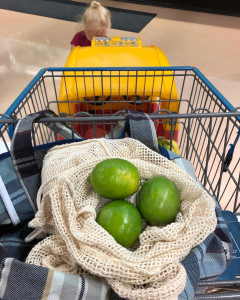
- Look for “naked” ingredients – meaning those you can buy without any packaging. Vegetables and fruits are perfect examples of this. Look for them in bulk bins and DON’T use the plastic bag. You can either bring your own produce bag (see my recommendations here if you want to purchase a few) or just throw them into your cart without a bag… trust me, the cashier will be able to ring them up for you like this just fine!
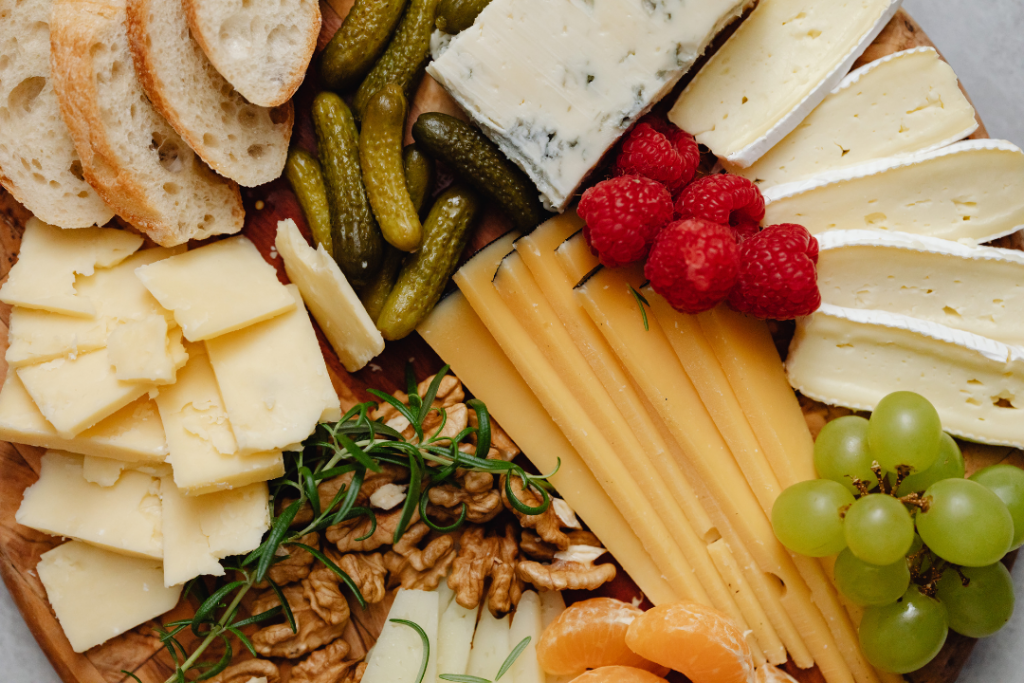
- Buy local – this is a great opportunity to support your favorite bakery, local farmer, cheese shop, or neighborhood restaurant. Lots of times, businesses like this would be happy to cater your party, make a cheese tray (hint, hint, the Rockford Cheese Shop) or create a large quantity order, but you’d better call ahead… the sooner the better!
 Buy in recyclable packaging – remember that metal and glass can be recycled endlessly (meaning over and over and over and over and… you get the idea), paper 5-7 times, and plastic only 2-3 times. I use this order to guide my packaging selection when I have choices.
- Buy in bulk – More food in the same container slightly reduces the packaging:food ratio. This is my last ditch effort to make a more sustainable choice, but this ONLY WORKS if you EAT ALL THE FOOD! Buying more than you eat (to save on packaging) and then throwing away the excess food COMPLETELY defeats the purpose!
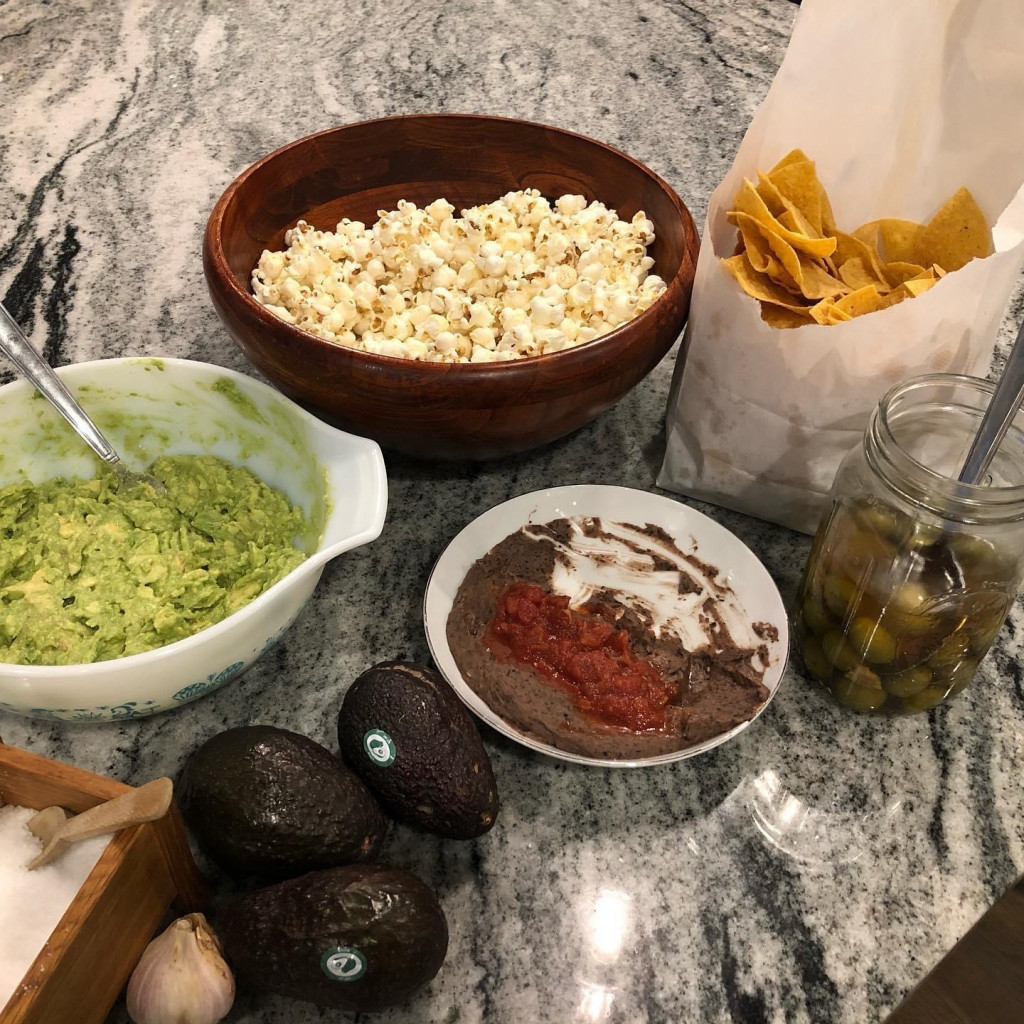
OK, on to our favorite snacks! Here they are, in no particular order…
- Guacamole (my favorite) – we’ve already talked about buying the
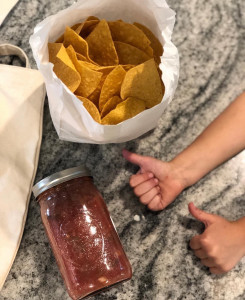
avocados, garlic, and tomatoes “naked” from the grocery store. Bonus points if you’ve grown any of these ingredients yourself. I go the extra mile and walk to the little Mexican restaurant down the road from my house and buy fresh tortilla chips in a paper bag… they’re SO delicious!
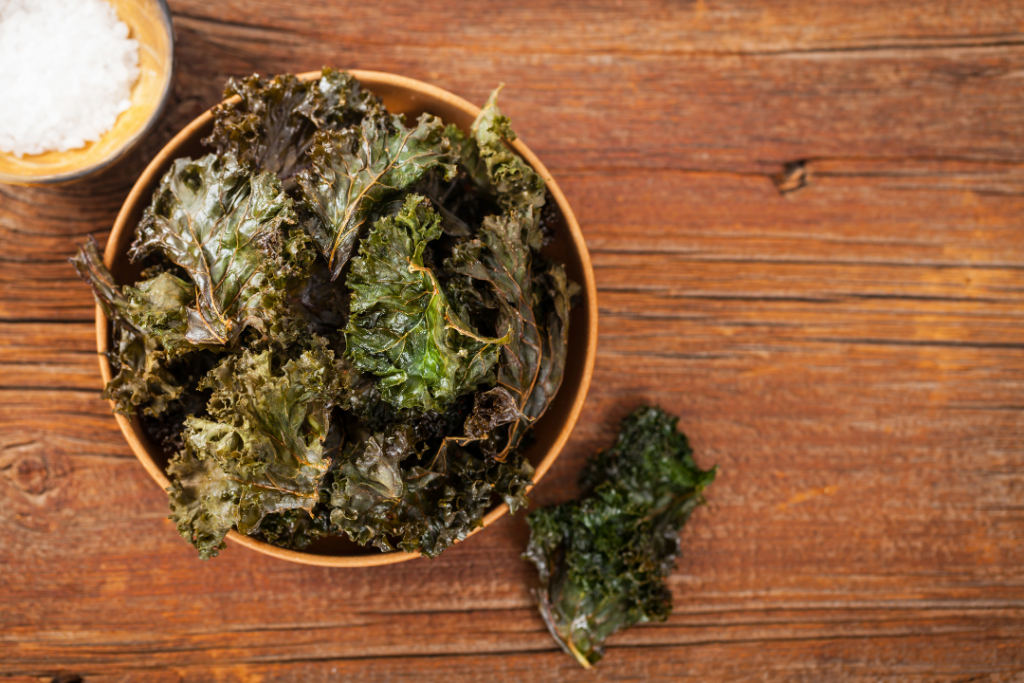
- Kale Chips (my oldest daughter’s favorite) – we’re still getting kale from our winter CSA farm share, so February is the perfect time for kale chips! We use this recipe. Even if you can’t buy it from a local farmer right now, kale is one of those vegetables you can usually find “naked” in the grocery store.
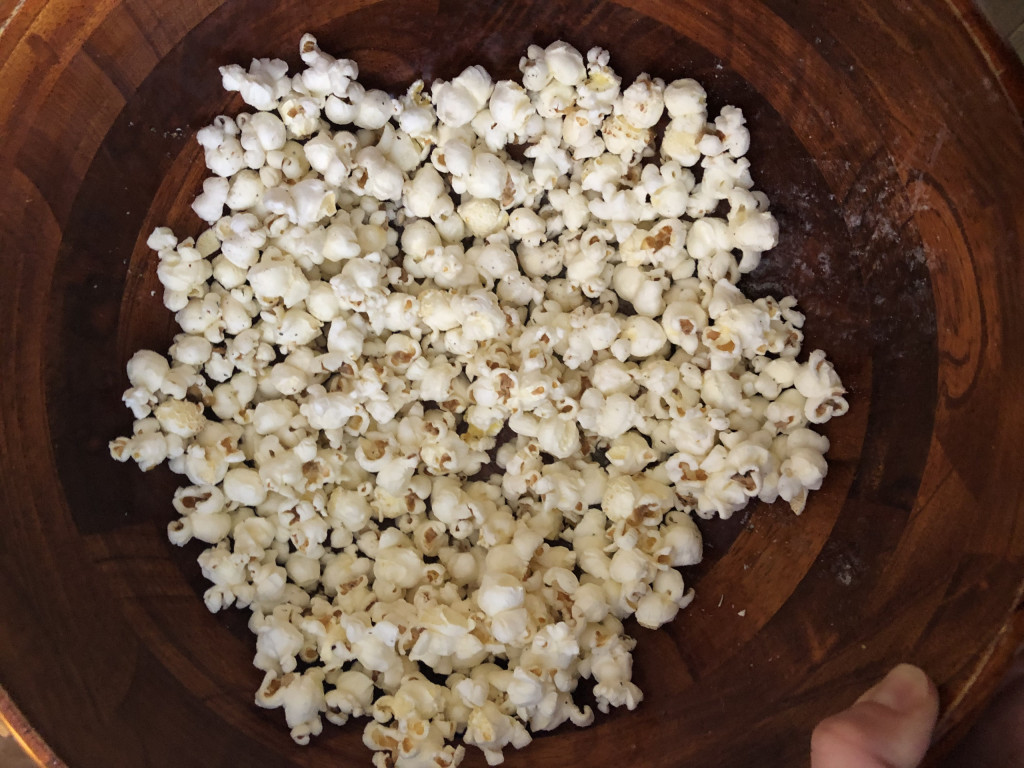
- Popcorn (Robbie’s favorite) – this simple snack is our go to for almost any lazy time around the house. Friday night movie night… is better with popcorn! Thursday night dinner when everyone is too exhausted to cook (or eat a real meal)… popcorn! I make it on the stove and don’t follow a recipe, but this one is pretty close to my routine if you’ve never cooked popcorn before. We buy our popcorn kernels in bulk (25 pound paper bag), but you can usually find kernels in glass jars in the grocery store. I use coconut oil, again purchased in a glass jar, and season with sea salt.
- Bean Dip (my youngest daughter’s favorite) – we nearly always have a batch of cooked black beans in our house (my favorite recipe is from Smitten Kitchen, in her first cookbook The Smitten Kitchen Cookbook, but you can also find the recipe online here) so we can easily whip up a dip with beans + cheddar cheese + sour cream + salsa. I can’t tell you the exact amounts of the ingredients, in part because Robbie always makes this dip and in part because he doesn’t measure, so you’ll have to experiment to find your favorite combo. Again, we eat this with chips from our favorite local restaurant. We buy the beans in bulk (25 pound paper bag) and have a bunch of frozen homemade garden salsa from last summer (but you could buy this in glass), but the cheese and sour cream usually come in plastic.
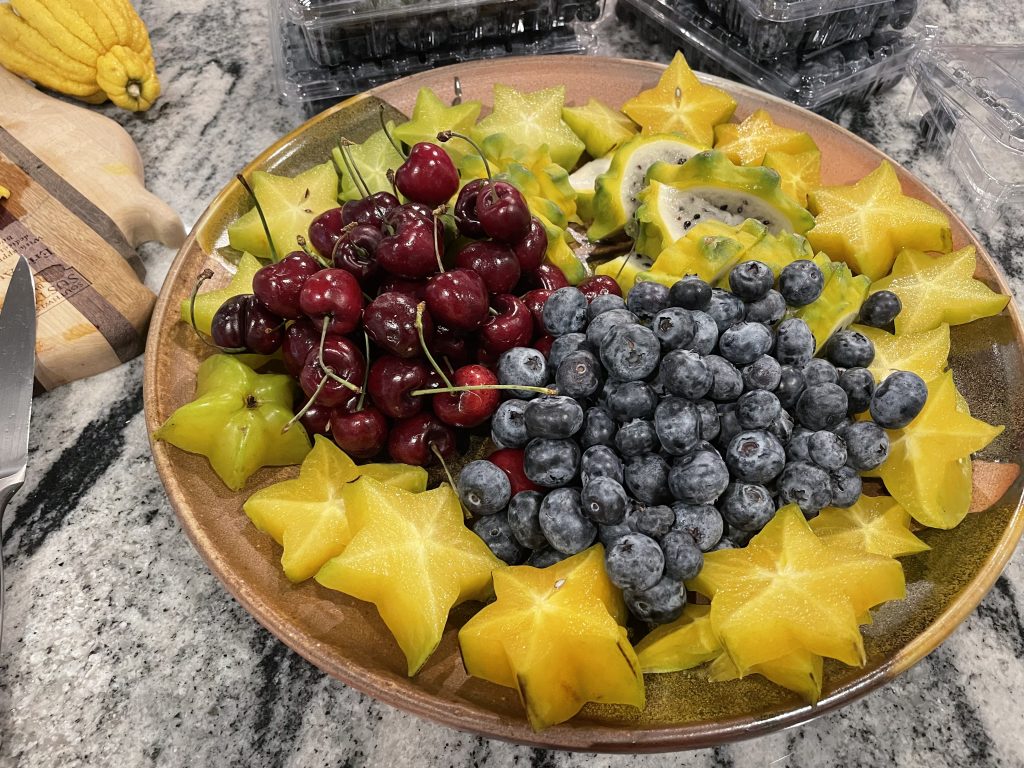
- 2024 UPDATE: “WEIRD FRUIT” – what?!? what is weird fruit, Erin? This has become the most asked for football snack from both my kiddos. They love to go to the grocery store with me and pick out the most weird looking fruits they can find. Dragon fruit, Buddha’s hand, star fruit… that’s pretty much all we can get at our small town grocery store, but they LOVE this tradition, cutting up and arranging these fruits alongside the more traditional favorites (like cherries, blueberries, and strawberries) for a creative (and lower waste) fruit plate.
Please add your favorite waste-free, low waste, local or sustainable snack suggestions in the comments!!
]]>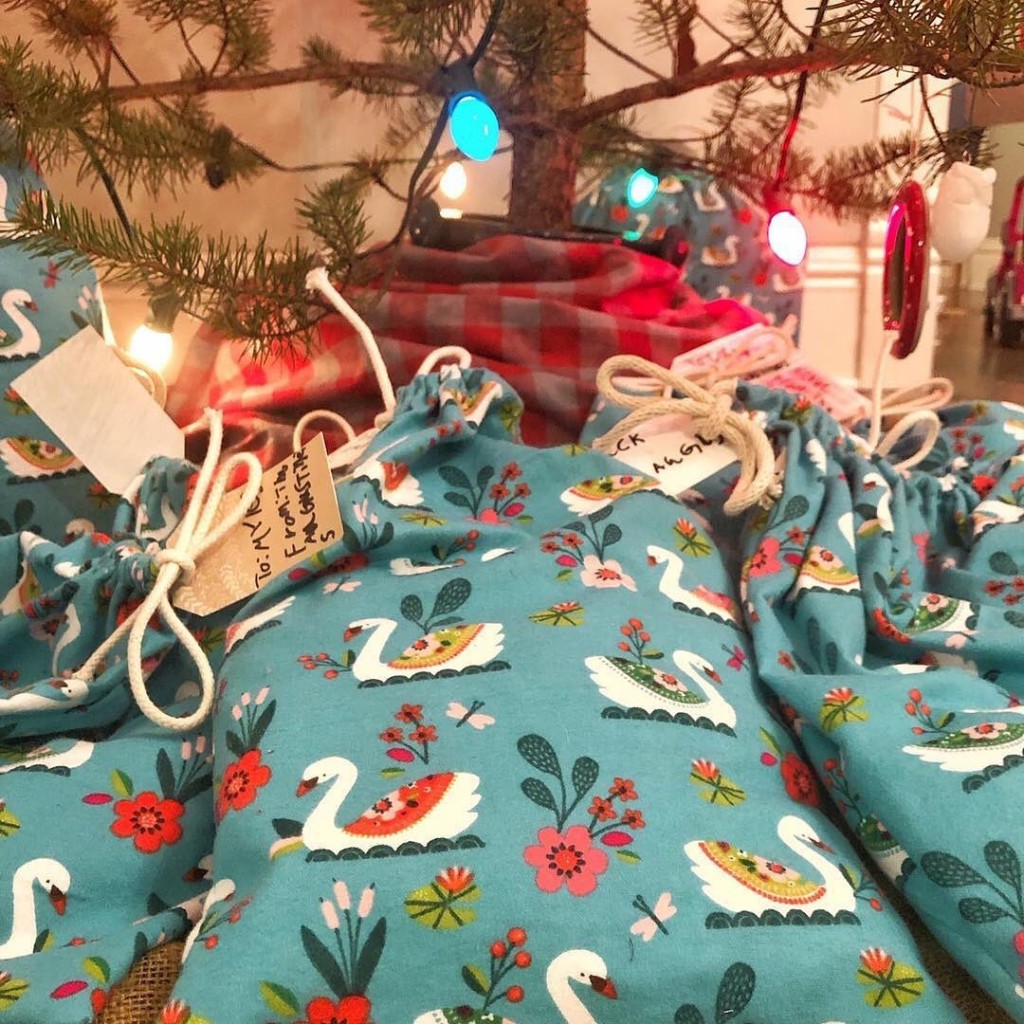
A few years ago, I sewed a bunch of reusable cloth gift bags in cheerful Christmas patterns and they continue to bring me such joy!
I love wrapping presents in these gorgeous bags. I love giving them to people (and am so honored when friends and family want to keep the bag in addition to the gift… in fact, you’ll regularly find me sneaking around and gathering my bags up after gift opening is over at our family gatherings). I love reusing them year after year!
AND they’re super easy to make! I swear, they’re a great project for beginner sewers because it doesn’t matter the size, shape, or even if they’re particularly square. The process is three simple steps: cut, sew, enjoy!
Step 1: Cut your fabric
If the exact size/shape isn’t important to you, I recommend letting your fabric dictate the size.
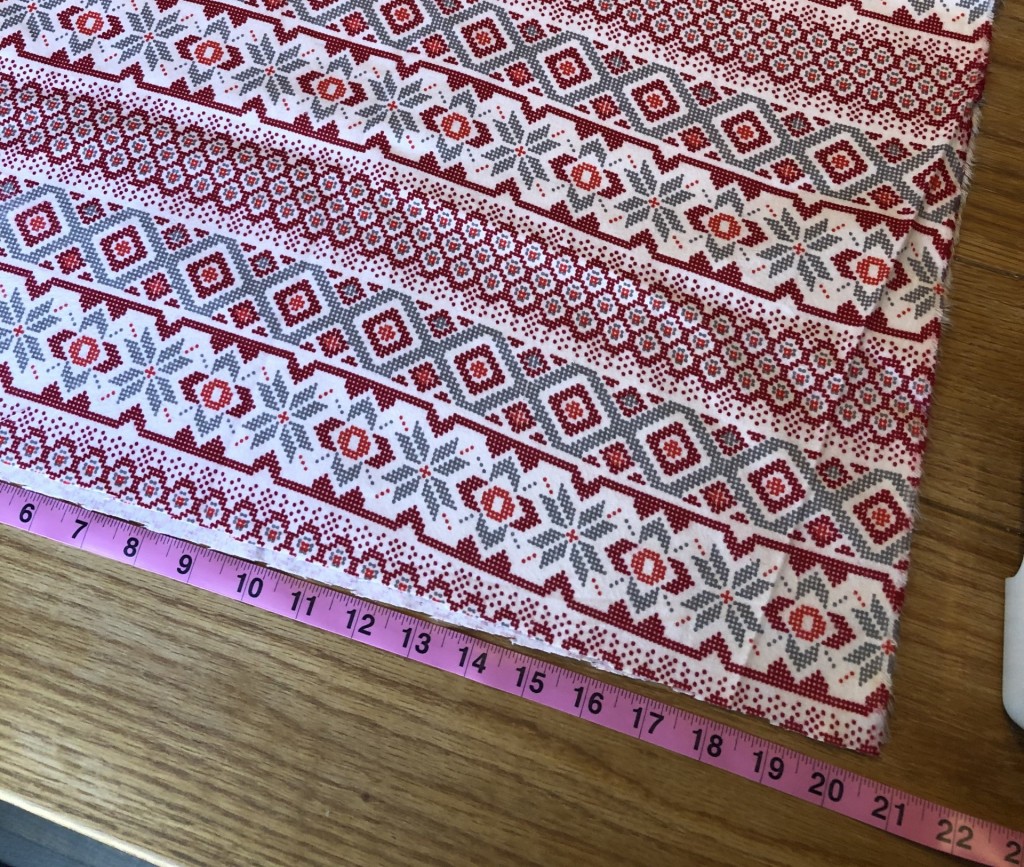
For example, my fabric is almost 42 inches wide, so I cut it exactly in half and made two 10 inch wide bags. I cut my fabric 15 inches tall and ended up with two 10”x13” gift bags. I love using printed fabric like this because it makes straight cuts easier. I pick a spot in the pattern and cut right along the “line”.
After cutting, my fabric is about 21 inches wide and 15 inches tall.
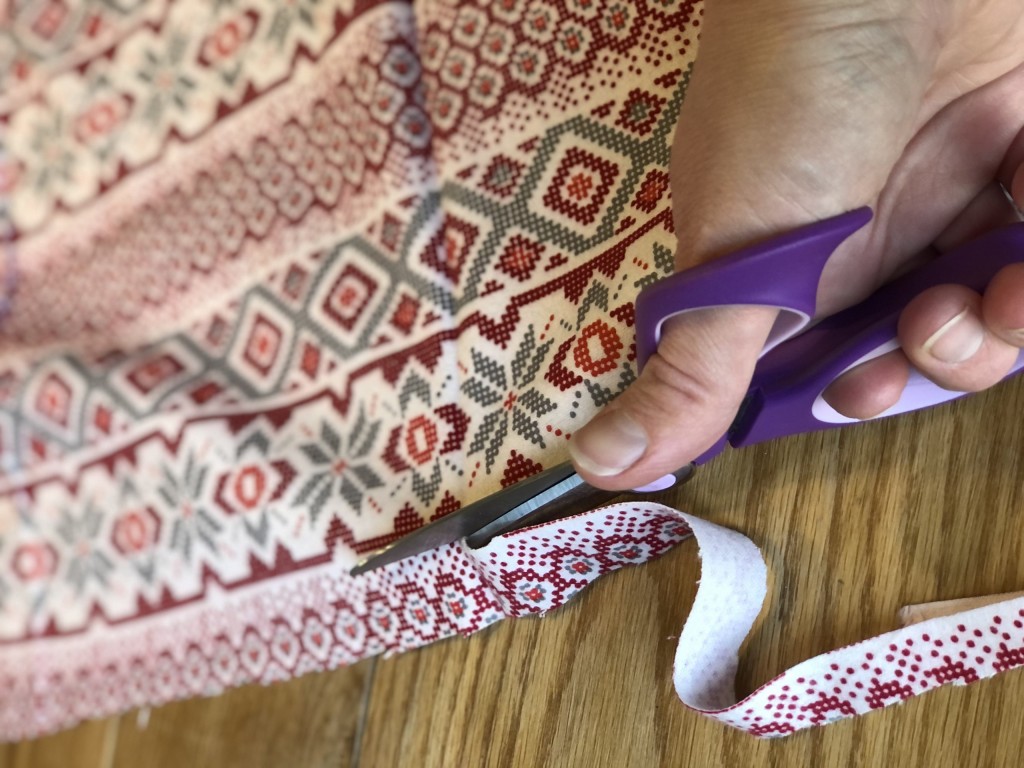
Step 2: Cut your cord
I used 1/4” cotton cord, but feel free to use bigger or smaller. Choose the top of your bag (based on the pattern) and cut your cord at least 8-10 inches longer than the width of your fabric (it will hang out 4-5 inches on either end when you’re done).
My fabric is 21 inches wide, so I cut my cord about 31 inches long.
Step 3: Sew your cord into place
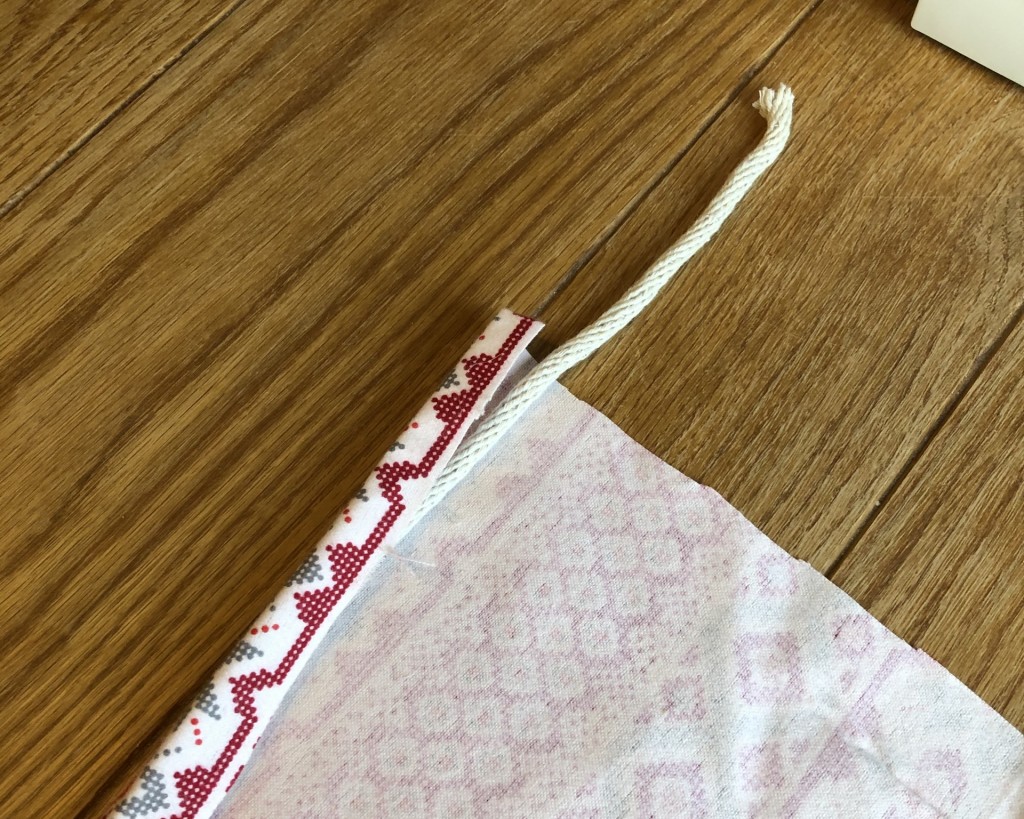
Place your fabric with the wrong side up* and the top pointing away from you. Place your cord along the top edge and fold the top of the fabric towards you. You’re going to sew a little pocket for the cord to slide through, so make sure there’s enough fabric that you can run your foot** along the seam without stitching the cord.
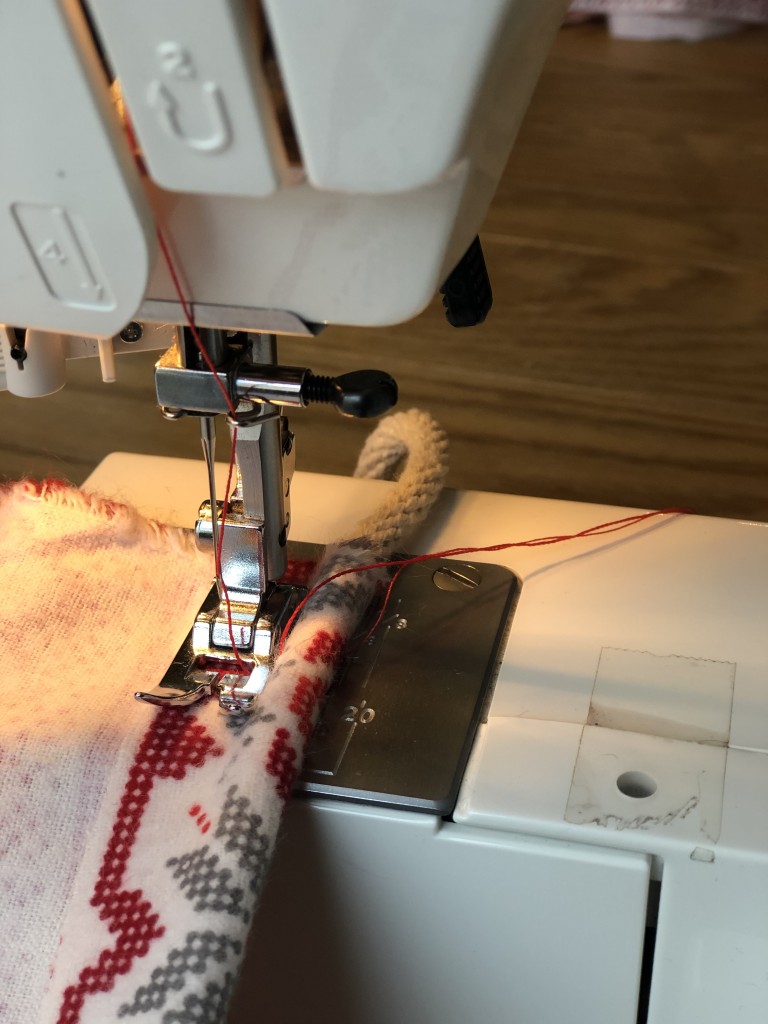
* the “wrong side” is what we call the back of your fabric, the side without the pattern, the side you want on the inside of your bag. ** the “foot” is the mechanism around the needle on your sewing machine as shown in this photo.
Step 4: Sew the other two seams
Keeping the wrong side up, fold your fabric in half. This will be the final shape of your bag, so the cord should be at the top and you should have seams to sew across the bottom and one of the sides. Trim any excess fabric if your edges aren’t lining up.
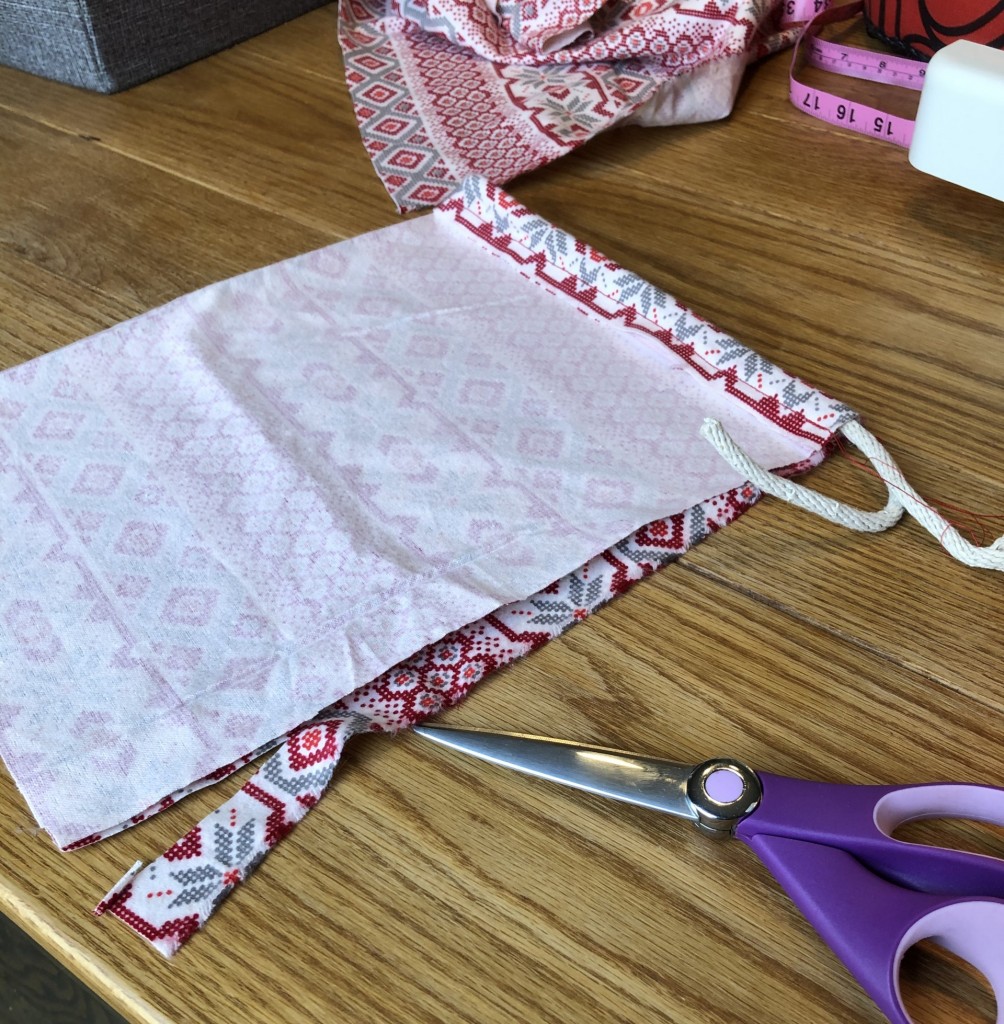
Go ahead and sew these seams. The only tricky part is making sure you don’t sew through the cord/pocket. If you do this, you won’t be able to pull the cord to cinch the bag closed.

Trim extra thread and turn your bag right side out.

Step 5: Tie knots at each end of the cord
This will prevent the cord from accidentally getting pulled into the pocket when someone is opening their gift. Fishing the cord back out is certainly possible, but a royal pain.

You’re done! You can make as many bags as you want, in a myriad of sizes to meet your gift giving needs!
I have about 24 bags total and the “10×13” bag I made today is the “medium” size bag in my collection. I have a bigger size (roughly twice as big) and a smaller size too. Three yards of fabric will yield about 8 medium and 2 large bags. I like to mix and match my colors and patterns, so I’ve purchased different patterns over the years.
Please drop your questions in the comments below. I’m always happy to answer questions!
And comeback to tell me about your experience if you’re making these reusable gift bags for the first time. I can’t wait to hear about your project!
PS. Does this post feel familiar? It should! It was originally posted a couple of years ago. I’ve updated and republished it because it’s one of my favorite posts.
]]>Most of us firmly believe that one is “better” than the other, but there’s a really interesting debate about the sustainability aspects of this tradition. Here are a few pros and cons to consider when choosing the type of tree you use to celebrate the holidays.
Natural Trees
PROS
- The trees provide many benefits to the environment as they grow, cleaning the air and providing watersheds and habitats for wildlife.
- They are a renewable resource and replanted after being cut.
- They grow best on rolling hills that are often unsuitable for other crops.
- When you buy a tree from a local farmer, you’re supporting the people who live in your community.
- Trees are biodegradable and can be composted, mulched, or burned.
- The British Carbon trust estimates the average carbon footprint of a natural tree is 3.5kg of CO2 when composted, mulched or burned.
CONS
- Buying a tree every year can get very expensive. According to Consumer Reports, the average cost of a natural Christmas tree in 2020 was $81.
- Not everyone has access to local Christmas trees and transportation contributes to the environmental impact of your tree. If you drive more than 10 miles to get your tree, it might be more environmentally friendly to purchase an artificial one.
- Not everyone has access to tree recycling programs. In the UK, an estimated 7 million Christmas trees are landfilled each year.
- The British Carbon trust estimates the average carbon footprint of a natural tree is 16kg of CO2 when composted, mulched or burned.

Artificial Trees
PROS
- The average artificial tree costs $107, making it the economical choice in the long run.
- Caring for your tree and extending its use beyond the average seven years will certainly reduce the environmental impact.
- Reselling, gifting, or donating your tree when you’re done with it will help extend the life.
- If you use your tree for 12 years or more, you might actually have less of a carbon footprint than a natural tree.
CONS
- Most of the artificial trees on the market are made of PVC and steel in China and shipped to the United States.
- Artificial trees are used for an average of 7 years before it is disposed of. If a tree is displayed for 1 month/year, it will have served as a Christmas tree a total of 7 months.
- Most artificial trees cannot be recycled at the end of their life.
- The British Carbon trust estimates the average carbon footprint of an artificial tree at 40kg.
My vote? Team Natural!
My family sits squarely on Team Natural. In fact, we choose to hunt for our Christmas tree in the National Forest each year and it’s one of my favorite family holiday traditions! We love the adventure of wandering through the wild forest, foraging for the “perfect” Christmas tree.
Did you know you can harvest a Christmas tree from the National Forest? You can! And in Michigan, the permit is only $5. Read more about my tips and recommendations for a successful Christmas tree hunt in the national forest here, in this updated blog post.

Let’s Recap
If you’re going to buy a natural tree, buy local from a tree farm or retailer (preferably less than 10 miles from your home) and don’t throw your tree in the trash after the holiday.
Lots of municipalities have specific days for curbside recycling of Christmas trees. Alternatively, you can put it in your yard waste container, drop it off at a local recycling center, or let it naturally biodegrade on your own property if you have the space.
Birds and small mammals love the extra shelter and you’ll be shocked how quickly the tree decomposes. Usually, your county/city will share this information right after Christmas. Please feel free to share a link to your county/city tree recycling program in the comments. I’m sure your co-workers will appreciate it!
If you’re going to buy an artificial tree, buy the most durable one you can find (look for warranties) and keep it as long as possible.
For all this debate, it’s worth maintaining the perspective that no matter which you choose, your tree has a climate impact equivalent to driving roughly between 10-20 miles. So, bike to work a few days a year, and you’ve already offset your tree, no matter which type it is.
What about you?
Are you on Team Natural? Feel free to share your favorite local tree farms in the comments.
Are you on Team Artificial? Who’s had their artificial tree the longest? Anyone over 10 years? 20 years? What’s the sturdiest model available?
Here are links to my sources if you’re interested in digging deeper.
https://www.sightline.org/2015/12/21/your-christmas-trees-carbon-footprint/
https://www.nytimes.com/2018/11/26/business/energy-environment/fake-christmas-tree-vs-real-tree.html
https://www.independent.co.uk/environment/christmas-trees-recycling-environment-sustainability-plastic-a8705081.html
https://www.carbontrust.com/news/2013/01/christmas-tree-disposal-advice/
https://www.in.gov/dnr/forestry/7561.htm?fbclid=IwAR3PlYxqOFDnWILG7ej8_BPRSsCPhO2LjGq2L9dZ3gXqwh7NKeu55LX53eY
https://www.thinkstep.com/content/study-comparative-life-cycle-assessment-artificial-and-natural-christmas-tree
]]>
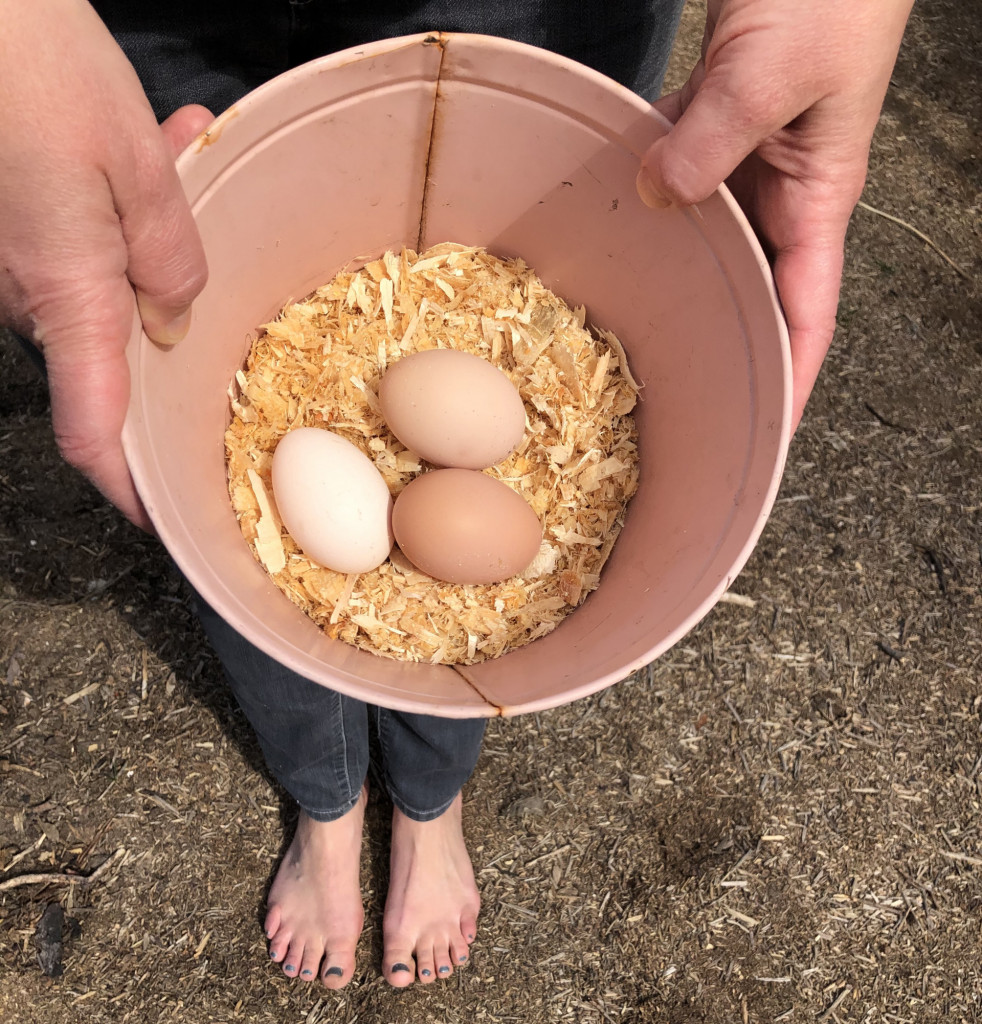
Please don’t worry if you have brown eggs. The eggs from our backyard chickens come in a variety of browns, ranging from almost white to medium brown (as you can see in the photo above), but I’ve colored the more common dark brown eggs before too and they come out just fine, so don’t feel the need to go out a buy white eggs for your Easter dyeing project.
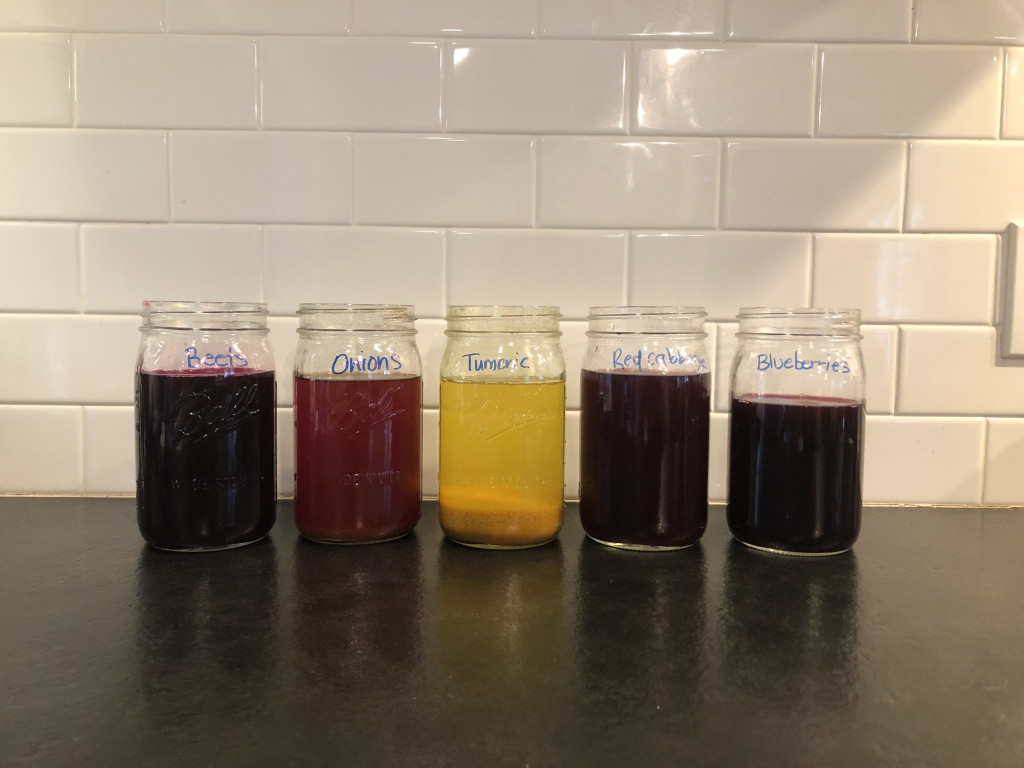
This year I got really excited about making my own natural dyes and am happy to share the recipes with you!
First, you might be asking…”why would you want to make your own Easter egg dyes, Erin? Isn’t that a lot of extra work to get boring, muted colors on your Easter eggs?”
I think it’s wildly important to talk about the why. Why I choose to spend my time and energy on this project vs something else feels like an important conversation to have, especially because slow living means I choose not to do lots of things, so I can do a few things really well.
I chose to explore natural dyes this year for a couple of reasons.
- FUN – This is always number one for me because sustainable living should be fun or it’s not worth doing. We had so much fun making our own dyes. My toddler and I treated it as a giant science experiment, trying to guess what colors we could make from different common foods in/around our home. And the color of the water doesn’t even always align with the color of the egg, so you get to be surprised all over again when you pull these magical eggs out of the dye.
- Health stuff – I generally like to avoid food dyes whenever possible. There are quite a few websites (like this one from the Cleveland Clinic) dedicated to this topic and I’m no where near a medical professional, so I’ll let you do your own research on this.
- Saving money – I didn’t spend a penny this year on our Easter eggs. I know single use dye kits aren’t very expensive (somewhere between $3 and $10, right?), but every dollar counts when you’re trying to make sustainable living available to everyone.
- Waste – I can’t stand the amount of waste in the average Easter egg dyeing kit. Sure, it’s not a lot by volume, but all of it feels unnecessary to me. I did take the time to think about the waste I’m creating when making my natural dyes because minimizing food waste is really important to me. I used the following ingredients in the recipe below and minimized food waste in the following ways:
-
- Beets: After boiling the beets for an hour they were perfectly cooked and edible so I saved them for salads and snacking. I didn’t peel them ahead of time, but I would recommend doing this if you plan to eat them and don’t enjoy eating the skin
- Onion skins: I stole a bunch of onion skins from my freezer stock bag (I save my vegetable scraps and meat bones in a bag in the freezer to make my own stock. Blog post coming soon about this process… stay tuned), but you could easily save your onion skins from cooking for a couple of days or sacrifice an onion or two. I was surprised by the small amount of skins required to make this dye. I used a combination of yellow and red onion skins to make my orange dye.
- Turmeric: this powdered spice was wasted. I couldn’t figure out how to save/use the spice in the end.
- Red cabbage: We happened to have a small red cabbage in our vegetable garden that had overwintered and was no longer edible. I can confirm that cabbage past it’s eating prime works just fine for dyes, but the smell of the cooking almost rotten cabbage isn’t great… it was almost more than my husband, Robbie, could handle!
- Blueberries: I used the last of a box of frozen blueberries from our freezer, so they were small and starting to dry out after spending the whole winter frozen. I composted the blueberries after boiling them for an hour. I bet you could get creative and eat them, maybe as a topping on yogurt or ice cream or in a smoothie. If you try this, please come back and tell me about it!
And finally, here’s the recipe and step-by step tutorial for you to make your own naturally dyed Easter eggs!
Recipe
(makes enough dye to color at least one dozen eggs)
This recipe is adapted from Mommypotamus
Ingredients
Hard boiled eggs
2 cups diced beets (for pink/red dye)
1-2 cups onion skins from red and/or yellow onions (for orange dye)
3 Tablespoons Turmeric (for yellow dye)
2 cups shredded red cabbage (for blue/green dye)
2 cups blueberries (for blue/purple dye)
3-4 cups of water per color
2-3 Tablespoons of vinegar per color
Instructions
- Cut/prep vegetables
- Place them in a pot, cover them with water (3-4 cups per pot/color), and bring to a boil
- Reduce heat and simmer for 10-60 minutes (longer time here creates a darker color)
- Cool completely and transfer to quart jar
- Add 2-3 Tablespoons vinegar per jar (note that 3 Tablespoons + overnight soaking was problematic for me; please see the note below)
- Place hard boiled eggs into the dye for 1 to 12 hours, depending on the desired color
Like any good experiment, we experienced both success and failures! A couple of important things I learned through my experimentation that might be helpful to you:
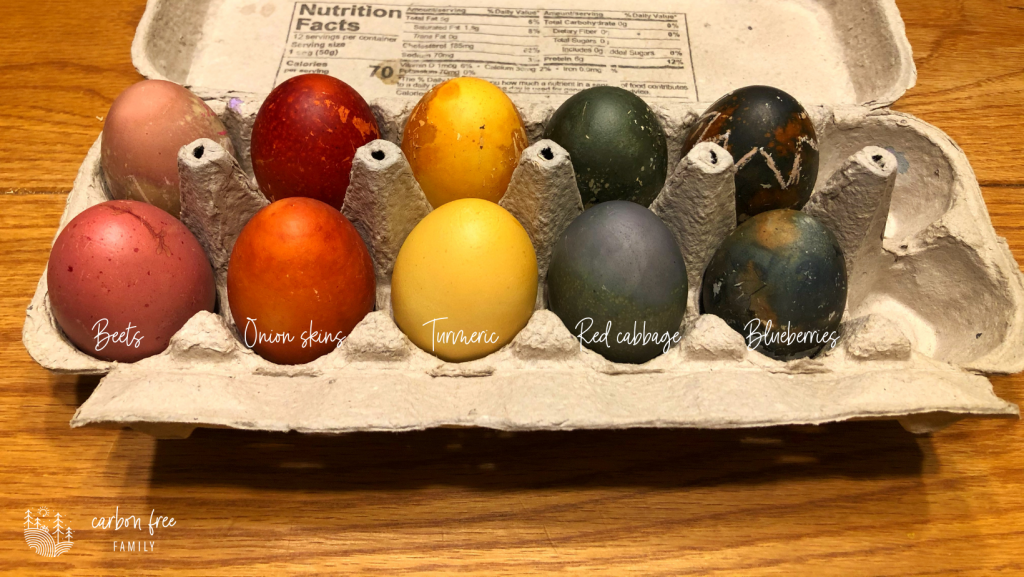
- Light brown eggs and/or a short time in the dye generally resulted in lighter colored final product (as you can see in the front row of the egg carton photo above)
- Darker brown eggs and/or leaving them in the dye longer generally resulted in darker colored final product (as you can see in the back row of the egg carton photo above)
- I left some of the eggs in the dye overnight and the vinegar started to peel off the outer layer of the eggs shell (you can see this in the back row of the egg carton photo above). If you are planning to leave your eggs in the dye overnight, I recommend using only 2 Tablespoons of vinegar to try to prevent this.
- Also, the natural dye doesn’t appear to be as “sturdy” as commercial dyes. As we handled the finished products, we noticed more and more scrapes and peeling in the dye.
As our first try at naturally dyed Easter eggs… I’m going to call this a wildly successful event. It was the perfect mix of science experiment and craft project, and we had great family moments throughout the process!
I can’t wait to see your naturally dyed eggs! If you try this at home, please come back and tell me about it! Bonus points for photos or tagging @carbonfreefamily on Instagram or Facebook. HAVE FUN!
]]>
If you’re dreaming of fruit season and want to start thinking about buying and preserving more local food, I’ve created two free ebooks to help you with these goals: one to help you Eat More Local Food and a second to help you Preserve Local Food for Eating All Year Long
Last summer I froze so much fruit… this much to be more precise:
- 120 pounds of tart cherries
- 50 pounds of blueberries
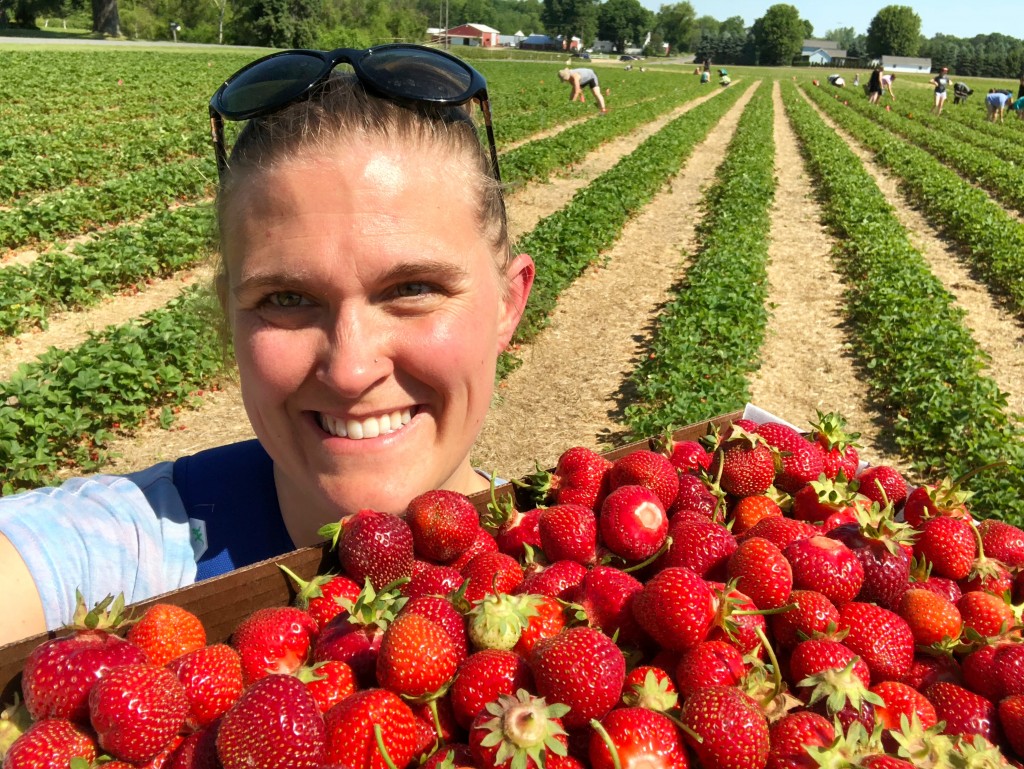
- 30 pounds of strawberries
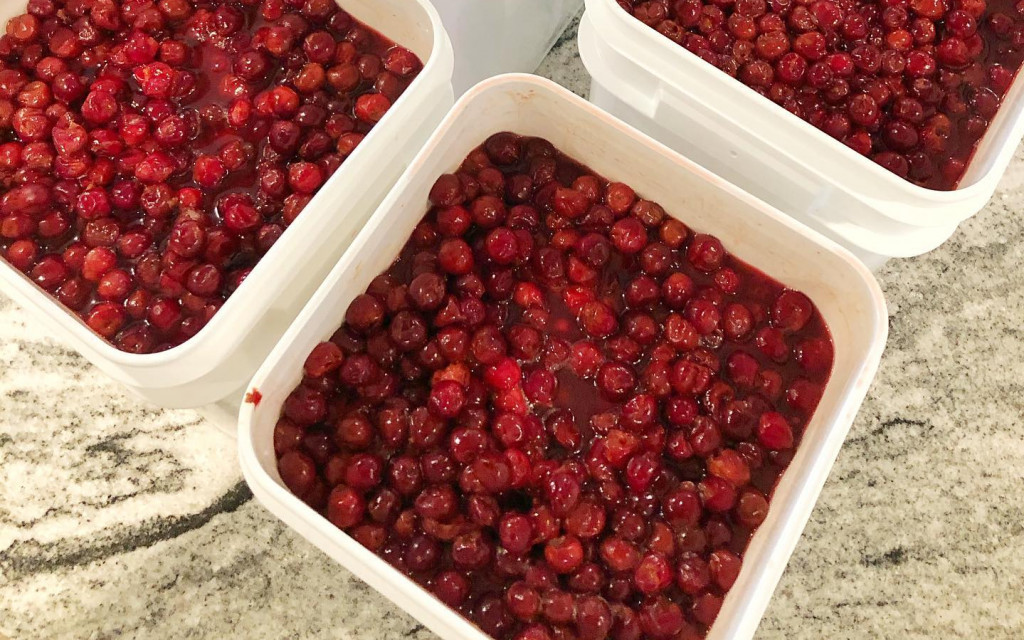
Now that it’s the middle of winter and I’ve realized that I’m still not very good at eating local food during the winter months (you can read more about this realization and subsequent goal to do better in this recent blog post), I’m pivoting my focus to creatively using all of this delicious frozen fruit.
Now, my kids absolutely love frozen tart cherries. It’s the preferred snack in our house… a simple bowl of frozen cherries. There’s something about the tartness and frozen sugars that melt in your mouth in the most magical way. If you’re never tried eating a frozen tart cherry, I highly recommend it.

Another favorite food around here is something called a dutch baby. It’s like a pancake, but with a whole lot less flour and a whole lot more eggs, which makes it practically a health food in my book. We first discovered dutch babies in… you guessed it, the Netherlands… specifically in December 2017, at a rustic restaurant that was connected to a gorgeous little outdoor ice skating rink in the middle of Amsterdam. Here we had a savory version with bacon. It wasn’t until we got home and I started obsessively looking for recipes that I realized most Americans make them with fruit and powdered sugar.
For several years, my go to topping was fresh red raspberries (which is pretty much my favorite food ever… you should have seen the massive quantities of raspberries I ate during my first pregnancy), but as my commitment to waste free principles grew over the past couple of years, so did my disappointment with the fact that I can only buy fresh berries at my local grocery stores in single use plastic clamshells. In the summer, I will happily return to fresh red raspberries (picked in my backyard or purchased from the farmers market) on top of my dutch baby, but I’ve begun experimenting with alternative fruit toppings that will reduce my waste. And let me tell you that our new favorite topping is tart cherries!

Recipe
(makes one large or two small, enough for two people; we double this for our family of four)
This recipe is adapted from Orangette
Download a printable PDF of this recipe here
Ingredients
6 Tbs unsalted butter
4 large eggs
½ cup whole wheat flour
½ cup half-and-half
4 cups frozen tart cherries (or other fruit of your choice)
Extra butter for melting on top
Juice of 1 lemon
Powdered sugar
Instructions
- Preheat the oven to 425 degrees Fahrenheit
- Divide the 6 tablespoons butter between two 6-inch cast-iron skillets (or one larger skillet; mine is 10 inches and works great) and melt it in the oven while it preheats
- In a blender or food processor, whir together the eggs, flour, and half-and-half
- Once butter has melted, use a brush (or tilt the pan) to coat the sides of the pan with butter
- Pour the batter into the skillets over the melted butter. Slide the skillets into the oven, and bake for 25 minutes
- While the pancake is cooking, place the frozen tart cherries into a small pot and cook over medium heat. You want them to fully defrost and start to simmer, but don’t cook away all of the liquid
- Remove the puffed pancakes from the oven, transfer them to a plate or shallow bowl, top with additional butter (if desired), tart cherries, lemon juice, and dust with powdered sugar
- Serve immediately and enjoy!
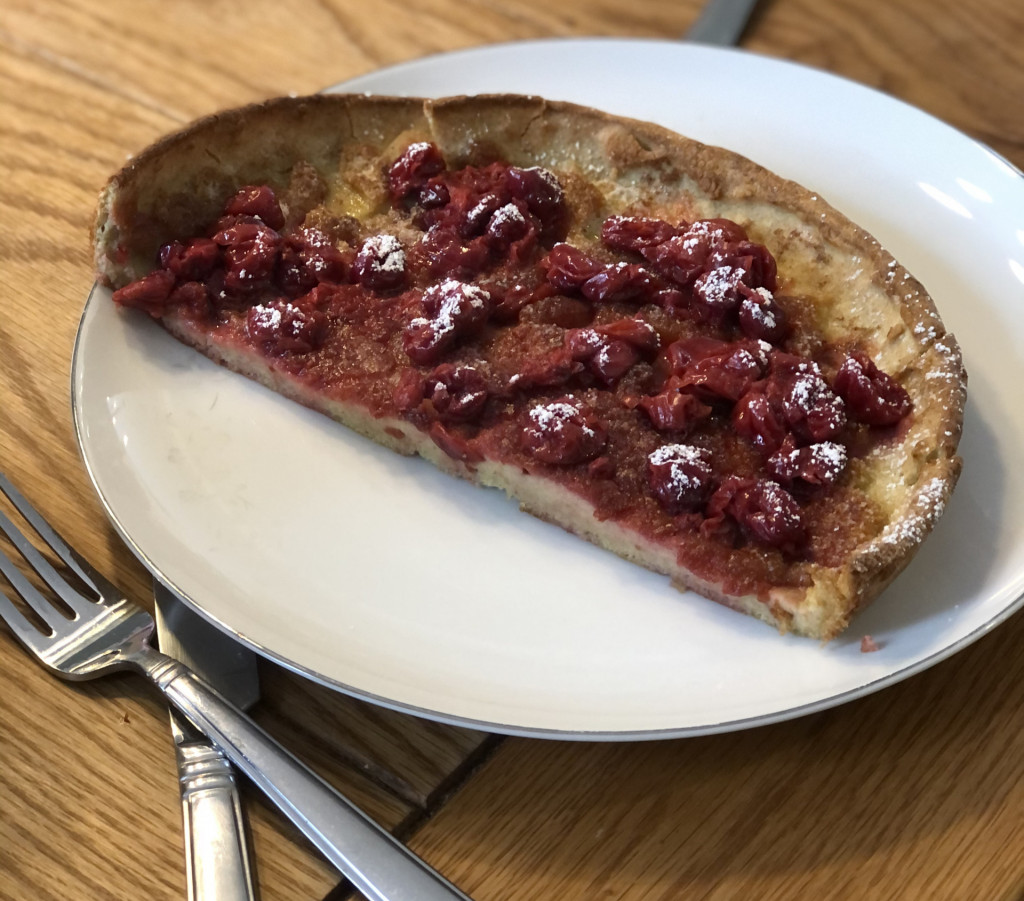
Don’t worry if yours don’t rise as much as some of these photos. Especially when I use whole wheat flour, sometimes the rise isn’t as impressive (like in the photo immediately above), but I can assure you they still taste delicious. If the rise and presentation is important to you, try using white flour and/or substituting whole milk for some of the half and half.

How might you modify your favorite recipes to include seasonal, local food? Please share your ideas, tried and tested recipes, and challenges in the comments.
]]>
According to the calculator, my goods footprint is pretty much nonexistent, but I firmly believe there’s always room for improvement. The goods category includes all the “stuff” in our lives… clothes, kitchen gadgets, books, magazines, home decor, basically anything you buy thats’s not food.
I’ve spent the last few years really focused on not buying stuff I don’t need. Call it minimalism. Call it sustainability. Call it slow living (because in retrospect, I’m shocked at how much time and energy I used to spend shopping). Whatever you want to call it, it makes me happy.
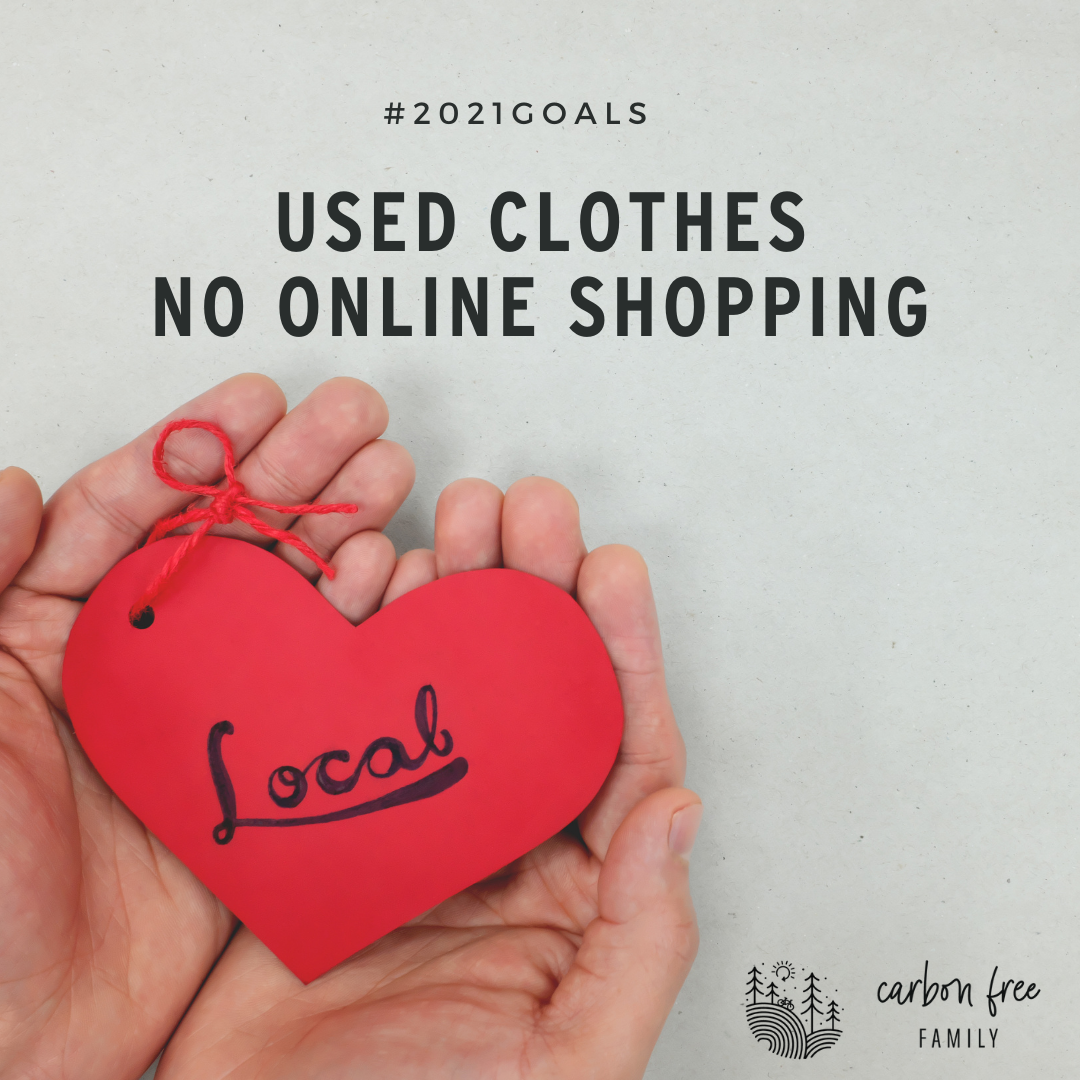
- Buy used clothes. So one of my goals is to simply keep up the good habits I’ve worked so hard to create. Not to let culture sway me back into habits that don’t serve me well. In 2020, I didn’t buy any new clothes (only used, and in full disclosure I did buy myself a new bra after my old one broke and my amazing mother bought me new undies and socks as gifts). I promise to post more about my capsule wardrobe strategies and the wide-ranging benefits of buying used in an upcoming blog post, so if you have specific questions, please drop them in the comments below!
- No online shopping. This year, I’m adding a second shopping related goal: to only buy {clothes + everything else} from local stores. I’m excited to put my dollars into my community and the individual people who own/run small businesses here. Sure, I might have to get creative and/or wait a day or two longer to get something, but I think creativity and patience are two GREAT skills to cultivate! This means I’m going to be asking for your advice (local friends, I’m looking at you here) for local places to buy the random things I need throughout the year.
How do you influence your friends, family, community, and elected officials? It’s fine if the answer is “I’ve never really thought about that”; my space is always a judgement free zone. The last category of my eco-footprint is “services”. Services include all of the infrastructure (mostly government) that supports your life, but isn’t within your direct control (think, roads, train tracks, bridges, police, fire, etc). This category invites us to think about the ways we influence the world around us.
While the environmental impact of these are not directly controlled by my actions (at least not compared to the car I choose to drive or the food I choose to eat), I firmly believe that we can and should influence them. This right here is why I publicly talk about my sustainability journey. This is why @carbonfreefamily exists! When I started Carbon Free Family in 2018, my goals was to talk about the joy, laughter, fun, and calm I find in a more sustainable life and hope that my story helps you find more a more sustainable version of yourself and your life.
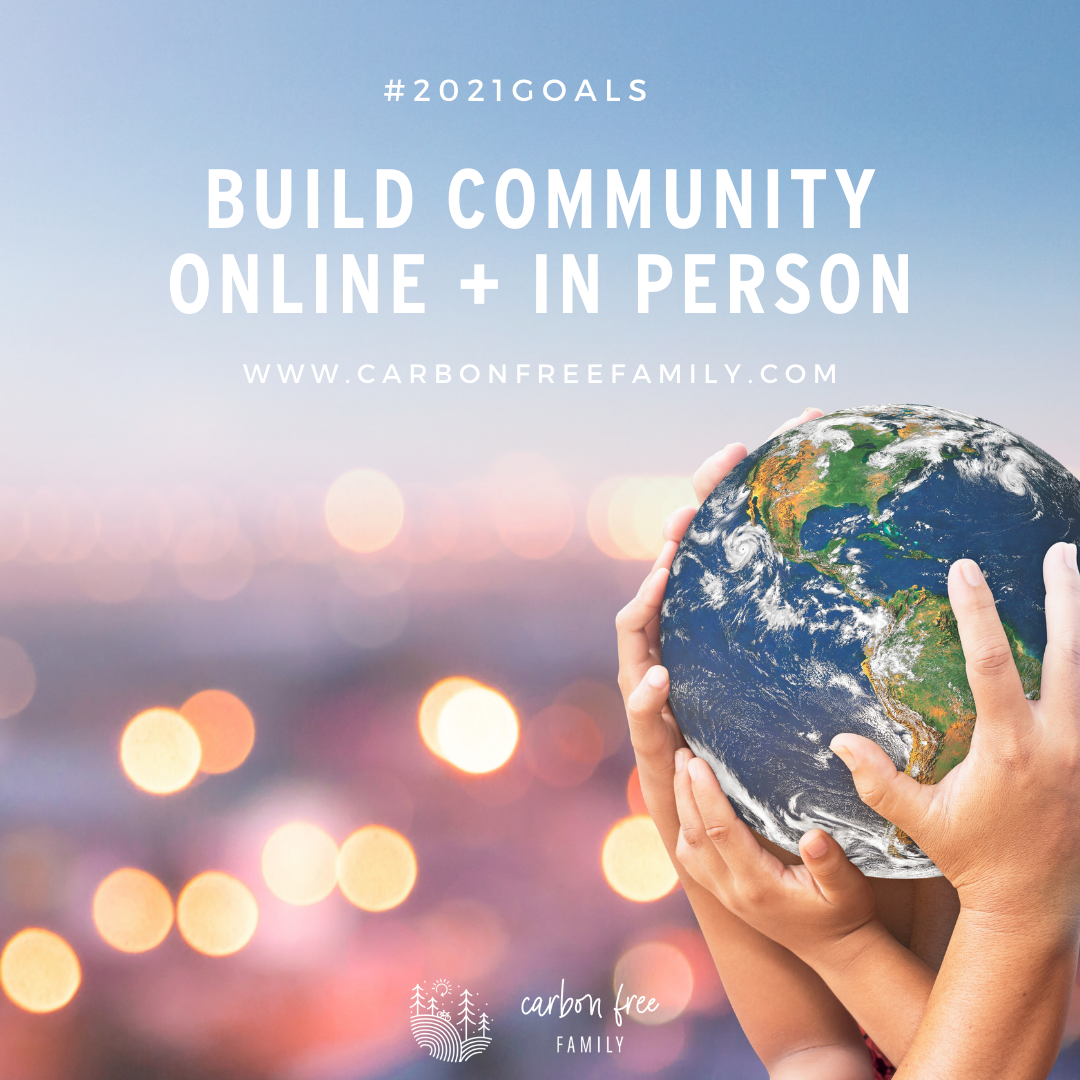
To continue my sharing journey in 2021 and support your personal sustainability growth, I’m excited to keep working to build this amazing community of people and resources, collectively committed to living a more sustainable life. I will be building more of these resources and community space:
- Digitally on Instagram, Facebook, and www.CarbonFreeFamily.com. Follow me on whichever is your preferred platform to stay in touch and involved!
- Through community presentations and workshops (online and someday soon in person again)
- In person gatherings, like the clothing swaps and mending parties I started hosting in early 2020. I can’t wait to gather with you again soon!
Sign up for my email list to get updates when a new blog post or event is posted!

Self care isn’t a category in the environmental footprint calculator, but self care is critically important for us all! We have to take care of ourselves before we can take care of the community and the planet. So, while this is the last set of goals I’m sharing with you, it might be the most important.
My early morning routine includes stretching, meditation, and coffee. I will continue to make quiet time with myself a priority. Every day.
2021 will be my third year participating in the 52 Hike Challenge (this is a great program with really great resources, especially for beginner hikers, so if you’re interested in learning more I highly recommend following to link to their website). My weekly time in nature continues to bring me such joy, connectedness (with nature and the humans that come along), and health. This year, as a bit of an added challenge, I’m going to try to visit as many different trails/parks as possible. I’m not fully committing to 52 different trails (because I’m so very fortunate to live near the White Pine Trail and some days I just don’t want to drive anywhere), but I am excited in intentionally explore new pockets of nature.
2021 will be my second full year participating in the 52 Days Unplugged challenge (again, to learn more, please visit the link or look for the #52daysunplugged posts on my Instagram and Facebook). I still struggle to have a healthy relationship with my phone, but weekly phone free days have opened my eyes to the addiction (and I don’t use that word lightly). This year, I’m going to continue to have at least one screen free day per week. Additionally, I’m going to focus on bringing screen free moments into my daily life, working to use my phone with intention (vs mindless scrolling or addictive pickups) each day.
WHEW! Now that I’ve written it all down, that feels like a lot to work on in just one year. And I feel compelled to talk about giving ourselves grace when setting our goals and working on them throughout the year. My goals are mine; your goals are yours. Our goals won’t look the same, just like our lives don’t look exactly the same. We’re all at a different place in our personal sustainability journey. Some habits take longer to break than others (for example, it took me 3 whole years to fully build my bike to work habit. Seriously, three years of walking out into my garage each morning and talking myself into hopping on that bike instead of the car). Additionally, my goals are made up, they only exist to serve me, to make my life better. If mid-way through the year, I realize a goal isn’t serving me in the way I intended, I LET IT GO! I encourage you to give yourself the same grace and flexibility.
My annual goal setting, much like my life, is a slow and reflective process. I like to calculate my environmental footprint (see my blog post last week for more information), reflect on last years’ progress and this year’s biggest opportunities.
I’m excited to take you on a journey of my 2021 intentions. I’ve organized them to coincide with the areas highlighted by the environmental footprint calculator and in order of my biggest to smallest opportunity to reduce my impacts: transportation, food, shelter, goods, and services.
![]()
Transportation remains my biggest opportunity. So, this year, I have the following goals:
- No flights – In 2020, we committed to no flights and found adventure nearby (see last week’s blog for more details). We explored our home state of Michigan and had wonderful family adventure (yes, even in the midst of the pandemic). I love travel, but I know how impactful my flights are. In 2021, we’re going to remain focused on nearby adventures, expanding our radius to include longer car rides this year… we’ve got a date with the smoky mountains for spring break! My long term solution will include offsetting the emissions from our family vacations, so please send me your recommendations if you’ve purchased offsets.
- Become a one car family again – In 2020, we bought a 100% electric vehicle (again, see last week’s blog for more details). We’ve been a one car family for several years, but it’s taken us months to fully embrace our new Tesla and be ready to give up our trusty old ‘08 Honda Fit. This is mostly because Robbie has dirty hobbies like hunting and woodworking and we had to figure out a way to haul messy things in our “fancy new car”. A few weeks ago, we installed a trailer hitch on the Tessy, so we’re finally ready to let Honda go and return to being a one car family. I can’t tell you how excited I am to never buy gasoline again!
My food is wildly important to me as I work to fully align my life with my values. And it’s my second biggest opportunity to impact my footprint. I also find the food category to be a stubborn one… meaning, its hard to see the impact (via a lower environmental footprint in the calculator) from the changes I’ve made (one more time, see last week’s blog for more on this). But that’s not going to stop me from leaning in to the joyous parts of my food journey! This year, I have only one food-related goal:
Eat local food, even in winter.
I’m proud of my summertime foodprint (that is, the environmental footprint of my food), but during the winter in Michigan I struggle to find locally grown, unpackaged food. So, I’m going to focus on this goal especially hard in the next couple of months (February through May) until my own backyard vegetable starts to produce and my local farmers market starts up again.
Here’s where YOU can help!
Michigan friends – please comment below with your favorite winter farm shares, farmers markets, and other resources you have for local food (that are available right now!) so I can build a robust list of farmers to support during these cold winter months. I promise to explore your recommendations and share my adventure, with details and recommendations, in an upcoming blog post.
Non-Michigan friends – please share your strategies and recommendations too! I have followers all over the world and we can always learn from your strategies!
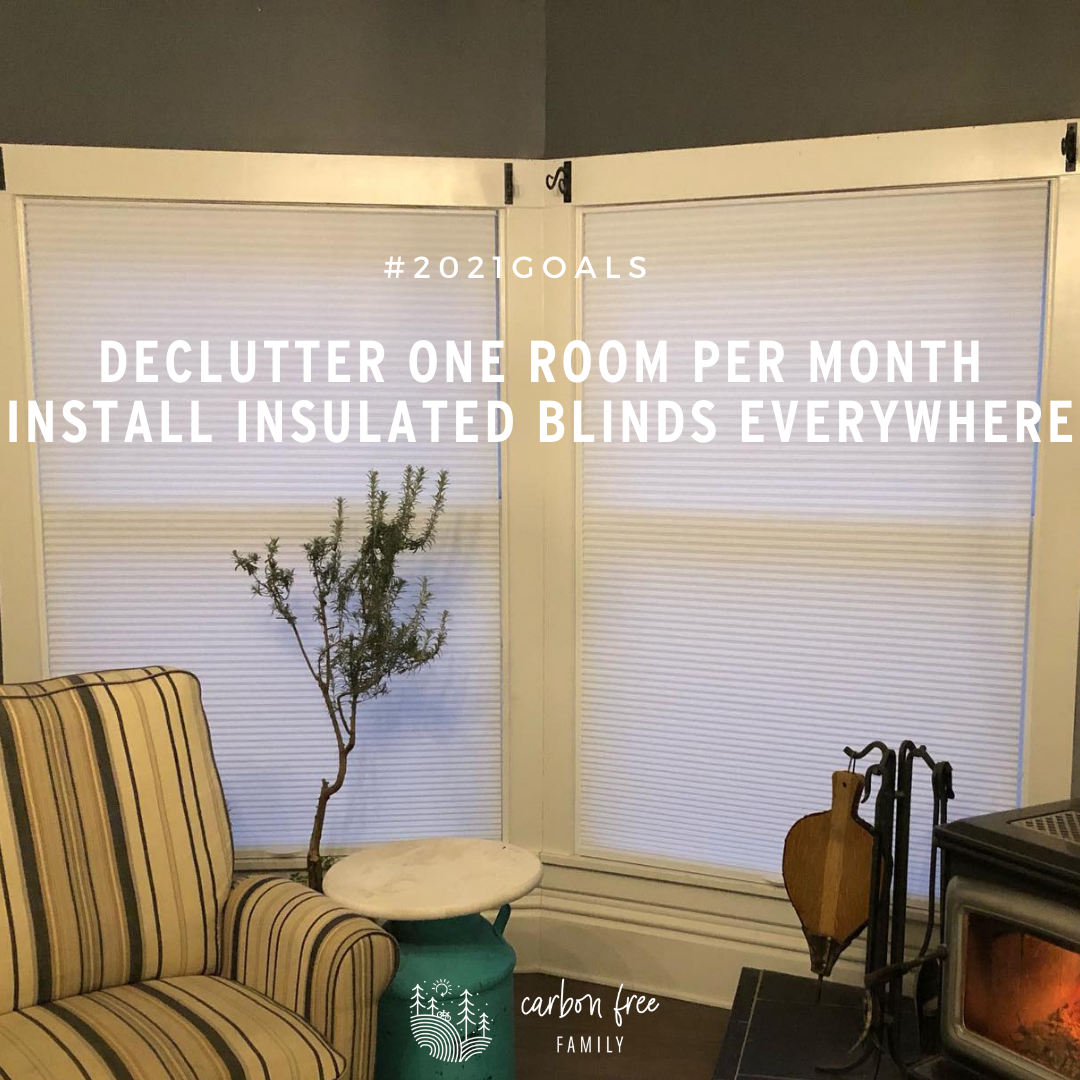
This year I’ve realized how very important it is for my home to be a place of peace, relaxation, and comfort. A place that calms my nerves, supports connected time with my family, and gives my soul space to Just Be Here. It’s not surprising that my 2021 goals include a few to make my home more cozy (and energy efficient) and less cluttered. I love it when the connections between minimalism and sustainability are clear like this.
- Declutter one room per month. Less stuff means less cleaning, less things to break, less things to repair, and more time with my family.
- Install insulated blinds everywhere. Cozy spaces in my home encourage all of us to slow down, sit down, play together and take the time for meaningful connection. Last year, we installed these blinds in most of the windows on the first floor of our home. Even I was shocked at how much warmer I felt in these better insulated spaces. And even better, we could see on our nest thermostat that the furnace was running less often, saving energy, carbon emissions and our hard earned money!
Alright! We’re halfway through my 2021 intentions and this feels like a good spot to take a break. I’ll be back next week with my goad related to goods, services, and self care (self care isn’t part of the footprint calculator, but I’ve added it. I firmly believe that we have to take care of ourselves before we can take care of the community and the planet).
Intentional living takes time. Sometimes the process is (intentionally) slow. If you’re still thinking about 2021 and what you might want to work on, I’m right here with you and for you. Drop your thoughts and questions in the comments. I’d love to hear about your goals, even if they’re still a “work in progress”.
]]>
A few years ago, I sewed a bunch of reusable cloth gift bags in cheerful Christmas patterns and they continue to bring me such joy!
I love wrapping presents in these gorgeous bags. I love giving them to people (and am so honored when friends and family want to keep the bag in addition to the gift… in fact, you’ll regularly find me sneaking around and gathering my bags up after gift opening is over at our family gatherings). I love reusing them year after year!
AND they’re super easy to make! I swear, they’re a great project for beginner sewers because it doesn’t matter the size, shape, or even if they’re particularly square. The process is three simple steps: cut, sew, enjoy!
Interested in building more sustainable habits in 2021? Please join my upcoming virtual workshop: Kickstart Your Sustainability Journey!
Step 1: Cut your fabric
If the exact size/shape isn’t important to you, I recommend letting your fabric dictate the size.
For example, my fabric is almost 42 inches wide, so I cut it exactly in half and made two 10 inch wide bags. I cut my fabric 15 inches tall and ended up with two 10”x13” gift bags. I love using printed fabric like this because it makes straight cuts easier. I pick a spot in the pattern and cut right along the “line”.
After cutting, my fabric is about 21 inches wide and 15 inches tall.
Step 2: Cut your cord
I used 1/4” cotton cord, but feel free to use bigger or smaller. Choose the top of your bag (based on the pattern) and cut your cord at least 8-10 inches longer than the width of your fabric (it will hang out 4-5 inches on either end when you’re done).
My fabric is 21 inches wide, so I cut my cord about 31 inches long.
Step 3: Sew your cord into place
Place your fabric with the wrong side up* and the top pointing away from you. Place your cord along the top edge and fold the top of the fabric towards you. You’re going to sew a little pocket for the cord to slide through, so make sure there’s enough fabric that you can run your foot** along the seam without stitching the cord.
* the “wrong side” is what we call the back of your fabric, the side without the pattern, the side you want on the inside of your bag. ** the “foot” is the mechanism around the needle on your sewing machine as shown in this photo.
Step 4: Sew the other two seams
Keeping the wrong side up, fold your fabric in half. This will be the final shape of your bag, so the cord should be at the top and you should have seams to sew across the bottom and one of the sides. Trim any excess fabric if your edges aren’t lining up.
Go ahead and sew these seams. The only tricky part is making sure you don’t sew through the cord/pocket. If you do this, you won’t be able to pull the cord to cinch the bag closed.
Trim extra thread and turn your bag right side out.
Step 5: Tie knots at each end of the cord
This will prevent the cord from accidentally getting pulled into the pocket when someone is opening their gift. Fishing the cord back out is certainly possible, but a royal pain.
You’re done! You can make as many bags as you want, in a myriad of sizes to meet your gift giving needs!
I have about 24 bags total and the “10×13” bag I made today is the “medium” size bag in my collection. I have a bigger size (roughly twice as big) and a smaller size too. Three yards of fabric will yield about 8 medium and 2 large bags. I like to mix and match my colors and patterns, so I’ve purchased different patterns over the years.
Please drop your questions in the comments below. I’m always happy to answer questions!
And comeback to tell me about your experience if you’re making these reusable gift bags for the first time. I can’t wait to hear about your project!
Please join my upcoming workshop… Kickstart Your Sustainability Journey! This 6-week online workshop will change the way you think about sustainability, flipping your mindset so that sustainability becomes a natural part of every decision you make and creating easy sustainable habits. Find more information and register here!
In some ways, COVID-19 has forced us all into a more intentional and sustainable life, and it’s worth thinking about how we might incorporate the lessons learned into “normal life,” whenever we return to it. The thing is… “normal” might look a lot different when we get back to it.
However you’re planning to rebuild your normal, I would encourage you to think about the simple and more sustainable aspects of your current lifestyle that you want to keep as you rebuild. To help with this, I’d like to tell you about the 80/20 Principle.
The 80/20 Principle was created by Italian economist, Vilfredo Pareto, and, in short, states that you get 80% of your results from 20% of your effort. This is a powerful model for business, time management, and sustainable living.
I have absolutely applied the 80/20 principle over the years when re-designing my sustainable lifestyle over the past few years. My family and I have chosen to make most of these changes under the notion that sustainability give us more, not less. These are the easy types of lifestyle changes, the 20%.
- We save money by not wasting (heat, electricity, gas, food).
- We ride our bikes more and find that our clothes fit better.
- We find more time to play because we are not shopping as much, so we have fewer things in our home and it stays cleaner longer.
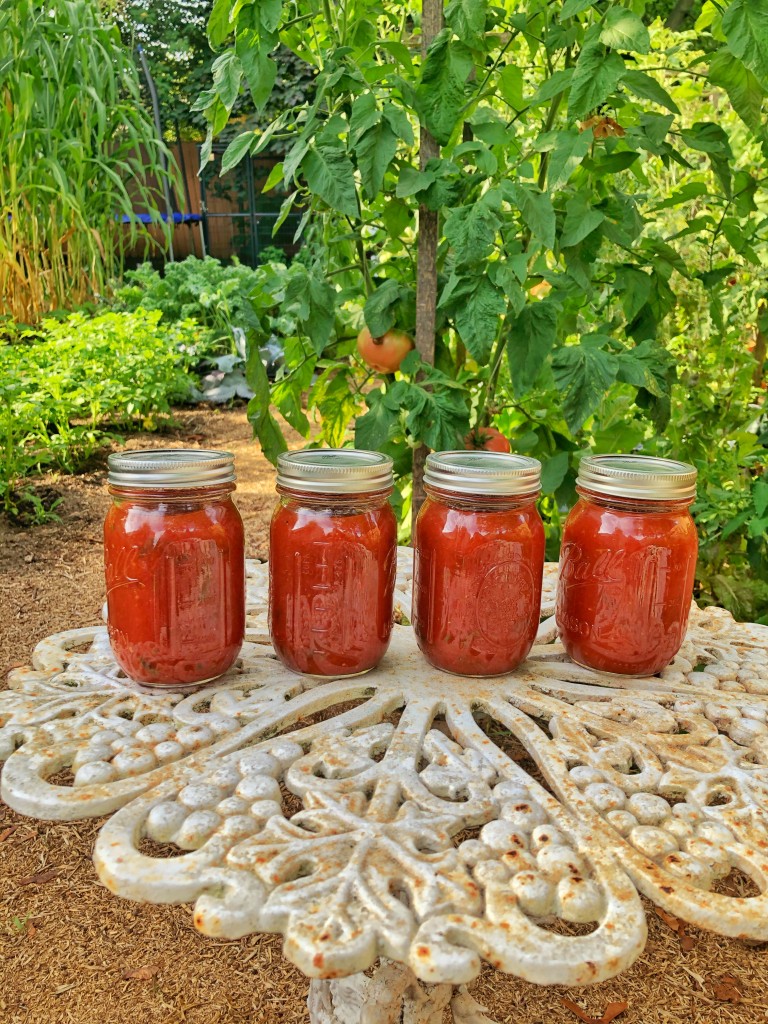
Because of COVID, we grew more vegetables in our backyard garden, shopped even more than usual at our local farmers market this summer, and canned/froze a lot of fresh, healthy, and local food. These activities saved us money, helped us connect as a family, and will improve our health. Next summer, I’m planning to hang on tight to these more sustainable habits, COVID or not, because they make me happy!
We accomplish 80% of our sustainability goals doing what is engaging and interesting to our family. So, here’s my advice for building a more sustainable life: Choose the fun stuff! Think about activities you enjoy most right now and the new habits you’ve created during COVID that are bringing you joy.
Here are a few areas for you to consider when you’re brainstorming about the activities and habits you want to keep.
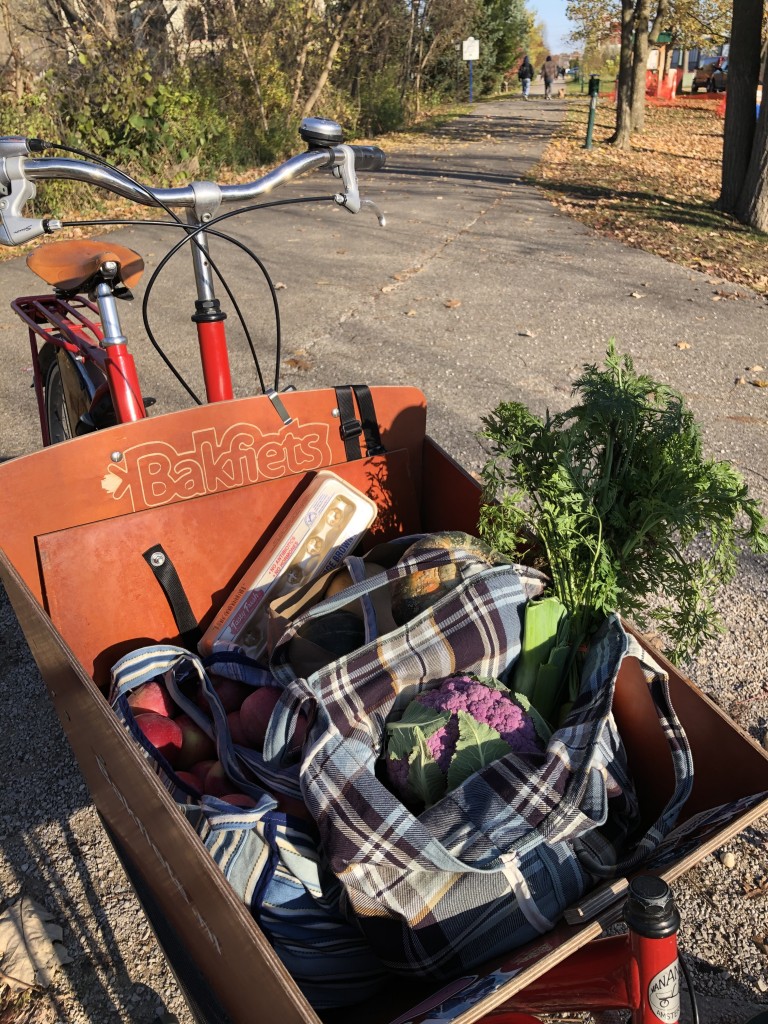
Drive less, walk and bike more
Most of us aren’t driving to work right now. Most of us are working from home and driving once per week to get groceries. From my home office window, I can see my street in downtown Rockford and I see so many people walking, skateboarding, and biking.
How can you incorporate driving less into your “new normal?”
- Did you realize that you can walk or bike to work, school, or the grocery store?
- Did you learn that you only need to grocery shop once per week (or even less)?
- Did you become really good at combining all of your errands into one trip?
- Did you discover activities, clubs, or events that aren’t actually important (or fun), so you’ll choose to stay home instead?
- Did you find new spaces or activities in your home that will help you maintain a slower life pace even when you are free to ramp back up your normal busyness?
Reduce food waste
I bet we’re all trying to stretch our food a little further these days. There are lots of benefits to this strategy: saving money, spending less time shopping, and throwing away less food, just to name a few.
How can you incorporate a heightened awareness of food waste into your “new normal?”
- Did you become really great at meal planning?
- Did you learn how to better organize your pantry or fridge? How does it feel to be able to find ingredients easily?
- Did you become an “iron chef” contender, learning to creatively use obscure ingredients in meals you (and your family) loved?
- Did you learn about food preservation this summer — canning, freezing, and/or fermenting extra fresh food safely for you to eat weeks or months later?
- Did you start composting in your own yard?
Embrace minimalism
Lots of us are looking at our homes differently these days, noticing clutter in a way we’ve never seen it before. According to Joshua Becker, founder of the Becoming Minimalist blog, “minimalism is intentionally living with only the things I really need—those items that support my purpose. I am removing the distraction of excess possessions so I can focus more on those things that matter most.”
How can you incorporate minimalist principles into your “new normal?”
- Did you purge toys, clothes, or clean your closets to pristine condition?
- How does it feel to have less clutter in your life?
- How can you prevent unwanted things from accumulating again?
- Did you redesign spaces in your home to be more comfortable or better suit your needs?
Please share some of your favorite slow living and sustainable habits that you’ve discovered during this global pandemic in the comments below!