This rhubarb shrub makes a really nice and simple spring cocktail when you mix it with ice, gin, and soda water. I recommend adding a sprig of thyme for extra spring freshness. Rather than talk your ear off about it, I’ll just leave the recipe here, encourage you to give it a try, and walk back to my Saturday afternoon gin drink in the yard…..
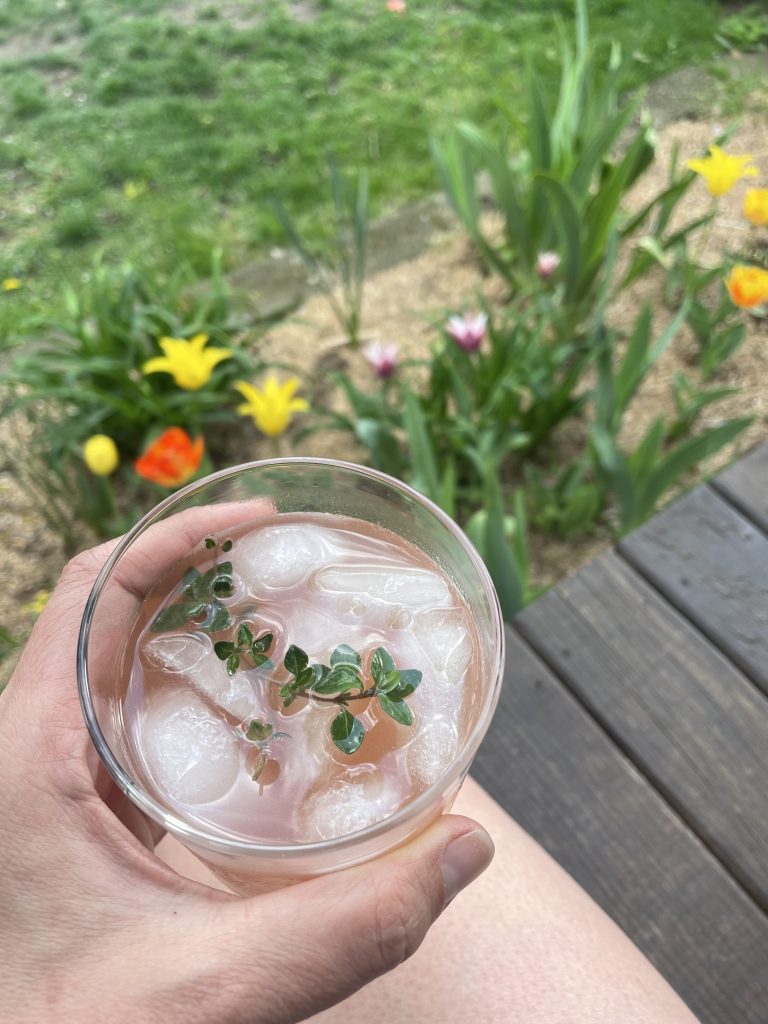
Rhubarb Shrub
Makes about 2 cups
Ingredients
1 pound rhubarb (about 4-6 stalks), roughly chopped
1 cup sugar (maple sugar or 1/2 cup maple syrup work great too)
1 cup water
1 cup apple cider vinegar (I hear red wine vinegar or balsamic are good too, but I haven’t tried them)
Instructions
- Bring rhubarb, sugar and water to a boil in small saucepan. Reduce heat to low and simmer 20 minutes.
- Take off the heat and add the apple cider vinegar. Let cool.
- Strain through a fine mesh sieve (you could use a cheese cloth or clean towel if you need a finer mesh)
- Chill and Enjoy!
This should last just fine in the fridge for a month or so, but I dare you to resist drinking it for that long! I like to add a tablespoon or two to each drink, but you might like more or less.
]]>There’s a “usual suspects” list of must-see Chicago attractions that get thrown around quite a bit. Whether it’s the Bean, Wrigley Field, Navy Pier, or any number of obligatory things to do while you’re in the Windy City. Your mileage might vary on these endeavors, but Chicago is also becoming a destination for travelers who want to “live like a local.” The stellar food, nightlife, and music scenes are becoming major draws of Chicago. One thing that doesn’t get talked about enough is Chicago as an eco-friendly travel destination.
While it may resemble a concrete jungle as much as any urban metropolis, Chicago has made significant strides in recent years toward becoming an eco-friendly city. City officials have been prioritizing sustainability and environmental initiatives for decades, and you’ll find that an eco-friendly trip to Chicago is very doable.
The biggest thing that Chicago has going for it is its extensive public transportation network. The famous “L” train system serves most parts of the city, and bus routes cover almost the entire city. If the weather is great (big if), Chicago is also very bike-friendly. Chicago’s restaurant scene has fully embraced vegan food and sustainability efforts, so it’s easy to find a plant-based meal in just about every neighborhood. There are also plenty of environmentally-conscious activities and attractions to visit during your trip.
One of the best ways to reduce carbon emissions is to get around on foot or on a bike. If you’ll be propelling yourself around the city, you won’t want to have to lug your bags around all day. Luckily, it’s easy to find convenient luggage storage in Chicago, where you can drop the bags off while you explore the best of the Windy City’s eco-friendly offerings.
Best ways to get around Chicago
While Chicago is a fairly drivable city compared to New York or Los Angeles, there are plenty of sustainable ways to navigate the city. Here are a few:
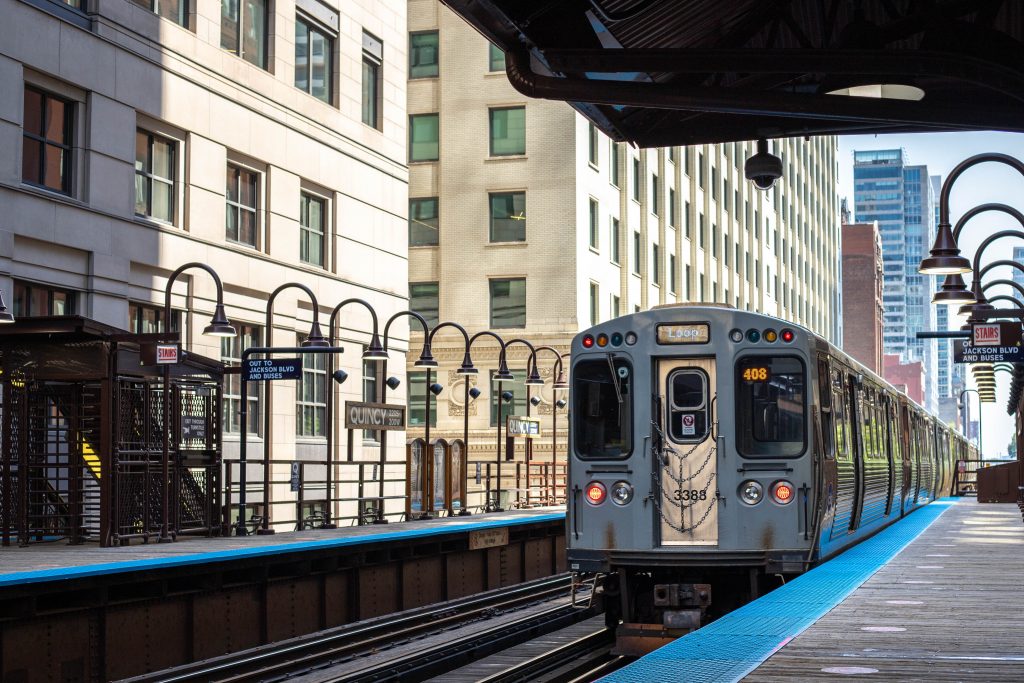
Public transportation
Chicago has one of the most extensive public transportation systems in the country. Operated by the Chicago Transit Authority (CTA), there are train lines and bus routes that cover almost the entire city’s geographical footprint.
Most of the popular tourist and business districts are directly served by the “L” train system, which is all routed through “the loop” downtown. CTA bus routes cover the rest of the city and are a very affordable way to get around.
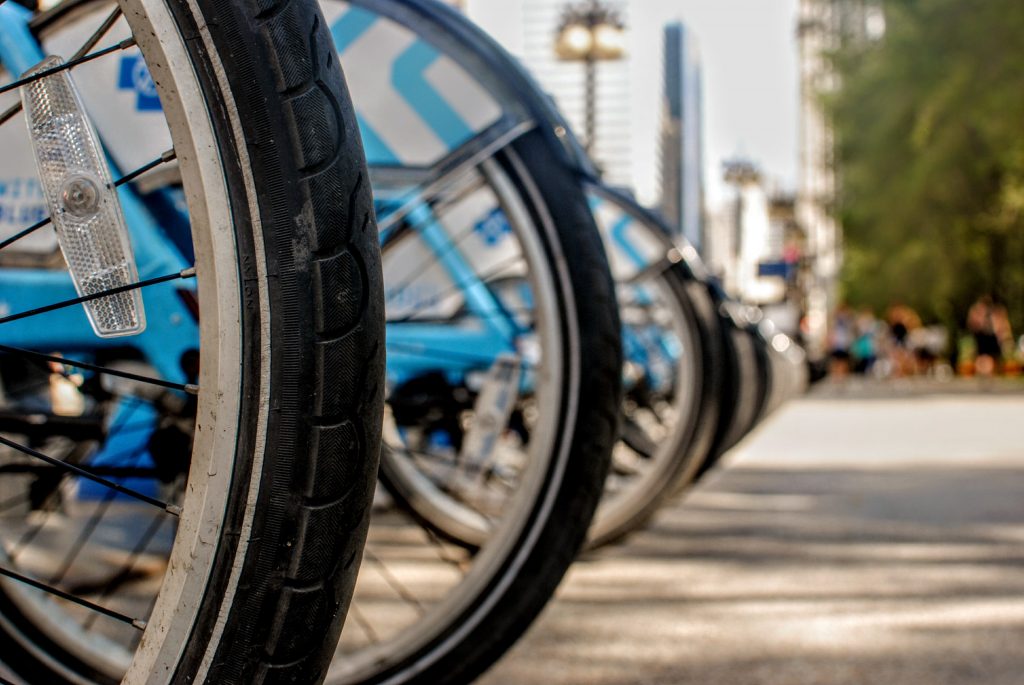
Cycling
Chicago is (almost to a fault) very flat, making it an easy city to navigate on two wheels. In recent years, Chicago has developed a robust cycling infrastructure of designated bike lanes and trails throughout the city.
Divvy, Chicago’s bike-sharing program, is an extremely popular method of transport. During the summer, you can’t miss the thousands of blue bikes being pedaled all over town. This is a great way to get around quickly and conveniently while limiting emissions.
Walking
Chicago’s neighborhoods are pedestrian-friendly and easy to navigate, and it’s generally the quickest way to get around buzzy tourist hotspots and popular nightlife destinations. Depending on your itinerary, you should be able to take the train or a bus to most places and cover the rest of your trip on foot.
Electric scooters
Electric scooters have become VERY popular in Chicago as an eco-friendly mode of transportation. Lime is the most popular service where you can rent an e-scooter to get to and from popular brunch spots and explore neighborhoods.

Vegan restaurants and bars
The windy city may be primarily associated with hot dogs and herculean portions of pizza, but Chicago has a solid vegan restaurant scene. Eating an entirely plant-based diet is one of the best ways to reduce your carbon footprint and minimize animal cruelty. Here are a few notable options for eating vegan while you’re in town:
The Chicago Diner
A beloved institution, The Chicago Diner has been serving up vegan versions of diner classics since 1983. From classic burgers (that you can’t tell are vegan) to hearty brunch scrambles, this menu offers familiar favorites without the guilt.
Handlebar
This laid-back hipster hangout in Wicker Park offers an extensive menu of vegan comfort food. Their seitan wings and vegan mac ‘n’ cheese are both famous among locals, and this cozy spot is an awesome place to have a few drinks as well. During the summer, their back patio is one of the hottest tables in town.
Demera Ethiopian Restaurant
While not exclusively vegan, Uptown’s Demera offers a wide range of vegan-friendly options that showcase the incredible flavors of Ethiopian cuisine. This authentic neighborhood spot features lentil stews, vegetable curries, and injera (fermented flatbread), all of which fit into a plant-based diet.
Bad Hunter
Located in the incredibly lively West Loop neighborhood, Bad Hunter has a vegetable-based menu of inventive modern dishes. The menu isn’t entirely vegan, but there are plenty of options, and they’re known for delicious craft cocktails and natural wine.
Sustainable activities in Chicago
With a stunning lakefront and plenty of parks, there are plenty of ec-friendly things to do during your trip to Chicago. You just have to know where to look!

Explore the city by bike
Chicago’s incredible lakefront trail offers amazing views of the skyline along with beautiful Lake Michigan. If you want to see the whole lakefront, you can pedal your way up and down in less than an hour. There is also the 606 trail that runs through uber-trendy neighborhoods like Wicker Park and Logan Square.
Garfield Park Conservatory
Located on the city’s West Side, the Garfield Park Conservatory is one of the most underrated attractions in the city. The Conservatory’s greenhouses are filled to the brim with lush greenery and exotic plants from around the world. There are various themed gardens and a serene atmosphere to enjoy. During the winter, the humid greenhouses will bring you back to life!

Take a kayak tour instead of a boat tour
The Chicago Architecture Tour is one of the obligatory tourist attractions that come highly recommended. While it’s a solid activity, a greener option would be renting a kayak and exploring the Chicago River without a carbon footprint.
Support local farmers’ markets
Many of Chicago’s neighborhoods host a farmers’ market on weekends. If you want to stock up on local goods and buy supplies for a picnic, head to popular pop-ups like the Green City Market or Logan Square Farmers Market. Even if you don’t buy anything, the people-watching is too good to pass up.
This post was written in collaboration with Bounce luggage storage.
Like this content? Want to see more guest posts? Please drop a note in the comments to recommend new topics or contributors we should be collaborating with.
]]>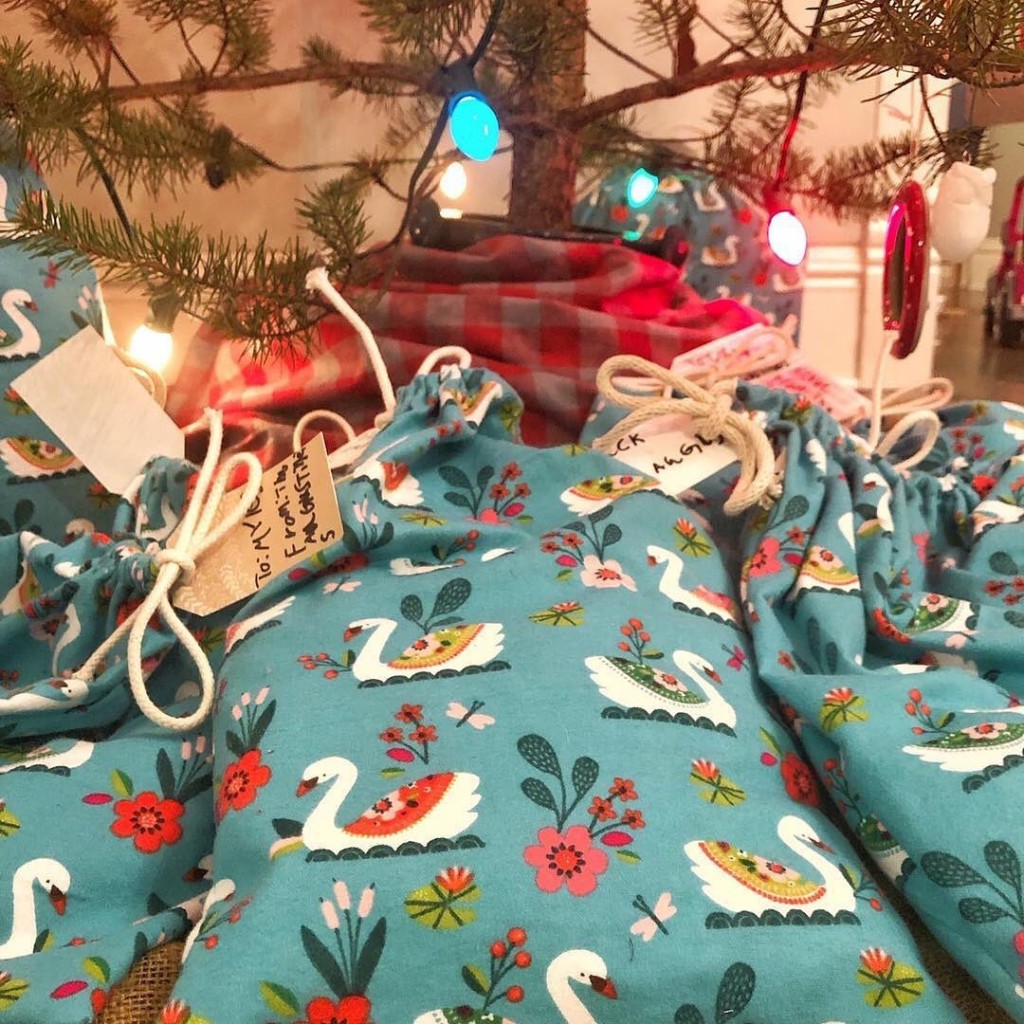
A few years ago, I sewed a bunch of reusable cloth gift bags in cheerful Christmas patterns and they continue to bring me such joy!
I love wrapping presents in these gorgeous bags. I love giving them to people (and am so honored when friends and family want to keep the bag in addition to the gift… in fact, you’ll regularly find me sneaking around and gathering my bags up after gift opening is over at our family gatherings). I love reusing them year after year!
AND they’re super easy to make! I swear, they’re a great project for beginner sewers because it doesn’t matter the size, shape, or even if they’re particularly square. The process is three simple steps: cut, sew, enjoy!
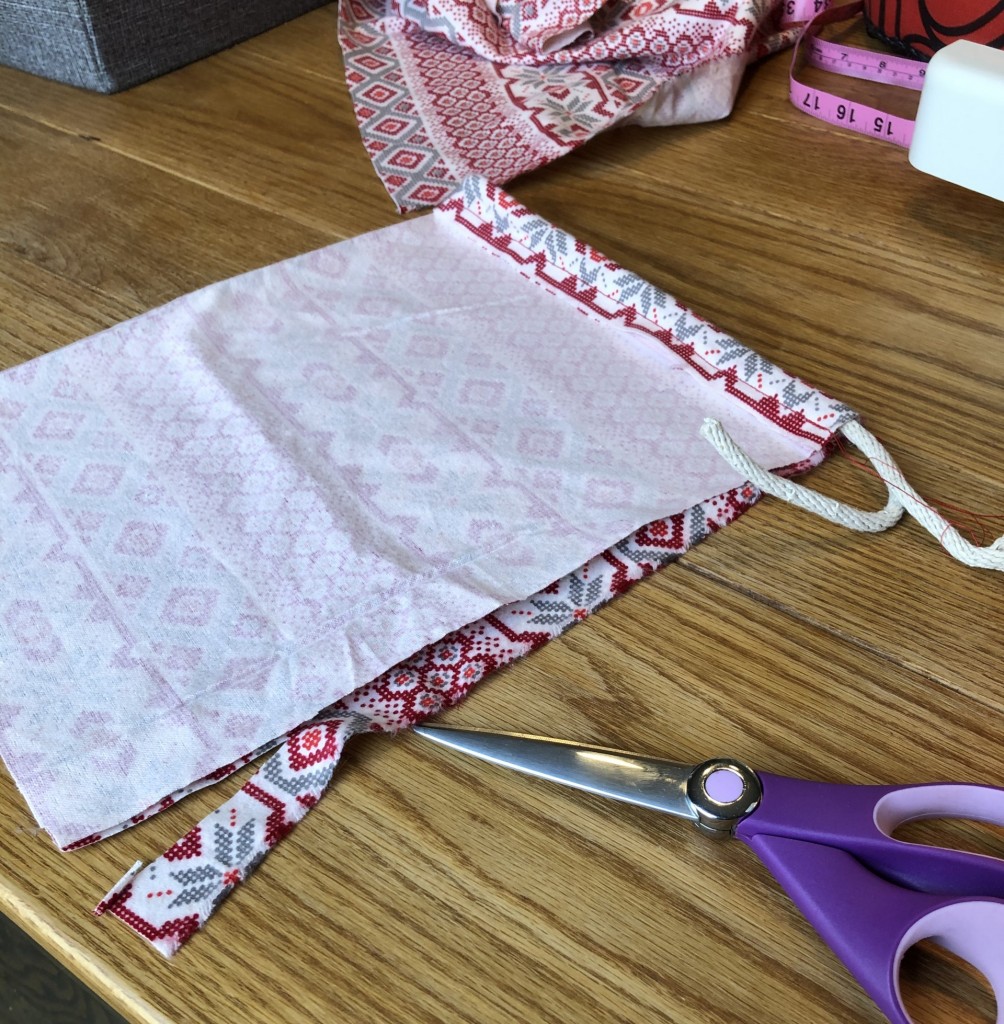
Step 1: Cut your fabric
If the exact size/shape isn’t important to you, I recommend letting your fabric dictate the size.
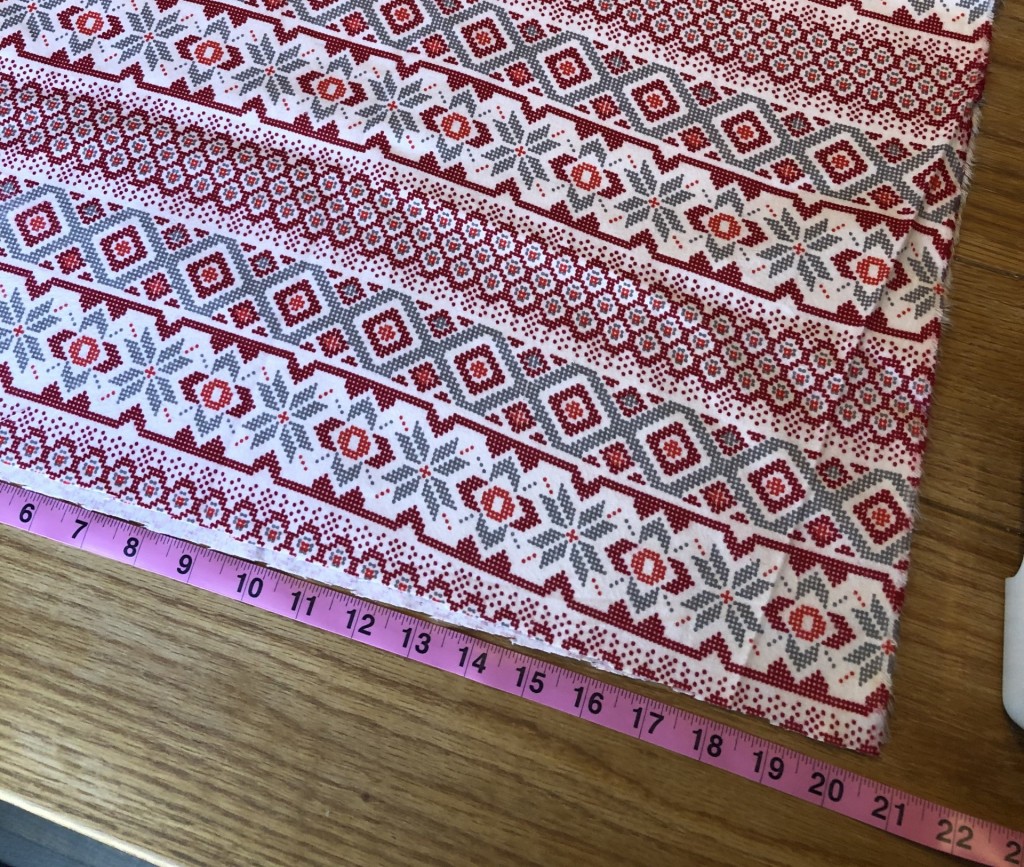
For example, my fabric is almost 42 inches wide, so I cut it exactly in half and made two 10 inch wide bags. I cut my fabric 15 inches tall and ended up with two 10”x13” gift bags. I love using printed fabric like this because it makes straight cuts easier. I pick a spot in the pattern and cut right along the “line”.
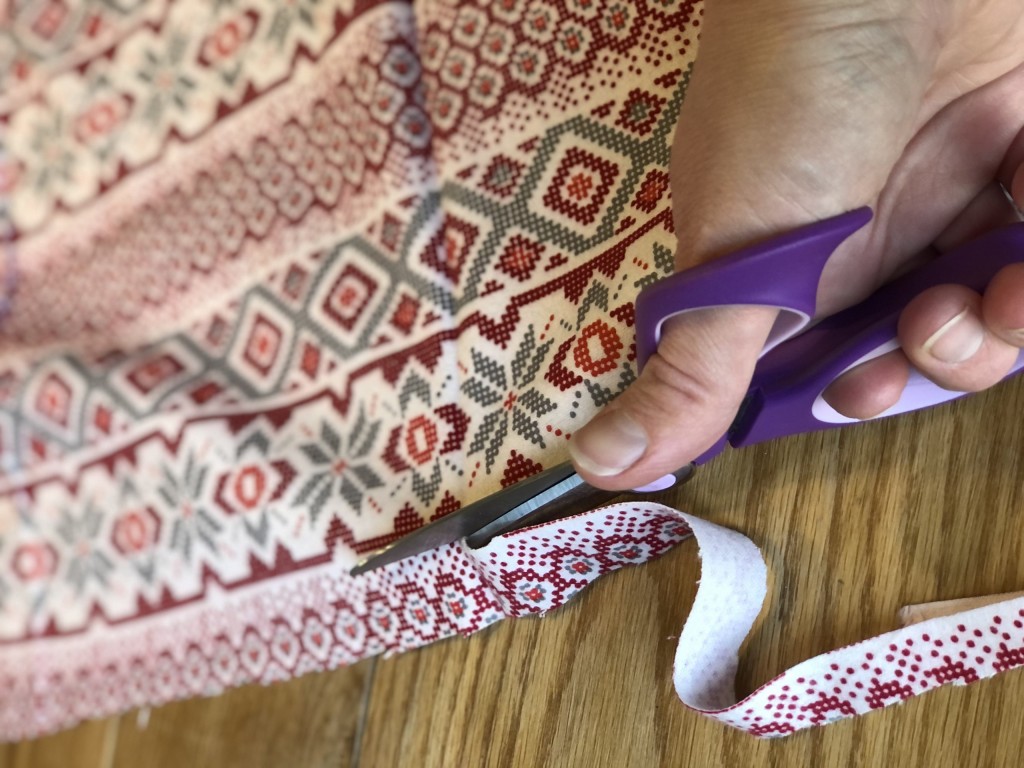
After cutting, my fabric is about 21 inches wide and 15 inches tall.
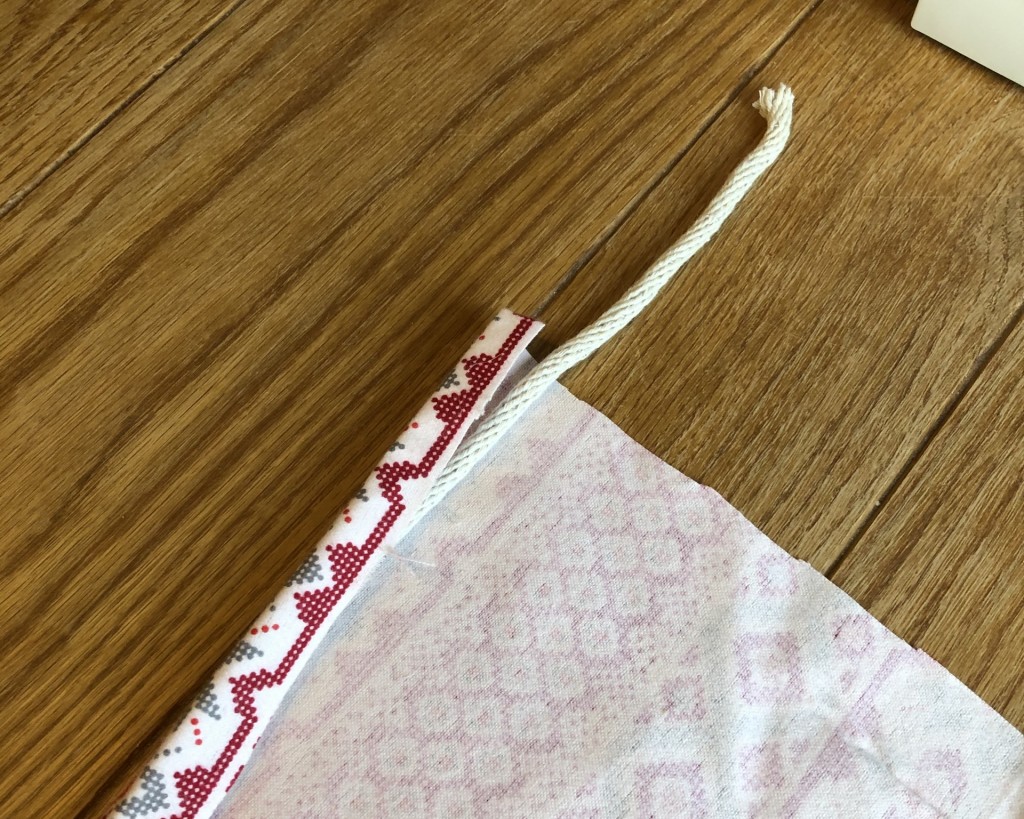
Step 2: Cut your cord
I used 1/4” cotton cord, but feel free to use bigger or smaller. Choose the top of your bag (based on the pattern) and cut your cord at least 8-10 inches longer than the width of your fabric (it will hang out 4-5 inches on either end when you’re done).
My fabric is 21 inches wide, so I cut my cord about 31 inches long.
Step 3: Sew your cord into place
Place your fabric with the wrong side up* and the top pointing away from you. Place your cord along the top edge and fold the top of the fabric towards you. You’re going to sew a little pocket for the cord to slide through, so make sure there’s enough fabric that you can run your foot** along the seam without stitching the cord.
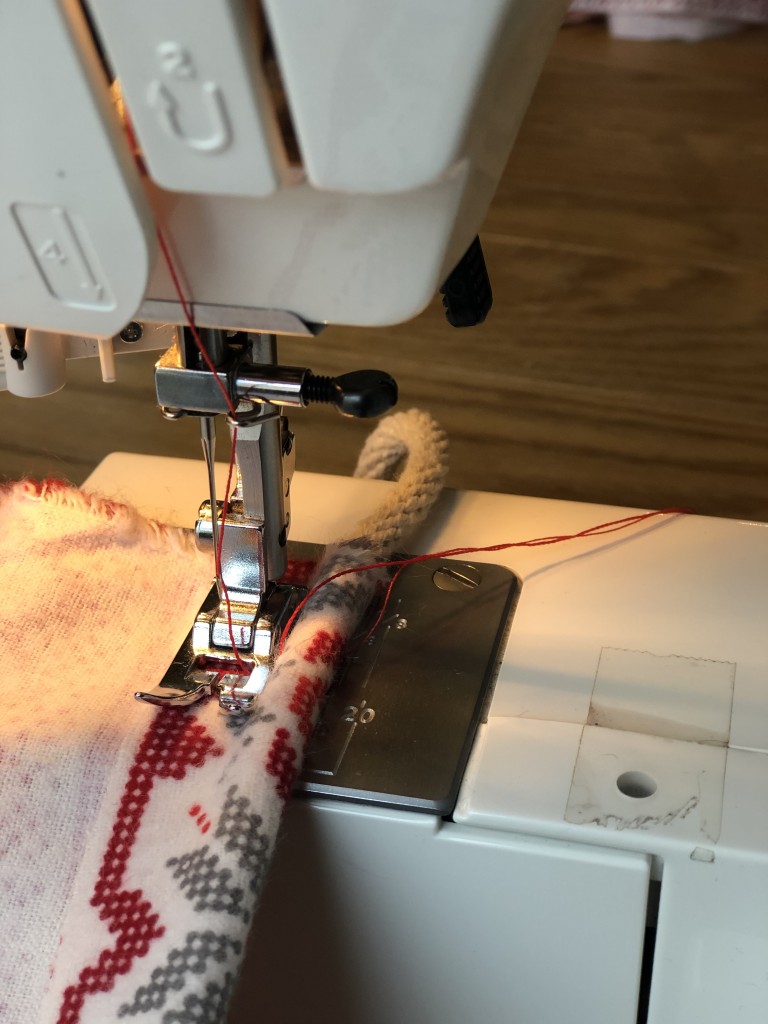
* the “wrong side” is what we call the back of your fabric, the side without the pattern, the side you want on the inside of your bag. ** the “foot” is the mechanism around the needle on your sewing machine as shown in this photo.
Step 4: Sew the other two seams
Keeping the wrong side up, fold your fabric in half. This will be the final shape of your bag, so the cord should be at the top and you should have seams to sew across the bottom and one of the sides. Trim any excess fabric if your edges aren’t lining up.
Go ahead and sew these seams. The only tricky part is making sure you don’t sew through the cord/pocket. If you do this, you won’t be able to pull the cord to cinch the bag closed.

Trim extra thread and turn your bag right side out.

Step 5: Tie knots at each end of the cord
This will prevent the cord from accidentally getting pulled into the pocket when someone is opening their gift. Fishing the cord back out is certainly possible, but a royal pain.

You’re done! You can make as many bags as you want, in a myriad of sizes to meet your gift giving needs!
I have about 24 bags total and the “10×13” bag I made today is the “medium” size bag in my collection. I have a bigger size (roughly twice as big) and a smaller size too. Three yards of fabric will yield about 8 medium and 2 large bags. I like to mix and match my colors and patterns, so I’ve purchased different patterns over the years.
Please drop your questions in the comments below. I’m always happy to answer questions!
And comeback to tell me about your experience if you’re making these reusable gift bags for the first time. I can’t wait to hear about your project!
PS. Does this post feel familiar? It should! It was originally posted a couple of years ago. I’ve updated and republished it because it’s one of my favorite posts.
]]>Most of us firmly believe that one is “better” than the other, but there’s a really interesting debate about the sustainability aspects of this tradition. Here are a few pros and cons to consider when choosing the type of tree you use to celebrate the holidays.
Natural Trees
PROS
- The trees provide many benefits to the environment as they grow, cleaning the air and providing watersheds and habitats for wildlife.
- They are a renewable resource and replanted after being cut.
- They grow best on rolling hills that are often unsuitable for other crops.
- When you buy a tree from a local farmer, you’re supporting the people who live in your community.
- Trees are biodegradable and can be composted, mulched, or burned.
- The British Carbon trust estimates the average carbon footprint of a natural tree is 3.5kg of CO2 when composted, mulched or burned.
CONS
- Buying a tree every year can get very expensive. According to Consumer Reports, the average cost of a natural Christmas tree in 2020 was $81.
- Not everyone has access to local Christmas trees and transportation contributes to the environmental impact of your tree. If you drive more than 10 miles to get your tree, it might be more environmentally friendly to purchase an artificial one.
- Not everyone has access to tree recycling programs. In the UK, an estimated 7 million Christmas trees are landfilled each year.
- The British Carbon trust estimates the average carbon footprint of a natural tree is 16kg of CO2 when composted, mulched or burned.

Artificial Trees
PROS
- The average artificial tree costs $107, making it the economical choice in the long run.
- Caring for your tree and extending its use beyond the average seven years will certainly reduce the environmental impact.
- Reselling, gifting, or donating your tree when you’re done with it will help extend the life.
- If you use your tree for 12 years or more, you might actually have less of a carbon footprint than a natural tree.
CONS
- Most of the artificial trees on the market are made of PVC and steel in China and shipped to the United States.
- Artificial trees are used for an average of 7 years before it is disposed of. If a tree is displayed for 1 month/year, it will have served as a Christmas tree a total of 7 months.
- Most artificial trees cannot be recycled at the end of their life.
- The British Carbon trust estimates the average carbon footprint of an artificial tree at 40kg.
My vote? Team Natural!
My family sits squarely on Team Natural. In fact, we choose to hunt for our Christmas tree in the National Forest each year and it’s one of my favorite family holiday traditions! We love the adventure of wandering through the wild forest, foraging for the “perfect” Christmas tree.
Did you know you can harvest a Christmas tree from the National Forest? You can! And in Michigan, the permit is only $5. Read more about my tips and recommendations for a successful Christmas tree hunt in the national forest here, in this updated blog post.

Let’s Recap
If you’re going to buy a natural tree, buy local from a tree farm or retailer (preferably less than 10 miles from your home) and don’t throw your tree in the trash after the holiday.
Lots of municipalities have specific days for curbside recycling of Christmas trees. Alternatively, you can put it in your yard waste container, drop it off at a local recycling center, or let it naturally biodegrade on your own property if you have the space.
Birds and small mammals love the extra shelter and you’ll be shocked how quickly the tree decomposes. Usually, your county/city will share this information right after Christmas. Please feel free to share a link to your county/city tree recycling program in the comments. I’m sure your co-workers will appreciate it!
If you’re going to buy an artificial tree, buy the most durable one you can find (look for warranties) and keep it as long as possible.
For all this debate, it’s worth maintaining the perspective that no matter which you choose, your tree has a climate impact equivalent to driving roughly between 10-20 miles. So, bike to work a few days a year, and you’ve already offset your tree, no matter which type it is.
What about you?
Are you on Team Natural? Feel free to share your favorite local tree farms in the comments.
Are you on Team Artificial? Who’s had their artificial tree the longest? Anyone over 10 years? 20 years? What’s the sturdiest model available?
Here are links to my sources if you’re interested in digging deeper.
https://www.sightline.org/2015/12/21/your-christmas-trees-carbon-footprint/
https://www.nytimes.com/2018/11/26/business/energy-environment/fake-christmas-tree-vs-real-tree.html
https://www.independent.co.uk/environment/christmas-trees-recycling-environment-sustainability-plastic-a8705081.html
https://www.carbontrust.com/news/2013/01/christmas-tree-disposal-advice/
https://www.in.gov/dnr/forestry/7561.htm?fbclid=IwAR3PlYxqOFDnWILG7ej8_BPRSsCPhO2LjGq2L9dZ3gXqwh7NKeu55LX53eY
https://www.thinkstep.com/content/study-comparative-life-cycle-assessment-artificial-and-natural-christmas-tree
]]>
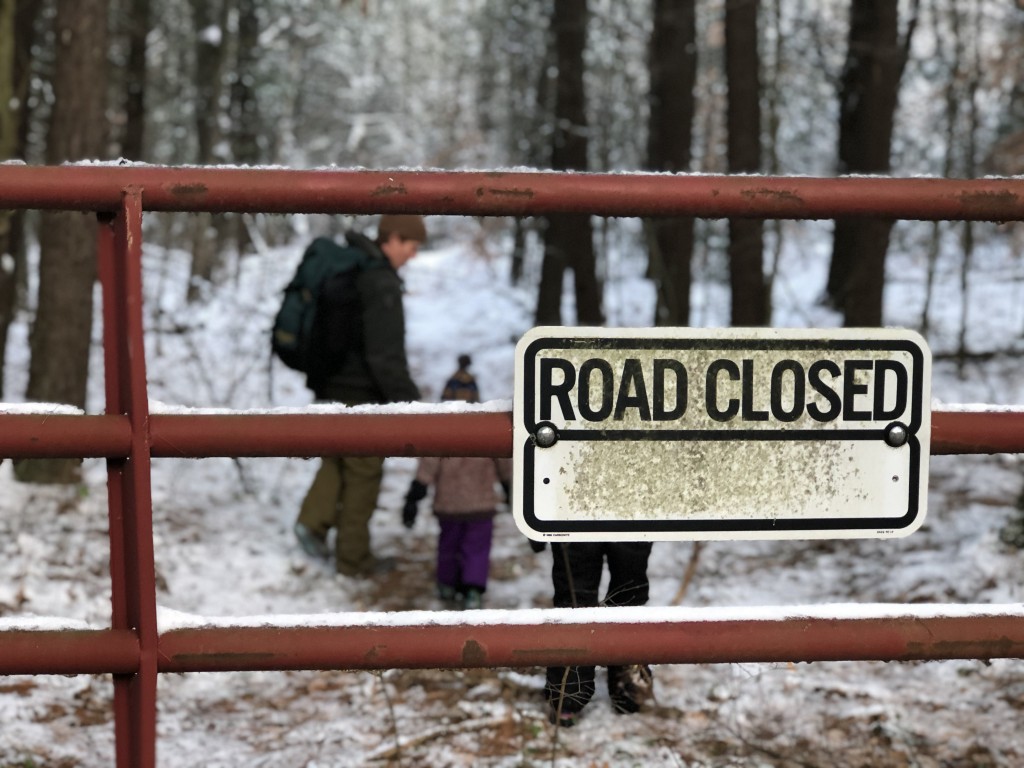
This is one of my FAVORITE family holiday traditions! We love the adventure of hunting for our Christmas tree in the natural woods! We pack hot chocolate and marshmallows, and make an afternoon out of it!

To be clear, my Christmas tree does NOT look like the $50 version many of us are used to buying from a tree lot. It’s hard to find a small, bushy tree (remember, we’re talking about a natural forest here), but I LOVE the entire experience and wouldn’t trade it for the world.
By harvesting a tree from the National Forest, I’m contributing to the overall forest health. As highlighted on recreation.gov, “Christmas tree permits are a unique opportunity for citizens to help thin densely populated stands of small-diameter trees – the perfect size for a Christmas tree.”
Ready to plan your hunt?
For a great day of family fun while hunting for a Christmas tree hunt in a National Forest near you, I recommend the following preparations:
- Plan to spend the whole day, don’t rush. One year, we tried to cram our Christmas tree hunt into an afternoon and ended up hunting well into twilight and hauling our tree out of the woods in the dark! Don’t get me wrong, we still had an amazing time, but I would have enjoyed it even more if we’d had more time for our fireside picnic. And, especially if this is your first time… it will take longer than you think.
- Pack a picnic. We love to bring snacks, hot cocoa, and s’mores supplies. Especially if it’s cold, we sometimes build a little campfire to warm our fingers and toes (of course, we make sure to build it in a safe spot and extinguish the fire completely before we leave). We try to move slowly through the adventure, making time to enjoy the woods before cutting our tree and coming home.
- Review the maps provided by your local organization to make sure you know where you are, and more importantly are not allowed to cut a tree. Be a good citizen and pay attention to private property signs. In Michigan, small parcels of private property and National Forest land are often intermingled. It’s also helpful to review aerial maps (on google) ahead of time to look for heavily forested areas and to identify areas with conifers.
- Take some printed maps along on your adventure. Sometimes our day proceeds exactly according to plan, but more often than not we have to adjust our plans along the way. We regularly find ourselves without cell service at various points during our hunt and are always grateful to have printed maps. We have an atlas that covers the whole of southern Michigan. We also print maps from recreation.gov to make sure we have the most updated information. If you live in Michigan, here are some additional maps to reference:
https://www.fs.usda.gov/Internet/FSE_DOCUMENTS/fseprd536815.pdf
https://www.fs.usda.gov/Internet/FSE_DOCUMENTS/fseprd536816.pdf
- Brush up on your tree identification skills. Your National Forest may limit the specific types of trees you’re allowed to harvest for your Christmas tree. If you’re not 100% confident in your tree identification skills, bring a book along with you!
- Consider buying two permits. If you have enough space in your home, think about buying a second permit so the kids can select and bring home their own tree. Crafting a love of the forest and outdoor adventures is a key point to this adventure for Robbie and me. You should see the pride in my girls’ faces as the find the perfect tiny tree for their bedroom. They name the tree, they carefully carry her to the car, place her in their shared room, decorate her with their favorite ornaments (she’s so small, it really only takes a few lights/ornaments and you could easily use paper chains and other homemade decorations if you don’t have extras), and water her every day. I said “no” to a second tree for years and I’m so happy I finally realized how much extra fun it could add to our adventure.
- Get ready for a fun family adventure!
![]()
Ready to buy your permit? It’s a quick and easy process! Here are a few tips:
Visit Recreation.gov for more information and to buy your permit online. It’s really quite easy! The website will help you through the following steps.

Choose Your Forest
Determine which participating forest works best for your Christmas tree outing. Each forest will have specific guidelines and season dates for cutting a holiday tree.

Get the Details
Be safe and prepared. Carefully read the details and rules of your permit, and follow the Need to Know suggestions to prepare for your visit.

Buy a Permit
Purchase and print your permit so you’re ready to find your perfect holiday tree.

I can’t wait to hear about your experience harvesting a Christmas tree from a National Forest near you! Please share your experience, stories, and recommendations!
PS. Does this post feel familiar? It should! It was originally posted a couple of years ago. I’ve updated and republished it because it’s one of my favorite posts.
]]>
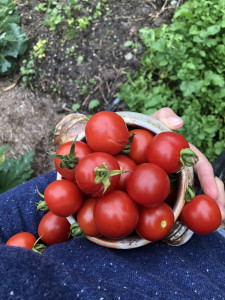
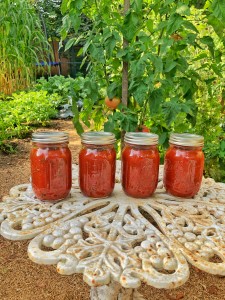
As a child and through my early twenties, I firmly believed that I did NOT like tomatoes. Now that I’m a little older, I’ve come to understand that the tomatoes you can buy in the grocery store in February are a pathetic shell of the locally grown (in my garden or by a local farmer) summer tomato.
These days, I avoid fresh tomatoes like the plague for 10 months of the year until the magical tomato season arrives, right on schedule at the beginning of every August (here in Michigan). In this moment (yes, right now!), I eat ALL THE TOMATOES!
My favorite recipes for fresh tomatoes
This means the Augustine house is eating fresh tomatoes for nearly every meal. Some of my favorite “recipes” aren’t really even recipes at all, but rather a collection of delicious ingredients set near each other on a plate. The key to each of these is REALLY GOOD ingredients. If you haven’t already, now is a great time to seek out the best olive oil and balsamic vinegar you can find. My local favorite is a Spanish olive oil, called Arbiquina, that I can buy in bulk from a local shop called Old World Olive Company (Michigan friends, they have several locations around the state). My absolute favorite balsamic is from a farm in Texas, but we haven’t been able to get it in recent years, so I’m currently using an 18-year traditional balsamic, also from Old World Olive Company. I buy my burrata and fresh mozzarella (and pretty much every other cheese I eat) from my local cheese shop, the Rockford Cheese Shop.
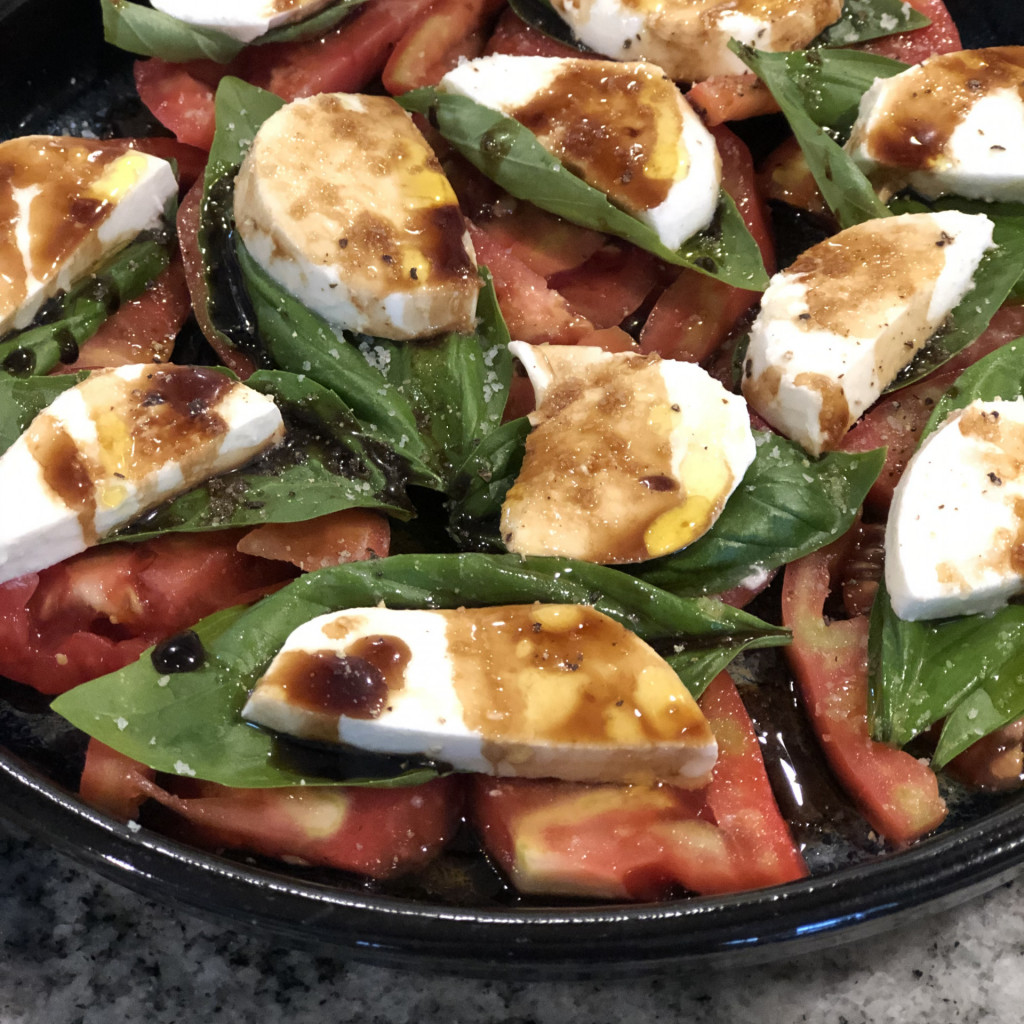
My favorite “new” recipe is this gorgeous five ingredient tomato and burrata salad from Barefoot Contessa. After eating this salad almost every day in the past week (psst… it’s really delicious for breakfast!), my favorite combination is: tomatoes, burrata, olive oil, salt and pepper. Add basil (like in the photo below of the first time I made this yumminess, last weekend) or balsamic (like in the recipe linked above) if you feel like it. Or not. It’s completely up to you!
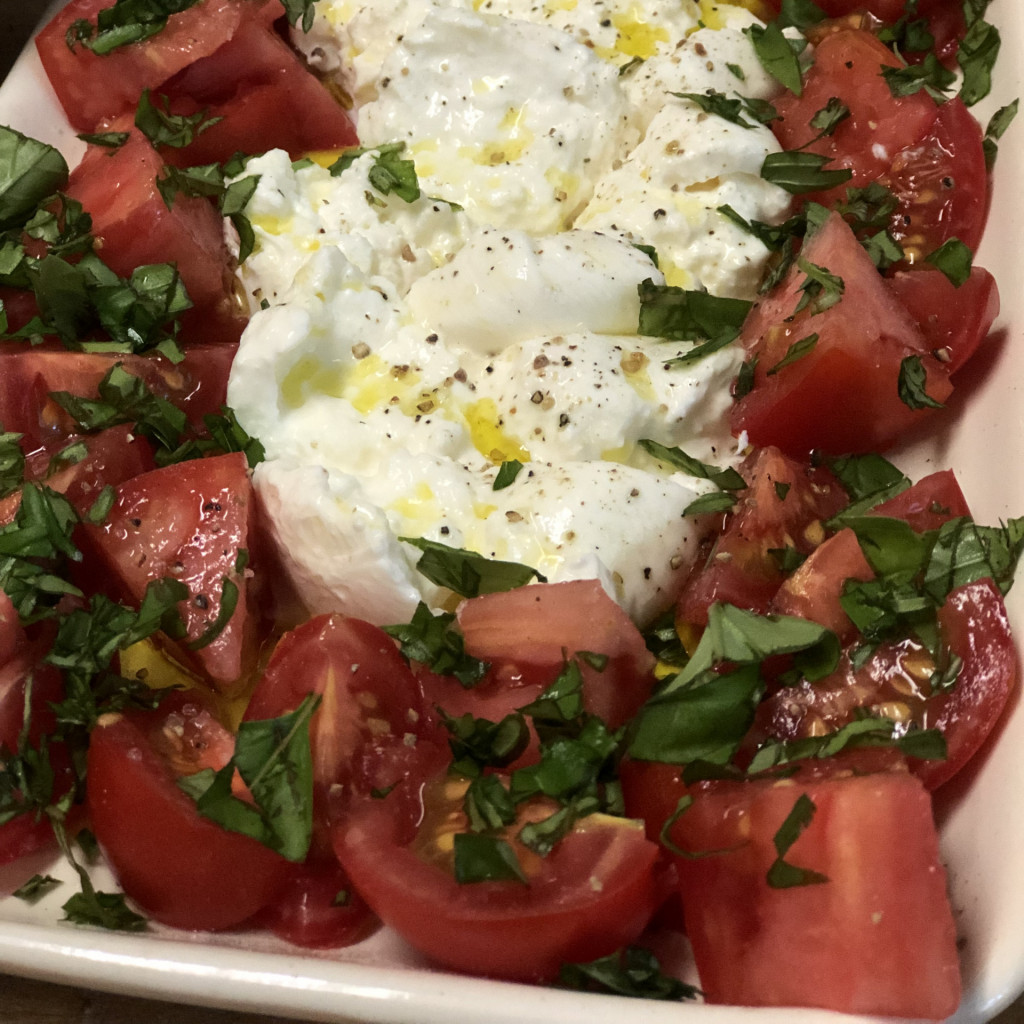
And the gateway Caprese salad (for many of us, including me, this is the first way people begin their love affair with tomatoes). Again, this “recipe” includes just a few fresh and simple ingredients… tomatoes, fresh mozzarella, and basil stacked in beautiful little piles, topped with balsamic vinegar, olive oil, salt, and pepper.
My favorite recipes to preserve tomatoes
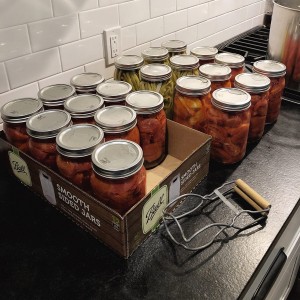
I don’t know about you, but I can only eat so many tomatoes (just me? hmmm. Must be the 26 tomato plants we planted this year in our backyard veggie garden, but we can’t keep up!). Each year, in August and September, we spend countless hours in the kitchen preserving tomatoes so we can eat this delicious local food all year long.
Last year, I created a series of blogs focused on preserving food and collected them all into this free course. The course includes individual lessons that explain the basic preservation methods of canning, freezing, and dehydrating, and specific examples of how I use these preserving methods in combination to preserve tomatoes, corn and all my favorite foods so I can eat them all year long.
Whenever you’re ready, these recipes are here waiting for you. My favorite ways to preserve tomatoes include (follow the links below for more information and recipes):
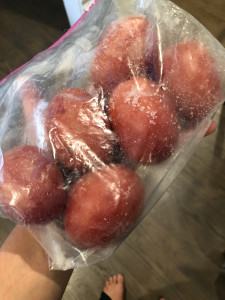
- Freeze them whole (it’s just as simple as it sounds… I put whole tomatoes (no processing) into a ziploc bag and throw them straight into the freezer. These are good for soups and sauces throughout the year, but not slicing because the freezing breaks down the cellular structure, which is a fancy way of saying they’ll be mushy when you defrost them)
- Can them as diced, quartered, halved or whole
- Grandma’s tomato sauce (I can it, but you could just as easily freeze it)
- Sun dried tomatoes (perfect for freezing)
- Tomato paste (perfect for freezing)


All of these recipes are delicious, but I have to tell you that homemade tomato paste changed my life! If you’ve never made your own I have to insist that you put it on your weekend “to do” list right now. This year. Before buying another single can of tomato paste. It’s truly that good. I can honestly say that I hope I never have to use the commercially made paste again.
Please share your thoughts, questions, and favorite recipes in the comments! How do you like to eat fresh tomatoes? How do you preserve them for later?
]]>

I struggled for a few minutes with the fact that the kits come in plastic bags, but like everything else, I’m embracing a #progressnotperfection attitude and looking for ways to eliminate the plastic bag in the future.
I’m growing oyster mushrooms using a grow kit from Mycophile’s Garden. They’re a mushroom farm located in Southwest Michigan and such a gift! I bought my first kit through West Michigan Farm Link (an awesome source for local food that I discovered this winter as I was trying to buy from more local farmers, even during the Michigan winter), but now they’re at my farmers market (and in Kalamazoo, Fulton Street, Grand Haven, St. Joe and others all over southwest Michigan), so I can easily restock. They also sell mushrooms by the pound, so you can pick some up tomorrow morning and make this salad for lunch!

I paid $20 for my oyster mushroom kit and have already harvested 3 pounds of mushrooms! And mine is currently fruiting for the third time right now. It’s the little things like this that bring me so much joy! The kit comes with growing instructions and I’m shocked at how easy it has been to grow these beautiful and delicious oyster mushrooms.

I’m trying to branch out and find new recipes (so please send me your favorites in the comments or by email carbonfreefamily@gmail.com), but it’s hard to try new things when this warm mushroom salad is SO. DAMN. DELICIOUS! I made a disappointing mushroom pizza (with the homegrown oyster mushrooms) a couple of weeks ago and Robbie summed it up well when he said, “I mean this pizza is pretty good, but I’m comparing it to that amazing salad and I want the salad instead.”
I usually make the salad with oyster mushrooms and they’re still my favorite by far, but I’ve tried it with shiitakes and lions mane too and it was pretty good too. If you try it with other varietals, please come back and tell me about it!

Recipe
(makes lunch/dinner salads for two or three people, more if you’re serving it as a side)
This recipe is adapted from Jamie Geller
Download a printable PDF of this recipe here
Ingredients
- 2 Tablespoons olive oil
- 1/2 to 1 pound mushrooms, cleaned and torn into pieces
- 2 garlic cloves, minced
- ¼ cup balsamic vinegar
- 3 cups salad greens (arugula works really nicely)
- salt + pepper
Instructions
- Clean your mushrooms. If they’re wild foraged and dirty, I recommend cleaning them as best you can without water, using a pastry brush, blowing the dirt off with your breath, or dusting it off with your fingers. Water changes the texture of mushrooms in a way thats unpleasant to me
- Tear them into large pieces. I read somewhere that the jagged edge makes them crisp up nicely and I’ve come to love the texture of torn mushrooms. If you have stems, chop them into small pieces.
- Heat olive oil over medium heat in a large saute pan, add mushrooms and cook, stirring occasionally until mushrooms are deep golden brown and have crispy edges, about 10 minutes.
- Add garlic and stir for just another minute to soften garlic a bit. Add balsamic and stir to coat mushrooms.
- Divide lettuce between 2-3 plates, top with warm mushrooms and drizzle with pan juices.
- Serve immediately and enjoy!
I can’t wait for you to come back and tell me how your mushrooms are growing! And if you like this salad! And if you tried it with other kinds of mushrooms!
]]>
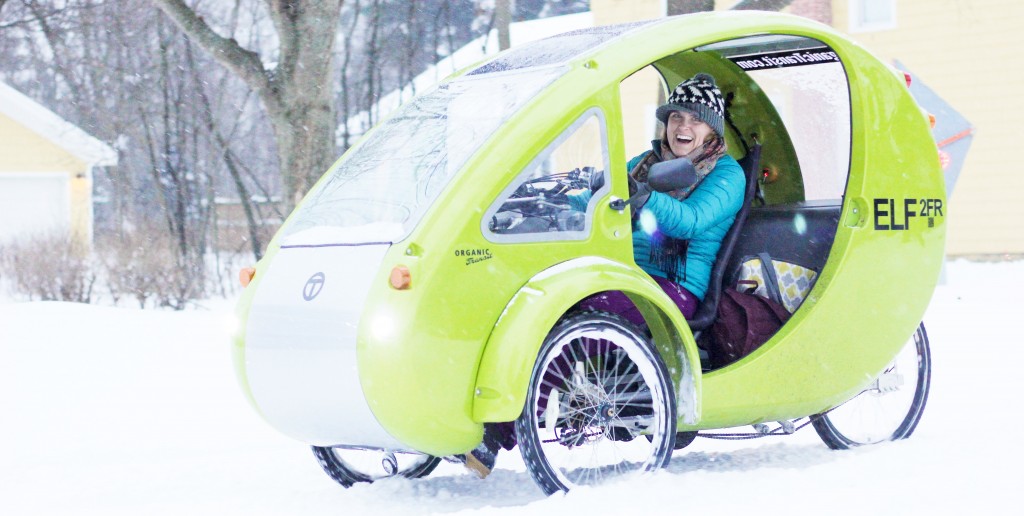
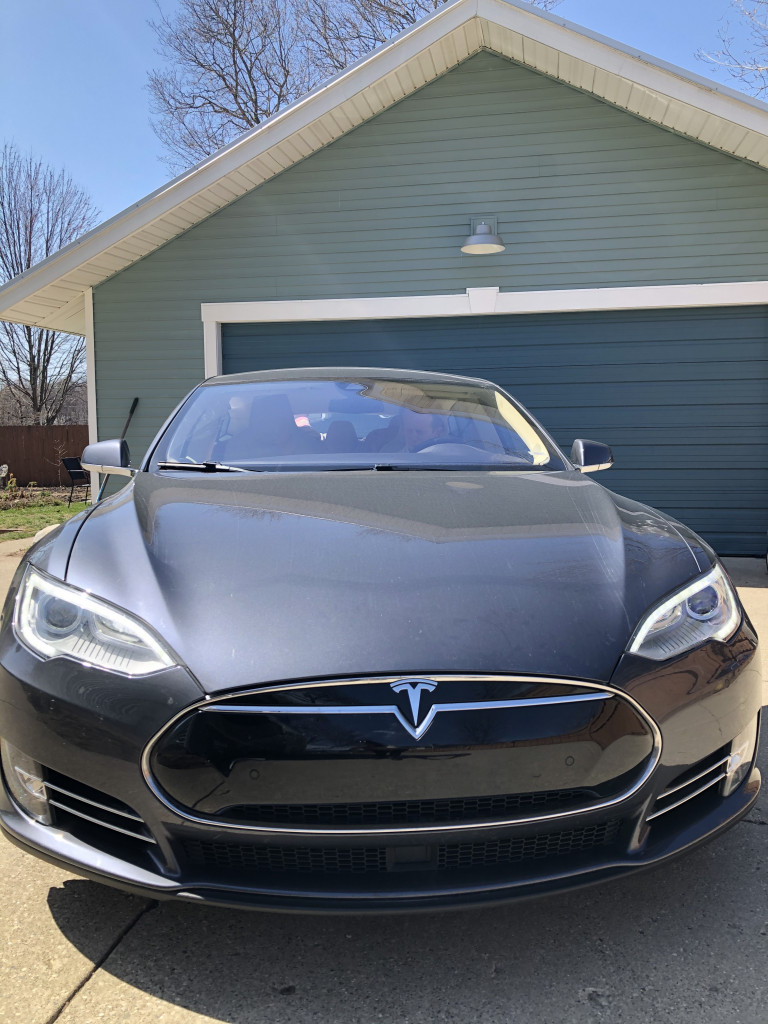
I should start by telling you that our daily life is not designed around a car, not any car. I bike my 1.6 mile commute to work, every single day (yes, even in winter… just for fun, I’ve included a photo of my winter bike below). And Robbie stays home with the kids so he doesn’t have a daily commute to work. Our oldest daughter walks to school. Robbie and our youngest daughter have designed their daily life around walkable and bikeable destinations. I’m forever grateful for the fantastic walkability and bikeability of our sweet little town of Rockford, MI. We drive 20 minutes for groceries (not more than once per week) and about an hour to visit close family + friends (again, not more than once per week). So our routine car use is pretty much a perfect fit for an electric vehicle.
Let’s pivot to our Big Concern. Road trips. Full disclosure: I’m the worst roadtripper. Ever. More than a few hours and I turn into a whiny puddle of jelly in the front seat, asking “are we there yet?” more often than the children! So while this was our biggest concern, it still wasn’t that big of a deal because we usually fly somewhere far away or focus on finding adventure relatively close to home. Fast forward a few months after we bought the car… and here we are in the middle of a global pandemic and nobody’s flying, nowhere fast.
So, Spring Break 2021 was a family road trip to the Smoky Mountains National Park. We had a few major goals for this road trip:
- Drive the approximately 700 miles to our spring break destination
- HAVE FUN! (if you’re new to Carbon Free Family, you’ll quickly learn that this is always our top priority. We firmly believe that a more sustainable life can be fun!)
- Become more comfortable with charging our car while driving longer distances
- Arrive at our destination at or near the perfect check-in time at our AirBnB
We planned to take 2 days to drive the 700 miles from Rockford, Michigan to Hot Springs, NC and this trip went remarkably according to plan. The only planning I did ahead of time was to book our overnight hotel in Cincinnati. I picked the hotel specifically because they had two Tesla destination charging stations (I explain the difference between a supercharger and a destination charger in this FAQ blog). I was very pleased to learn that Marriott hotels lists electric charging stations in the “parking and transit” section of their hotel descriptions. I wish the brand would go one step further and include this in the “filters” so I can search specifically for hotels with charging stations (nudge, nudge @Marriott).
Away we go! Here’s what our first day looked like:
(you can follow along as if this were in real time in the “tesla EV” highlight on my Instagram)
2:15pm: Rockford, MI
We left the house at around 2:15pm with an 80% charge (237 miles). We weren’t at 100% because my daughter and I drove to our horse barn in the morning to sneak in a quick lesson before leaving for vacation. Ideally, we would leave the house with a full charge for a road trip like this, but life is all about compromise, right?
3:45pm:
We stopped for a potty break at 3:45pm. We didn’t need to charge yet, but… little bladders couldn’t hold it for 30 minutes to make it to the supercharger. Someday soon I’m certain there will be a EV charging station at every rest area and even our 15 minute potty break would recharge our battery a smidge.
4:30pm: Angola, MI
We stopped for our first charge of the trip in Angola, IN. We had about 55 miles of range left, so it was a pretty long charge. This was not my favorite charging station of the trip… slow speeds (only about 190 mi/hr or 55kW) and almost no amenities. Especially since we needed a big charge, I would have preferred a faster speed charger (you’ll see that sometimes we can get up to 400 miles/hour… this measurement is telling you the number of miles of charge gained by the battery per hour of charging). We stayed for about 45 minutes and left with 182 miles of range.
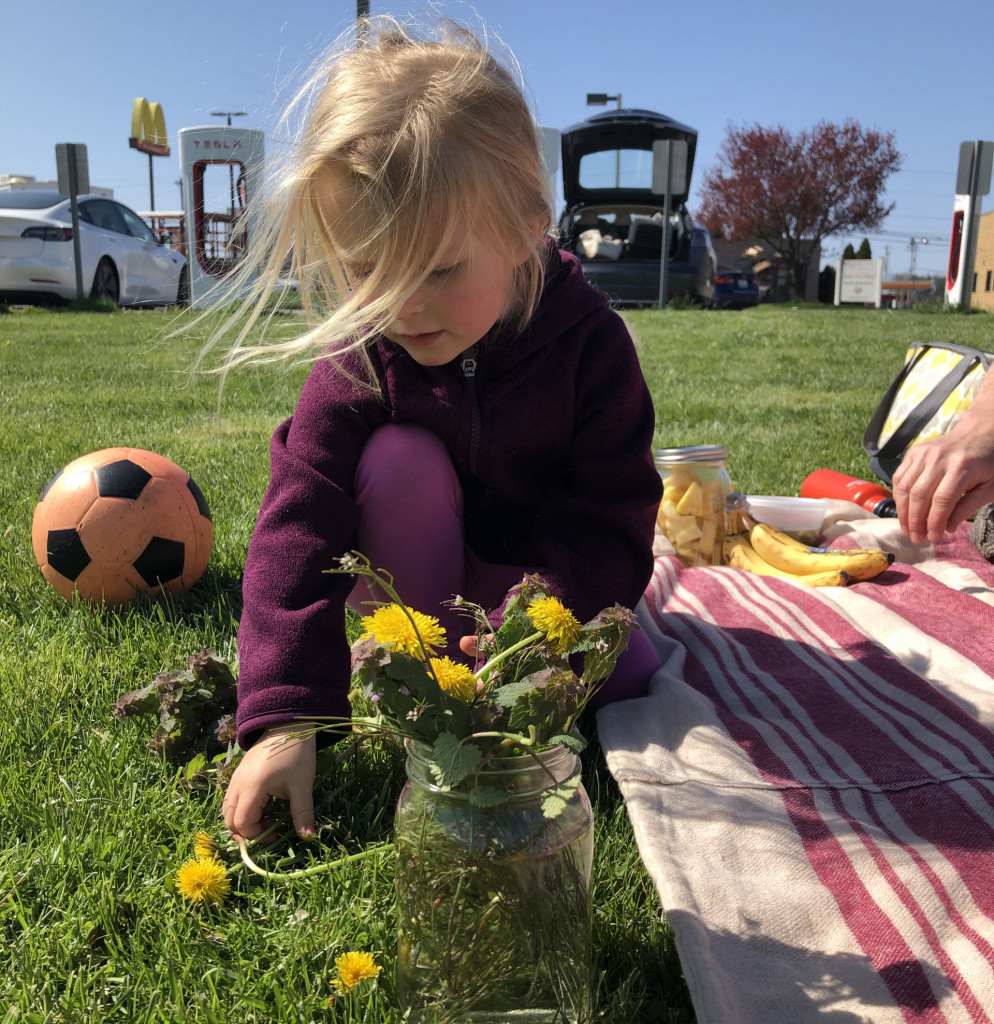
We like to plan our meals around charging stops, either popping into a grocery store to buy picnic supplies or ordering takeout from a nearby restaurant. In Angola, the charging station (a bank of 6 units) was located in an isolated strip mall with a motel and really small diner style restaurant. Maybe another time we’ll try the food, but this time we opted for soccer in the beautiful green space nearby. I would rate this stop 1/10 on speed and amenities, but 10/10 on green space. Check out the beautiful trail and field to play in!

7:30pm: Lima, OH
We arrived with about 60 miles of range and were excited to find 8 spaces, only one other car, and fast charging speeds (between 320 and 350 mi/hr). This station was located in a very commercial area, with several hotels, restaurants, and not much green space. We walked through parking lots (no sidewalks… I should probably save it for another time, but I think there’s a real opportunity for areas near a charging station to be better designed for walkability) to a Panera Bread for snacks (for the kids) and a {decaf} cappuccino (for me) and to stretch our legs. Robbie played soccer with the kids in the hotel parking lot as the sun began to set. It was really a lovely scene. We stayed just long enough to gain enough charge to complete the remaining 135 miles to the hotel, around 40 minutes.
10:30pm: Cincinnati, OH
We arrived at our hotel happy and ready for bed. It took us just over 8 hours to drive 385 miles on the first day of our road trip. This is probably about an hour and a half longer than if we were death marching (meaning nascar style pee breaks with no time for play) in a gas-powered car. We don’t travel that way anyways, so for us this feels like slightly longer than it would have taken us in our old {gas-powered} car, but not noticeably longer.
We stayed at a Marriott and they had two Tesla charging stations + another non-tesla charger. The charging speed was slow (about 25 miles per hour), but slower speeds are fine for an overnight stop. We left in the morning around 9am with a full charge (251 miles… even more than when we left our house the previous day!).
And we’re off again! Day 2 of our road trip:
9am: Cincinnati, OH
We only had 295 miles to go today and planned on making just one charging stop. We couldn’t check into our AirBnB until 3pm, so we took out time leaving the hotel.
11am: London, KY
This was the best charging stop of our trip! We knew we wanted to eat an early lunch, so I went online on my phone (from the highway) to look for a restaurant. There was a Cracker Barrel nearby so I placed an order online. Once we arrived, I took a nice little walk (again, no sidewalks though) to pick up our lunch while Robbie and the girls played soccer + set up a beautiful picnic space. This charging station had it all… green space to play, easily accessible bathrooms (in a tourist information center) and lots of restaurants to choose from. We took our time here and stayed about an hour, plenty of time for our car to completely charge up again.
3pm: Hot Springs, NC
We arrived! Happy, healthy, relaxed, with plenty of charge left, and ready for a wonderful week in the North Carolina mountains!
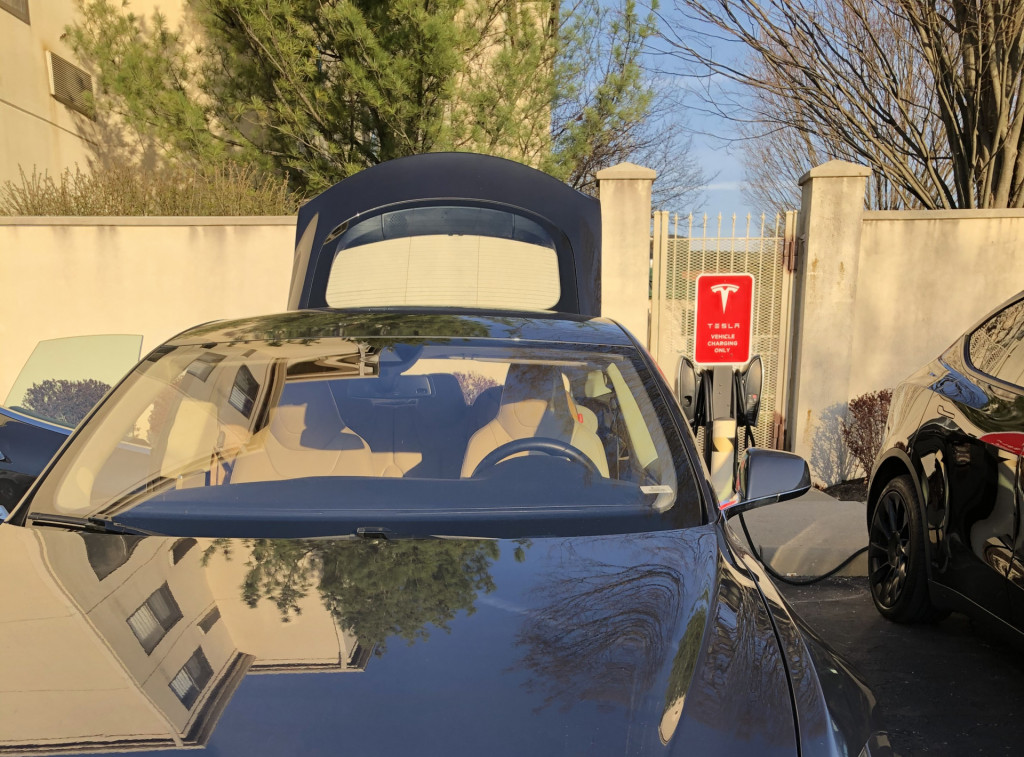
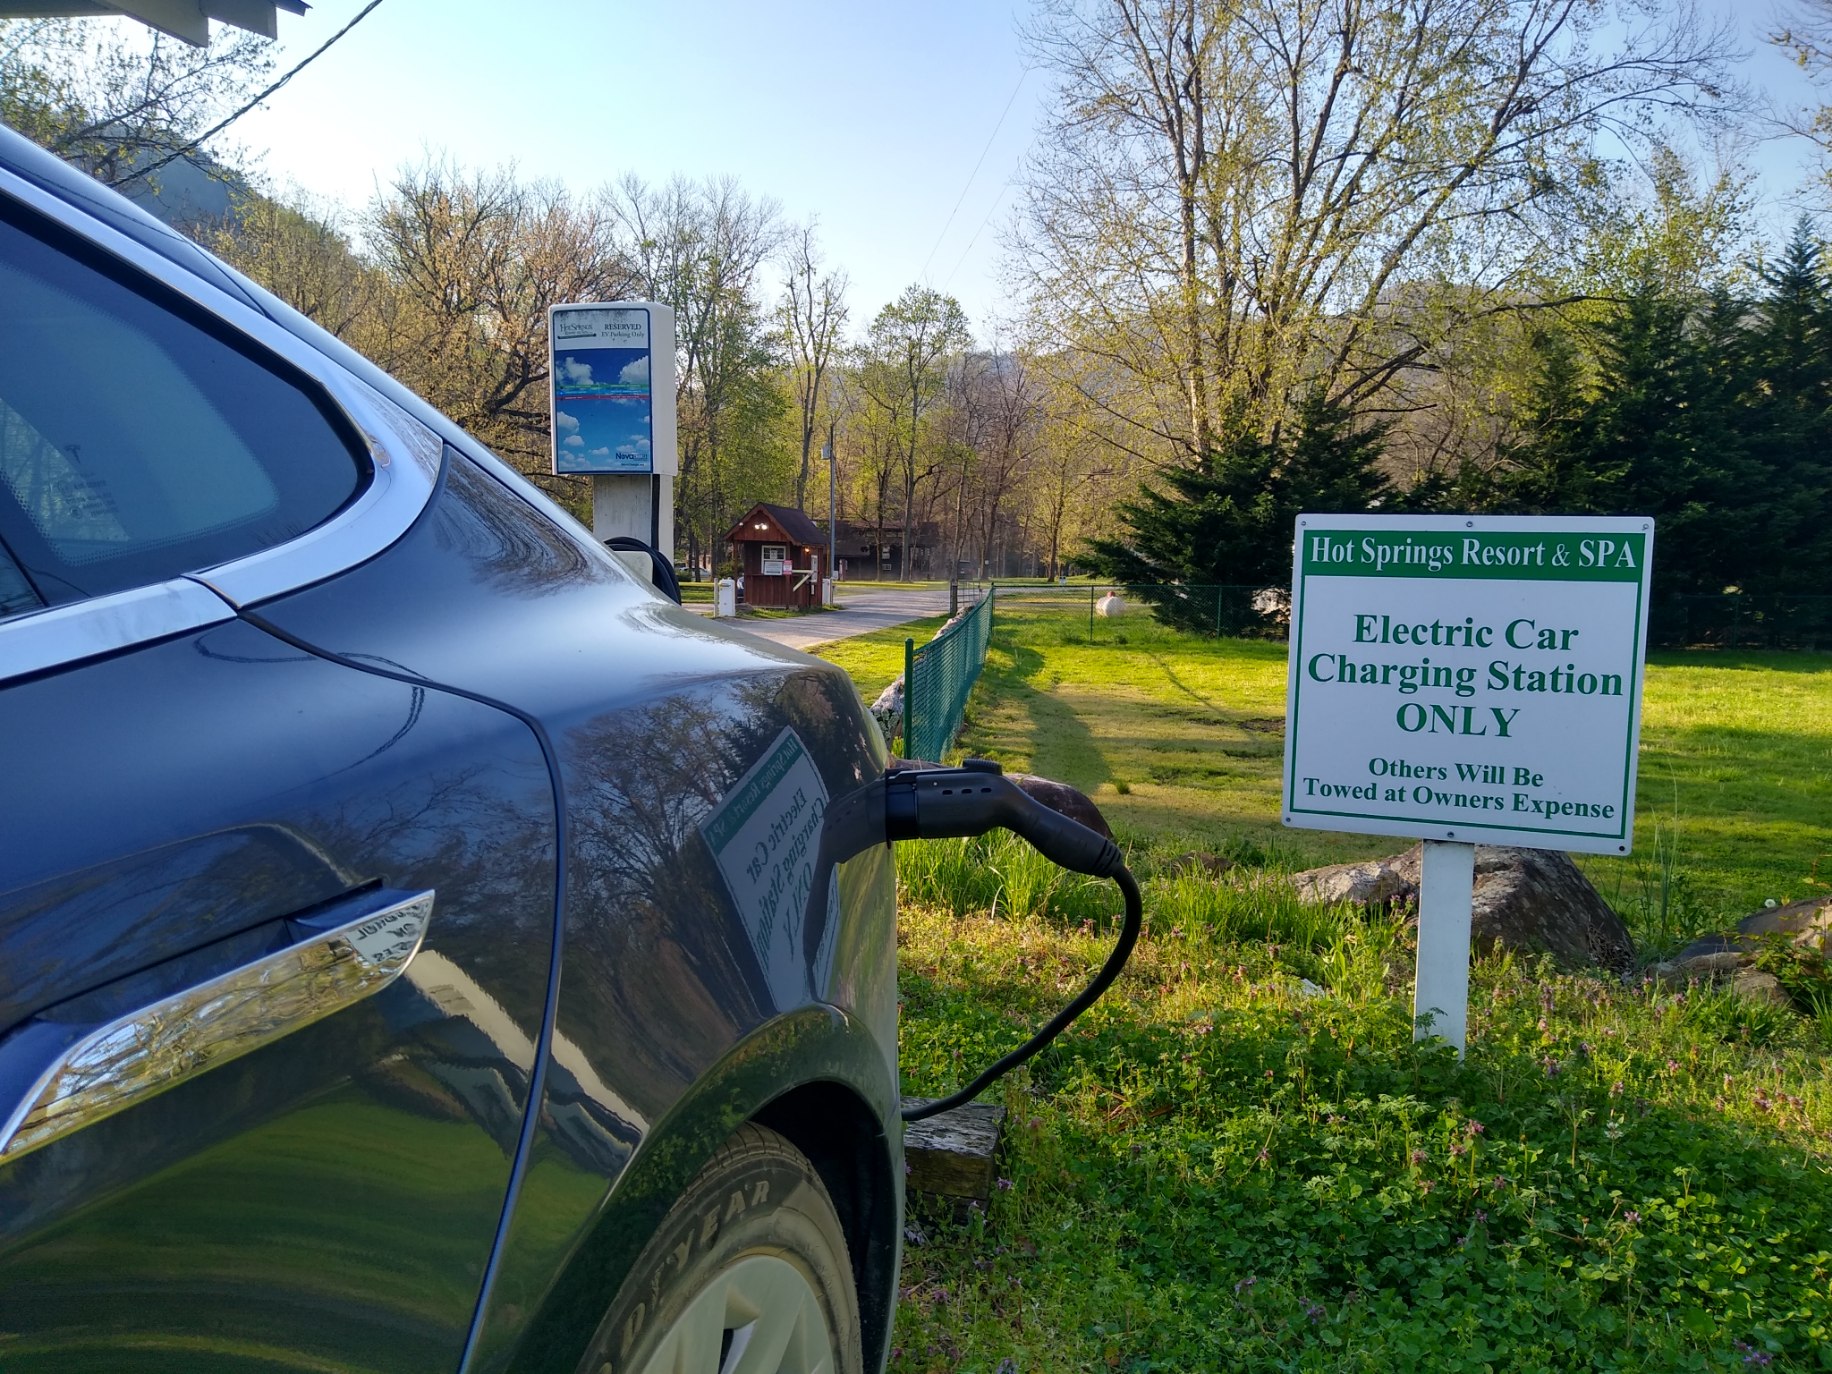
But what about during vacation… I’ll admit that I didn’t really think about this when booking my family vacation in a tiny little town in the North Carolina mountains. We didn’t even ponder how we were going to recharge during the week until it magically popped into Robbie’s head a couple of days before we left. Thankfully, there was a charger in downtown Hot Springs, less than a half mile walk (on the Appalachian Trail, no less) from our rented home. Twice during the week, we used these charging stations at the Hot Springs Resort and Spa (and campground). These were destination chargers (again, see this FAQ blog for a full explanation of what this means) so they charged slowly, but we parked there overnight and it worked out just fine.
So what were my key takeaways from this first road trip in my new Tesla?
- It doesn’t take that much longer. In fact, pausing to recharge my car supports my intention to live a slower life. It encourages me to enjoy the little moments along the journey rather than racing to the destination.
- Plan ahead for food. Ordering on the road and having snacks in cases where food options are limited are both helpful strategies.
- Make sure there’s a charger at/near your vacation destination
Are you driving an electric car yet? If so, tell me about your charging adventures in the comments! If not, whats your biggest concern… what’s holding you back?
]]>
Q: Does your Tesla use any gasoline?
Nope. Not one drop. How crazy is that?!?!
In fact, I find it fascinating to think about all of the pieces of a car associated with the gas engine that we don’t have…
Radiator? Nope.
Exhaust System? Nope.
Oil changes? Never have to do those.
Q: Do you have to drive out of your way to find a charging station?
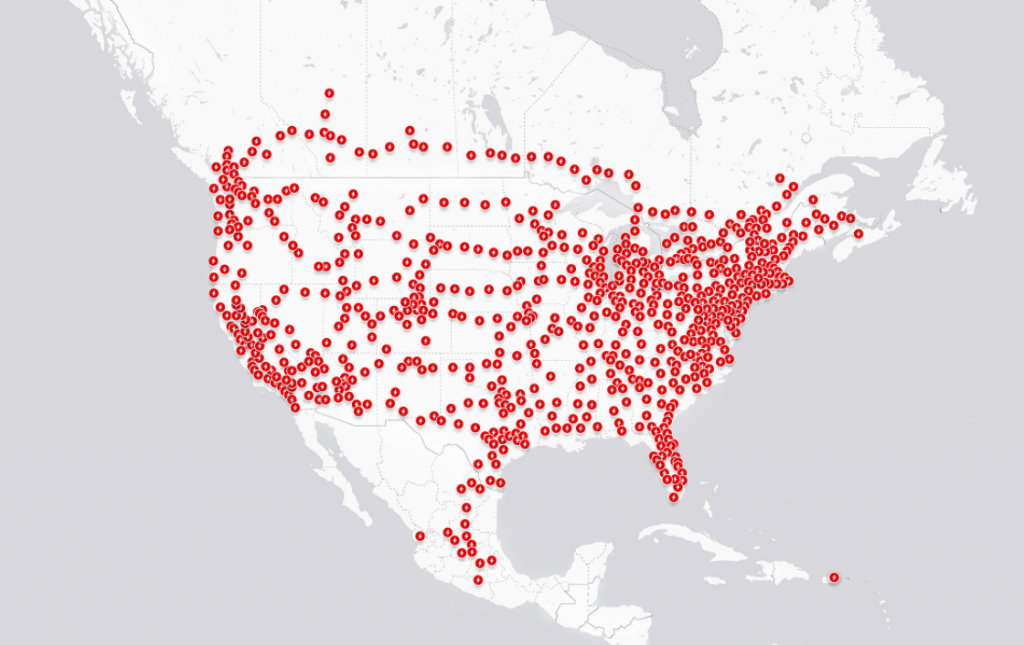
Not necessarily. One of the reasons we bought a Tesla was for the amazingly designed charging network. There’s a super charger within 100 miles of just about every location in the United States. Check out the map below (from Tesla).
In fact, on our recent road trip from Michigan to North Carolina, we drove less miles following the route with charging stations that we would have otherwise (approximately 630 miles vs 690 miles). It took longer (see this blog post for a full recap of the trip), yes, but the miles driven were less.
Q: What mapping software do you use to map your route with charging stations?
From my phone or computer, I generally use A Better Route Planner. Once I’m in the car, Tesla has a pretty good mapping system built into the dashboard and I usually use that. In both of these mapping tools, I enter my destination and the route automatically includes one or more stops at charging stations along my route to ensure I’ll arrive at my destination safely. These directions are optimized for route and charge time… meaning that often I will stop for two shorter charges rather than one longer one because charging efficiency is highest when your battery is low (battery low = fast charging; battery nearly full = slower charging speed).
Q: What’s the difference between a supercharger and a destination charger?
Tesla Superchargers are 480-volt chargers that are designed to charge a Tesla in under an hour, making them perfect for charging up on long-distance road trips. They’ve generally been installed in a grid across the country, strategically placed on highly traveled routes/roads. These are installed and owned by Tesla, in partnership with various local businesses and towns.
Destination chargers, on the other hand, are installed by businesses and land owners for public use. They have a slower charging speed than Superchargers, adding about 35 or 40 miles of range per hour of charging. This blog has lots more information about the charging network if you’re interested in reading more. Destination chargers are being installed all over the country and are often designed to charge both Teslas and other brands of electric vehicles at the same charging station. It’s worth noting that if you want to charge your Tesla at a non-tesla branded charger, you do need to carry a converter with you because the plugs are shaped differently.
Q: How much does it cost to charge? Is it cheaper than gas?
Some places (usually slower chargers at a destination, like a museum, zoo, or business) are free, but the Tesla supercharging network we usually chose to use charges, on average $0.25 per kilowatt (kW). My Model S can drive approximately 3 miles per kW, which means I’m paying about $0.08 per mile.
When I charge at home, my cost to charge is even less, as I pay about $0.10 per kW for my electricity at home, which equates to about $0.03 per mile.
For reference, lets compare that to my previous car (an ’08 Honda Fit that got approximately 35 mpg) and assume the current gas price of $2.63 per gallon. I was paying about $0.13 per mile, so operating my Tesla (even if I always have to charge at the “expensive” supercharging stations) is cheaper than operating my old gas engine car.
Now, my Honda Fit cost me approximately $17,000 to buy in 2008 and I paid about $50,000 for my used Tesla in 2020, so I’ll have to drive 660,000 miles before I make up the difference in purchase price. There are additional cost savings in maintenance (for example, I never have to change my oil). This blog estimates the average maintenance at around $300 per year.
Q: Electricity is made by burning fossil fuels, so how is an electric car better for the environment?
You’re right that lots of the electricity in the United States is made by coal burning power plants. According to the US Energy Information Administration (eia) about 60% of electricity generated in the US in 2020 was from fossil fuels—coal, natural gas, petroleum, and other gases. About 20% was from nuclear energy, and about 20% was from renewable energy sources.
At home, we purchase 100% renewable energy credits. While it’s impossible to received the exact kW generated from solar and wind because it all gets mixed together in the grid, when I choose to pay an extra $1.50 per 150 kWh, I’m encouraging Consumers Energy, our electricity provider, to invest in more renewables and helping to fund these projects. You can do this too, by joining the Solar Gardens program. Subscription levels start at $9 per month and help fund solar panel projects throughout the state.
Whether you have an electric car or not, I encourage you to contact your electricity provider and ask about their renewable energy programs. Programs throughout the country are all structured a little differently, but nearly every electricity company has one. And if yours doesn’t, keep pestering them until they create one. As their customer, you hold all the power (pun intended)!
Do you have a question I didn’t answer yet?? Post your questions in the comments box below, message me on Facebook or Instagram or email me at carbonfreefamily@gmail.com.
]]>

If you’re dreaming of fruit season and want to start thinking about buying and preserving more local food, I’ve created two free ebooks to help you with these goals: one to help you Eat More Local Food and a second to help you Preserve Local Food for Eating All Year Long
Last summer I froze so much fruit… this much to be more precise:
- 120 pounds of tart cherries
- 50 pounds of blueberries
- 30 pounds of strawberries
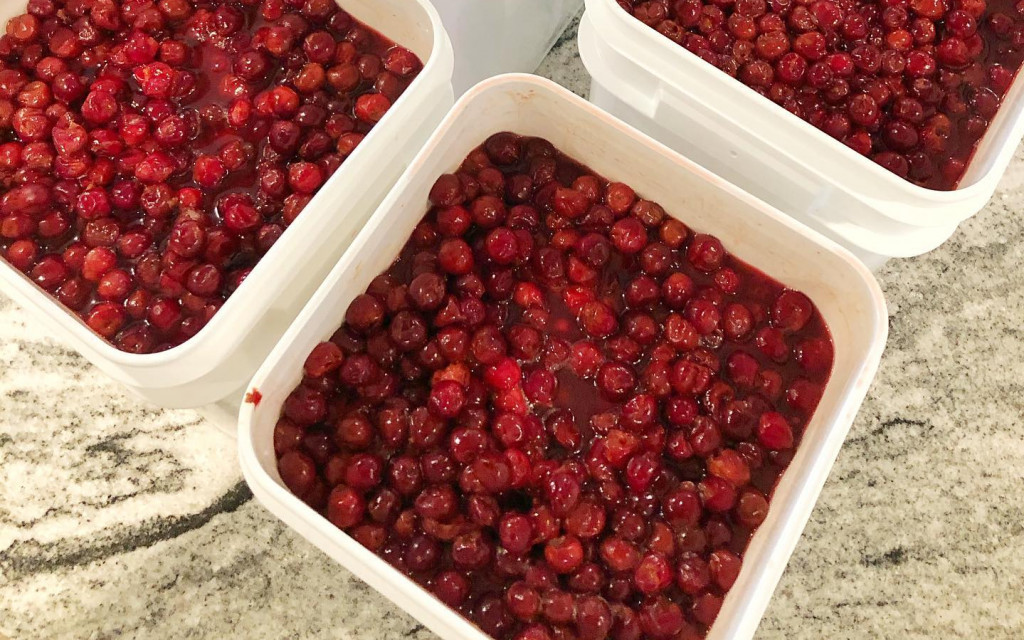
Now that it’s the middle of winter and I’ve realized that I’m still not very good at eating local food during the winter months (you can read more about this realization and subsequent goal to do better in this recent blog post), I’m pivoting my focus to creatively using all of this delicious frozen fruit.
Now, my kids absolutely love frozen tart cherries. It’s the preferred snack in our house… a simple bowl of frozen cherries. There’s something about the tartness and frozen sugars that melt in your mouth in the most magical way. If you’re never tried eating a frozen tart cherry, I highly recommend it.

Another favorite food around here is something called a dutch baby. It’s like a pancake, but with a whole lot less flour and a whole lot more eggs, which makes it practically a health food in my book. We first discovered dutch babies in… you guessed it, the Netherlands… specifically in December 2017, at a rustic restaurant that was connected to a gorgeous little outdoor ice skating rink in the middle of Amsterdam. Here we had a savory version with bacon. It wasn’t until we got home and I started obsessively looking for recipes that I realized most Americans make them with fruit and powdered sugar.
For several years, my go to topping was fresh red raspberries (which is pretty much my favorite food ever… you should have seen the massive quantities of raspberries I ate during my first pregnancy), but as my commitment to waste free principles grew over the past couple of years, so did my disappointment with the fact that I can only buy fresh berries at my local grocery stores in single use plastic clamshells. In the summer, I will happily return to fresh red raspberries (picked in my backyard or purchased from the farmers market) on top of my dutch baby, but I’ve begun experimenting with alternative fruit toppings that will reduce my waste. And let me tell you that our new favorite topping is tart cherries!

Recipe
(makes one large or two small, enough for two people; we double this for our family of four)
This recipe is adapted from Orangette
Download a printable PDF of this recipe here
Ingredients
6 Tbs unsalted butter
4 large eggs
½ cup whole wheat flour
½ cup half-and-half
4 cups frozen tart cherries (or other fruit of your choice)
Extra butter for melting on top
Juice of 1 lemon
Powdered sugar
Instructions
- Preheat the oven to 425 degrees Fahrenheit
- Divide the 6 tablespoons butter between two 6-inch cast-iron skillets (or one larger skillet; mine is 10 inches and works great) and melt it in the oven while it preheats
- In a blender or food processor, whir together the eggs, flour, and half-and-half
- Once butter has melted, use a brush (or tilt the pan) to coat the sides of the pan with butter
- Pour the batter into the skillets over the melted butter. Slide the skillets into the oven, and bake for 25 minutes
- While the pancake is cooking, place the frozen tart cherries into a small pot and cook over medium heat. You want them to fully defrost and start to simmer, but don’t cook away all of the liquid
- Remove the puffed pancakes from the oven, transfer them to a plate or shallow bowl, top with additional butter (if desired), tart cherries, lemon juice, and dust with powdered sugar
- Serve immediately and enjoy!

Don’t worry if yours don’t rise as much as some of these photos. Especially when I use whole wheat flour, sometimes the rise isn’t as impressive (like in the photo immediately above), but I can assure you they still taste delicious. If the rise and presentation is important to you, try using white flour and/or substituting whole milk for some of the half and half.

How might you modify your favorite recipes to include seasonal, local food? Please share your ideas, tried and tested recipes, and challenges in the comments.
]]>