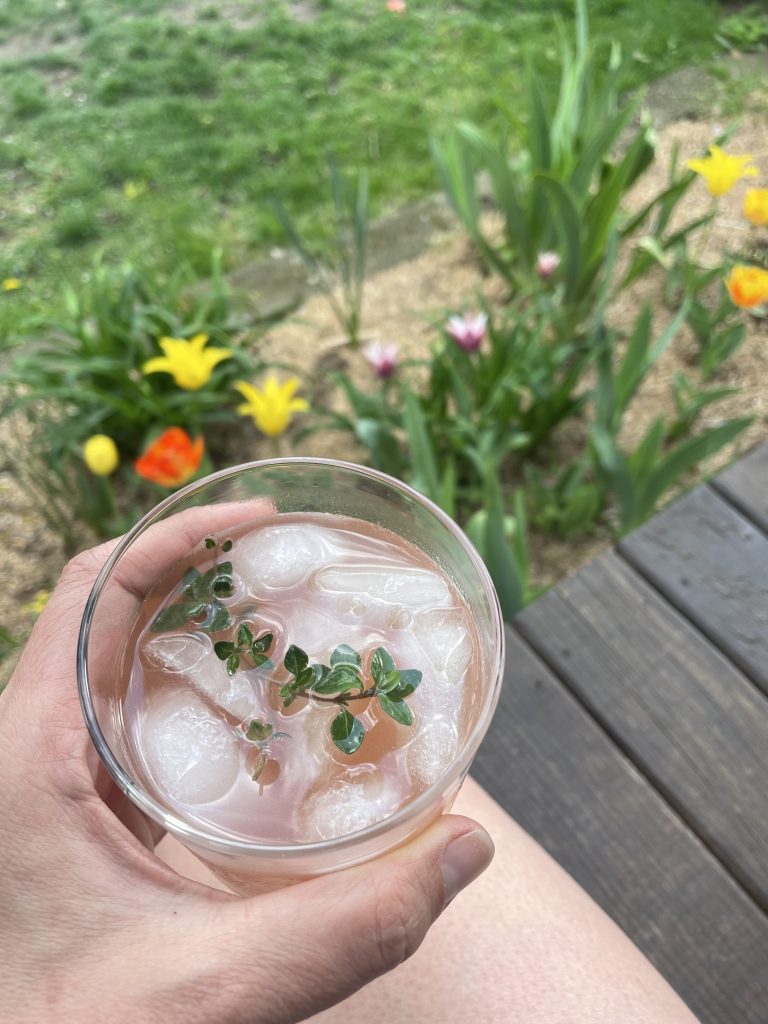
This rhubarb shrub makes a really nice and simple spring cocktail when you mix it with ice, gin, and soda water. I recommend adding a sprig of thyme for extra spring freshness. Rather than talk your ear off about it, I’ll just leave the recipe here, encourage you to give it a try, and walk back to my Saturday afternoon gin drink in the yard…..
Rhubarb Shrub
Makes about 2 cups
Ingredients
1 pound rhubarb (about 4-6 stalks), roughly chopped
1 cup sugar (maple sugar or 1/2 cup maple syrup work great too)
1 cup water
1 cup apple cider vinegar (I hear red wine vinegar or balsamic are good too, but I haven’t tried them)
Instructions
- Bring rhubarb, sugar and water to a boil in small saucepan. Reduce heat to low and simmer 20 minutes.
- Take off the heat and add the apple cider vinegar. Let cool.
- Strain through a fine mesh sieve (you could use a cheese cloth or clean towel if you need a finer mesh)
- Chill and Enjoy!
This should last just fine in the fridge for a month or so, but I dare you to resist drinking it for that long! I like to add a tablespoon or two to each drink, but you might like more or less.
]]>(Note: this post was originally published in February 2022, but I’ve given it a bit of a refresh for this years Super Bowl game and party)
In general, here are my strategies for picking the best (and lowest waste) super bowl (or, erm…. Saturday afternoon or Friday night movie night) snacks:
- Choose homemade snacks – homemade is almost always going to be lower waste than the pre-made alternative (in fact, if you can think of a single example that breaks this rule, tell me in the comments and I’ll figure out some sort of prize!). Think about a bag of potatoes vs frozen tater tots, potato skins or French fries and “naked” avocados, garlic and tomatoes vs the plastic tub of remade guacamole
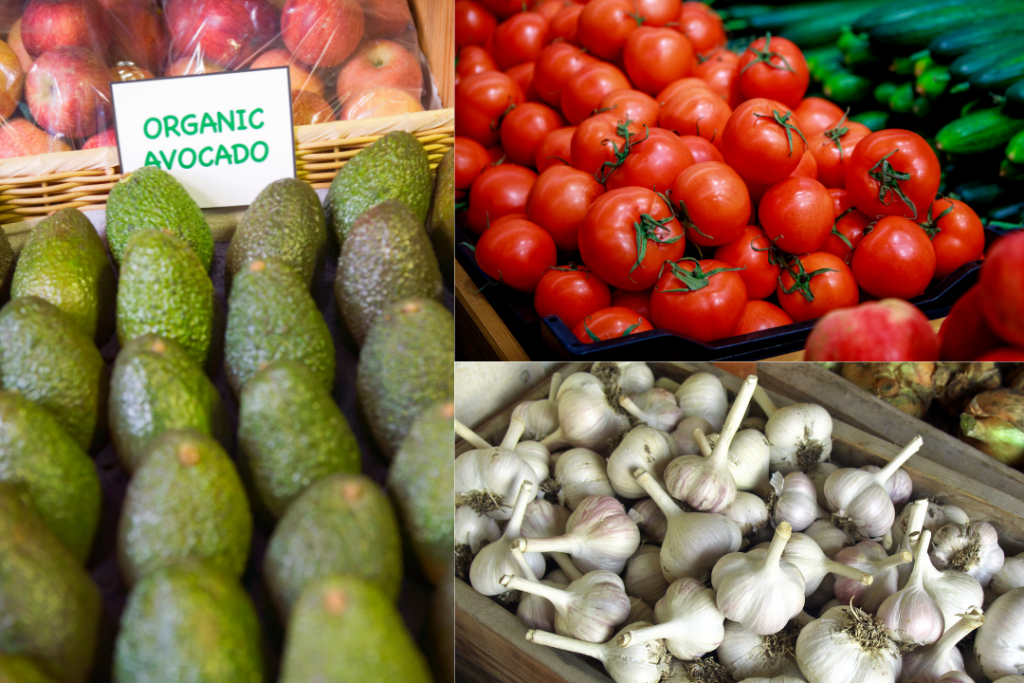
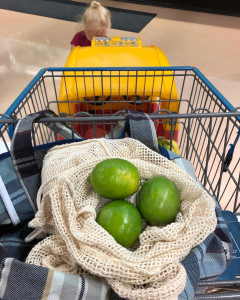
- Look for “naked” ingredients – meaning those you can buy without any packaging. Vegetables and fruits are perfect examples of this. Look for them in bulk bins and DON’T use the plastic bag. You can either bring your own produce bag (see my recommendations here if you want to purchase a few) or just throw them into your cart without a bag… trust me, the cashier will be able to ring them up for you like this just fine!
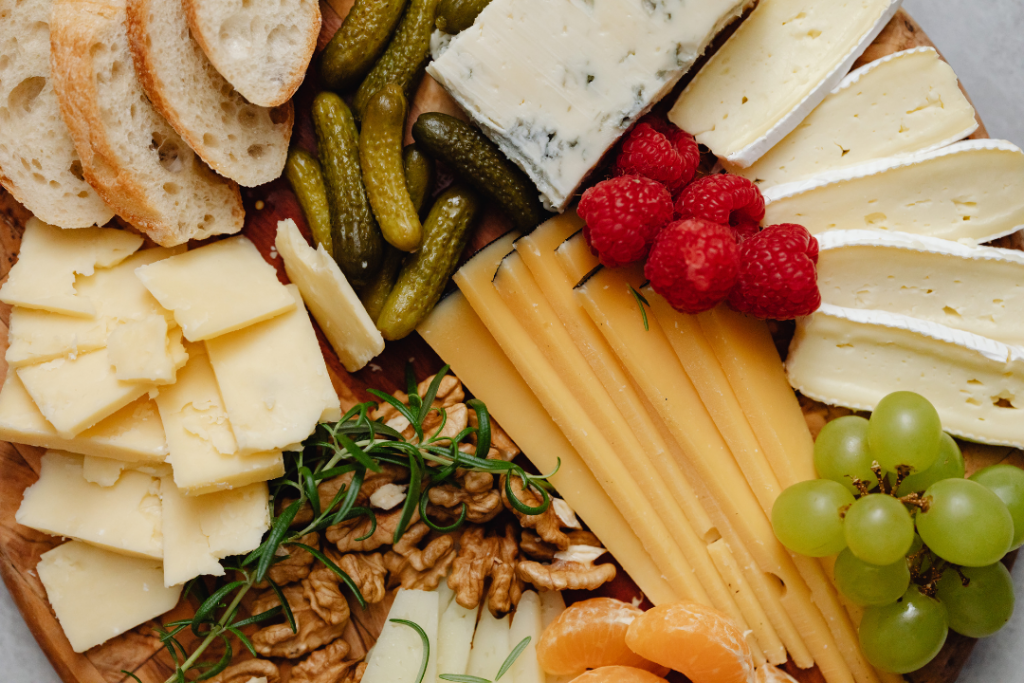
- Buy local – this is a great opportunity to support your favorite bakery, local farmer, cheese shop, or neighborhood restaurant. Lots of times, businesses like this would be happy to cater your party, make a cheese tray (hint, hint, the Rockford Cheese Shop) or create a large quantity order, but you’d better call ahead… the sooner the better!
 Buy in recyclable packaging – remember that metal and glass can be recycled endlessly (meaning over and over and over and over and… you get the idea), paper 5-7 times, and plastic only 2-3 times. I use this order to guide my packaging selection when I have choices.
- Buy in bulk – More food in the same container slightly reduces the packaging:food ratio. This is my last ditch effort to make a more sustainable choice, but this ONLY WORKS if you EAT ALL THE FOOD! Buying more than you eat (to save on packaging) and then throwing away the excess food COMPLETELY defeats the purpose!
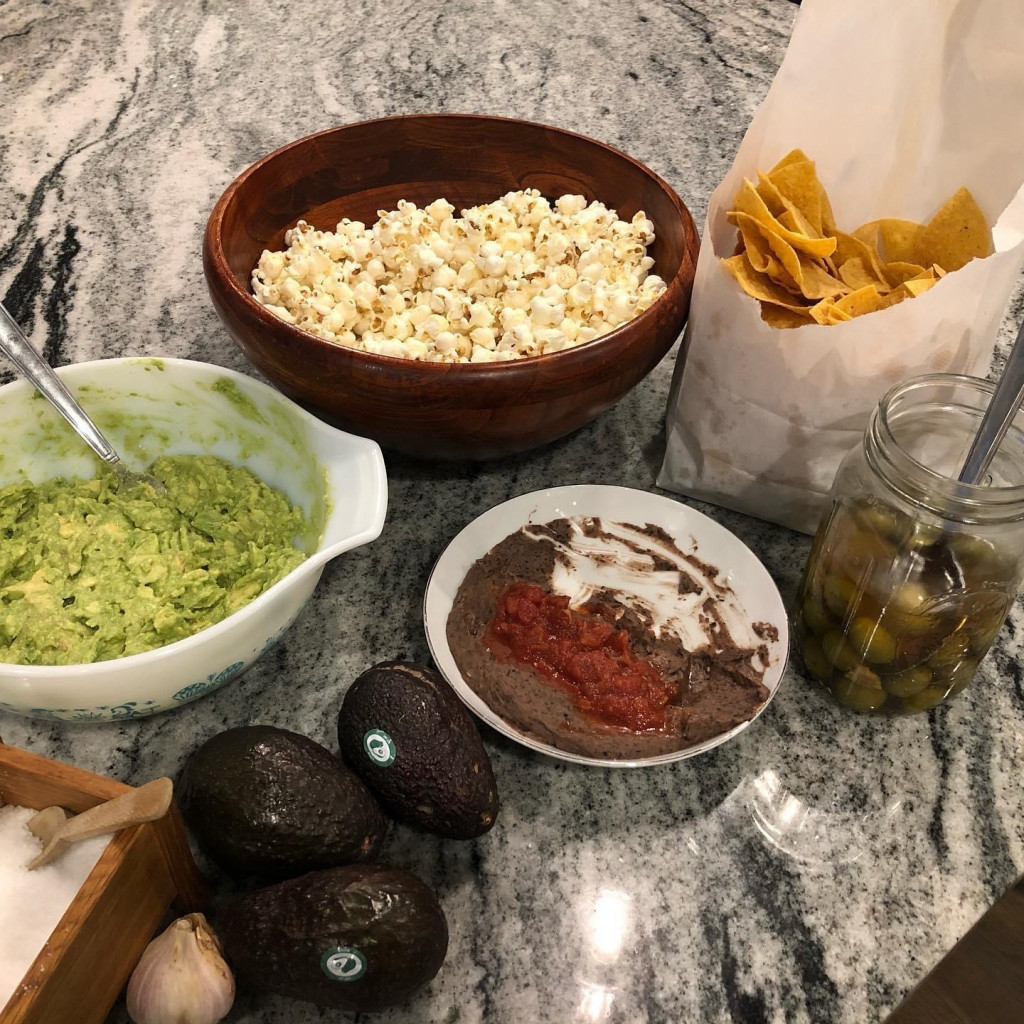
OK, on to our favorite snacks! Here they are, in no particular order…
- Guacamole (my favorite) – we’ve already talked about buying the
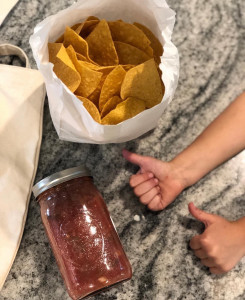
avocados, garlic, and tomatoes “naked” from the grocery store. Bonus points if you’ve grown any of these ingredients yourself. I go the extra mile and walk to the little Mexican restaurant down the road from my house and buy fresh tortilla chips in a paper bag… they’re SO delicious!
- Kale Chips (my oldest daughter’s favorite) – we’re still getting kale from our winter CSA farm share, so February is the perfect time for kale chips! We use this recipe. Even if you can’t buy it from a local farmer right now, kale is one of those vegetables you can usually find “naked” in the grocery store.

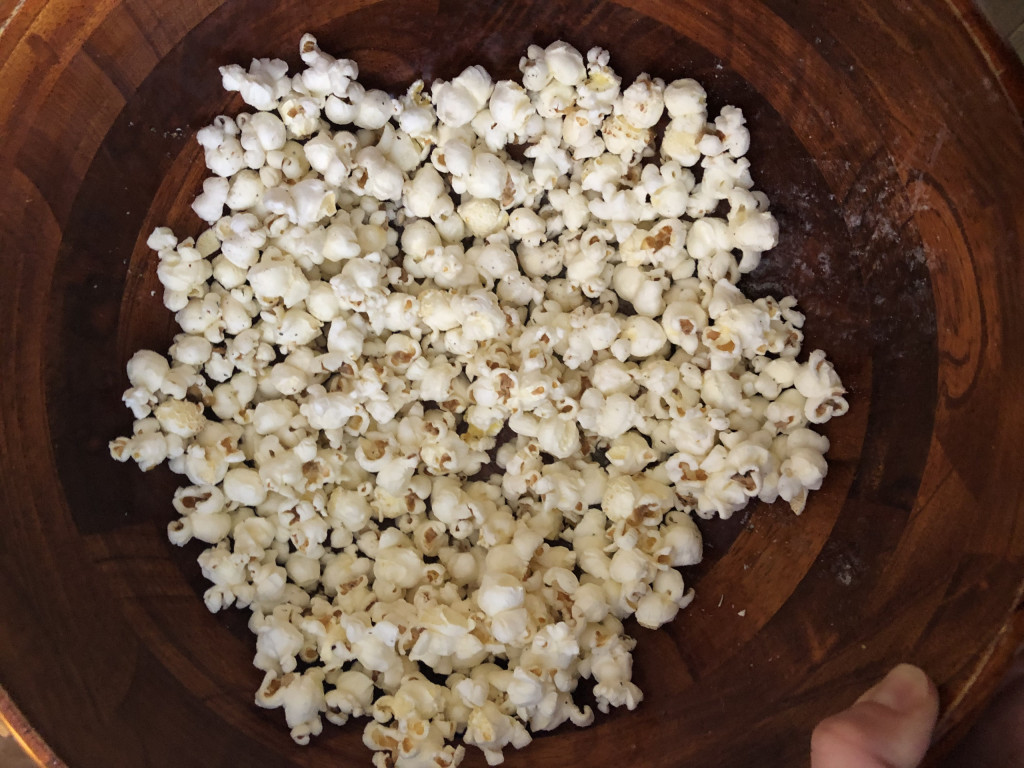
- Popcorn (Robbie’s favorite) – this simple snack is our go to for almost any lazy time around the house. Friday night movie night… is better with popcorn! Thursday night dinner when everyone is too exhausted to cook (or eat a real meal)… popcorn! I make it on the stove and don’t follow a recipe, but this one is pretty close to my routine if you’ve never cooked popcorn before. We buy our popcorn kernels in bulk (25 pound paper bag), but you can usually find kernels in glass jars in the grocery store. I use coconut oil, again purchased in a glass jar, and season with sea salt.
- Bean Dip (my youngest daughter’s favorite) – we nearly always have a batch of cooked black beans in our house (my favorite recipe is from Smitten Kitchen, in her first cookbook The Smitten Kitchen Cookbook, but you can also find the recipe online here) so we can easily whip up a dip with beans + cheddar cheese + sour cream + salsa. I can’t tell you the exact amounts of the ingredients, in part because Robbie always makes this dip and in part because he doesn’t measure, so you’ll have to experiment to find your favorite combo. Again, we eat this with chips from our favorite local restaurant. We buy the beans in bulk (25 pound paper bag) and have a bunch of frozen homemade garden salsa from last summer (but you could buy this in glass), but the cheese and sour cream usually come in plastic.
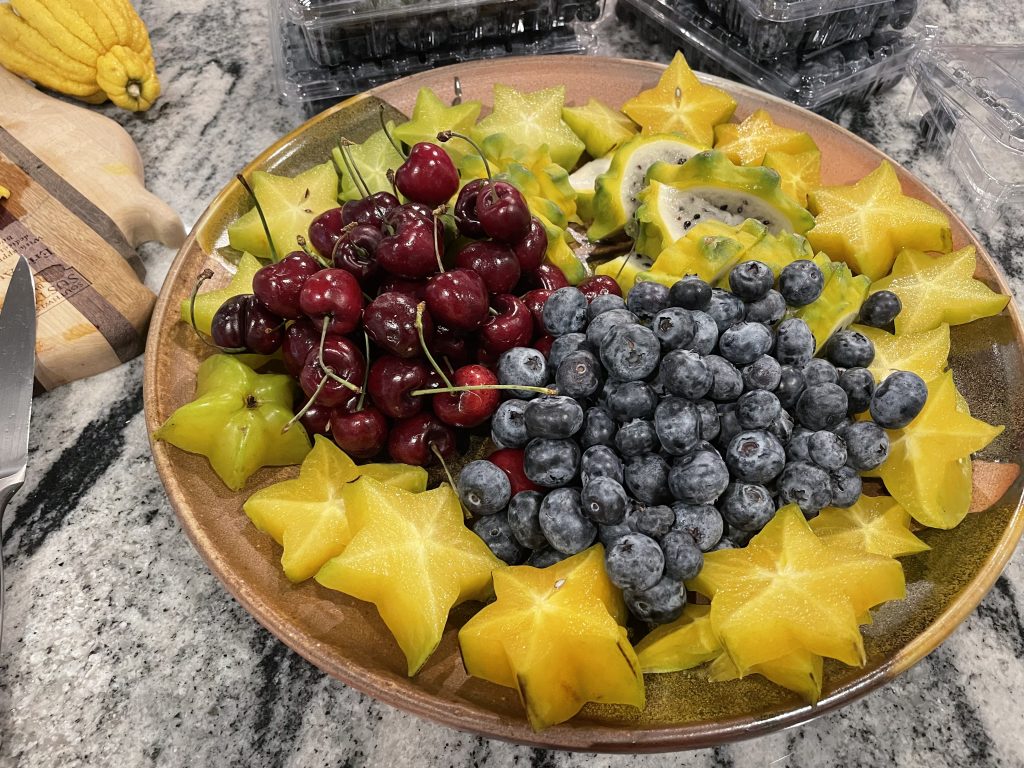
- 2024 UPDATE: “WEIRD FRUIT” – what?!? what is weird fruit, Erin? This has become the most asked for football snack from both my kiddos. They love to go to the grocery store with me and pick out the most weird looking fruits they can find. Dragon fruit, Buddha’s hand, star fruit… that’s pretty much all we can get at our small town grocery store, but they LOVE this tradition, cutting up and arranging these fruits alongside the more traditional favorites (like cherries, blueberries, and strawberries) for a creative (and lower waste) fruit plate.
Please add your favorite waste-free, low waste, local or sustainable snack suggestions in the comments!!
]]>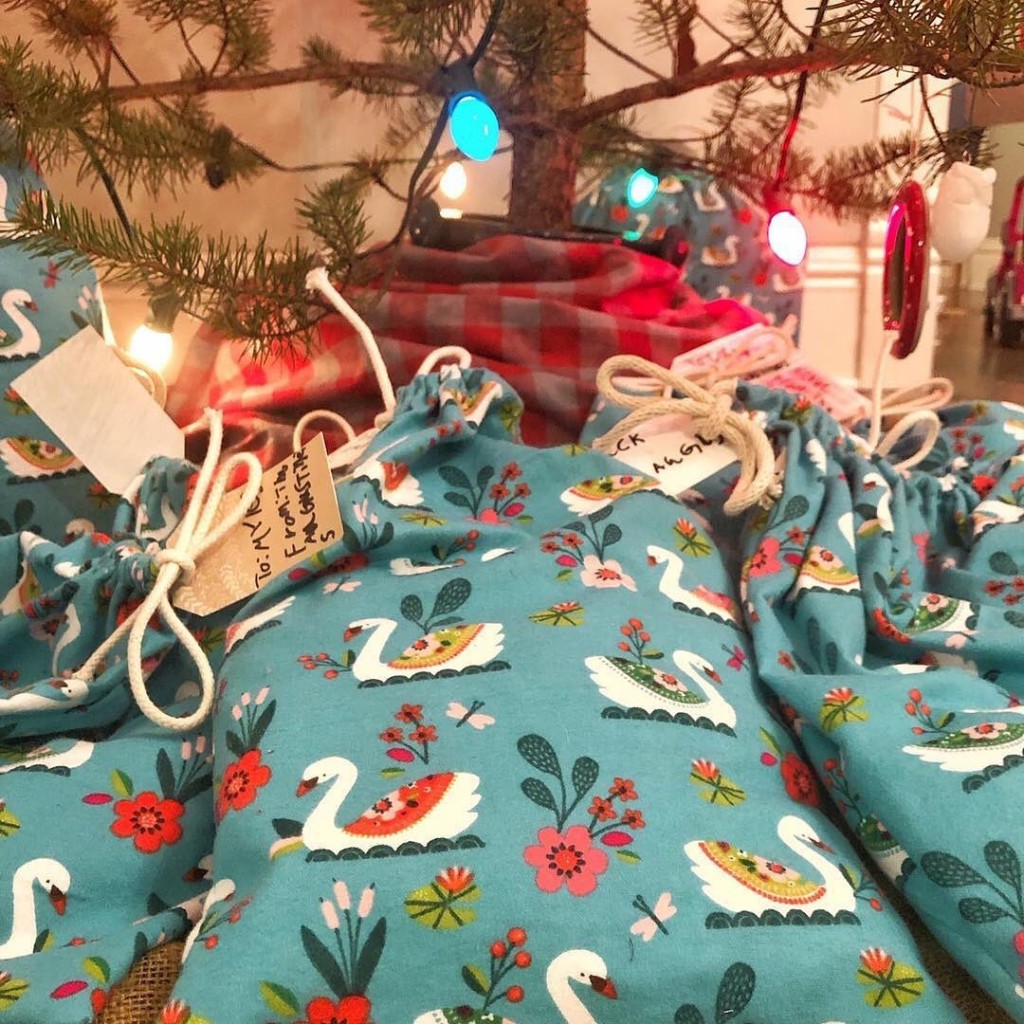
A few years ago, I sewed a bunch of reusable cloth gift bags in cheerful Christmas patterns and they continue to bring me such joy!
I love wrapping presents in these gorgeous bags. I love giving them to people (and am so honored when friends and family want to keep the bag in addition to the gift… in fact, you’ll regularly find me sneaking around and gathering my bags up after gift opening is over at our family gatherings). I love reusing them year after year!
AND they’re super easy to make! I swear, they’re a great project for beginner sewers because it doesn’t matter the size, shape, or even if they’re particularly square. The process is three simple steps: cut, sew, enjoy!
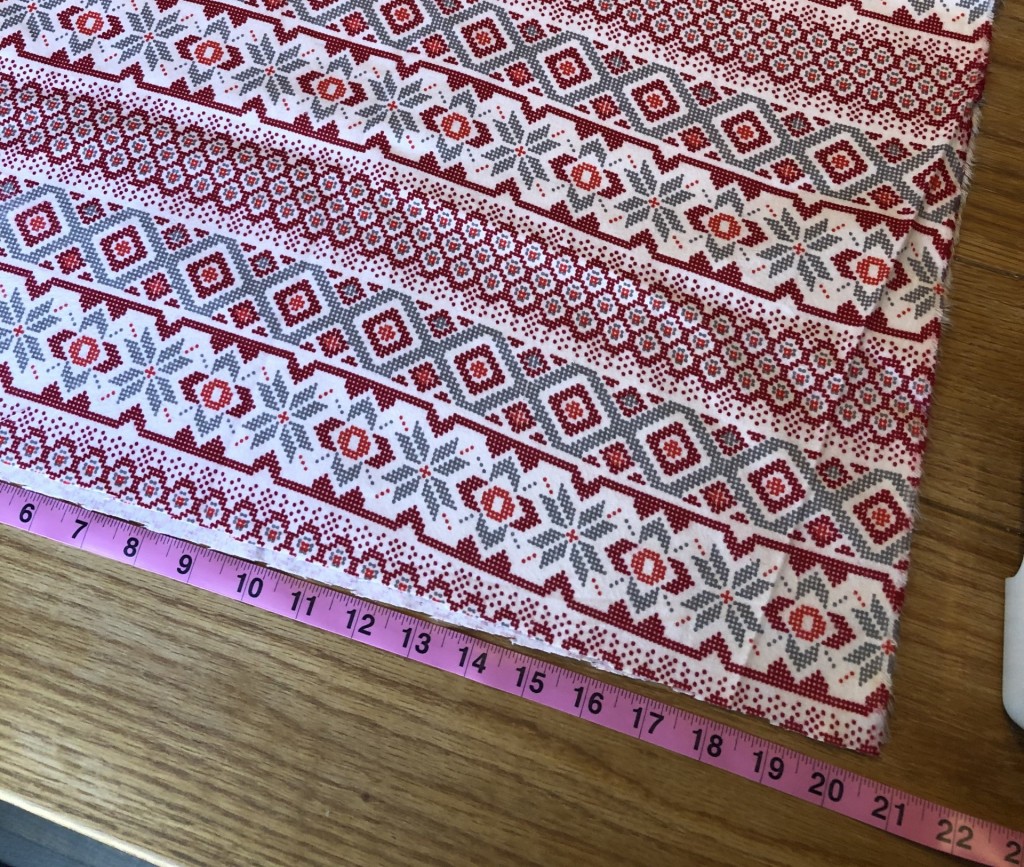
Step 1: Cut your fabric
If the exact size/shape isn’t important to you, I recommend letting your fabric dictate the size.
For example, my fabric is almost 42 inches wide, so I cut it exactly in half and made two 10 inch wide bags. I cut my fabric 15 inches tall and ended up with two 10”x13” gift bags. I love using printed fabric like this because it makes straight cuts easier. I pick a spot in the pattern and cut right along the “line”.
After cutting, my fabric is about 21 inches wide and 15 inches tall.
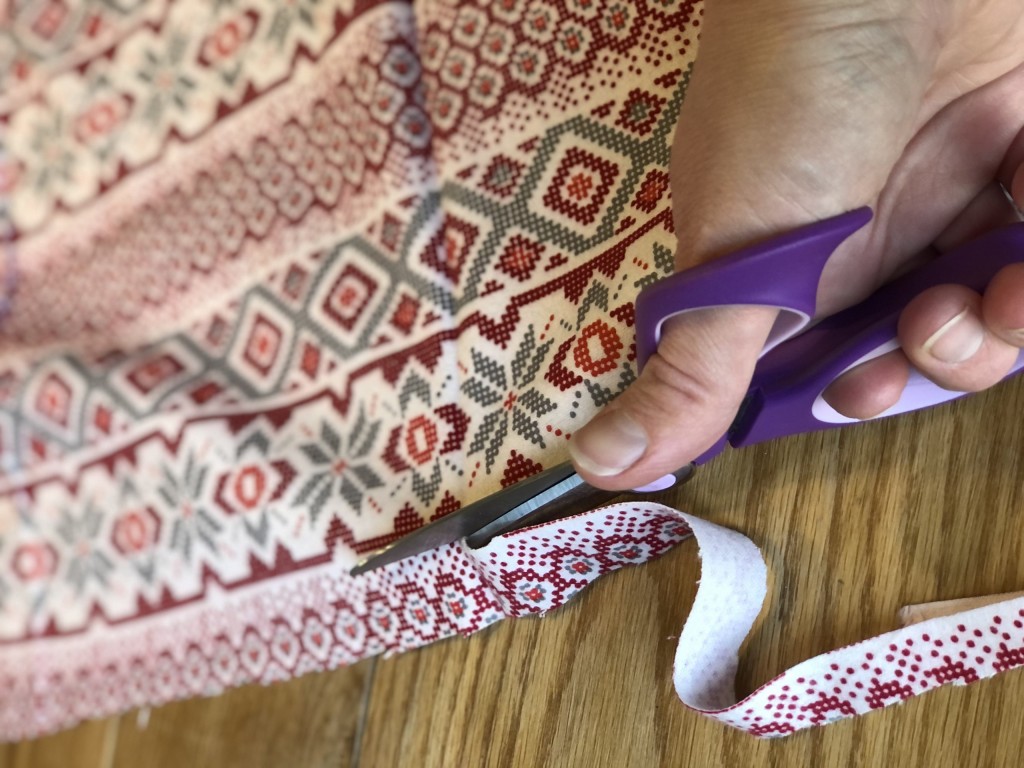
Step 2: Cut your cord
I used 1/4” cotton cord, but feel free to use bigger or smaller. Choose the top of your bag (based on the pattern) and cut your cord at least 8-10 inches longer than the width of your fabric (it will hang out 4-5 inches on either end when you’re done).
My fabric is 21 inches wide, so I cut my cord about 31 inches long.
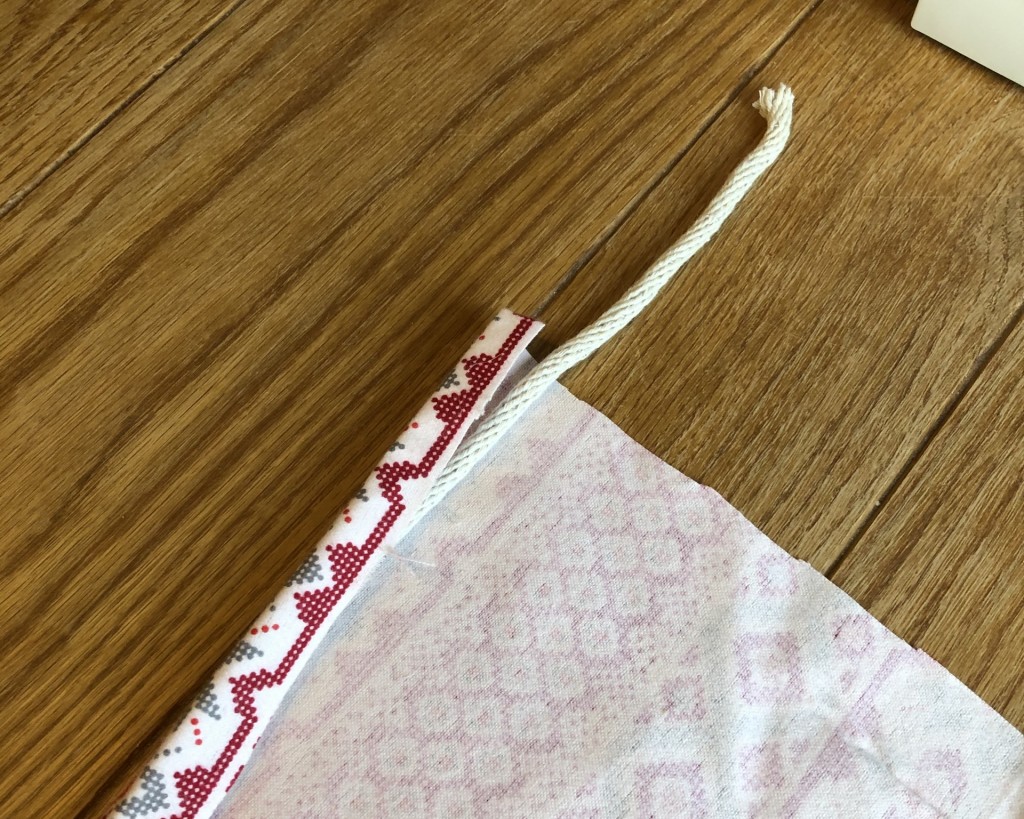
Step 3: Sew your cord into place
Place your fabric with the wrong side up* and the top pointing away from you. Place your cord along the top edge and fold the top of the fabric towards you. You’re going to sew a little pocket for the cord to slide through, so make sure there’s enough fabric that you can run your foot** along the seam without stitching the cord.
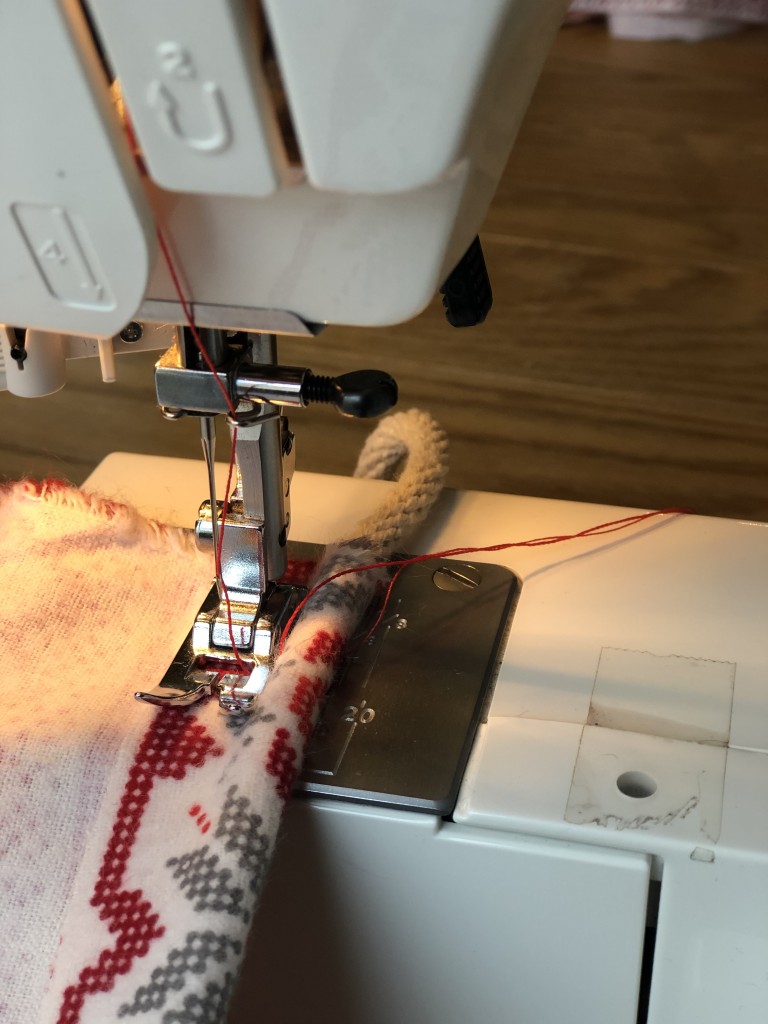
* the “wrong side” is what we call the back of your fabric, the side without the pattern, the side you want on the inside of your bag. ** the “foot” is the mechanism around the needle on your sewing machine as shown in this photo.
Step 4: Sew the other two seams
Keeping the wrong side up, fold your fabric in half. This will be the final shape of your bag, so the cord should be at the top and you should have seams to sew across the bottom and one of the sides. Trim any excess fabric if your edges aren’t lining up.
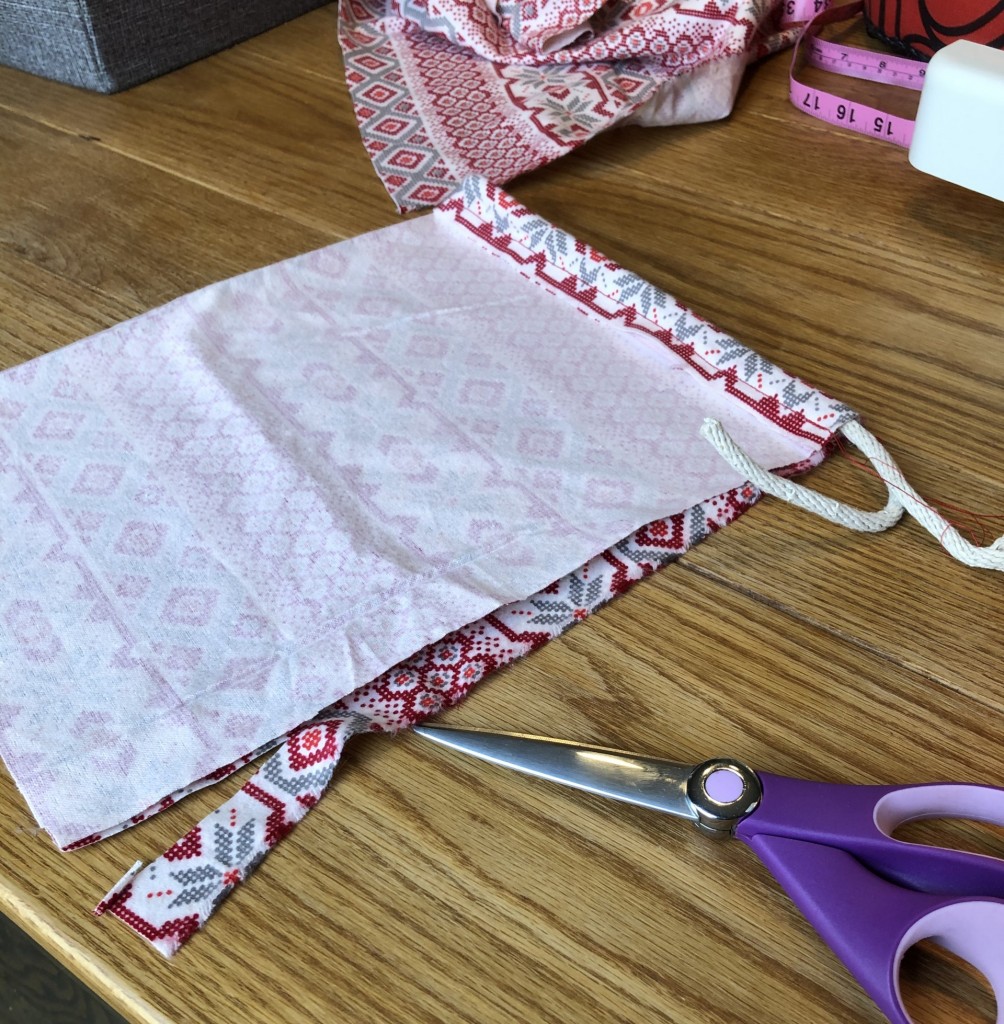
Go ahead and sew these seams. The only tricky part is making sure you don’t sew through the cord/pocket. If you do this, you won’t be able to pull the cord to cinch the bag closed.

Trim extra thread and turn your bag right side out.

Step 5: Tie knots at each end of the cord
This will prevent the cord from accidentally getting pulled into the pocket when someone is opening their gift. Fishing the cord back out is certainly possible, but a royal pain.

You’re done! You can make as many bags as you want, in a myriad of sizes to meet your gift giving needs!
I have about 24 bags total and the “10×13” bag I made today is the “medium” size bag in my collection. I have a bigger size (roughly twice as big) and a smaller size too. Three yards of fabric will yield about 8 medium and 2 large bags. I like to mix and match my colors and patterns, so I’ve purchased different patterns over the years.
Please drop your questions in the comments below. I’m always happy to answer questions!
And comeback to tell me about your experience if you’re making these reusable gift bags for the first time. I can’t wait to hear about your project!
PS. Does this post feel familiar? It should! It was originally posted a couple of years ago. I’ve updated and republished it because it’s one of my favorite posts.
]]>The blog went live last week, but since every day is Earth Day around here, I’m sharing it with you now. Read on for some great tips from sustainability bloggers around the web, including yours truly.
P.S. most of these tips are relevant for everyone, even if you don’t live in an apartment, so don’t let the title fool you into skipping this great read.
Switching to greener alternatives is a great way to live a sustainable life, especially with Earth Day approaching. There are many ways to be environmentally cautious while living in an apartment.
Most apartment complexes offer compost and recycling bins and there are many alternatives to things you use every day. To help you get started, we reached out to green experts to share their tips on how to live a sustainable lifestyle in an apartment. So whether you’re trying to live a more environmentally friendly life in your apartment in Boulder, CO, or your studio in New York, NY, read on to see what they had to say.
1) Ways to recycle when your apartment doesn’t offer the service
About 20 billion plastic water bottles wind up in landfills each year or are incinerated. Recycling those plastic bottles and aluminum cans helps the environment, and in some states like California, put some cashback in your pocket. Some apartment complexes don’t have separate recycling available for the residents so recyclable items end up in the trash and ultimately, in the landfills. Here are a few ways to recycle if your apartment complex doesn’t offer to recycle.
- Contact companies to pick up your cans and bottles from your door.
- Walk your recyclables down separately if your building has a designated recycling room.
- Ask friends who have access to curbside recycling if you could bring the recycling with them.
- Bring your recycling to a drop point or recycling center.
- Ask your landlord to get curbside recycling or set up a recycling area and get signatures from other people in your building.
- Bring it to work and use the office recycling pick up.

2) Be conscientious of where you live
Transportation has a big environmental impact, so choosing where to live can be a really important moment in your sustainability journey; it’s your opportunity to design a life where you can walk and bike more and drive less. Here’s a fun exercise I like to use when shopping for a new house or apartment:
- Grab a map and draw dots on the map to mark the places you need to visit often (for example, your work, the kids’ schools, your favorite grocery stores, restaurants, coffee shops, the public library – whatever is most important to you). Hopefully, these are clustered in one area of the map. If not, start with the most important cluster and repeat this exercise multiple times.
- Use a string and a pencil to draw two circles, with your cluster of dots at the center; one that represents 1 mile and another that represents 3 miles; you should, of course, choose distances that feel right to you and your walking/biking lifestyle. If public transportation is an option, draw a third circle to represent your reasonable commute on public transportation.
- These circles represent the best areas for you to live. If you had to do this for multiple clusters, look for overlapping circles that will allow you to live in one place, yet walk, bike, or take public transportation to your most important/frequent destinations.
3) Planning is a crucial part of a sustainable lifestyle
There are so many fantastic tips for reducing food waste from adding kitchen rolls to your bags of salad leaves extending their freshness by up to 4 days to keeping your spring onions in a glass of water and placing them near your kitchen window – this allows you to clip them as you need them and have them grow back in between. But the most important thing is ‘Planning’, plan your meals for the week in advance of going shopping. Then check what food you currently have and after that only buy what you need for the planned meals. Lastly, the freezer is your friend. If you have too much food, freeze it instead of letting it go to waste. – Foodie Save
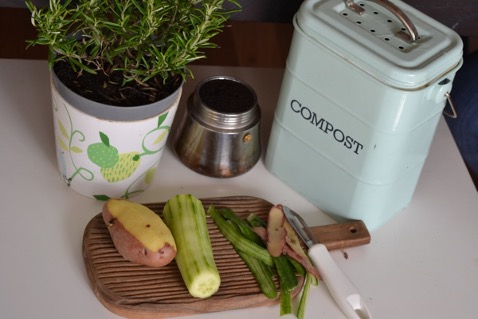
4) Composting companies can aid you on your journey
Managing your own composting system in an apartment can be difficult. Some companies provide a 5-gallon bucket with an easy-to-remove, but tight sealing lid for you to store your food scraps, and can even empty it for you. – Circle Compost
5) Simple switches can make a big difference
We believe you don’t have to switch up your entire life to live more sustainably in an apartment. Simple swaps like replacing your shower head for a water-saving version, switching out your soap products for low/zero waste alternatives, or starting a worm composting bin on your patio for your food waste can all make apartment living a little greener. By being informed consumers and utilizing our purchasing power in sustainable ways, we can co-create a healthier, more abundant planet. – Heal the Planet
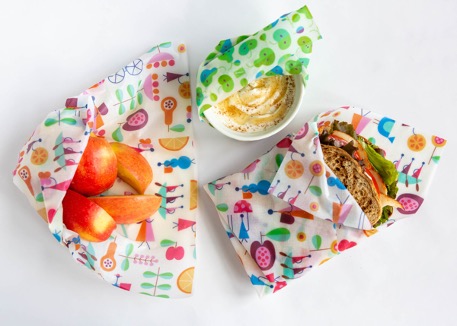
6) Use reusable food wraps to preserve leftovers
Use reusable food wraps for long-lasting produce. Learn veggie revival tips, recipes that preserve or celebrate seasonal favorites, and how to cultivate a scrappy kitchen ecosystem that alchemizes trash into treasure – like turning a freezer full of peels into stock, excess herbs into pesto, leftover berries, and kale into smoothie cubes, the last of this-n-that into salad dressing. Whatever your imagination dreams up to rise to the challenge of no leaf left behind. – Z Wraps
7) Be mindful of your surroundings and ‘unplug’
We believe living a more sustainable life means being more aware of the entire energy ecosystem around you, and making little decisions that can have a big impact. This can be as simple as ‘unplugging’ literally and figuratively. For example, designate a special time of each day (or week) and commit to shutting off smartphones, computers, and the TV to enjoy some low-tech time out. Shutting down over time adds up. Chargers, even without being attached to a phone or device, still draw between 0.1 and 0.5 watts per hour. – Pink Energy
8) Keep your compost and plants bug-free
We understand that keeping things sustainable and hassle-free isn’t always easy, so take advantage of their simple sustainable solutions to common problems: Pest products can tackle fruit flies for those kitchen composters out there. – Aunt Fannie’s
9) Switch to eco-friendly kitchen accessories
Each of us has a moral responsibility to be environmentally friendly by reducing waste and conserving our planet’s precious resources. One simple solution is to get rid of the single-use plastic products and switch to compostable products in your kitchen. You can start by using eco-friendly dinnerware such as plant-based cups, plates, straws, and cutlery composting help break down organic materials and turn them into rich soil, without harming the environment with chemicals or filling up the landfills. – Greenchain Compostables
10) See if your building provides EV charging equipment
Your apartment is a reflection of you, like your commitment to a sustainable lifestyle and your decision to drive an electric vehicle. Make a statement by living where that commitment is shared by your fellow residents and building owners too. Look for EV charging equipment and talk to the building management about valuable utility incentives and potential carbon credits for adding charging. – Tracy K. Price, CEO of Qmerit.
11) Reduce your plastic waste with biodegradable bags
We feel one of the best ways to live a sustainable apartment life is to reduce your plastic waste by looking for re-usable plastic products or non-plastic products, recycle what can’t be reused, look for products with the least amount of wasteful packaging, and supporting companies with a sustainable environmental mission. And when you do throw away garbage use biodegradable bags. – BagUps
12) Be an eco-conscious consumer
Limited space in apartment living can be a real struggle. For anyone pursuing a sustainable lifestyle, my advice is to adopt the mindset of an eco-conscious consumer. This mindset begins by minimizing your possessions. It’s easier to get organized when you get back to the basics, plus life gets simpler. You would be amazed how uncluttered the mind can become just by decluttering the physical space surrounding you. Next, when shopping and acquiring new possessions, commit to donating one or two items for every new thing you bring into your space. This mindset will help you choose quality over quantity and think before buying. – ECO CRATES of America
13) Support renewable energy
Whether you rent or own an apartment, anyone can easily reduce their carbon footprint by supporting renewable energy from sources that replenish themselves naturally — like wind, water, sun, or forests. There can be affordable ways to reduce your environmental impact. In states like Maine, you are able to support renewable energy by matching your electricity use with no-emission 100% Maine-made clean energy. – Maine Green Power
Which of these is most eye-opening for you? Is one of your favorite tips missing from the list? Share your feedback in the comments!
]]>
I hear you… “ok, Erin, but after I’ve roasted and frozen them, what do I DO with all these beautiful red peppers?”
Let me introduce you to my FAVORITE fall soup: Roasted Red Pepper Curry Soup. It’s easy to make, gluten free, dairy free, and EVERYONE in my family is happy to eat this meal! This recipe works well with roasted red peppers from a jar if you’re short on time or you could follow steps 1 and 2 below with just 3 or 4 peppers if you want to make a batch of soup today (and skip the freezing all the peppers step).
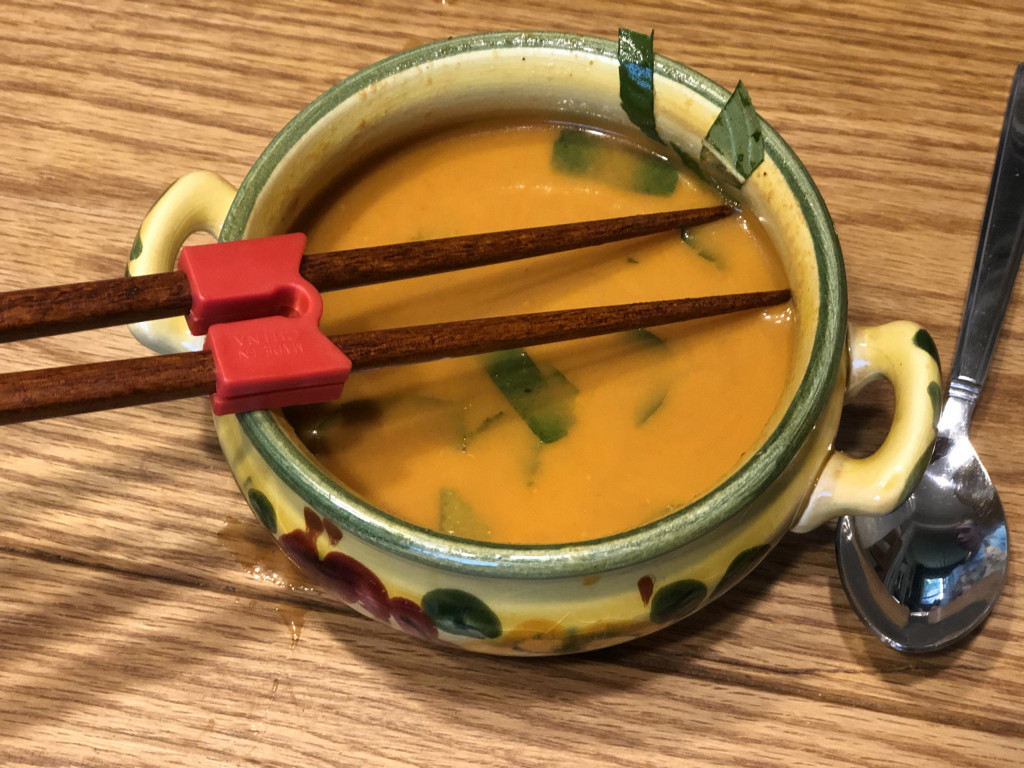
One of the things I love about this recipe, is the ability to customize your bowl with your favorite toppings. In my house, this type of approach is key to finding a dinner everyone loves. Robbie and I love adding thai basil from the garden, a swirl of sriracha, and chopped up pistachios for a little spicy crunch. The kids love fried tofu and rice noodles. The combinations and possibilities feel endless! If you experiment with toppings in your home and find a combo you love, please come back and share it in the comments!

Home-roasted Red Peppers
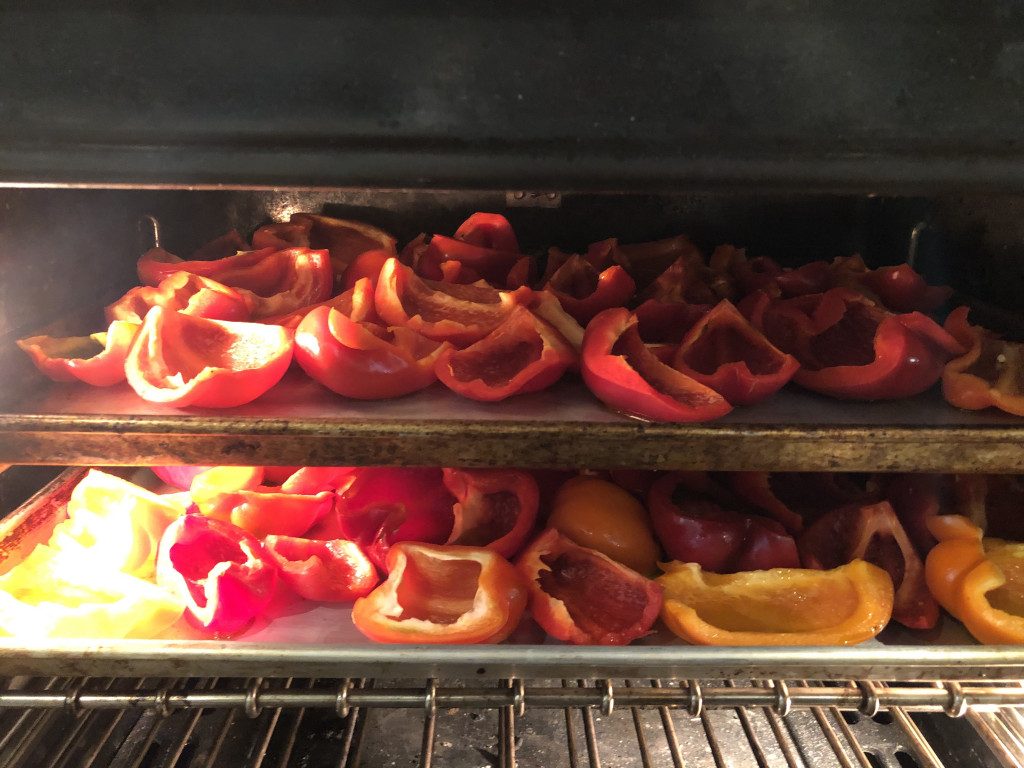
My farmers market and nearby farm stands are overflowing with beautiful red, and even yellow and orange, peppers! Home-roasted red peppers might be the easiest and least time consuming way for you to dip your toe into the home food preservation waters. It’s a simple as 1, 2, 3!
- Wash and cut peppers into quarters, removing the stem, seeds, and inner white ribs
- Place on a baking sheet, drizzle with olive oil and roast at 450F until the skin starts to bubble and slightly blacken.
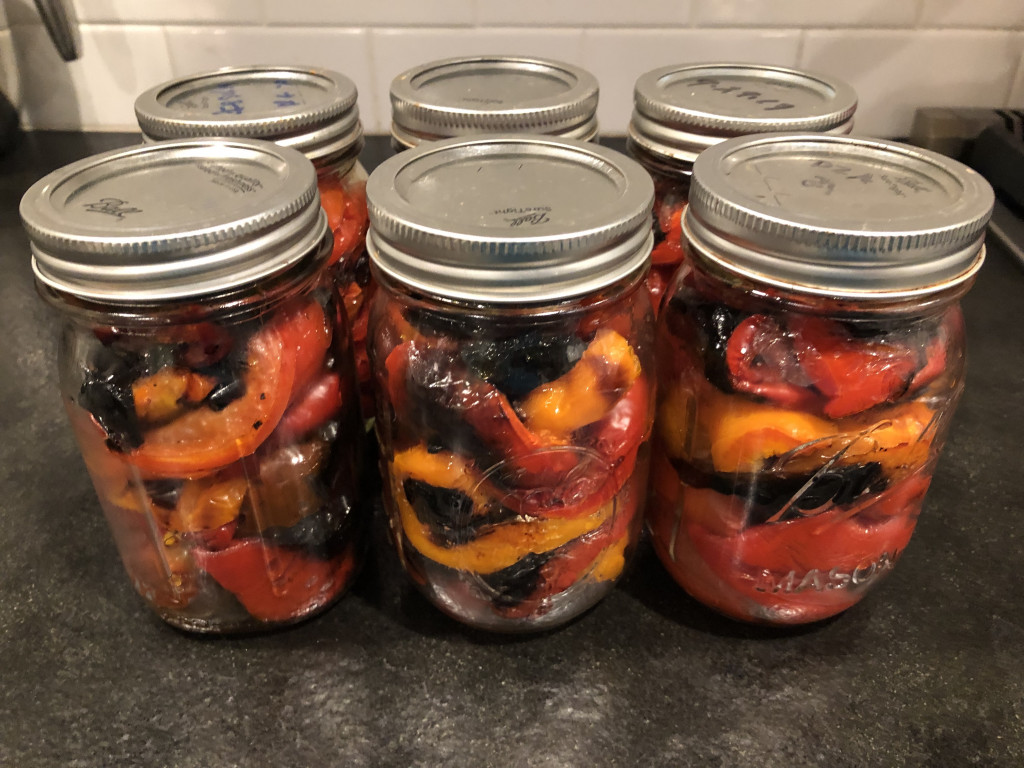
- Place into pint jars (each one will hold something like 3-5 peppers) and pop them into the freezer
Roasted Red Pepper Curry Soup Recipe
(makes lunch/dinner for four to six people, leftovers are delicious too)
I have no idea where this recipe came from. I wish I could tell you the source, but I wrote it in my “favorite recipes book” and have been making it from there for the past couple of years. Apologies to the original author.
Download a printable PDF of this recipe here
Ingredients
- 2 teaspoons olive oil
- 2 cloves garlic, chopped roughly
- 1 inch ginger root, chopped roughly
- 3-4 red peppers, roasted in the oven as described above
- 1 quart (4 cups) vegetable or chicken stock
- 1 can coconut milk
- 3-4 Tablespoons red curry paste
- 2 Tablespoons soy sauce
- 2 Tablespoons lemon juice (lime would work just fine too)
Optional ingredients for topping (I recommend picking 3 or 4 of these)
- 1/4 cup cilantro, basil, or parsley, chopped
- 1 package of tofu, tossed in corn starch and pan fried in oil
- 1/2 package brown rice noodles (follow instructions on the package to cook)
- 1/2 cup peanuts, pistachios, or other favorite nuts, chopped
- Sriracha or other hot sauce
Instructions
- In a medium pot, saute garlic, ginger, and red peppers in olive oil on med-high heat until soft
- Add stock, coconut milk, curry paste, soy, and lemon juice. Bring to a boil
- Reduce heat to medium and cook for 5 minutes (longer is fine)
- Blend (I’ve used both an immersion blender and a countertop blender. Both work fine here)
- Optional: if you like a smoother soup, I recommend pouring it through a mesh sieve or strainer. If you don’t mind a chunky soup (or don’t have a sieve/strainer), you can skip this step.
- Salt and pepper to taste.
- Add your favorite toppings/stir ins from the options listed above or GET CREATIVE with what you have/love
- ENJOY!
Please share your comments, questions, and favorite toppings for this soup in the questions below! If you want to share gorgeous photos of your dinner, please tag me on Instagram and Facebook @carbonfreefamily. I LOVE seeing your beautiful photos!
]]>
But what if gifts is your (or your partner’s) love language? And how do we navigate the challenging world of the school Valentine’s Day party?
For these situations, I can offer you a couple of suggestions and a little tutorial for homemade, low waste Valentines.
Here are a few recommendations for low- or no-waste gifts:
- Consumables. In my world, gifts of food are always welcome. There are lots of ways to give the traditional gifts of chocolate in a less impactful way.
- Consider buying from a local business and try to avoid packaging. Lots of local coffee and candy shops will sell you bulk candy in a paper bag or your own container, instead of the cellophane wrapped heart box that has become the tradition.
- Or consider buying FairTrade Certified chocolate, so you know the food was raised and harvested in an environmentally and socially responsible way.
- If chocolate isn’t your thing, consider gifting another favorite food, like a special fruit, a favorite meal, or dessert. Bonus points if you support a local, small business or buy your food without packaging.
- Plants. If you’re looking for an alternative to cut flowers, consider a potted plant instead. You can choose something that will continue to grow inside you home, improving your general health and air quality, or a type of plant that can be planted outside in your flower garden in the spring. Don’t overlook the fun option of edible plants. Herbs, like rosemary, or dwarf fruit trees, like lemons and limes, make a really fun gift!
- Something really practical. If your partner is the kind of person who really loves tearing open the wrapping paper, opening a box, and discovering the gift inside, consider gifting them something they actually need. One year, Robbie gave me a dozen pairs of my favorite socks. In the middle of winter in Michigan, this is a grand expression of love!
Ok! On to the homemade Valentine’s tutorial!
My oldest daughter and I were inspired by beautiful homemade valentines created by @tulips_and_a_toolbox, so we decided to have a try at making our own. I was shocked at how well it worked to sew paper, so I just had to share the details with you! (Yes, you read that right, we sewed these paper Valentines… on my sewing machine!)
If you want to make them exactly like ours, you’ll need the following supplies, but this craft is so flexible that I encourage you to substitute supplies you already have in your home. There’s no need to go our a buy anything special for this!
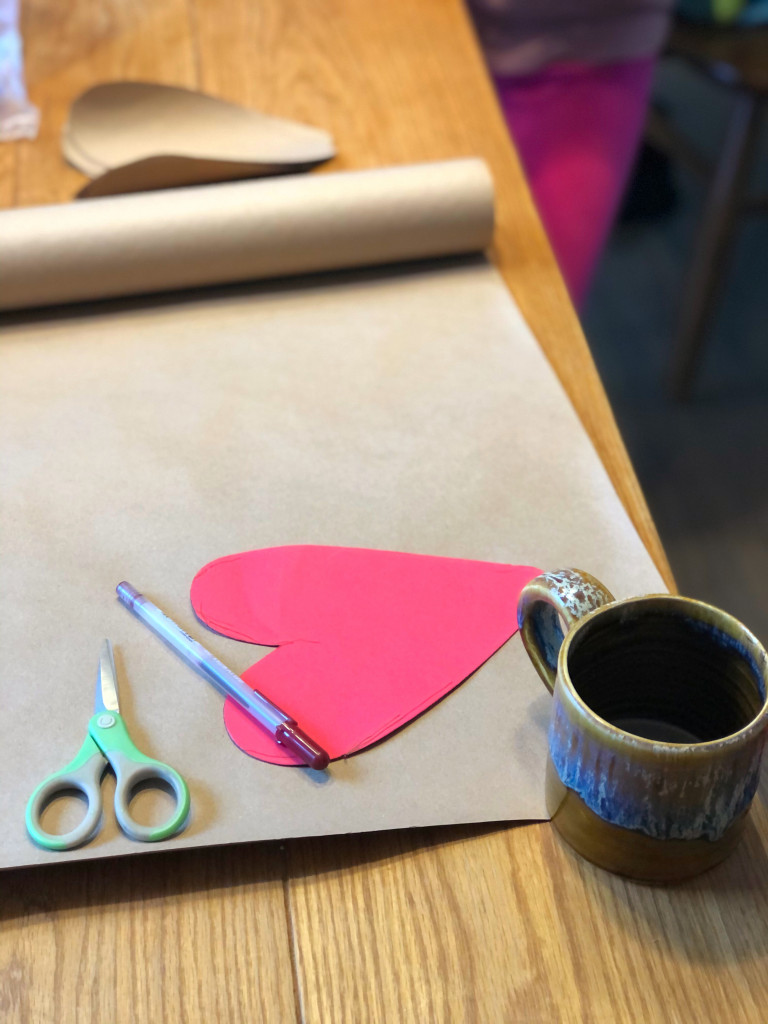
Recommended Supplies:
- Paper – we used brown craft paper from a big roll. You’ll see in the tutorial that this was less than ideal; flat paper would work slightly better if you have it.
- Stamps + ink – we used this to decorate our valentines; if you don’t have stamps and ink at home or you’re doing this craft with younger kids markers, colored pencils, crayons, stickers, and/or stencils would also work great.
- Scissors
- Sewing machine + thread – you can absolutely sew these by hand (I tried it and it was hard, but doable; although the finished product didn’t look nearly as crisp and professional as the ones I sewed on the machine)
Step 1: Create a template
If you want to make your Valentines shapes uniform and consistent, I recommend creating a template that you can trace over and over again. I cut this heart out on my Cricut, but you could easily draw and cut out a template of any shape/size by hand. If you want to stuff your Valentines with a little gift, be sure to make the shape big enough that you’ll be able to fit the gift inside when you sew the two pieces together.
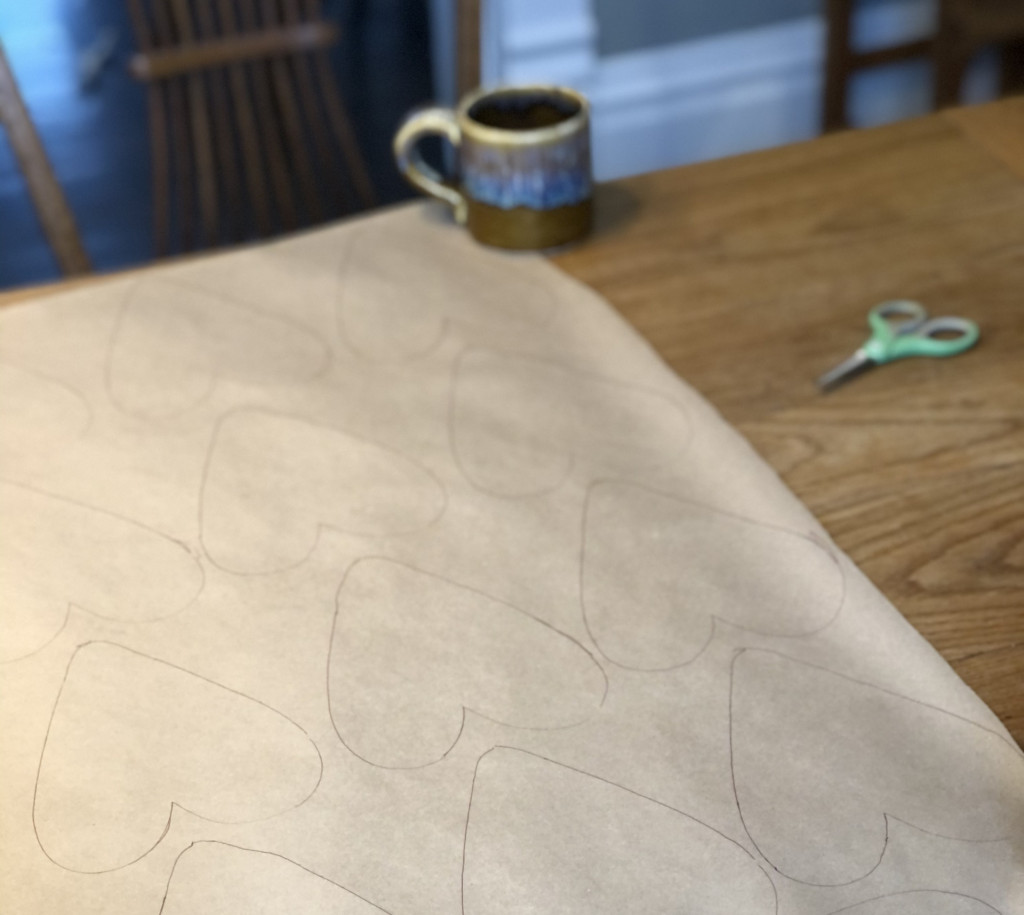
Step 2: Trace your template
Use the template to trace your hearts onto your paper. Remember, you’ll need two paper hearts for each Valentine if you’re planning to sew them together into a cute little pouch.
We used rolled brown paper, which was a little challenging as the paper kept trying to roll back up. As you can see in the photos, I used weights on the corners to hold the paper in place while I was tracing.
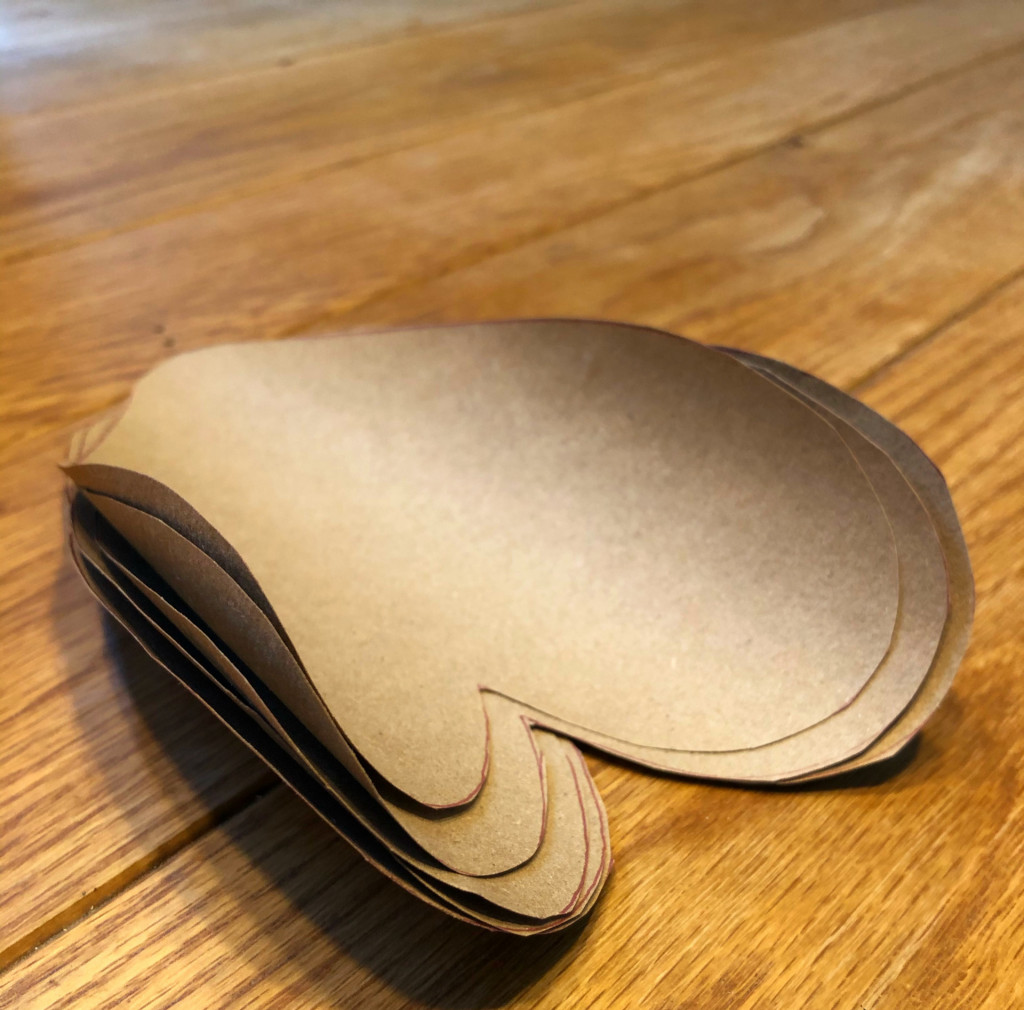
Step 3: Cut out your hearts
Cut out all your hearts at once. Again, mine kept wanting to roll up, so I had to flatten them under a heavy book before moving on to the next step.
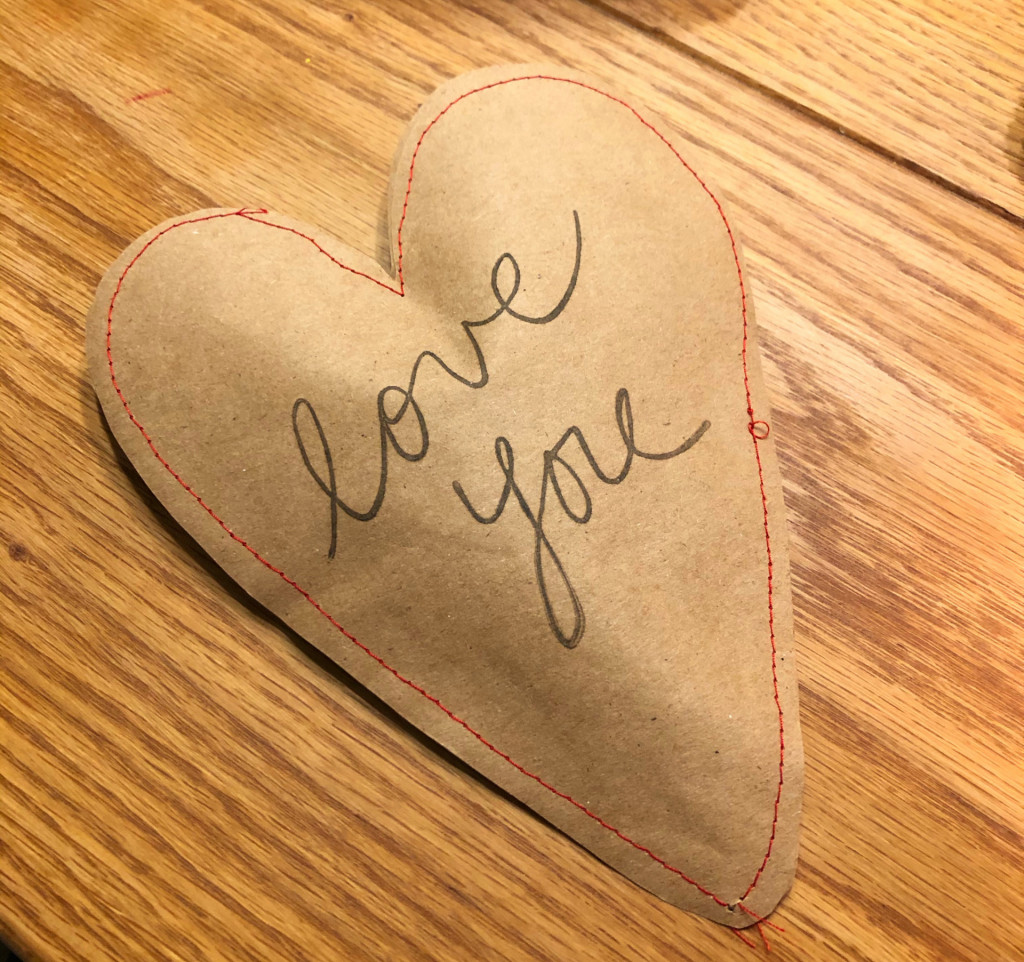
Step 4: Decorate your Valentines
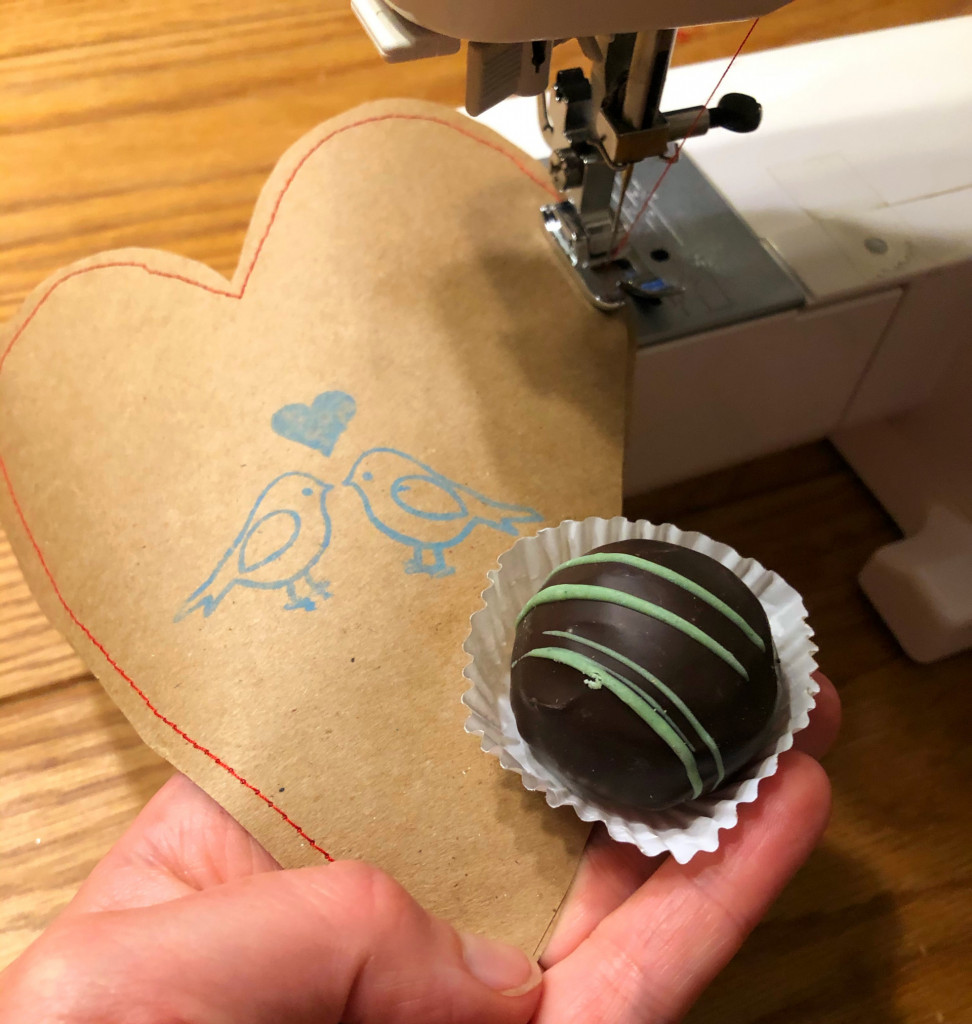
We had a great time using stamps and ink to decorate our Valentines with words and pictures to communicate love and well wishes! We used stamps, but again you could draw free-style or use stencils if you don’t have stamps/ink handy.
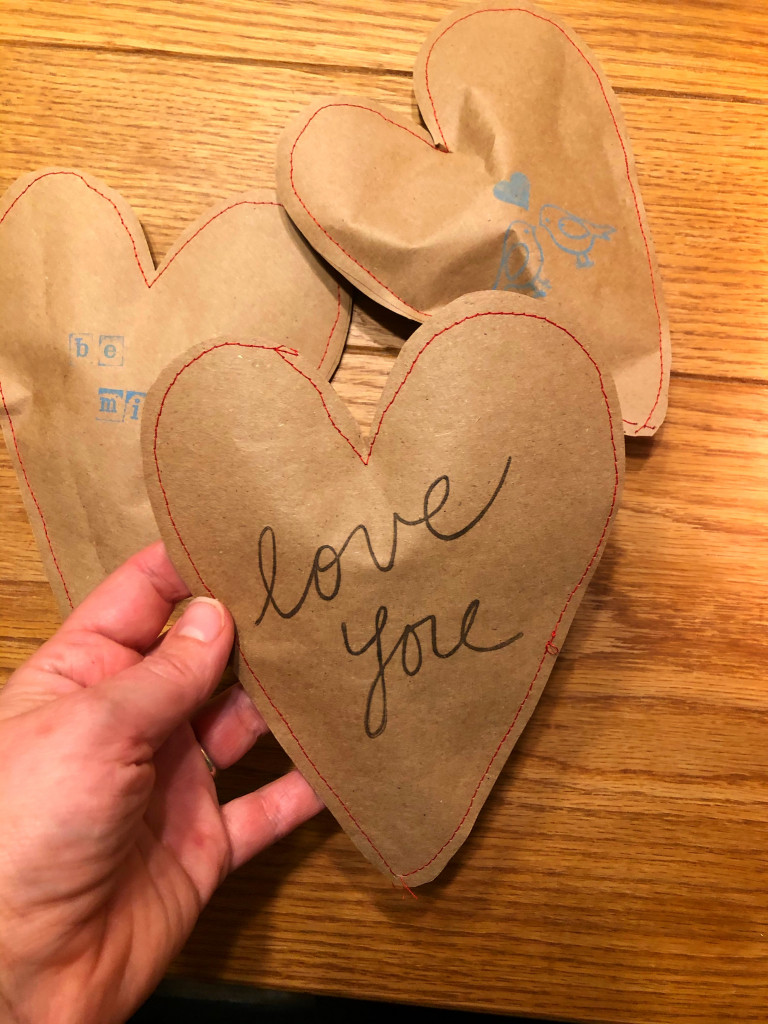
Step 5: Stuff and Sew
There are two ways to approach the stuffing/sewing.
If your gift is small enough, like this truffle from my favorite local coffee/candy shop (Sweetland Candies), mints, or those little candy hearts with the cute messages, you can sew the entire way around the edge of your Valentine. I recommend sewing at least half way around, pausing to stick your little gift into the pouch, and then sewing the rest of the way.
Here are a few tips while sewing:
- Match your two pieces of paper, making sure the decorated side(s) are facing out. Hold them together and sew around the entire edge.
- I found that I didn’t need to pin or tape them in place, holding the two pieces together with my left hand while steering with my right seemed to work just fine.
- I also found that it didn’t seem to matter where on the heart I started and ended my sewing.
- If you’re an experienced sewer, have fun with various stitches and edging techniques! I decided I liked the simple look of the plain red stitch on the plain brown paper.
If your gift is bigger, like the fun dip candy my daughter wanted to give her third grade classmates, you can sew most of the way around the edge, leaving the top open.
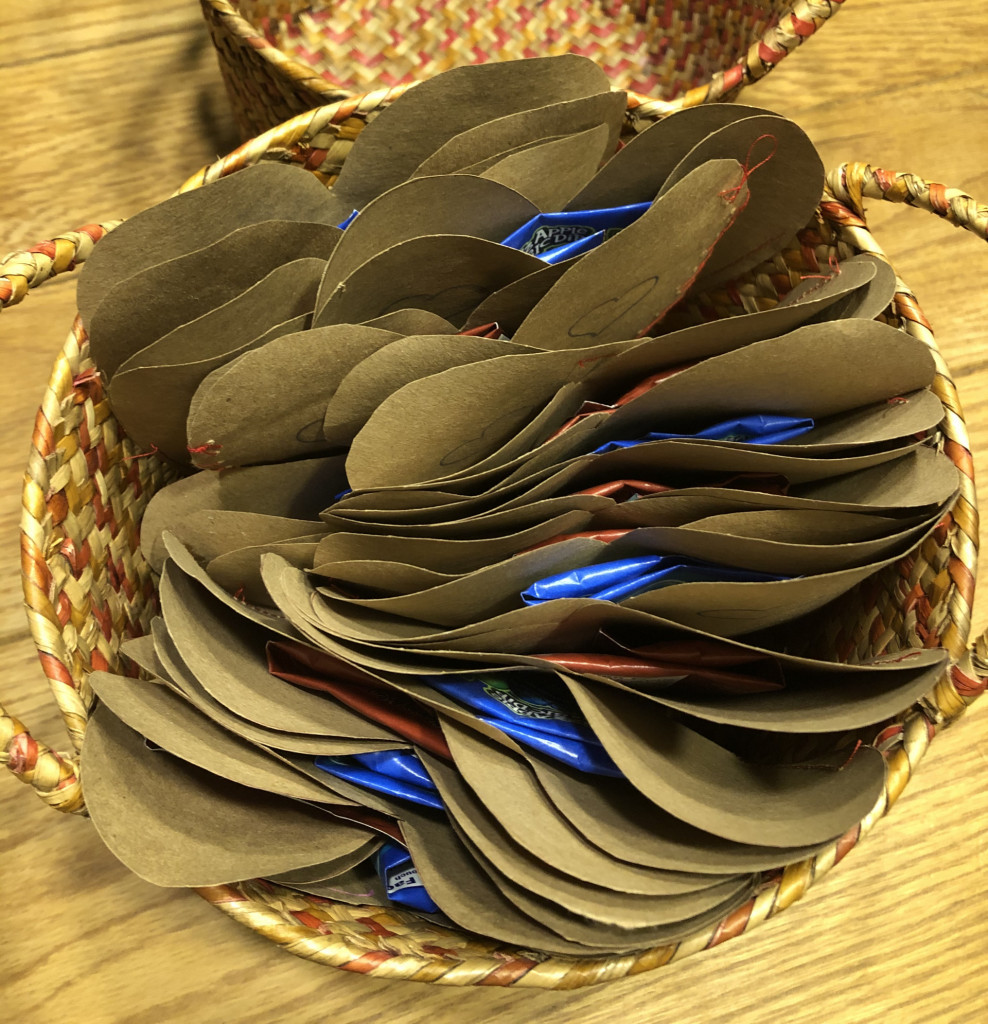
Voila! You’re done! You can make as many of these cute little Valentines as you want, in a myriad of sizes and shapes, depending on your gift giving needs, time available and attention span (especially if you’re doing this craft with little ones)!
Please drop your questions in the comments below. I’m always happy to answer questions!
And comeback to tell me about your experience! I can’t wait to see your beautiful homemade Valentines! If you share photos on Instagram or Facebook, please tag me @carbonfreefamily so I can celebrate your amazing results with you!
]]>
My annual goal setting, much like my life, is a slow and reflective process. I like to calculate my environmental footprint (see my blog post last week for more information), reflect on last years’ progress and this year’s biggest opportunities.
I’m excited to take you on a journey of my 2021 intentions. I’ve organized them to coincide with the areas highlighted by the environmental footprint calculator and in order of my biggest to smallest opportunity to reduce my impacts: transportation, food, shelter, goods, and services.
![]()
Transportation remains my biggest opportunity. So, this year, I have the following goals:
- No flights – In 2020, we committed to no flights and found adventure nearby (see last week’s blog for more details). We explored our home state of Michigan and had wonderful family adventure (yes, even in the midst of the pandemic). I love travel, but I know how impactful my flights are. In 2021, we’re going to remain focused on nearby adventures, expanding our radius to include longer car rides this year… we’ve got a date with the smoky mountains for spring break! My long term solution will include offsetting the emissions from our family vacations, so please send me your recommendations if you’ve purchased offsets.
- Become a one car family again – In 2020, we bought a 100% electric vehicle (again, see last week’s blog for more details). We’ve been a one car family for several years, but it’s taken us months to fully embrace our new Tesla and be ready to give up our trusty old ‘08 Honda Fit. This is mostly because Robbie has dirty hobbies like hunting and woodworking and we had to figure out a way to haul messy things in our “fancy new car”. A few weeks ago, we installed a trailer hitch on the Tessy, so we’re finally ready to let Honda go and return to being a one car family. I can’t tell you how excited I am to never buy gasoline again!

My food is wildly important to me as I work to fully align my life with my values. And it’s my second biggest opportunity to impact my footprint. I also find the food category to be a stubborn one… meaning, its hard to see the impact (via a lower environmental footprint in the calculator) from the changes I’ve made (one more time, see last week’s blog for more on this). But that’s not going to stop me from leaning in to the joyous parts of my food journey! This year, I have only one food-related goal:
Eat local food, even in winter.
I’m proud of my summertime foodprint (that is, the environmental footprint of my food), but during the winter in Michigan I struggle to find locally grown, unpackaged food. So, I’m going to focus on this goal especially hard in the next couple of months (February through May) until my own backyard vegetable starts to produce and my local farmers market starts up again.
Here’s where YOU can help!
Michigan friends – please comment below with your favorite winter farm shares, farmers markets, and other resources you have for local food (that are available right now!) so I can build a robust list of farmers to support during these cold winter months. I promise to explore your recommendations and share my adventure, with details and recommendations, in an upcoming blog post.
Non-Michigan friends – please share your strategies and recommendations too! I have followers all over the world and we can always learn from your strategies!
This year I’ve realized how very important it is for my home to be a place of peace, relaxation, and comfort. A place that calms my nerves, supports connected time with my family, and gives my soul space to Just Be Here. It’s not surprising that my 2021 goals include a few to make my home more cozy (and energy efficient) and less cluttered. I love it when the connections between minimalism and sustainability are clear like this.
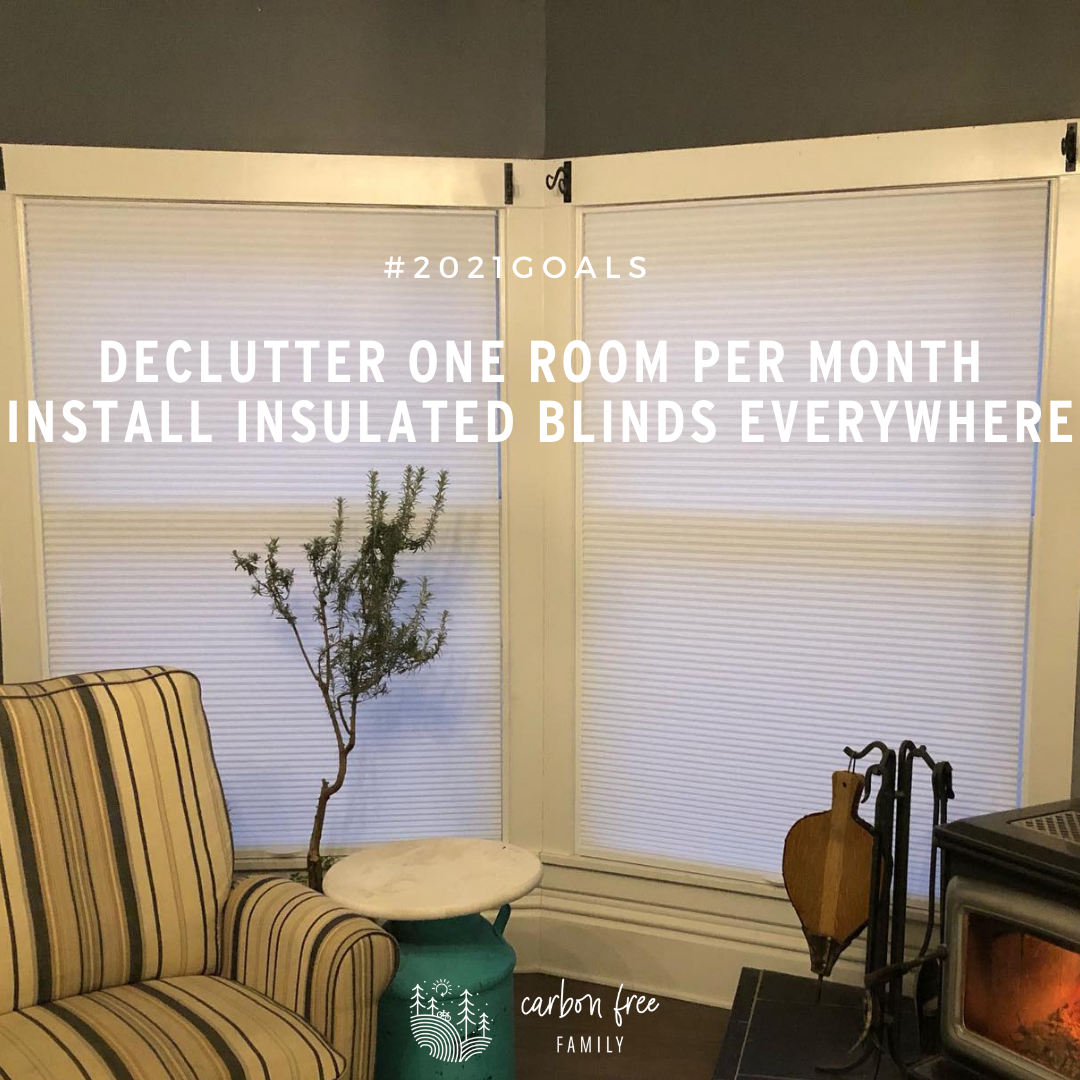
- Declutter one room per month. Less stuff means less cleaning, less things to break, less things to repair, and more time with my family.
- Install insulated blinds everywhere. Cozy spaces in my home encourage all of us to slow down, sit down, play together and take the time for meaningful connection. Last year, we installed these blinds in most of the windows on the first floor of our home. Even I was shocked at how much warmer I felt in these better insulated spaces. And even better, we could see on our nest thermostat that the furnace was running less often, saving energy, carbon emissions and our hard earned money!
Alright! We’re halfway through my 2021 intentions and this feels like a good spot to take a break. I’ll be back next week with my goad related to goods, services, and self care (self care isn’t part of the footprint calculator, but I’ve added it. I firmly believe that we have to take care of ourselves before we can take care of the community and the planet).
Intentional living takes time. Sometimes the process is (intentionally) slow. If you’re still thinking about 2021 and what you might want to work on, I’m right here with you and for you. Drop your thoughts and questions in the comments. I’d love to hear about your goals, even if they’re still a “work in progress”.
]]>
A few years ago, I sewed a bunch of reusable cloth gift bags in cheerful Christmas patterns and they continue to bring me such joy!
I love wrapping presents in these gorgeous bags. I love giving them to people (and am so honored when friends and family want to keep the bag in addition to the gift… in fact, you’ll regularly find me sneaking around and gathering my bags up after gift opening is over at our family gatherings). I love reusing them year after year!
AND they’re super easy to make! I swear, they’re a great project for beginner sewers because it doesn’t matter the size, shape, or even if they’re particularly square. The process is three simple steps: cut, sew, enjoy!
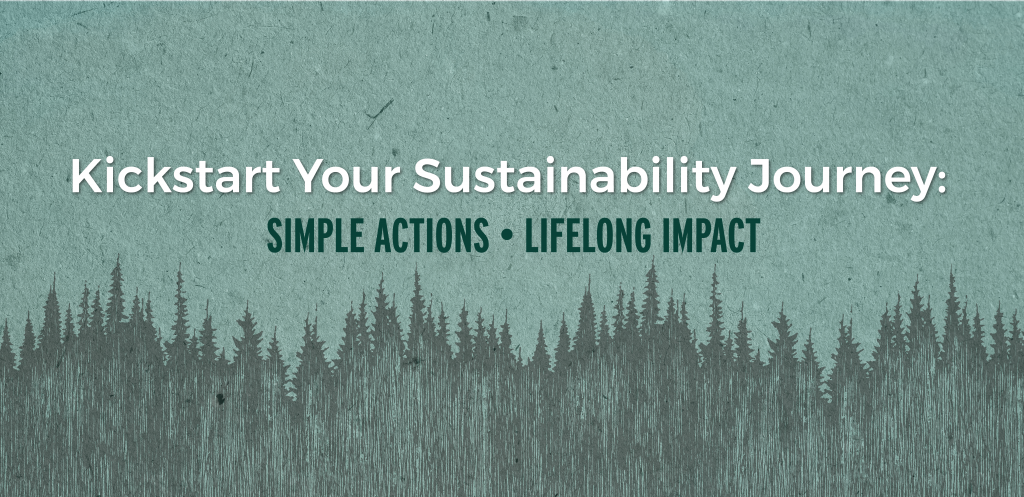
Interested in building more sustainable habits in 2021? Please join my upcoming virtual workshop: Kickstart Your Sustainability Journey!
Step 1: Cut your fabric
If the exact size/shape isn’t important to you, I recommend letting your fabric dictate the size.
For example, my fabric is almost 42 inches wide, so I cut it exactly in half and made two 10 inch wide bags. I cut my fabric 15 inches tall and ended up with two 10”x13” gift bags. I love using printed fabric like this because it makes straight cuts easier. I pick a spot in the pattern and cut right along the “line”.
After cutting, my fabric is about 21 inches wide and 15 inches tall.
Step 2: Cut your cord
I used 1/4” cotton cord, but feel free to use bigger or smaller. Choose the top of your bag (based on the pattern) and cut your cord at least 8-10 inches longer than the width of your fabric (it will hang out 4-5 inches on either end when you’re done).
My fabric is 21 inches wide, so I cut my cord about 31 inches long.
Step 3: Sew your cord into place
Place your fabric with the wrong side up* and the top pointing away from you. Place your cord along the top edge and fold the top of the fabric towards you. You’re going to sew a little pocket for the cord to slide through, so make sure there’s enough fabric that you can run your foot** along the seam without stitching the cord.
* the “wrong side” is what we call the back of your fabric, the side without the pattern, the side you want on the inside of your bag. ** the “foot” is the mechanism around the needle on your sewing machine as shown in this photo.
Step 4: Sew the other two seams
Keeping the wrong side up, fold your fabric in half. This will be the final shape of your bag, so the cord should be at the top and you should have seams to sew across the bottom and one of the sides. Trim any excess fabric if your edges aren’t lining up.
Go ahead and sew these seams. The only tricky part is making sure you don’t sew through the cord/pocket. If you do this, you won’t be able to pull the cord to cinch the bag closed.
Trim extra thread and turn your bag right side out.
Step 5: Tie knots at each end of the cord
This will prevent the cord from accidentally getting pulled into the pocket when someone is opening their gift. Fishing the cord back out is certainly possible, but a royal pain.
You’re done! You can make as many bags as you want, in a myriad of sizes to meet your gift giving needs!
I have about 24 bags total and the “10×13” bag I made today is the “medium” size bag in my collection. I have a bigger size (roughly twice as big) and a smaller size too. Three yards of fabric will yield about 8 medium and 2 large bags. I like to mix and match my colors and patterns, so I’ve purchased different patterns over the years.
Please drop your questions in the comments below. I’m always happy to answer questions!
And comeback to tell me about your experience if you’re making these reusable gift bags for the first time. I can’t wait to hear about your project!
Please join my upcoming workshop… Kickstart Your Sustainability Journey! This 6-week online workshop will change the way you think about sustainability, flipping your mindset so that sustainability becomes a natural part of every decision you make and creating easy sustainable habits. Find more information and register here!
In some ways, COVID-19 has forced us all into a more intentional and sustainable life, and it’s worth thinking about how we might incorporate the lessons learned into “normal life,” whenever we return to it. The thing is… “normal” might look a lot different when we get back to it.
However you’re planning to rebuild your normal, I would encourage you to think about the simple and more sustainable aspects of your current lifestyle that you want to keep as you rebuild. To help with this, I’d like to tell you about the 80/20 Principle.
The 80/20 Principle was created by Italian economist, Vilfredo Pareto, and, in short, states that you get 80% of your results from 20% of your effort. This is a powerful model for business, time management, and sustainable living.
I have absolutely applied the 80/20 principle over the years when re-designing my sustainable lifestyle over the past few years. My family and I have chosen to make most of these changes under the notion that sustainability give us more, not less. These are the easy types of lifestyle changes, the 20%.
- We save money by not wasting (heat, electricity, gas, food).
- We ride our bikes more and find that our clothes fit better.
- We find more time to play because we are not shopping as much, so we have fewer things in our home and it stays cleaner longer.
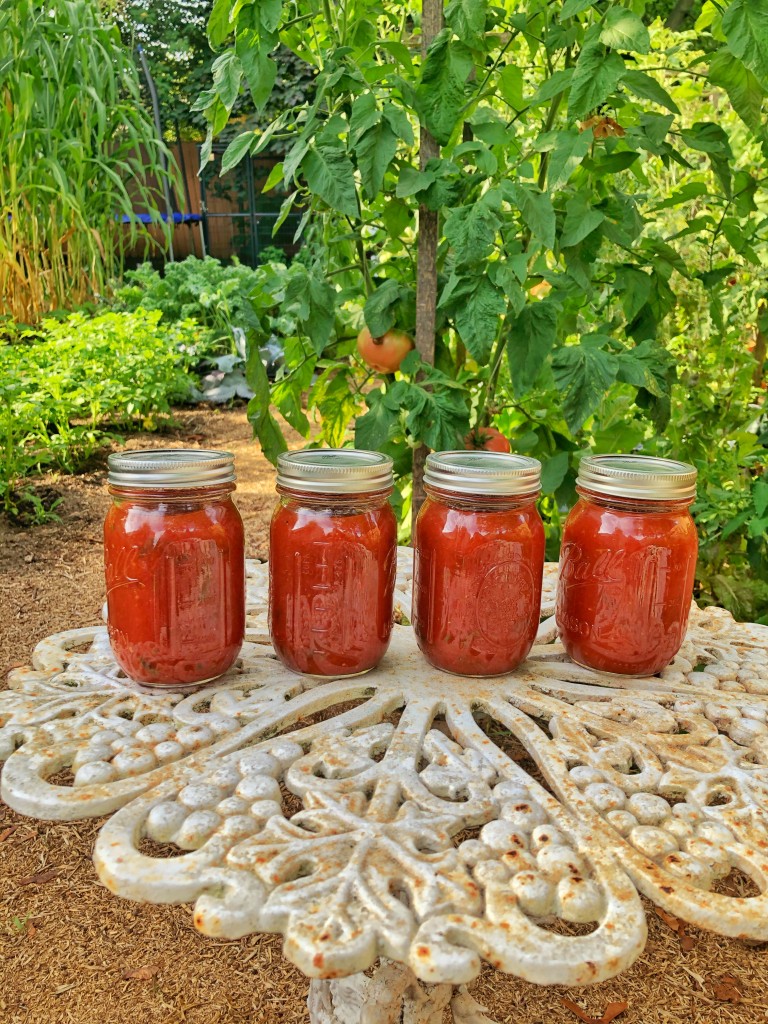
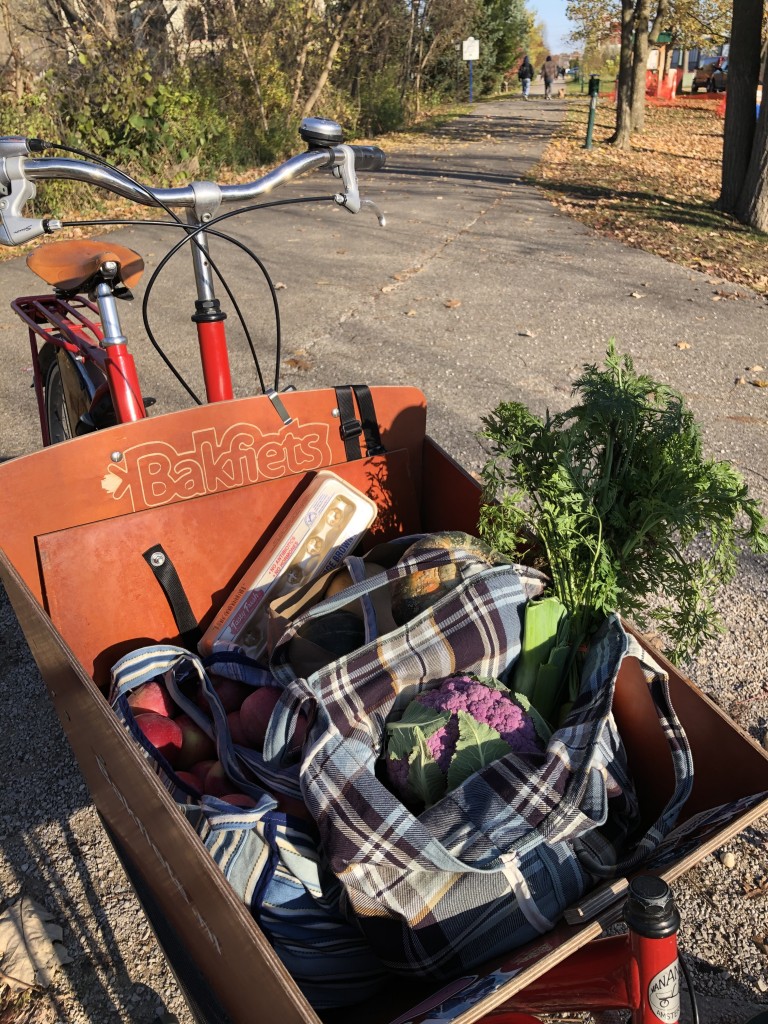
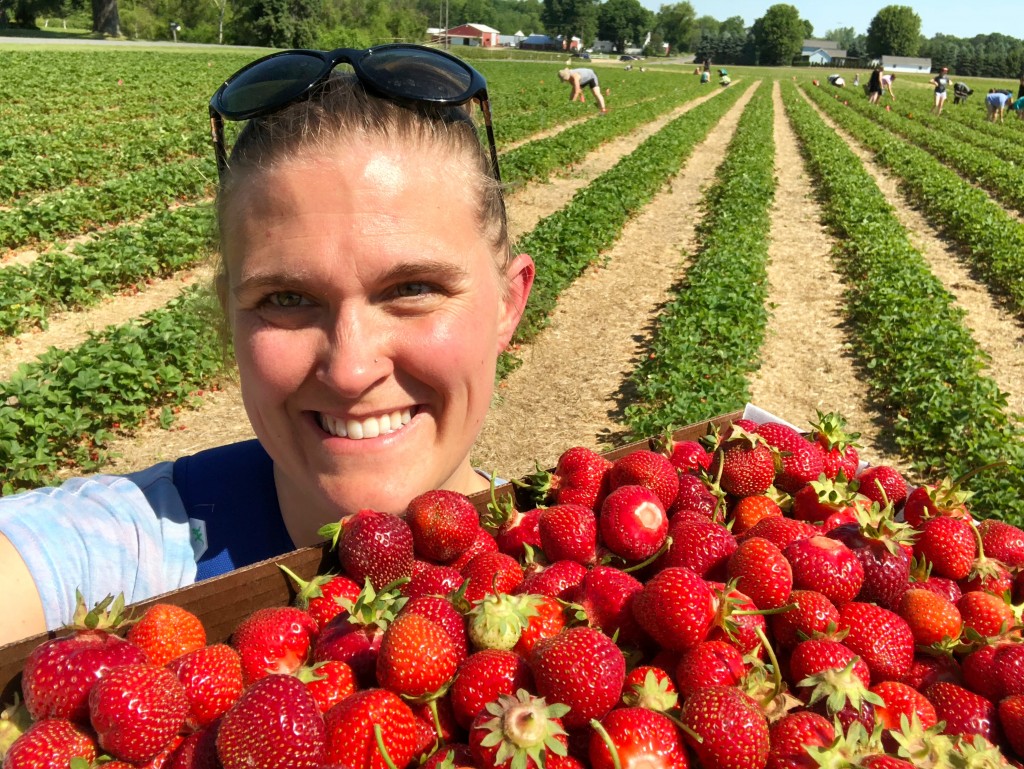
Because of COVID, we grew more vegetables in our backyard garden, shopped even more than usual at our local farmers market this summer, and canned/froze a lot of fresh, healthy, and local food. These activities saved us money, helped us connect as a family, and will improve our health. Next summer, I’m planning to hang on tight to these more sustainable habits, COVID or not, because they make me happy!
We accomplish 80% of our sustainability goals doing what is engaging and interesting to our family. So, here’s my advice for building a more sustainable life: Choose the fun stuff! Think about activities you enjoy most right now and the new habits you’ve created during COVID that are bringing you joy.
Here are a few areas for you to consider when you’re brainstorming about the activities and habits you want to keep.
Drive less, walk and bike more
Most of us aren’t driving to work right now. Most of us are working from home and driving once per week to get groceries. From my home office window, I can see my street in downtown Rockford and I see so many people walking, skateboarding, and biking.
How can you incorporate driving less into your “new normal?”
- Did you realize that you can walk or bike to work, school, or the grocery store?
- Did you learn that you only need to grocery shop once per week (or even less)?
- Did you become really good at combining all of your errands into one trip?
- Did you discover activities, clubs, or events that aren’t actually important (or fun), so you’ll choose to stay home instead?
- Did you find new spaces or activities in your home that will help you maintain a slower life pace even when you are free to ramp back up your normal busyness?
Reduce food waste
I bet we’re all trying to stretch our food a little further these days. There are lots of benefits to this strategy: saving money, spending less time shopping, and throwing away less food, just to name a few.
How can you incorporate a heightened awareness of food waste into your “new normal?”
- Did you become really great at meal planning?
- Did you learn how to better organize your pantry or fridge? How does it feel to be able to find ingredients easily?
- Did you become an “iron chef” contender, learning to creatively use obscure ingredients in meals you (and your family) loved?
- Did you learn about food preservation this summer — canning, freezing, and/or fermenting extra fresh food safely for you to eat weeks or months later?
- Did you start composting in your own yard?
Embrace minimalism
Lots of us are looking at our homes differently these days, noticing clutter in a way we’ve never seen it before. According to Joshua Becker, founder of the Becoming Minimalist blog, “minimalism is intentionally living with only the things I really need—those items that support my purpose. I am removing the distraction of excess possessions so I can focus more on those things that matter most.”
How can you incorporate minimalist principles into your “new normal?”
- Did you purge toys, clothes, or clean your closets to pristine condition?
- How does it feel to have less clutter in your life?
- How can you prevent unwanted things from accumulating again?
- Did you redesign spaces in your home to be more comfortable or better suit your needs?
Please share some of your favorite slow living and sustainable habits that you’ve discovered during this global pandemic in the comments below!
Ps. Local friends, if these words feel familiar to you, they should! The 80/20 Rule parts of this blog were originally written by Robbie for a Rockford Sustainability Committee column in the Rockford Squire. He graciously let me reuse them in this post
]]>I was wrong in my post last week… trick-or-treating isn’t canceled in my community. And as we’re approaching everything differently this year, with everyone’s health and safety in the front and center of our minds, let’s talk Halloween candy…
I’m committed to plastic free candy! Individually wrapped candies already feel really wasteful, but when you add on the fact that those multilayer plastic wrappers can’t be recycled… I’m out!
Here are the options I recommend instead:
1. Hand out homemade snacks. Remember when this was the norm? It might not work for traditional trick-or-treating, but especially since 2020 will be a non-traditional year all around, maybe now is the perfect year to hand out cookies, cupcakes, popcorn balls, or some other homemade goodie. If you go this route, you might need to get creative about your own packaging. I recommend serving them unpackaged or in a paper-based bag (brown paper or waxed paper both work great).

2. Choose a recyclable or compostable individually wrapped packaging, including the following:
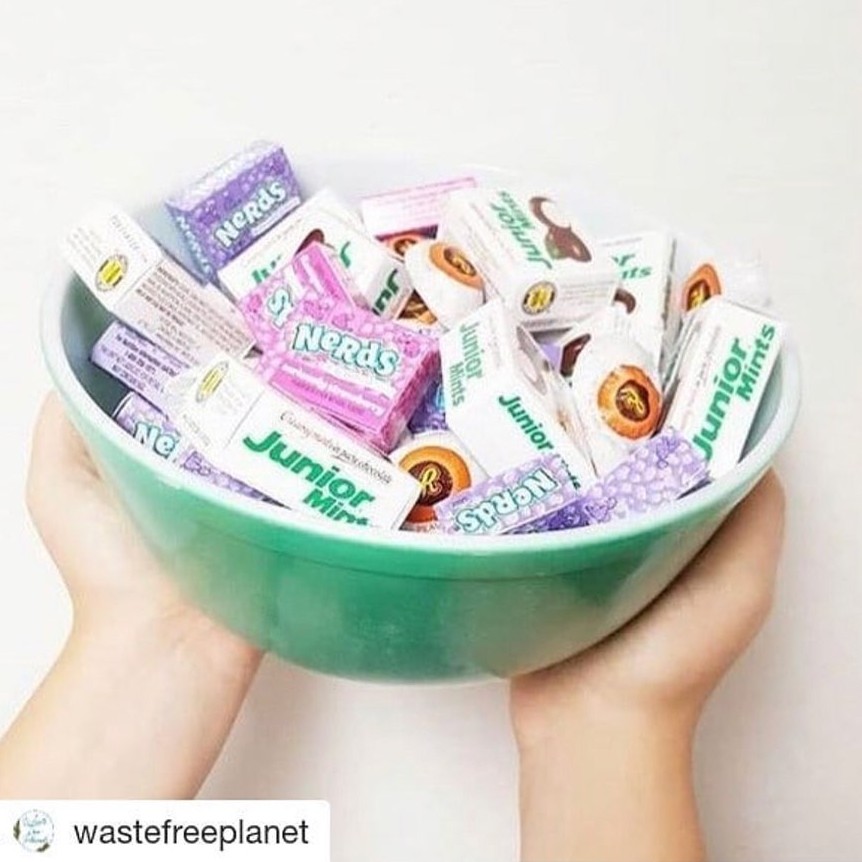
- Cardboard. You can find a few common commercial candies (like nerds or junior mints) packaged in a individual serving cardboard box. These boxes are recyclable and a good option.
- Aluminum foil. Aluminum foil is recyclable IF you roll it up into a bigger ball before putting it in your bin. Again, there are several commercial candies (like hershey’s kisses, rolos, and other non-branded chocolate).
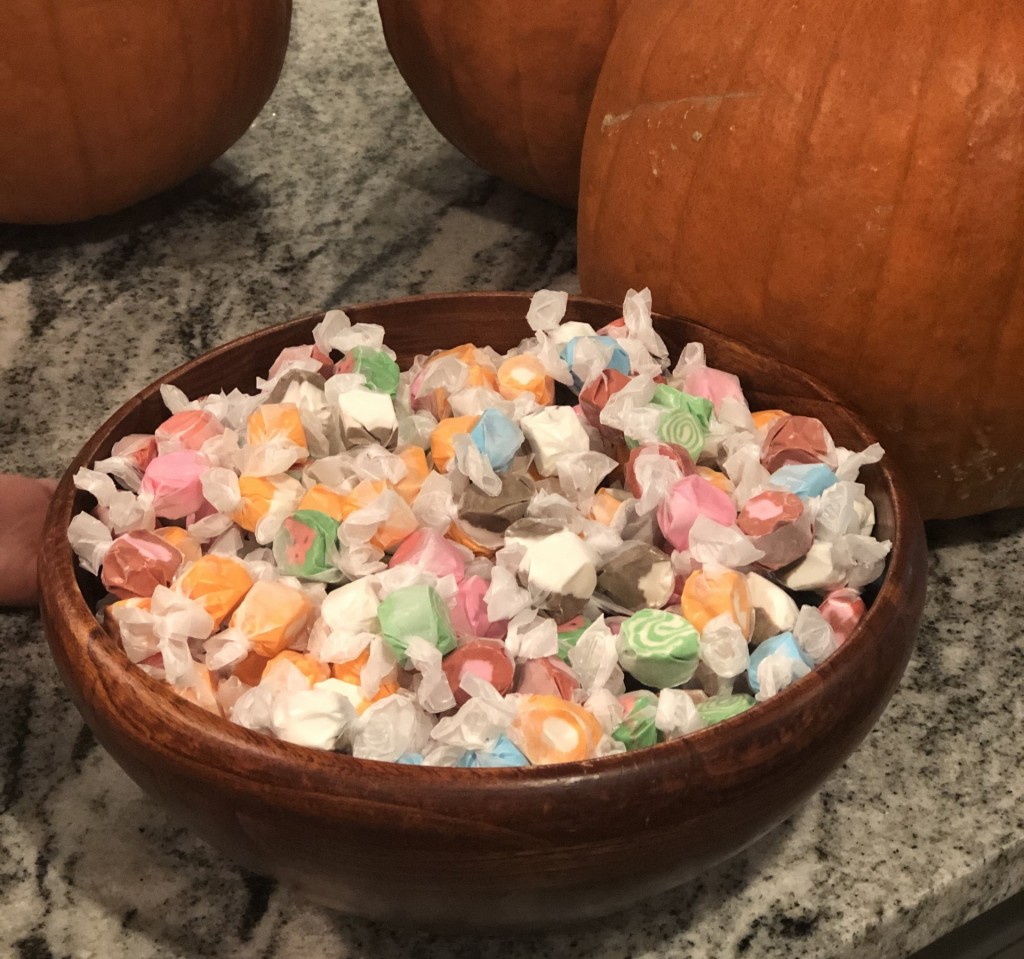
- Wax paper. We love to buy and hand out salt water taffy from our local bulk store (more on that in a minute) because it comes wrapped in wax paper. Wax paper is biodegradable, which means you can compost it in your home compost. There are two kinds of wax… one that’s vegetable based and another that’s petroleum based. We’ve decided that we’re willing to compost either one (in very small amounts), but you might want to think further about this if you use your compost for growing food.
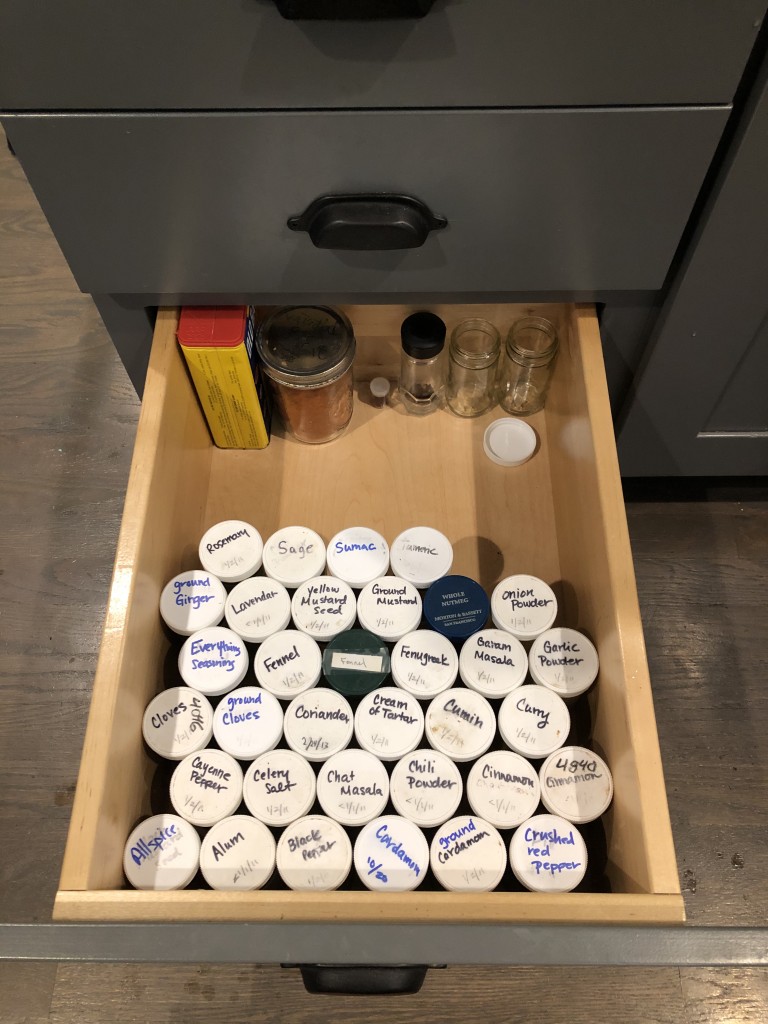
4. Buy in bulk. If you can buy candy from bulk bins at your grocery store, go for it! Bring your own bag and fill it up with your favorite candy! If you don’t have access to a good bulk bin, I recommend choosing the biggest bag you can find. Much of the common Halloween candy at grocery stores across the US comes packaged in a big plastic bag. If you need lots of candy, try buying one BIG bag of it instead of several smaller ones. And reuse the bag (for a trash can liner, picking up after your dog, or something else)

5. Buy local. If you can afford it, many local candy stores offer individually wrapped candies, including chocolates wrapped in foil like the ones pictured below. I recognize this might be a financial burden if you have hundreds of kids trick or treating at your house, but this might be an option to consider if you’re hosting a smaller party (maybe at your kids’ school or this year because you’re looking to embrace a smaller version of your Halloween traditions).

What’s your favorite Halloween candy?
What have you done to make Halloween more sustainable at your house?
Do you have a favorite Fair Trade or Rainforest Alliance certified candy you can recommend to me?