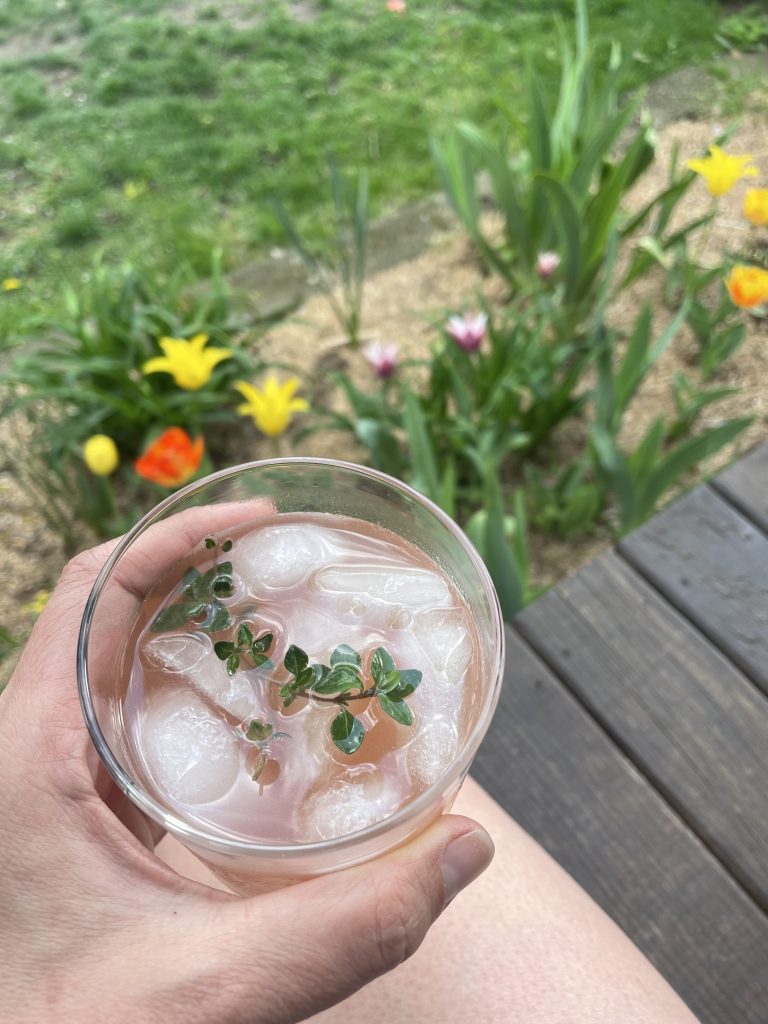
This rhubarb shrub makes a really nice and simple spring cocktail when you mix it with ice, gin, and soda water. I recommend adding a sprig of thyme for extra spring freshness. Rather than talk your ear off about it, I’ll just leave the recipe here, encourage you to give it a try, and walk back to my Saturday afternoon gin drink in the yard…..
Rhubarb Shrub
Makes about 2 cups
Ingredients
1 pound rhubarb (about 4-6 stalks), roughly chopped
1 cup sugar (maple sugar or 1/2 cup maple syrup work great too)
1 cup water
1 cup apple cider vinegar (I hear red wine vinegar or balsamic are good too, but I haven’t tried them)
Instructions
- Bring rhubarb, sugar and water to a boil in small saucepan. Reduce heat to low and simmer 20 minutes.
- Take off the heat and add the apple cider vinegar. Let cool.
- Strain through a fine mesh sieve (you could use a cheese cloth or clean towel if you need a finer mesh)
- Chill and Enjoy!
This should last just fine in the fridge for a month or so, but I dare you to resist drinking it for that long! I like to add a tablespoon or two to each drink, but you might like more or less.
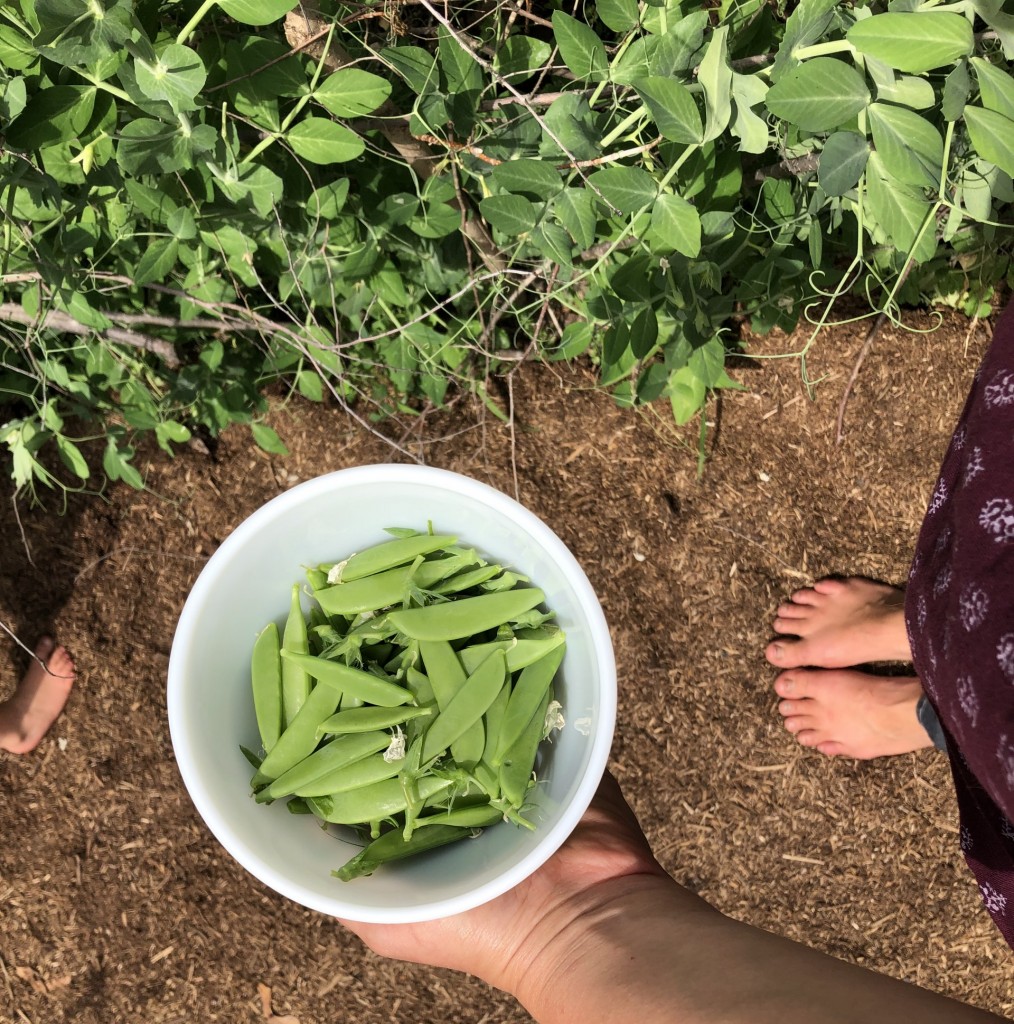
]]>As you know, I’m currently obsessed with sugar snap peas. They’re coming out of my backyard vegetable garden by the pound right now… we’re picking every other day and getting a pound each time! So I’ve had a lot of peas to experiment with. My other favorite recipe is this sugar snap peas salad.
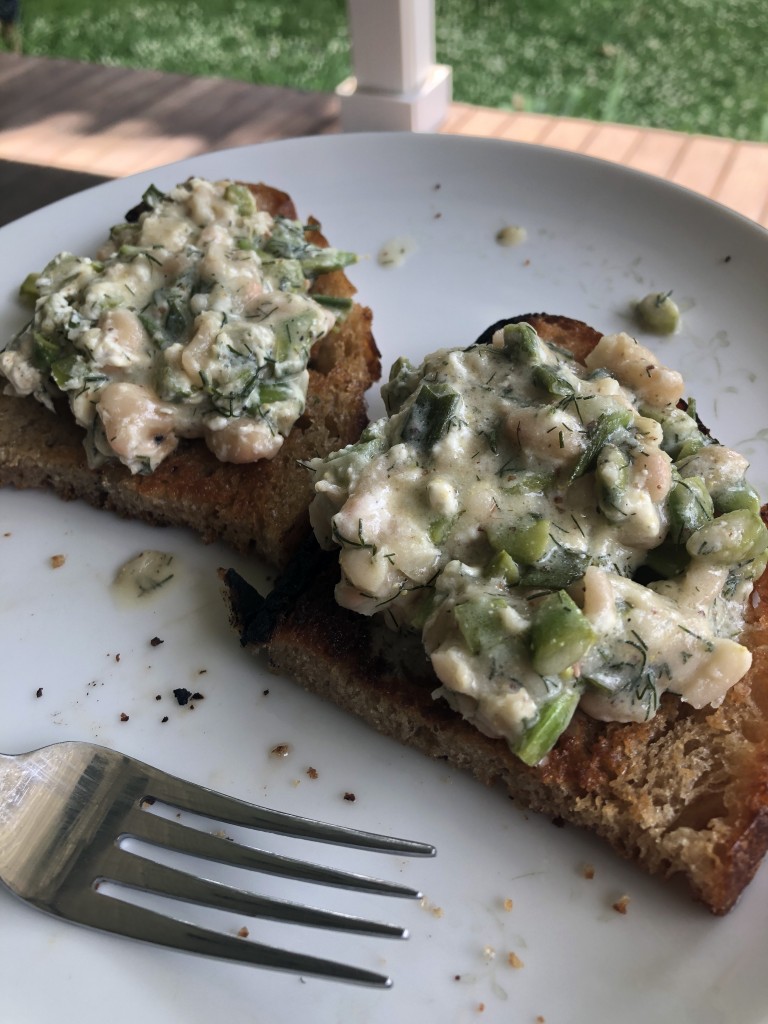
This is our second favorite recipe so far. I love it for two reasons:
- I love any recipe that incorporates my homemade yogurt, especially if its a savory recipe that lets me eat yogurt for dinner!
- Similarly, I love to put delicious toppings on garlic toast! The simplicity of a fancy open face sandwich really makes me happy.
Dilly Beans and Sugar Snap Peas on Toast
adapted slightly from Bon Appetit
Ingredients
1½ cups plain, whole-milk yogurt, drained*
1 teaspoon salt
1 lemon, juice and zest
2 Tablespoons apple cider vinegar
2 teaspoons Dijon mustard
1 teaspoon black pepper
1/4 cup olive oil, plus more for toast
4 chives
8 oz. sugar snap peas
1/2 cup dill
1 14.5-oz can cannellini (3/4 cup dried beans)*
4 slices crusty bread
1 garlic clove
Assembly
- Preheat oven to 400F
- Using a fine mesh sieve, drain your yogurt. Once it’s drained, pour it into a bowl, add lemon zest, and stir to combine.
- In a large bowl, whisk lemon juice, vinegar, Dijon mustard, 1 teaspoon salt, and ¾ teaspoon pepper.
- Whisking constantly, slowly stream in ¼ cup olive oil until dressing thickens slightly and no longer looks oily. You want to add the oil gradually so that your mixture will be creamy and emulsified.
- Trim chives and slice thinly crosswise. Add to bowl with dressing and stir to combine.
- Trim ends of peas and cut on a diagonal into ½” pieces (about the size of your beans) and add to bowl.
- Finely chop dill and add to bowl.
- Drain and rinse beans, then add to bowl with dressing.
- Toss until well coated. Taste and adjust seasoning, adding more salt if needed.
- Place bread on a baking sheet, drizzle (both sides) with olive oil. Toast bread in the oven, finishing on broil if needed to make them extra crispy.
- Rub both sides of the bread with garlic clove; season with a little salt.
- Divide yogurt mixture among toasts. Spoon peas and beans over. Don’t leave any vinaigrette behind: Divide any leftovers among toasts.
I’m still on the lookout for great pea recipes, so please tell me how you’re using them and send me your favorite recipes in the comments below!
*Recipe Notes:
- You could use greek yogurt or ricotta instead of draining whole-milk yogurt. The original recipe calls for ricotta, which I never have in my fridge. On the other hand, I make my own yogurt every single week, so I’ve always got plain, whole-milk yogurt.
- I almost always cook dried beans in my instant pot. If you’re like me, you’ll need to cook 3/4 cup dried beans for 40 minutes in the instant pot.
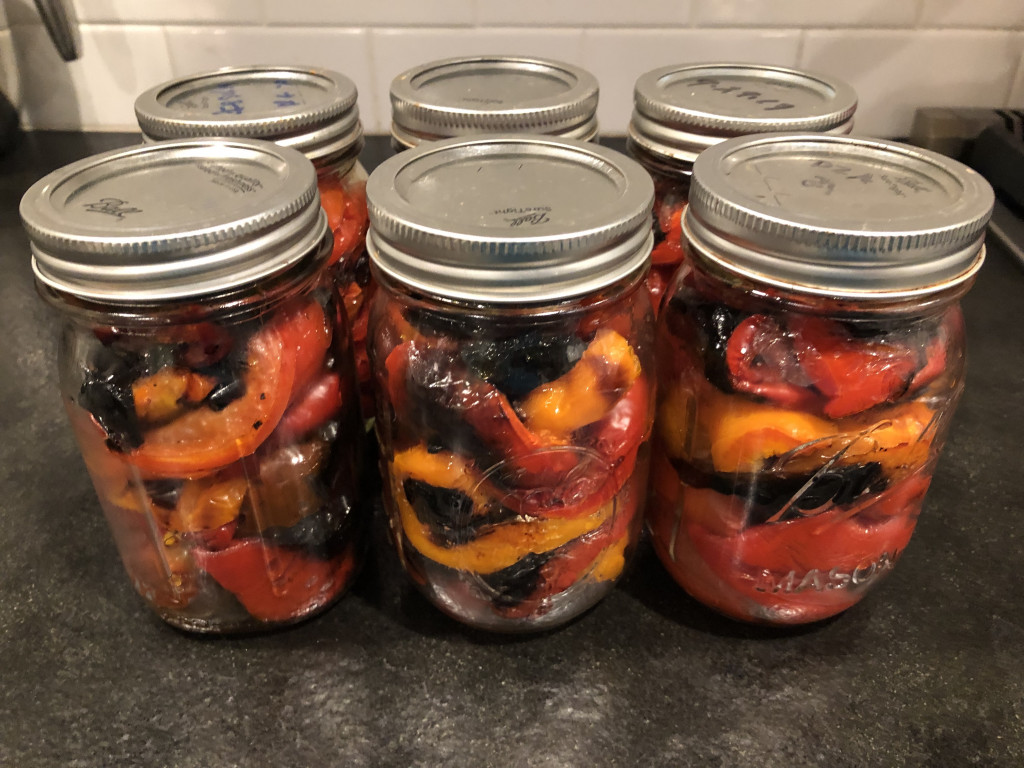
I hear you… “ok, Erin, but after I’ve roasted and frozen them, what do I DO with all these beautiful red peppers?”
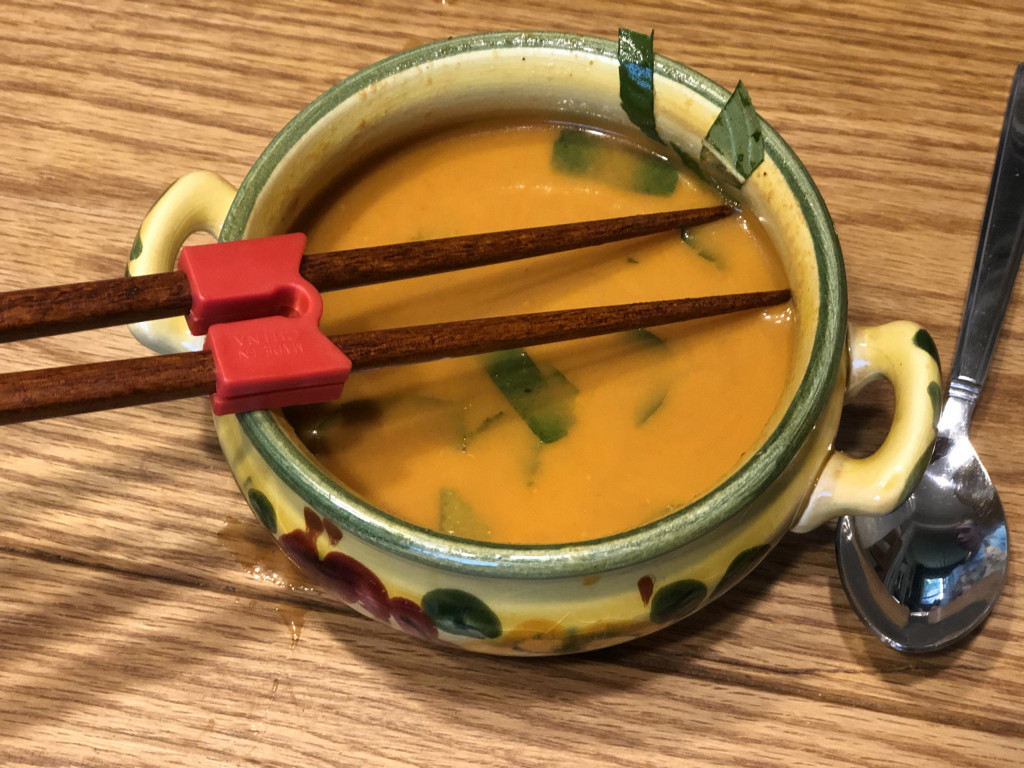
Let me introduce you to my FAVORITE fall soup: Roasted Red Pepper Curry Soup. It’s easy to make, gluten free, dairy free, and EVERYONE in my family is happy to eat this meal! This recipe works well with roasted red peppers from a jar if you’re short on time or you could follow steps 1 and 2 below with just 3 or 4 peppers if you want to make a batch of soup today (and skip the freezing all the peppers step).
One of the things I love about this recipe, is the ability to customize your bowl with your favorite toppings. In my house, this type of approach is key to finding a dinner everyone loves. Robbie and I love adding thai basil from the garden, a swirl of sriracha, and chopped up pistachios for a little spicy crunch. The kids love fried tofu and rice noodles. The combinations and possibilities feel endless! If you experiment with toppings in your home and find a combo you love, please come back and share it in the comments!
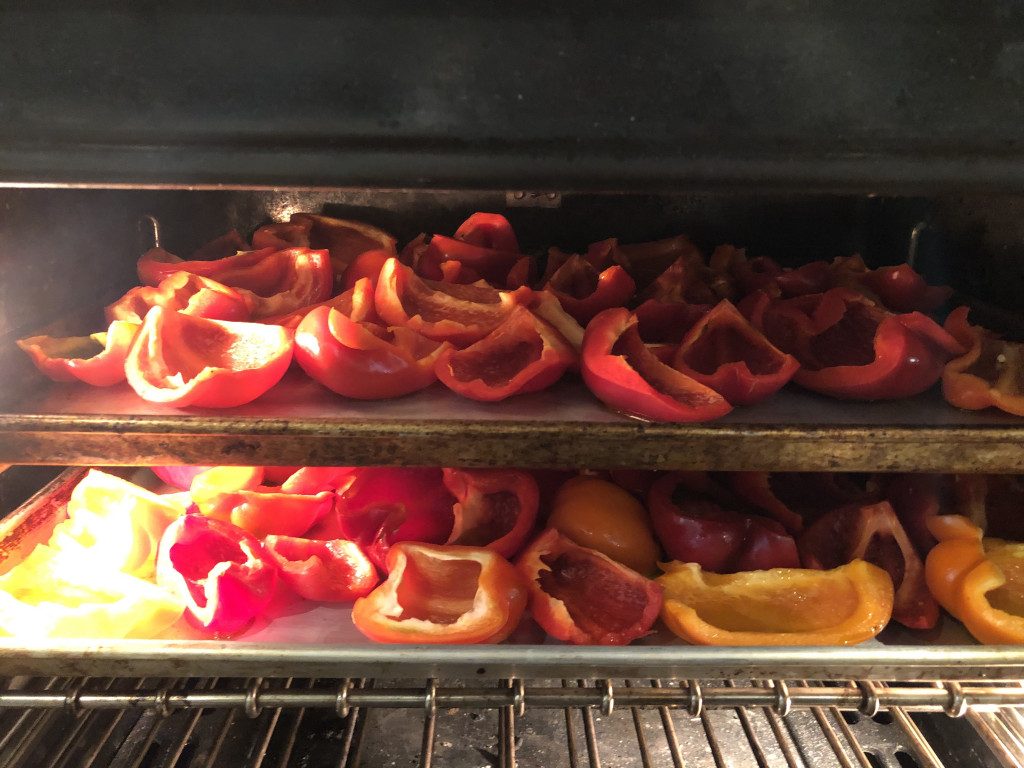

Home-roasted Red Peppers
My farmers market and nearby farm stands are overflowing with beautiful red, and even yellow and orange, peppers! Home-roasted red peppers might be the easiest and least time consuming way for you to dip your toe into the home food preservation waters. It’s a simple as 1, 2, 3!
- Wash and cut peppers into quarters, removing the stem, seeds, and inner white ribs
- Place on a baking sheet, drizzle with olive oil and roast at 450F until the skin starts to bubble and slightly blacken.
- Place into pint jars (each one will hold something like 3-5 peppers) and pop them into the freezer
Roasted Red Pepper Curry Soup Recipe
(makes lunch/dinner for four to six people, leftovers are delicious too)
I have no idea where this recipe came from. I wish I could tell you the source, but I wrote it in my “favorite recipes book” and have been making it from there for the past couple of years. Apologies to the original author.
Download a printable PDF of this recipe here
Ingredients
- 2 teaspoons olive oil
- 2 cloves garlic, chopped roughly
- 1 inch ginger root, chopped roughly
- 3-4 red peppers, roasted in the oven as described above
- 1 quart (4 cups) vegetable or chicken stock
- 1 can coconut milk
- 3-4 Tablespoons red curry paste
- 2 Tablespoons soy sauce
- 2 Tablespoons lemon juice (lime would work just fine too)
Optional ingredients for topping (I recommend picking 3 or 4 of these)
- 1/4 cup cilantro, basil, or parsley, chopped
- 1 package of tofu, tossed in corn starch and pan fried in oil
- 1/2 package brown rice noodles (follow instructions on the package to cook)
- 1/2 cup peanuts, pistachios, or other favorite nuts, chopped
- Sriracha or other hot sauce
Instructions
- In a medium pot, saute garlic, ginger, and red peppers in olive oil on med-high heat until soft
- Add stock, coconut milk, curry paste, soy, and lemon juice. Bring to a boil
- Reduce heat to medium and cook for 5 minutes (longer is fine)
- Blend (I’ve used both an immersion blender and a countertop blender. Both work fine here)
- Optional: if you like a smoother soup, I recommend pouring it through a mesh sieve or strainer. If you don’t mind a chunky soup (or don’t have a sieve/strainer), you can skip this step.
- Salt and pepper to taste.
- Add your favorite toppings/stir ins from the options listed above or GET CREATIVE with what you have/love
- ENJOY!
Please share your comments, questions, and favorite toppings for this soup in the questions below! If you want to share gorgeous photos of your dinner, please tag me on Instagram and Facebook @carbonfreefamily. I LOVE seeing your beautiful photos!
]]>
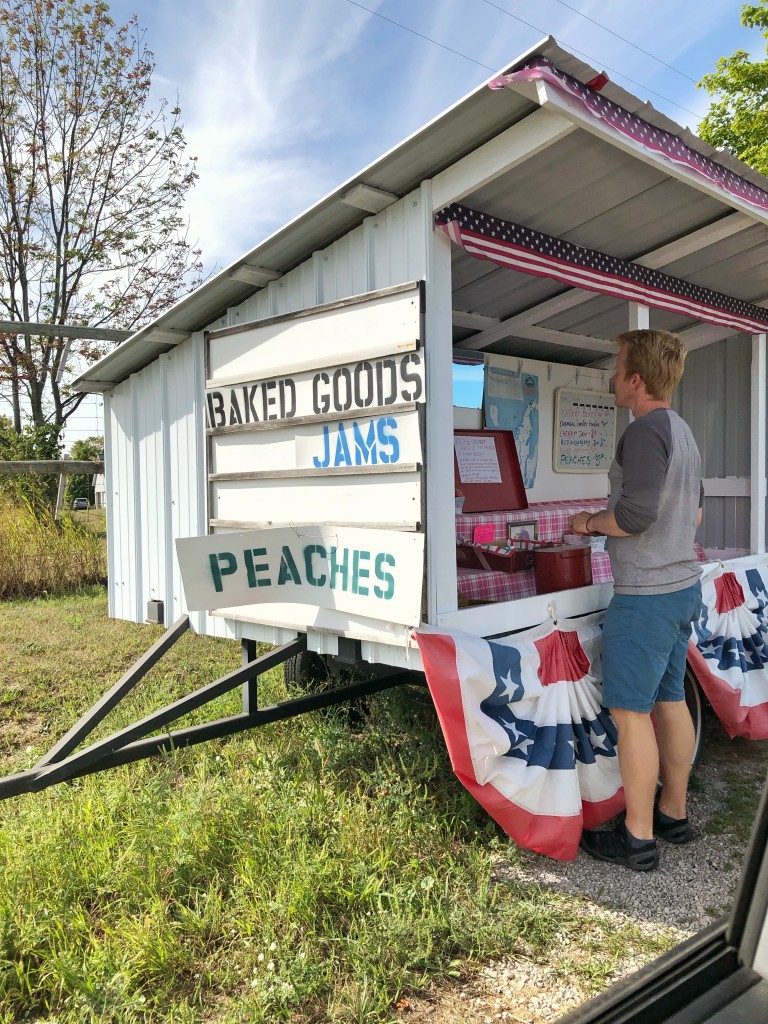
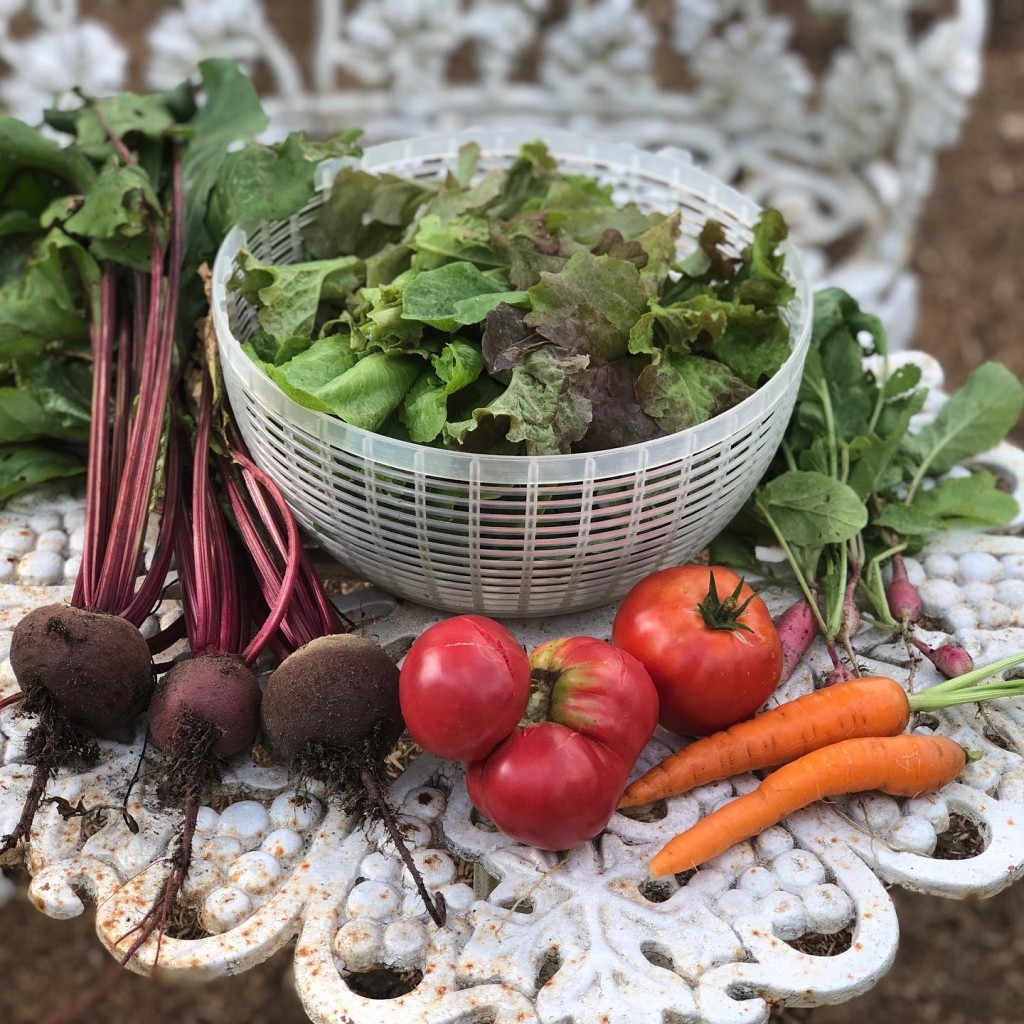
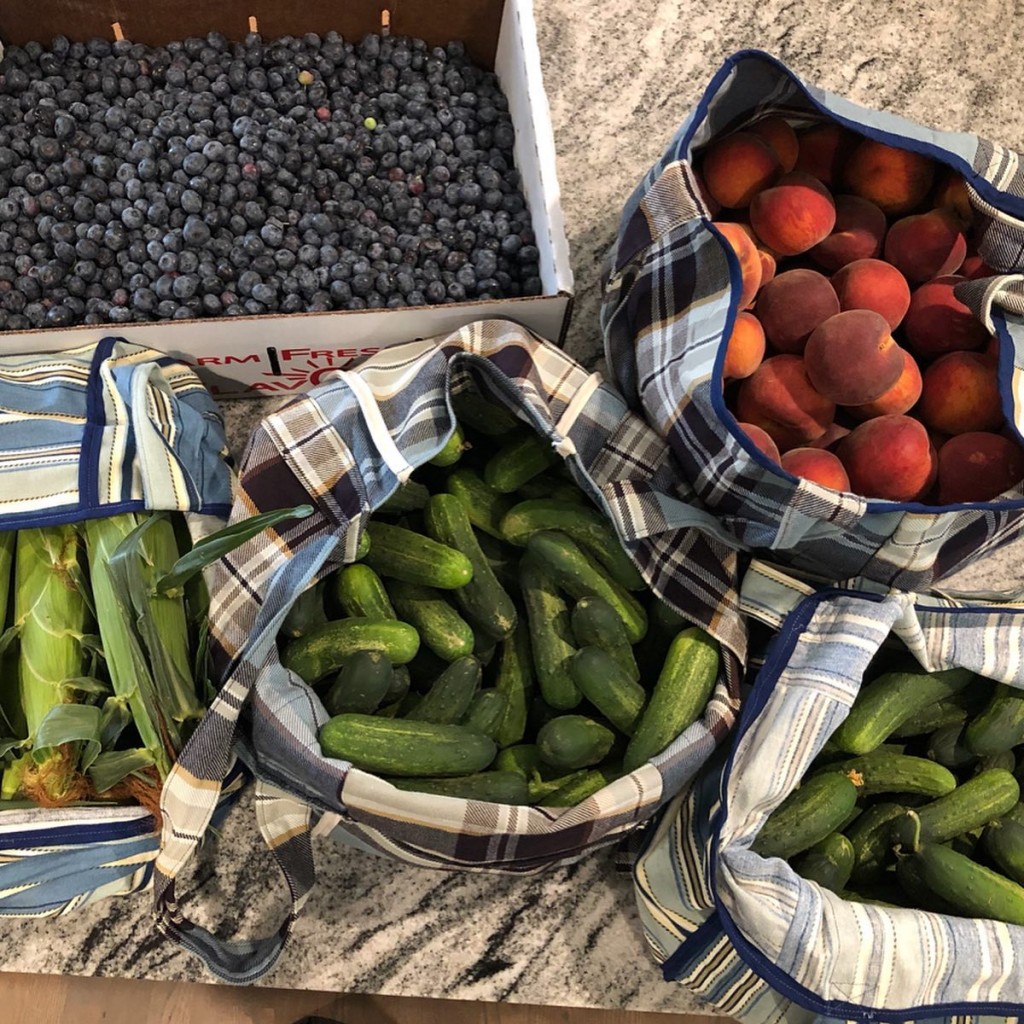
It’s summer and when the weather gets warm I quickly become obsessed with my garden (where I grow herbs, vegetables, and fruit), the farmers market, UPick, local roadside stands, foraging in the woods, and buying in bulk to can and freeze all of this gloriously delicious local produce so I can continue to eat it all year long.
What do you love most about local food? Add your voice to this conversation in the comments below!
Because of this obsession, I’ve created a couple of free workshops to help you incorporate more local food into your life. In these workshops, you’ll find videos, checklists, recipes, and a downloadable ebook so you can access all of the resources offline at your convenience.
Eating more local food is fun, nutritious, and builds resiliency in both ourselves and our community (by creating strong local food systems that can financially support farmers making a decent living).
The average produce in America travels 1,500 miles from the farm to your plate. This is the most commonly referenced statistic (and its explored in great detail in this Slate article), but I’ve seen this number as high as 5,120 miles! All of this transportation causes greenhouse gas (GHG) emissions and contributes to global warming.
In addition to reducing these GHG emissions, eating local has the following benefits to you and your community:
- Fun adventures for you and your family – my kids LOVE picking berries. They LOVE eating fresh raw corn on the cob that was picked only hours earlier by a local farmer and placed on a tiny little farm stand in their front yard. They LOVE picking cherry tomatoes from “their garden” and popping them straight into their mouth, juice squishing out the sides as they laugh out loud. They LOVE foraging in the woods for mushrooms, wild berries, and ramps for hours on end. Robbie and I LOVE experiencing each and every one of these adventures with them.

- Building a stronger community – I try to support local, small businesses whenever possible and local farmers are no exception! Did you know that $68 of every $100 spent at a local independent store is reinvested in the community versus $43 with a larger retailer? Plus, I enjoy knowing my farmer. I enjoy talking with them about their products and their life. I enjoy spending my hard earned money on a person.
- More nutritious food – smaller farmers often grow more interesting and nutritious varietals and the speed to market means there are more vitamins and nutrients in your food.
- Less chemicals – There are lots of different ways farmers choose to use less chemicals and communicate about this when selling their produce (including USDA certified organic, organically grown, and no-spray). One of the things I love most about the farmers market and farm stores is the fact that I can talk directly with the farmer to understand their farming practices and personal beliefs. Many local farmers will invite you to visit their farm and learn all about this… all you have to do is ask!
While you’re busy incorporating more local food into your diet, you’re probably naturally getting the benefits of unprocessed and unpackaged foods too. Both of these have big benefits to you!
Why unprocessed?
Additional resources (like water, energy, and associated fossil fuels for cooking), are required to turn fresh fruits, vegetables, and animal products into processed foods.
In addition to the environmental reasons to eat more unprocessed food, there are lots of potential health benefits. Diets including Clean Eating, Paleo, and Whole30 all encourage more fresh foods and less processed because the processing removes important fiber, vitamins, and nutrients while adding unhealthy ingredients like salt, sugar, and other complicated additives to preserve them or make them tastier. For additional reading, I recommend this article from Vox and this one from Harvard Health Publishing.
Why unpackaged?
Packaging is necessary when food is being transported long distances, but not so much within local food systems. I see packaging as waste that requires additional storage and effort to recycle/dispose. You’ll be surprised at the joy you might find in the extra space and time you have when you have less waste to manage in your life. There’s a whole lesson in the Eat More Local Food course designed to help you quickly and easily build your own waste free shopping kit. This kit is useful for any shopping you do, including your local grocery store.
If you’re interested in help finding more local food, please check out my Eat More Local Food course. It’s designed for you to work at your own pace through a series of lessons. Each lesson will take you less than 15 minutes and is designed to help you quickly and easily get more local food onto your plate, right now!
Why are you excited to eat more local food? Please add your thoughts, recommendations and questions in the comments!
]]>
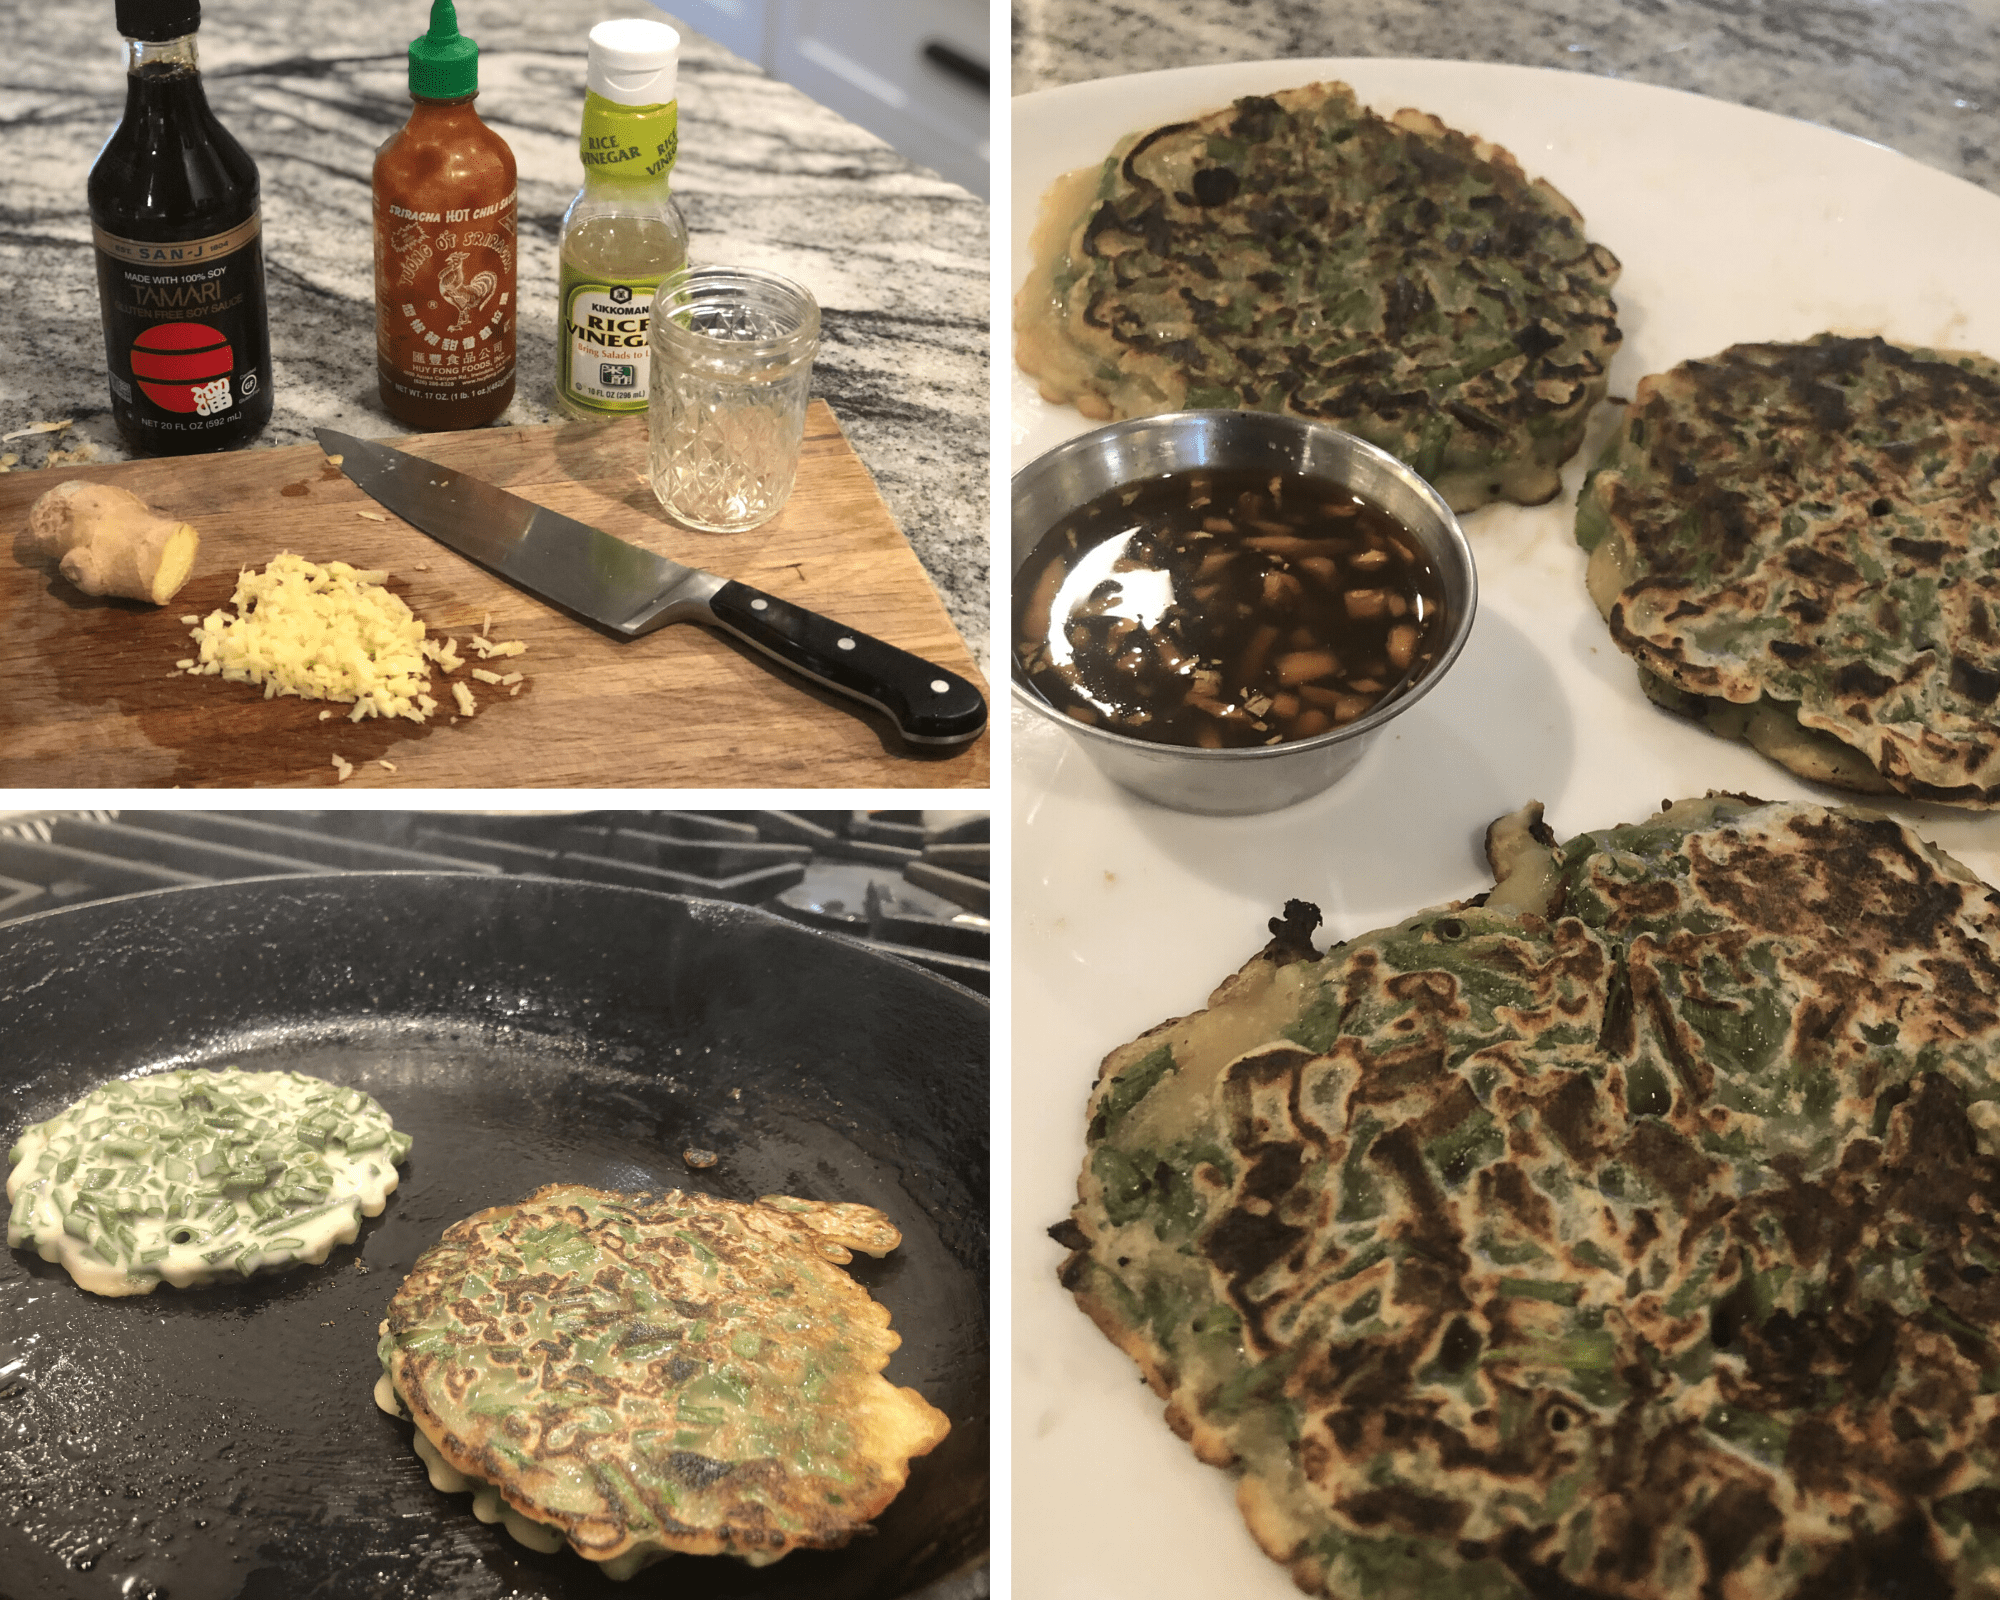
This spring, since I’m unemployed, the newly appointed head chef, and trying to minimize trips to the grocery store (for both financial and COVID reasons), I decided it was time I figured out how to eat chives.
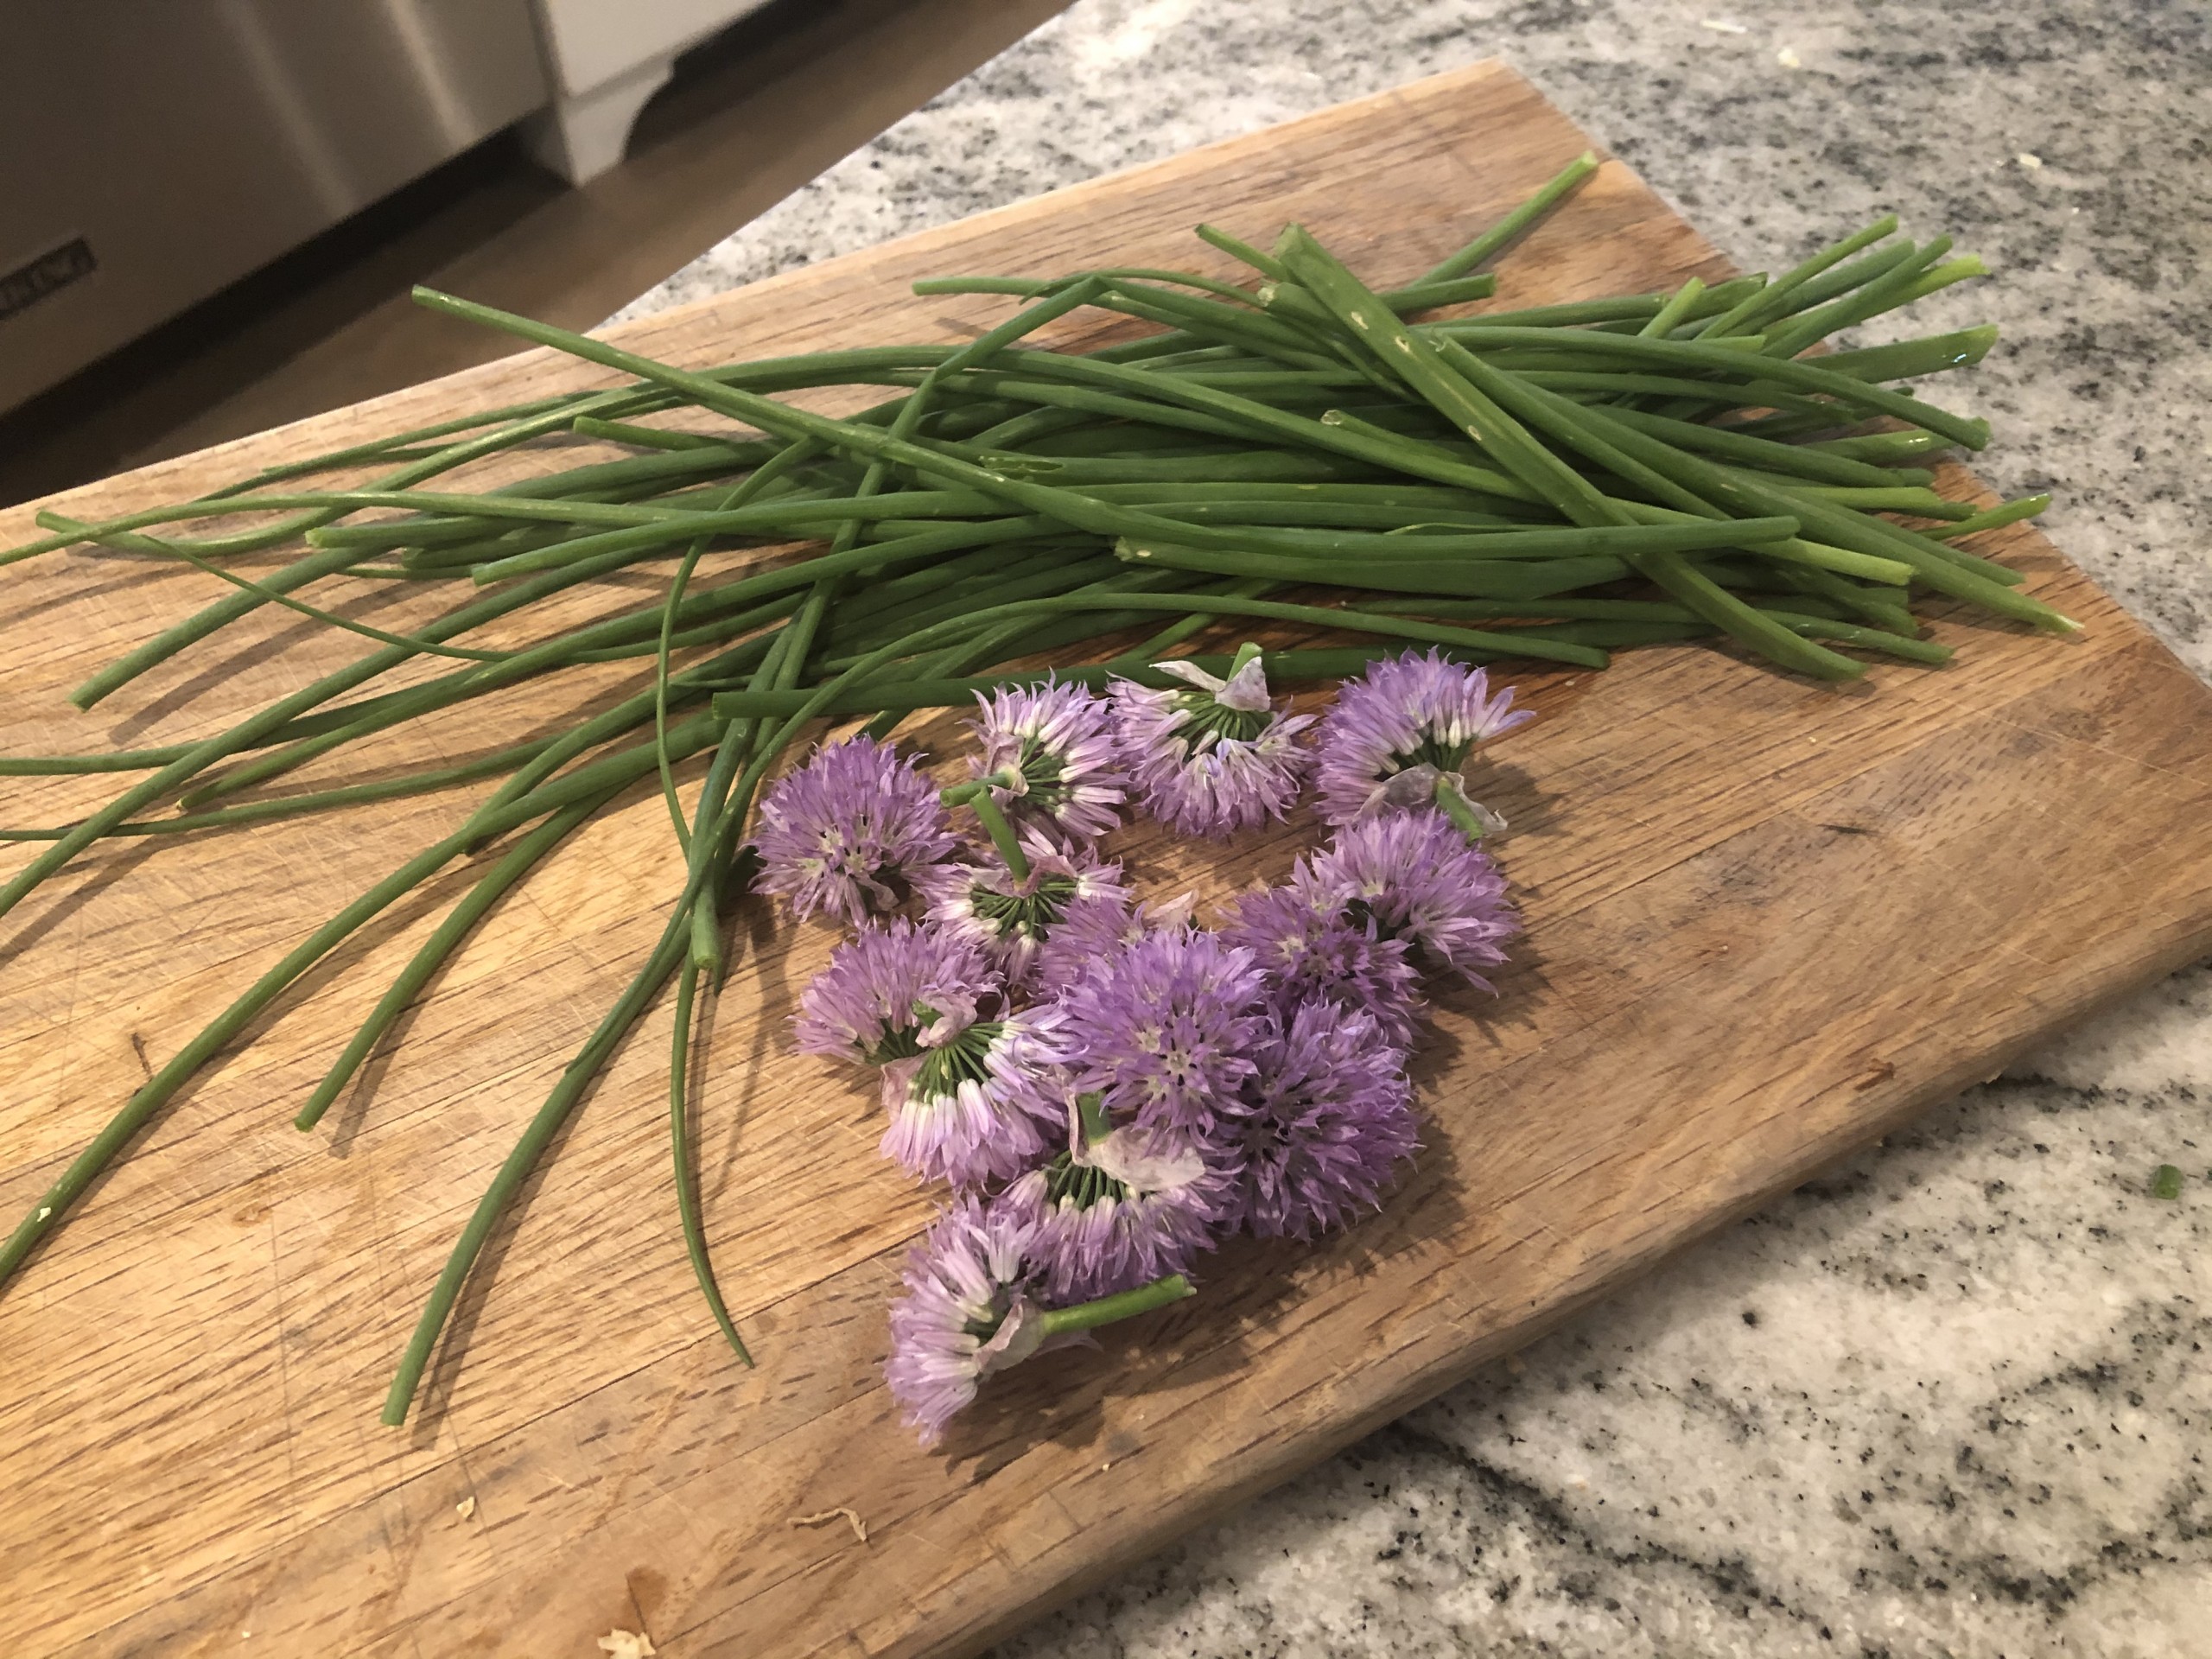
I’m pleased to report that I’ve found two recipes that together use the entire plant.
I’m happily adding the chive blossoms to my salads – no recipe necessary, I simply pull the petals off the stem and sprinkle them in top of my salad. The taste is mild and they look gorgeous!
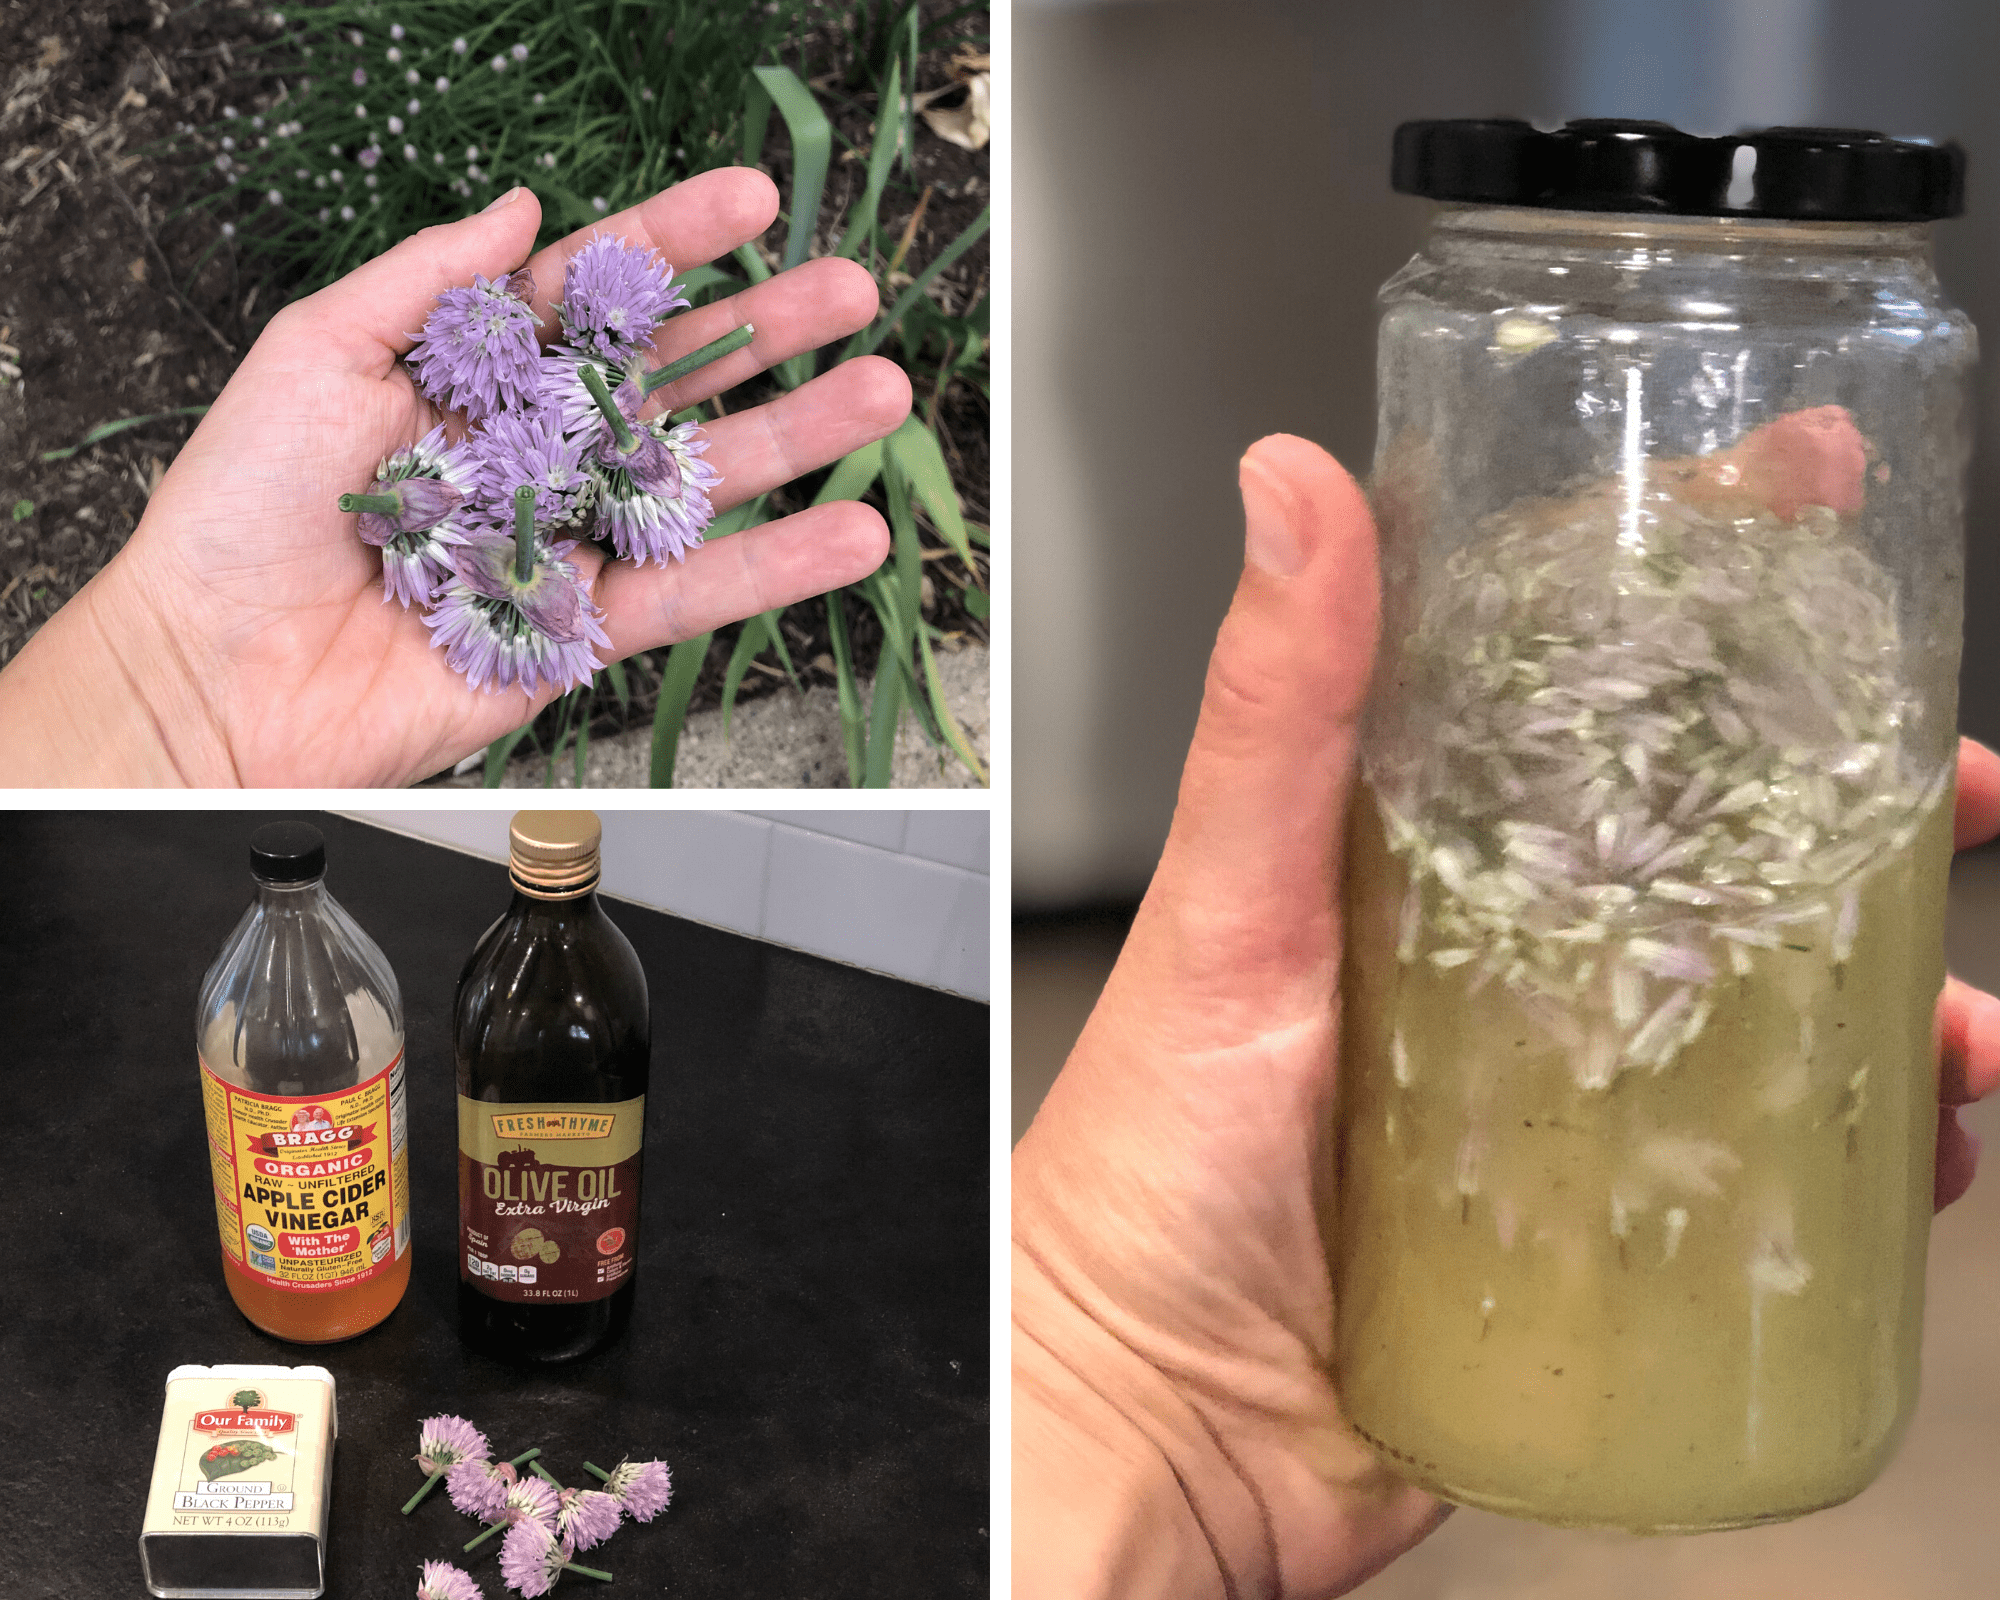
I’ve fallen in LOVE with this chive vinaigrette recipe from my friend, Joyce (you can follow her on Facebook @MosaicStarfish).
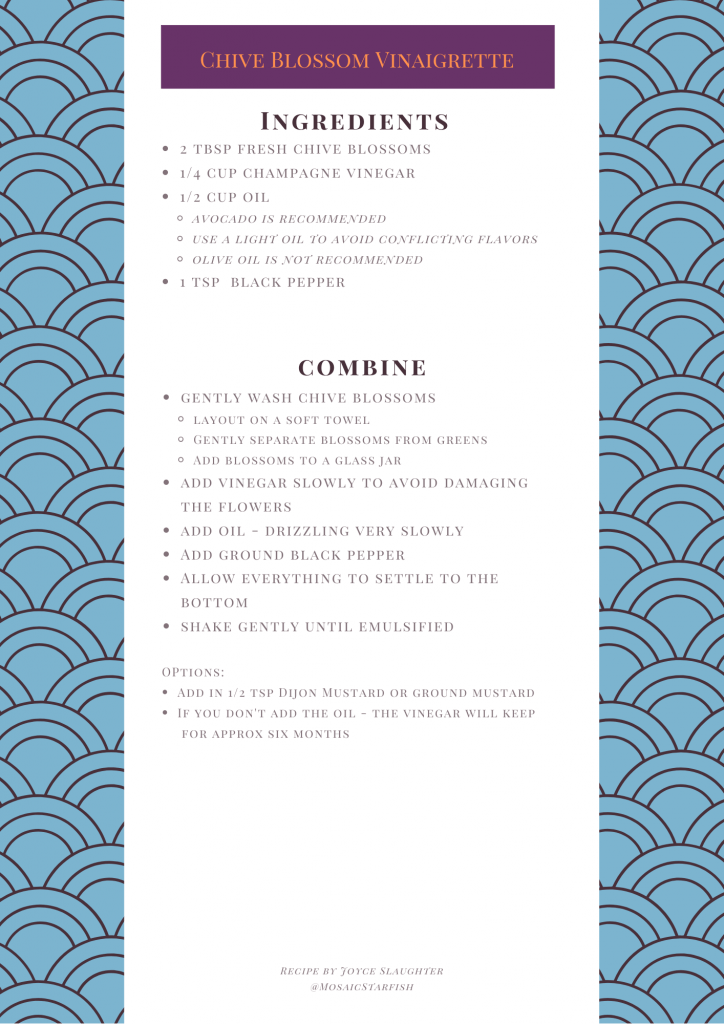
I don’t regularly keep champagne vinegar in my pantry, but I never let a little substitution slow me down, so I made it with apple cider vinegar instead. It was delicious! Maybe it’s even better with champagne vinegar?
Recipe #2 uses the green part of the chive plant and comes from the April 2020 issue of Bon Apetit. You can find the original recipe here. Below is my modified version.
Chive Pancakes Recipe
Ingredients
Sauce
2 cloves garlic, minced
2 Tablespoons soy sauce
2 Tablespoons rice vinegar
1/4 teaspoon Sriracha chili sauce
1 teaspoon honey
Pancakes
Whisk garlic, soy sauce, vinegar, chili sauce, and honey in a small bowl until sugar is dissolved. Set sauce aside.
Whisk flour, cornstarch, and salt in a large bowl. Whisk honey, club soda, soy sauce, and sesame oil in a medium bowl to combine, then pour into dry ingredients and whisk until smooth (be careful not to overmix; it’s okay if there are a few small lumps). Fold in chives.
Heat 1 Tablespoon oil in a medium cast iron skillet over medium-high. Pour ¼ cup batter into skillet. Cook until bottom of pancake is set and golden, about 2 minutes. Flip and cook, pressing down on pancake to create direct contact with pan, until other side is golden, about 1 minute. Continue cooking, turning often to keep scallions from burning, until golden brown and crisp and cooked through, about 5 minutes longer. Transfer pancake to a wire rack. Repeat process with remaining batter, adding more oil as needed, to make a total of 8 pancakes.
Serve with sauce on the side for dipping.
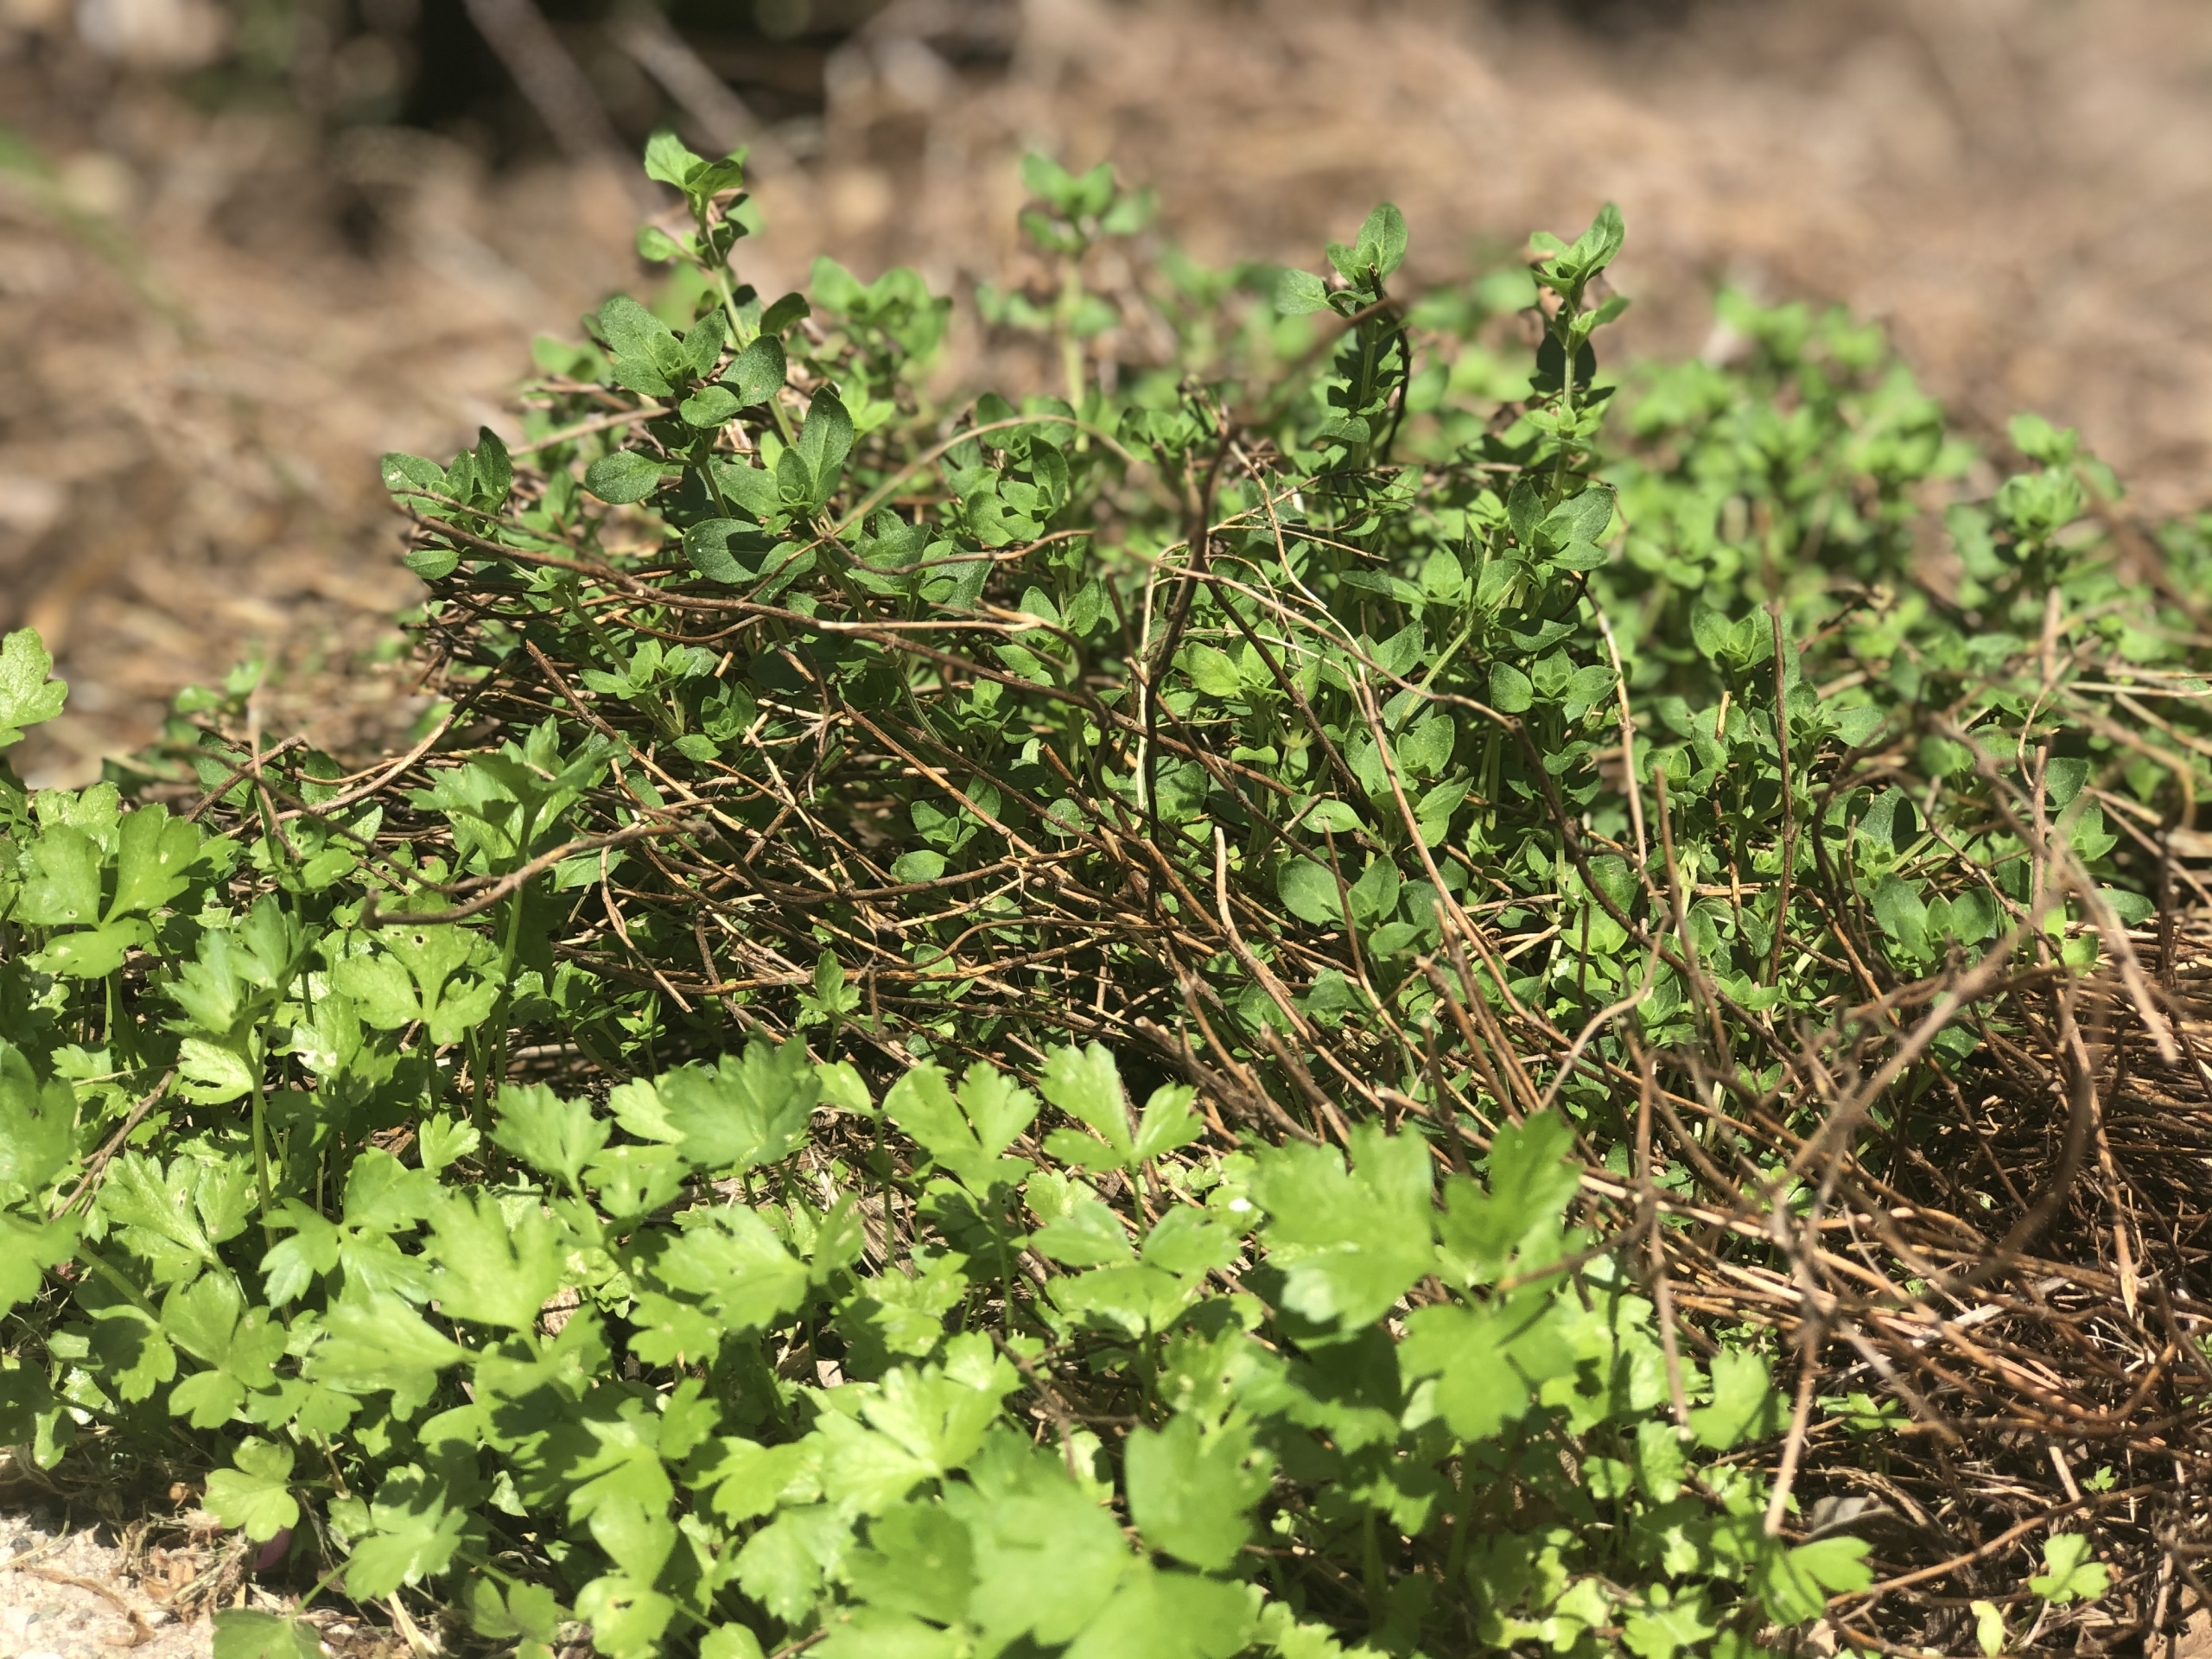
The herbs in this recipe are so easy to grow!
Thyme is a perennial herb and fresh green leaves emerge amidst the dead stalks in my garden each spring.
Parsley is an annual herb, but it readily re-seeds itself if you let it go to seed at the end of the season. I panicked this year, thinking mine hadn’t re-seeded, and bought new parsley plants… only to find these little beauties a few days later it’s a good thing I love to eat parsley because I’ve got loads of it now!
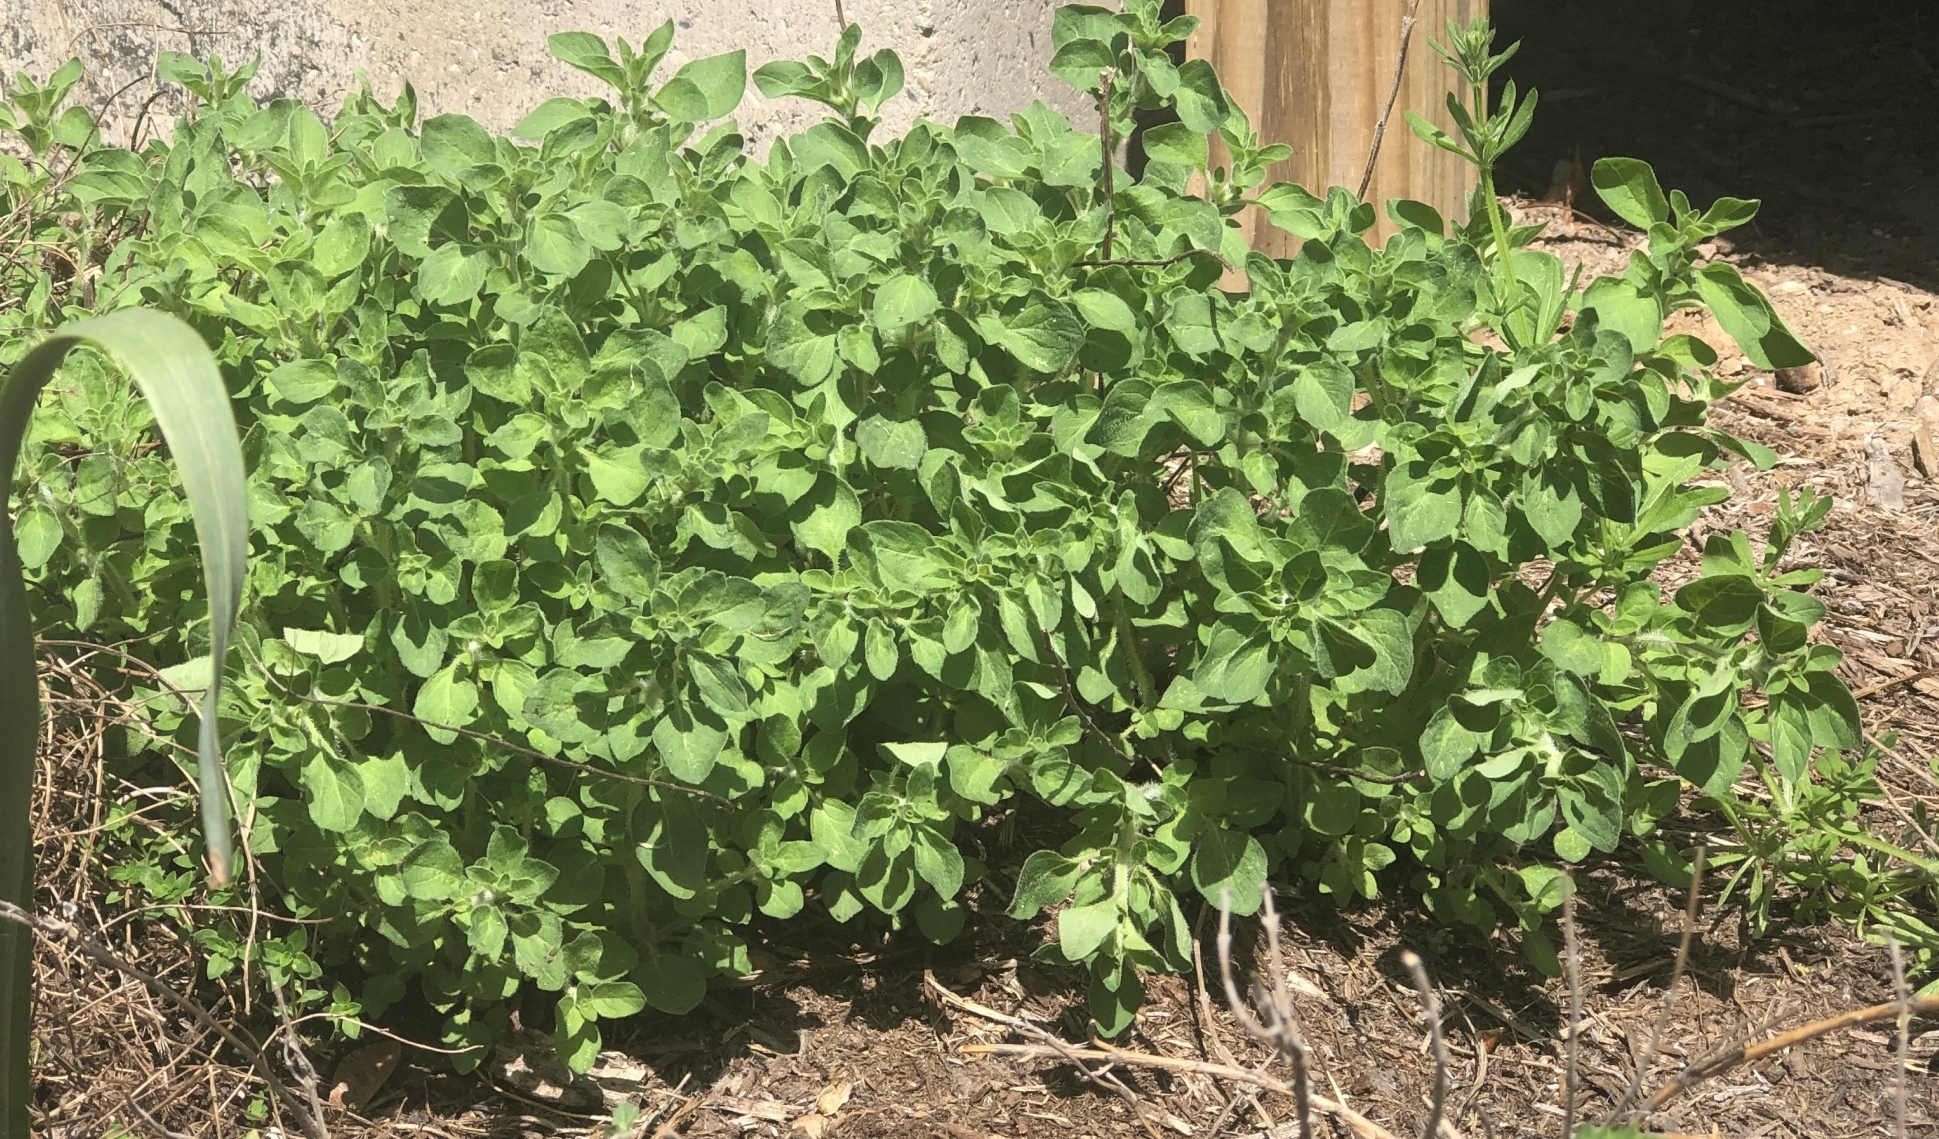
Oregano is another perennial that comes back year after year and grows in my herb garden with reckless abandon and I’m always struggling to find ways to incorporate it into my cooking routine.
Bonus points if you make your own sour cream, mayonnaise, and/or yogurt to reduce your single use plastic consumption even further.
Karoline (you can follow her @motherfoodie on Instagram) shared this recipe with me a few weeks ago and we’re officially hooked!
We have modified it slightly to match the ingredients we regularly have on hand, the fact that we like more herby flavor, and cut the recipe in approximately 1/3 to make about a pint of dressing (though we usually store in it a quart jar as shown in the photo below).
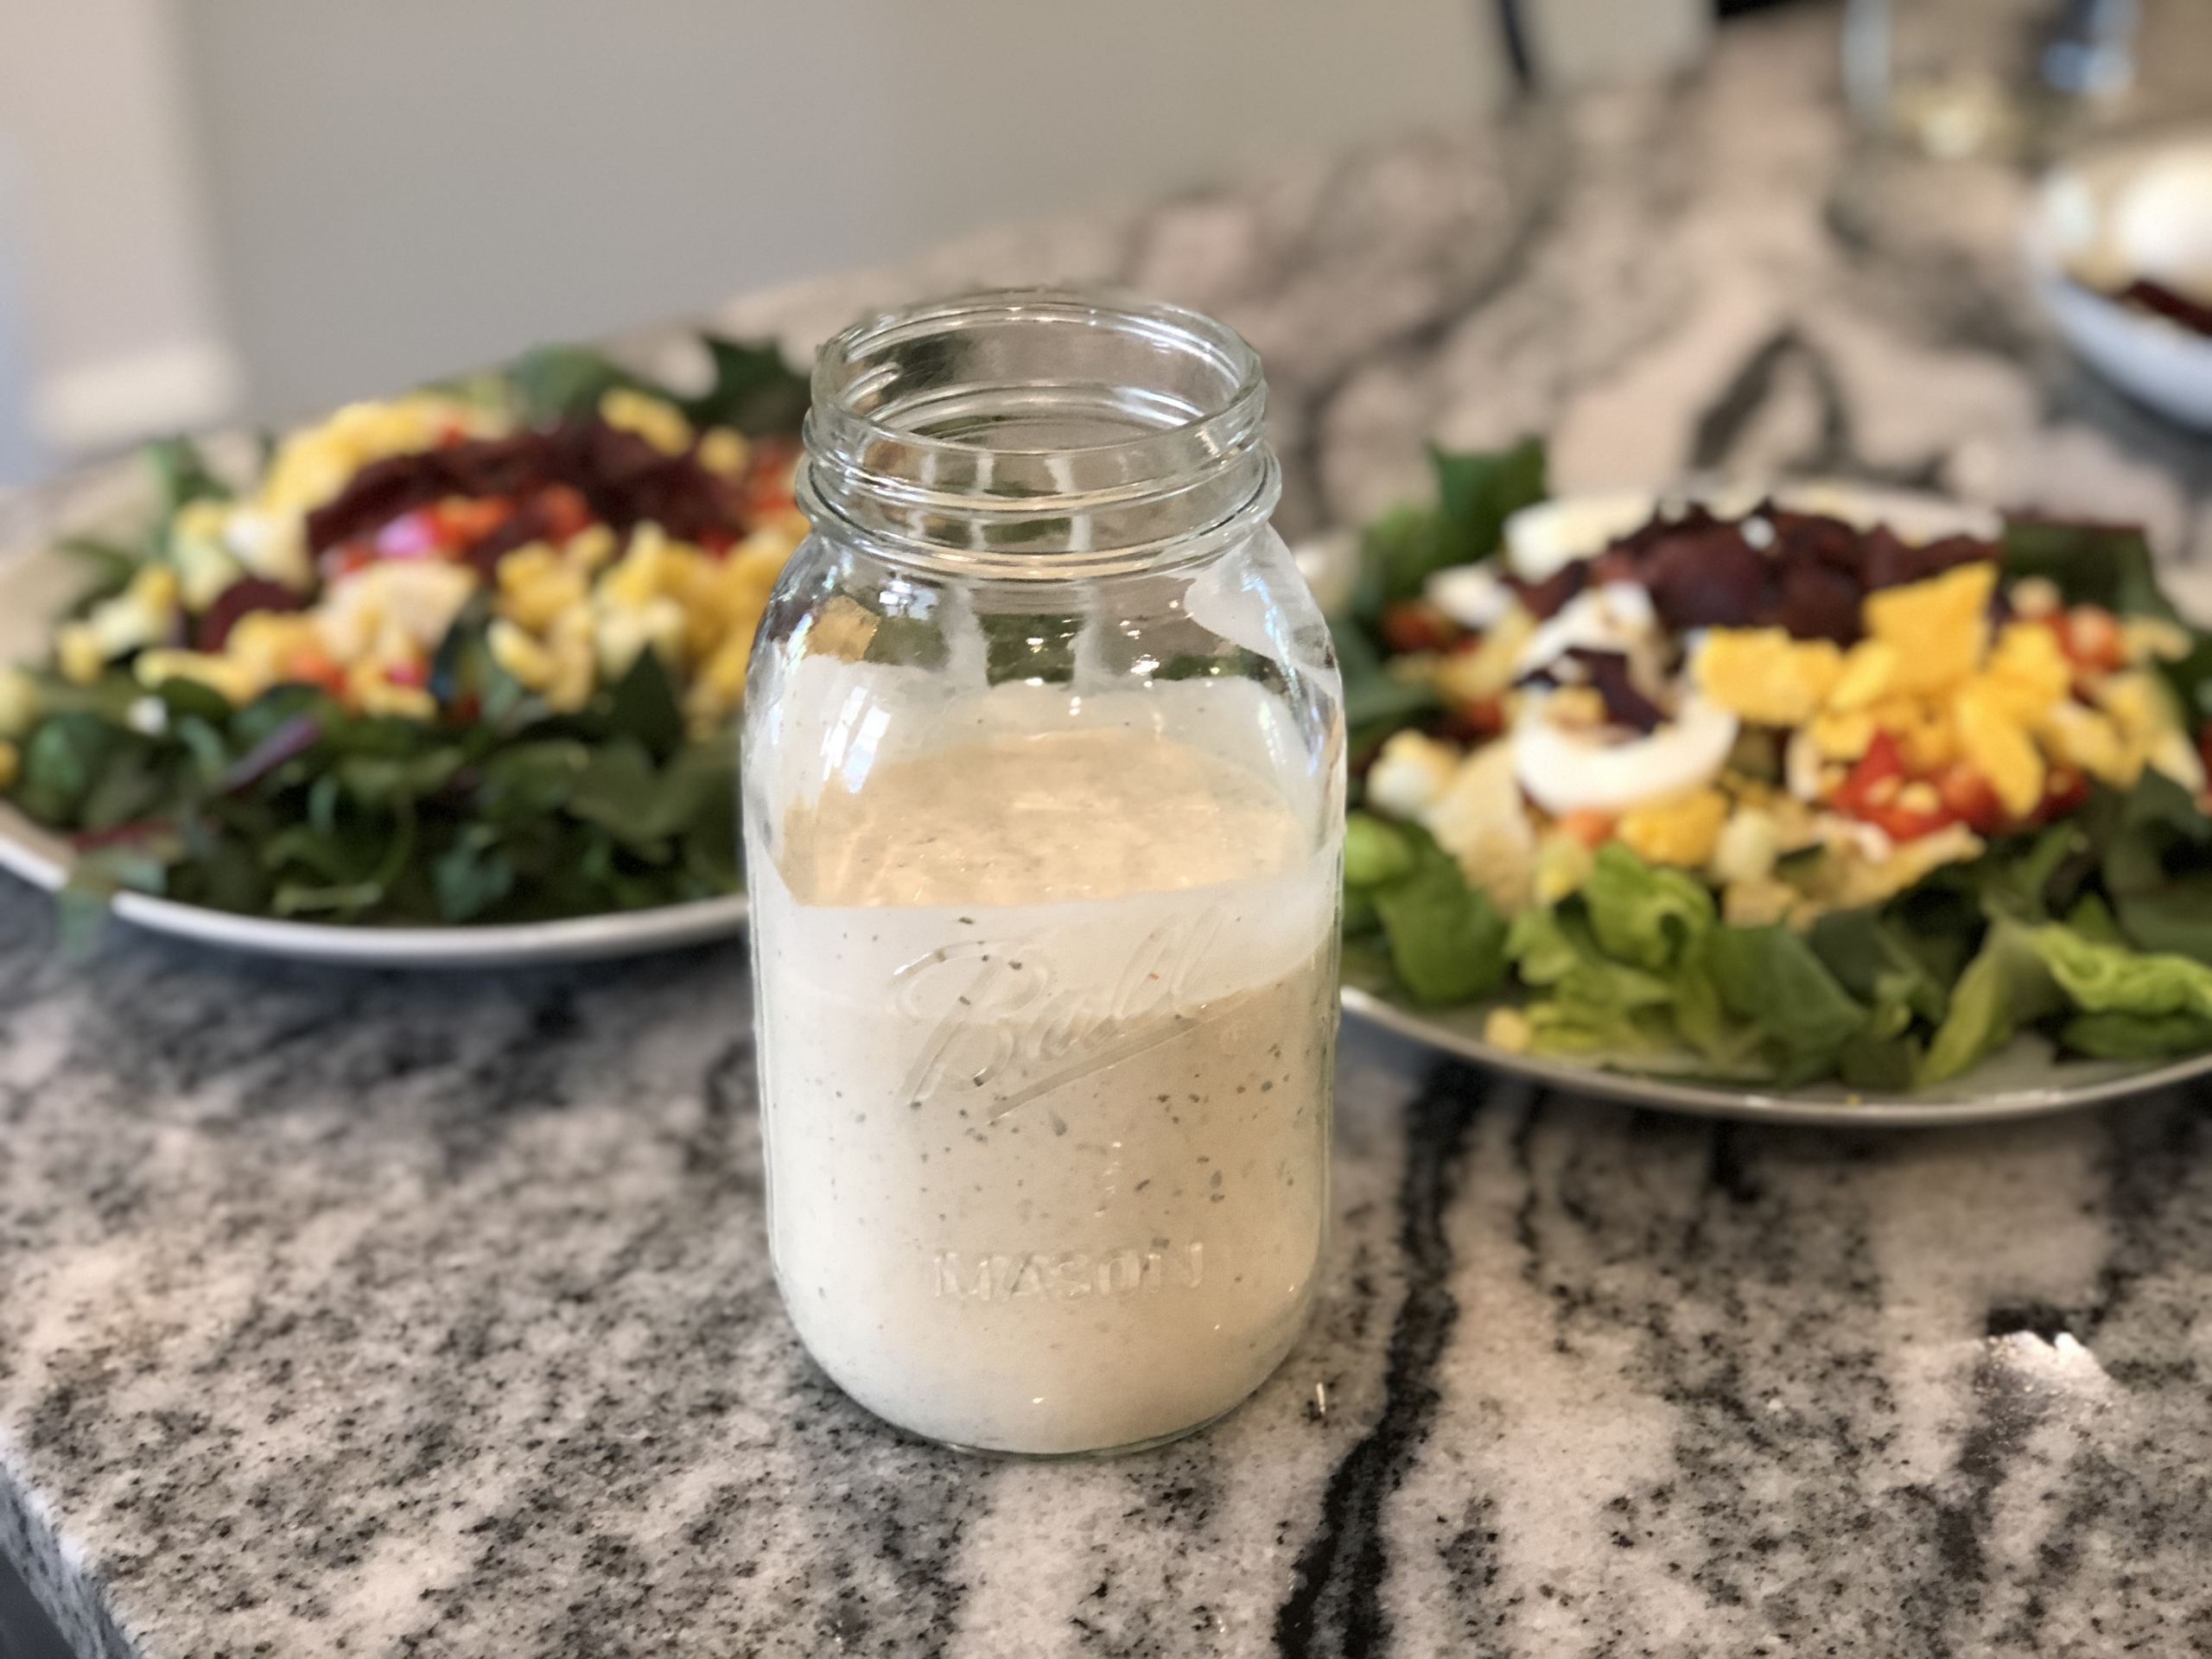
Ingredients
1/4 cup mayonnaise
1/4 cup sour cream
1/4 cup plain yogurt
2 teaspoons apple cider vinegar
1-2 sprigs of parsley (1 tsp if using dried)
5-6 sprigs thyme, leaves removed from the tough stalk (1 tsp if using dried)
5-6 leaves oregano (1/2 tsp if using dried)
1 clove garlic
Pinch of sweet paprika
Salt and pepper, to taste
We throw all of the dry ingredients into our food processor to chop first, then add the liquid ingredients.
If you fall in love with making your own ranch dressing, like we did, all of these herbs are easy to dry in bulk at the end of the season so you can make delicious homemade ranch dressing from your own herb garden all year long.
To dry your own herbs:
1. Gather them into small bunches and hang somewhere with good airflow (so they don’t get moldy while drying) for several days.
2. Once herbs are dry and crunchy, remove the leaves (they will naturally crumble) and store them in an airtight container (spice jars, pint jars, or plastic bags all work well).
If you have a food dehydrator, it will speed up the drying process, but it is definitely not necessary.
]]>