(Note: this post was originally published in February 2022, but I’ve given it a bit of a refresh for this years Super Bowl game and party)
In general, here are my strategies for picking the best (and lowest waste) super bowl (or, erm…. Saturday afternoon or Friday night movie night) snacks:
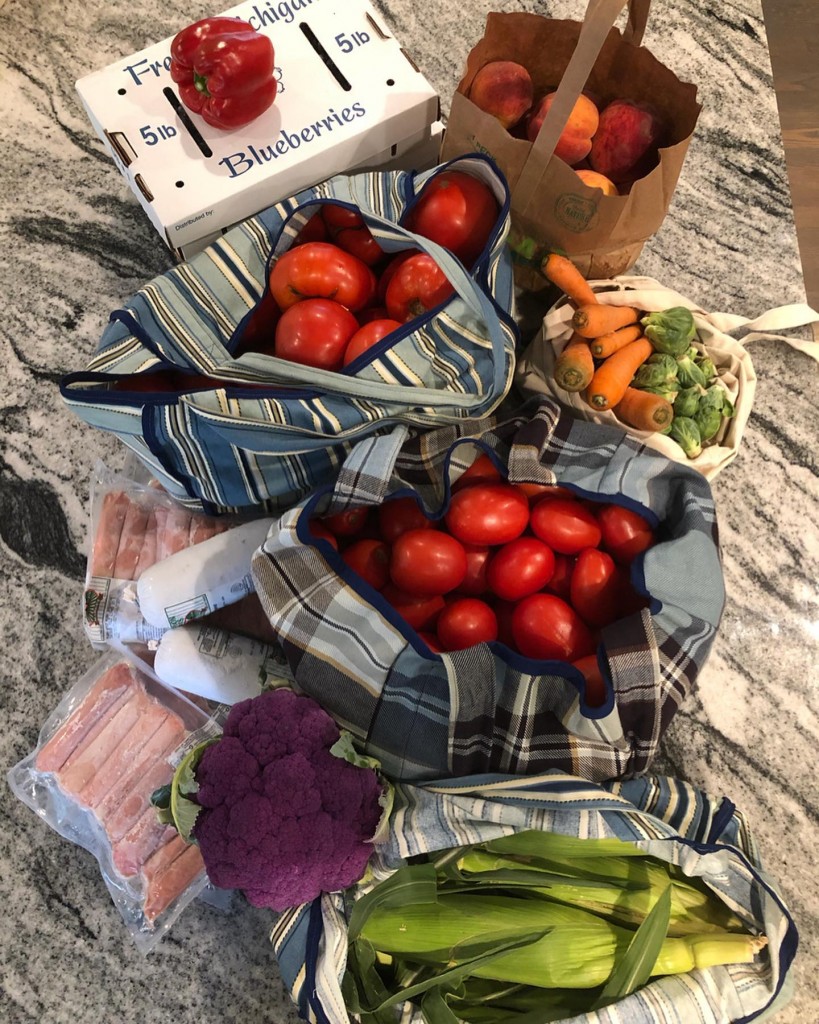
- Choose homemade snacks – homemade is almost always going to be lower waste than the pre-made alternative (in fact, if you can think of a single example that breaks this rule, tell me in the comments and I’ll figure out some sort of prize!). Think about a bag of potatoes vs frozen tater tots, potato skins or French fries and “naked” avocados, garlic and tomatoes vs the plastic tub of remade guacamole
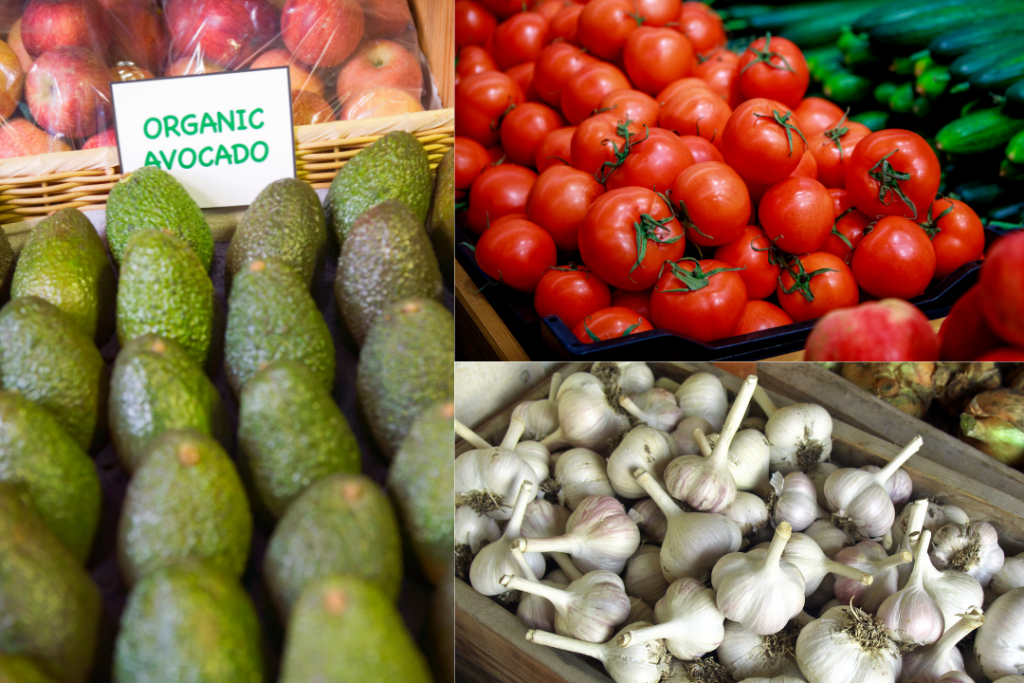
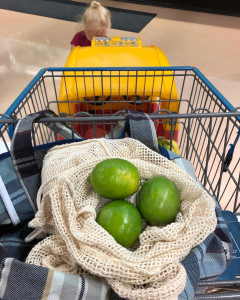
- Look for “naked” ingredients – meaning those you can buy without any packaging. Vegetables and fruits are perfect examples of this. Look for them in bulk bins and DON’T use the plastic bag. You can either bring your own produce bag (see my recommendations here if you want to purchase a few) or just throw them into your cart without a bag… trust me, the cashier will be able to ring them up for you like this just fine!
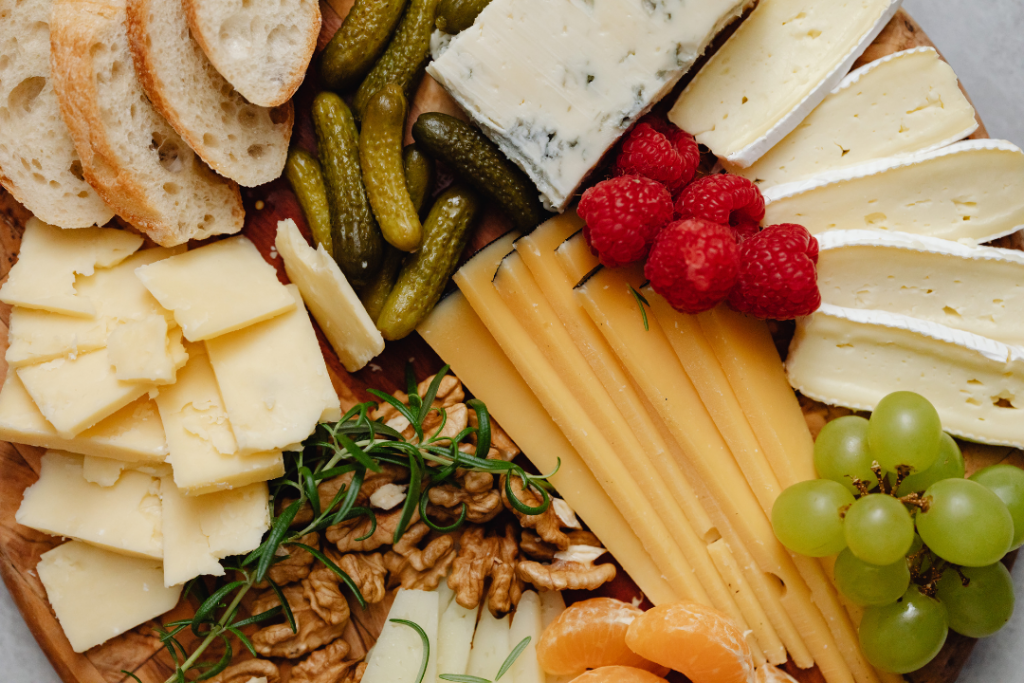
- Buy local – this is a great opportunity to support your favorite bakery, local farmer, cheese shop, or neighborhood restaurant. Lots of times, businesses like this would be happy to cater your party, make a cheese tray (hint, hint, the Rockford Cheese Shop) or create a large quantity order, but you’d better call ahead… the sooner the better!
 Buy in recyclable packaging – remember that metal and glass can be recycled endlessly (meaning over and over and over and over and… you get the idea), paper 5-7 times, and plastic only 2-3 times. I use this order to guide my packaging selection when I have choices.
- Buy in bulk – More food in the same container slightly reduces the packaging:food ratio. This is my last ditch effort to make a more sustainable choice, but this ONLY WORKS if you EAT ALL THE FOOD! Buying more than you eat (to save on packaging) and then throwing away the excess food COMPLETELY defeats the purpose!
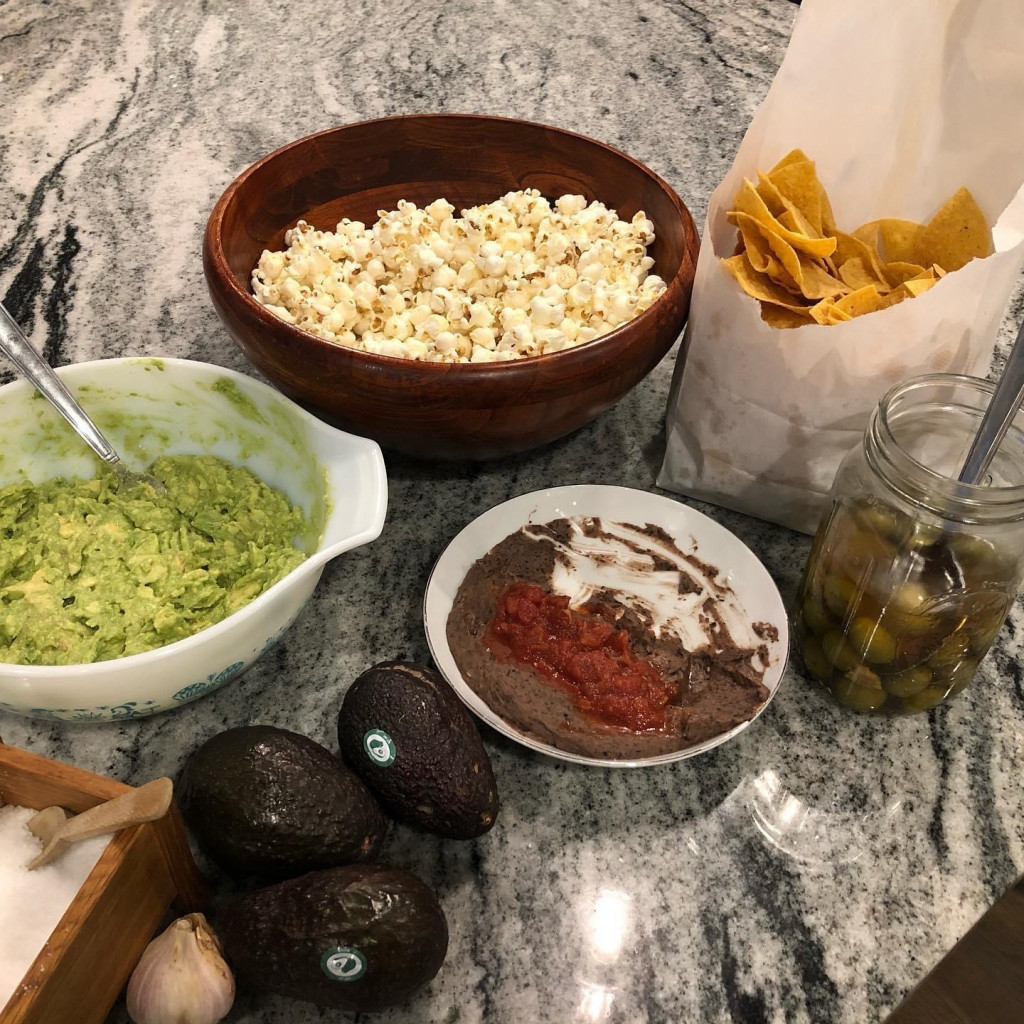
OK, on to our favorite snacks! Here they are, in no particular order…
- Guacamole (my favorite) – we’ve already talked about buying the
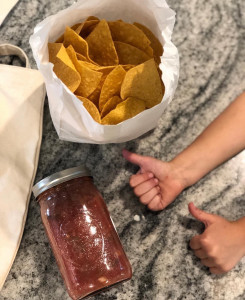
avocados, garlic, and tomatoes “naked” from the grocery store. Bonus points if you’ve grown any of these ingredients yourself. I go the extra mile and walk to the little Mexican restaurant down the road from my house and buy fresh tortilla chips in a paper bag… they’re SO delicious!
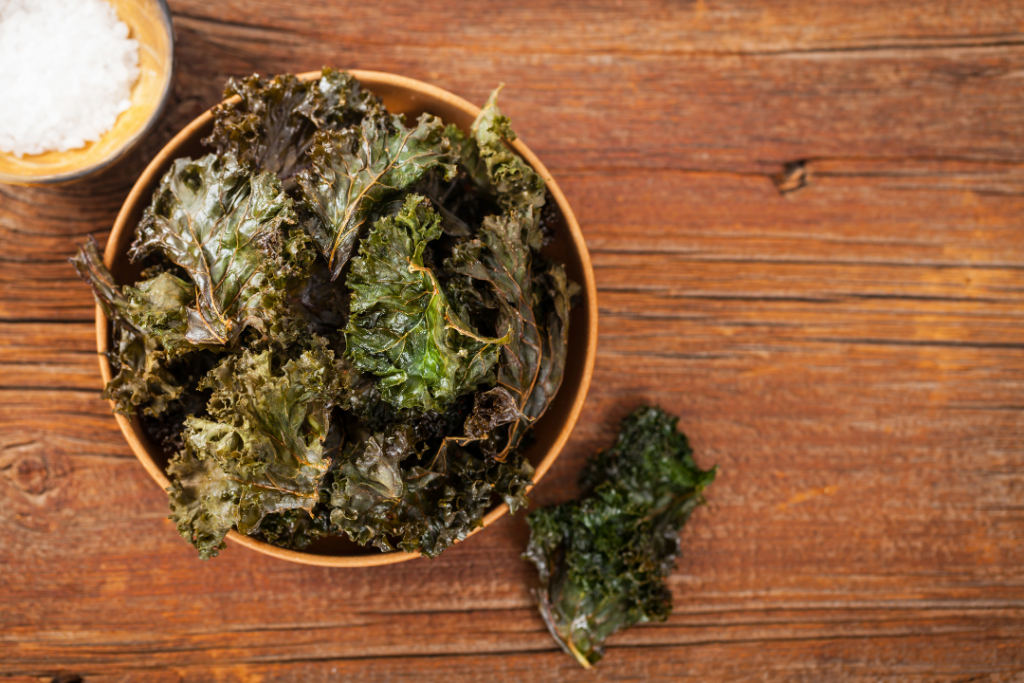
- Kale Chips (my oldest daughter’s favorite) – we’re still getting kale from our winter CSA farm share, so February is the perfect time for kale chips! We use this recipe. Even if you can’t buy it from a local farmer right now, kale is one of those vegetables you can usually find “naked” in the grocery store.
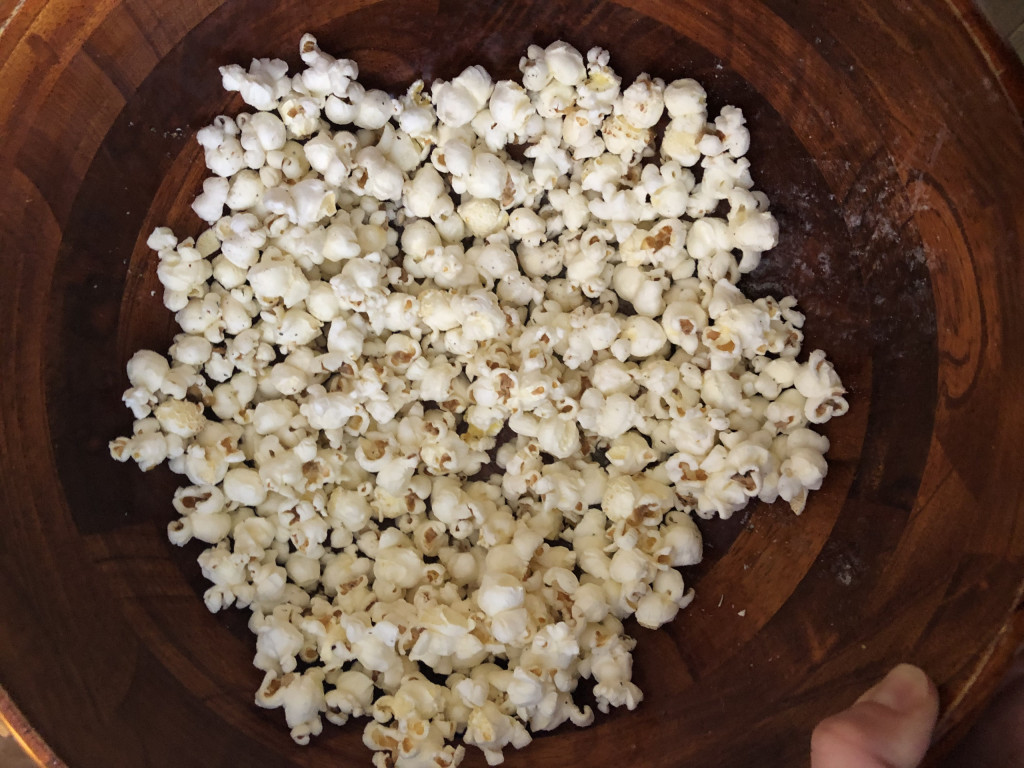
- Popcorn (Robbie’s favorite) – this simple snack is our go to for almost any lazy time around the house. Friday night movie night… is better with popcorn! Thursday night dinner when everyone is too exhausted to cook (or eat a real meal)… popcorn! I make it on the stove and don’t follow a recipe, but this one is pretty close to my routine if you’ve never cooked popcorn before. We buy our popcorn kernels in bulk (25 pound paper bag), but you can usually find kernels in glass jars in the grocery store. I use coconut oil, again purchased in a glass jar, and season with sea salt.
- Bean Dip (my youngest daughter’s favorite) – we nearly always have a batch of cooked black beans in our house (my favorite recipe is from Smitten Kitchen, in her first cookbook The Smitten Kitchen Cookbook, but you can also find the recipe online here) so we can easily whip up a dip with beans + cheddar cheese + sour cream + salsa. I can’t tell you the exact amounts of the ingredients, in part because Robbie always makes this dip and in part because he doesn’t measure, so you’ll have to experiment to find your favorite combo. Again, we eat this with chips from our favorite local restaurant. We buy the beans in bulk (25 pound paper bag) and have a bunch of frozen homemade garden salsa from last summer (but you could buy this in glass), but the cheese and sour cream usually come in plastic.
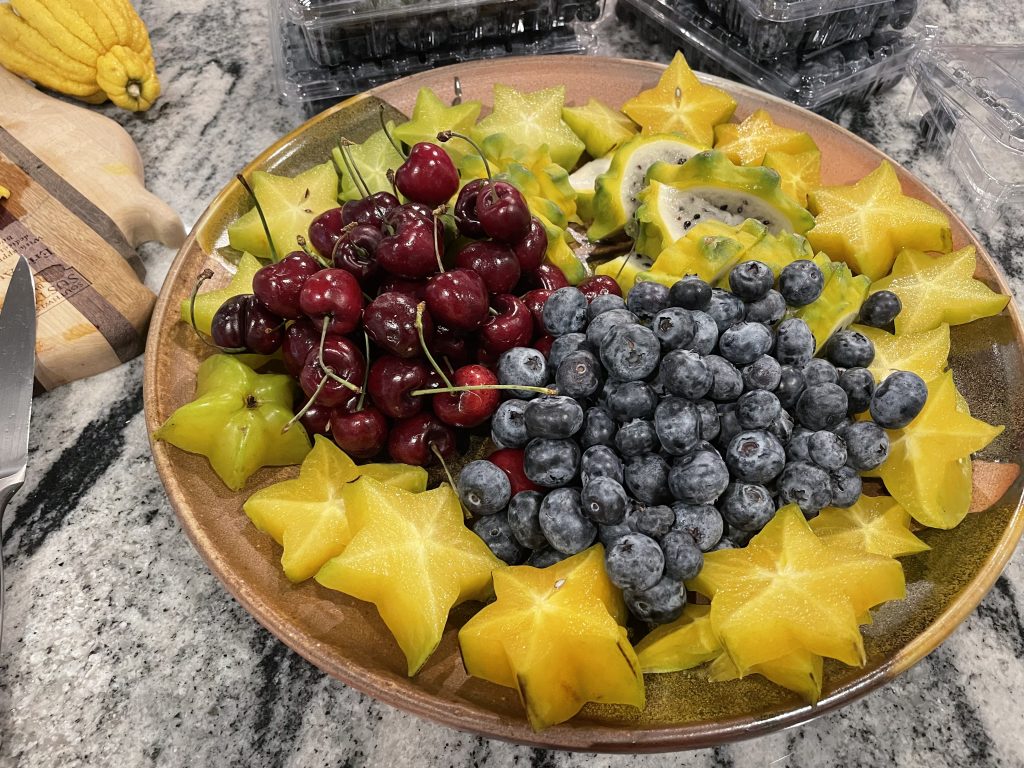
- 2024 UPDATE: “WEIRD FRUIT” – what?!? what is weird fruit, Erin? This has become the most asked for football snack from both my kiddos. They love to go to the grocery store with me and pick out the most weird looking fruits they can find. Dragon fruit, Buddha’s hand, star fruit… that’s pretty much all we can get at our small town grocery store, but they LOVE this tradition, cutting up and arranging these fruits alongside the more traditional favorites (like cherries, blueberries, and strawberries) for a creative (and lower waste) fruit plate.
Please add your favorite waste-free, low waste, local or sustainable snack suggestions in the comments!!
]]>The blog went live last week, but since every day is Earth Day around here, I’m sharing it with you now. Read on for some great tips from sustainability bloggers around the web, including yours truly.
P.S. most of these tips are relevant for everyone, even if you don’t live in an apartment, so don’t let the title fool you into skipping this great read.
Switching to greener alternatives is a great way to live a sustainable life, especially with Earth Day approaching. There are many ways to be environmentally cautious while living in an apartment.
Most apartment complexes offer compost and recycling bins and there are many alternatives to things you use every day. To help you get started, we reached out to green experts to share their tips on how to live a sustainable lifestyle in an apartment. So whether you’re trying to live a more environmentally friendly life in your apartment in Boulder, CO, or your studio in New York, NY, read on to see what they had to say.
1) Ways to recycle when your apartment doesn’t offer the service
About 20 billion plastic water bottles wind up in landfills each year or are incinerated. Recycling those plastic bottles and aluminum cans helps the environment, and in some states like California, put some cashback in your pocket. Some apartment complexes don’t have separate recycling available for the residents so recyclable items end up in the trash and ultimately, in the landfills. Here are a few ways to recycle if your apartment complex doesn’t offer to recycle.
- Contact companies to pick up your cans and bottles from your door.
- Walk your recyclables down separately if your building has a designated recycling room.
- Ask friends who have access to curbside recycling if you could bring the recycling with them.
- Bring your recycling to a drop point or recycling center.
- Ask your landlord to get curbside recycling or set up a recycling area and get signatures from other people in your building.
- Bring it to work and use the office recycling pick up.

2) Be conscientious of where you live
Transportation has a big environmental impact, so choosing where to live can be a really important moment in your sustainability journey; it’s your opportunity to design a life where you can walk and bike more and drive less. Here’s a fun exercise I like to use when shopping for a new house or apartment:
- Grab a map and draw dots on the map to mark the places you need to visit often (for example, your work, the kids’ schools, your favorite grocery stores, restaurants, coffee shops, the public library – whatever is most important to you). Hopefully, these are clustered in one area of the map. If not, start with the most important cluster and repeat this exercise multiple times.
- Use a string and a pencil to draw two circles, with your cluster of dots at the center; one that represents 1 mile and another that represents 3 miles; you should, of course, choose distances that feel right to you and your walking/biking lifestyle. If public transportation is an option, draw a third circle to represent your reasonable commute on public transportation.
- These circles represent the best areas for you to live. If you had to do this for multiple clusters, look for overlapping circles that will allow you to live in one place, yet walk, bike, or take public transportation to your most important/frequent destinations.
3) Planning is a crucial part of a sustainable lifestyle
There are so many fantastic tips for reducing food waste from adding kitchen rolls to your bags of salad leaves extending their freshness by up to 4 days to keeping your spring onions in a glass of water and placing them near your kitchen window – this allows you to clip them as you need them and have them grow back in between. But the most important thing is ‘Planning’, plan your meals for the week in advance of going shopping. Then check what food you currently have and after that only buy what you need for the planned meals. Lastly, the freezer is your friend. If you have too much food, freeze it instead of letting it go to waste. – Foodie Save
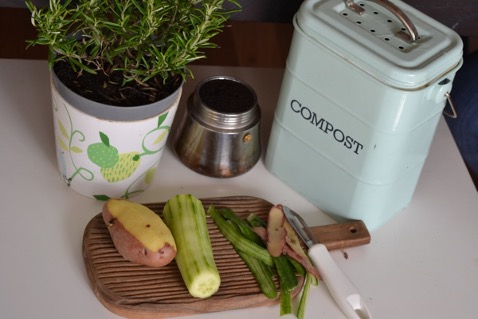
4) Composting companies can aid you on your journey
Managing your own composting system in an apartment can be difficult. Some companies provide a 5-gallon bucket with an easy-to-remove, but tight sealing lid for you to store your food scraps, and can even empty it for you. – Circle Compost
5) Simple switches can make a big difference
We believe you don’t have to switch up your entire life to live more sustainably in an apartment. Simple swaps like replacing your shower head for a water-saving version, switching out your soap products for low/zero waste alternatives, or starting a worm composting bin on your patio for your food waste can all make apartment living a little greener. By being informed consumers and utilizing our purchasing power in sustainable ways, we can co-create a healthier, more abundant planet. – Heal the Planet
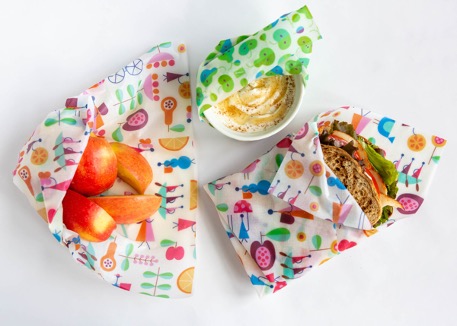
6) Use reusable food wraps to preserve leftovers
Use reusable food wraps for long-lasting produce. Learn veggie revival tips, recipes that preserve or celebrate seasonal favorites, and how to cultivate a scrappy kitchen ecosystem that alchemizes trash into treasure – like turning a freezer full of peels into stock, excess herbs into pesto, leftover berries, and kale into smoothie cubes, the last of this-n-that into salad dressing. Whatever your imagination dreams up to rise to the challenge of no leaf left behind. – Z Wraps
7) Be mindful of your surroundings and ‘unplug’
We believe living a more sustainable life means being more aware of the entire energy ecosystem around you, and making little decisions that can have a big impact. This can be as simple as ‘unplugging’ literally and figuratively. For example, designate a special time of each day (or week) and commit to shutting off smartphones, computers, and the TV to enjoy some low-tech time out. Shutting down over time adds up. Chargers, even without being attached to a phone or device, still draw between 0.1 and 0.5 watts per hour. – Pink Energy
8) Keep your compost and plants bug-free
We understand that keeping things sustainable and hassle-free isn’t always easy, so take advantage of their simple sustainable solutions to common problems: Pest products can tackle fruit flies for those kitchen composters out there. – Aunt Fannie’s
9) Switch to eco-friendly kitchen accessories
Each of us has a moral responsibility to be environmentally friendly by reducing waste and conserving our planet’s precious resources. One simple solution is to get rid of the single-use plastic products and switch to compostable products in your kitchen. You can start by using eco-friendly dinnerware such as plant-based cups, plates, straws, and cutlery composting help break down organic materials and turn them into rich soil, without harming the environment with chemicals or filling up the landfills. – Greenchain Compostables
10) See if your building provides EV charging equipment
Your apartment is a reflection of you, like your commitment to a sustainable lifestyle and your decision to drive an electric vehicle. Make a statement by living where that commitment is shared by your fellow residents and building owners too. Look for EV charging equipment and talk to the building management about valuable utility incentives and potential carbon credits for adding charging. – Tracy K. Price, CEO of Qmerit.
11) Reduce your plastic waste with biodegradable bags
We feel one of the best ways to live a sustainable apartment life is to reduce your plastic waste by looking for re-usable plastic products or non-plastic products, recycle what can’t be reused, look for products with the least amount of wasteful packaging, and supporting companies with a sustainable environmental mission. And when you do throw away garbage use biodegradable bags. – BagUps
12) Be an eco-conscious consumer
Limited space in apartment living can be a real struggle. For anyone pursuing a sustainable lifestyle, my advice is to adopt the mindset of an eco-conscious consumer. This mindset begins by minimizing your possessions. It’s easier to get organized when you get back to the basics, plus life gets simpler. You would be amazed how uncluttered the mind can become just by decluttering the physical space surrounding you. Next, when shopping and acquiring new possessions, commit to donating one or two items for every new thing you bring into your space. This mindset will help you choose quality over quantity and think before buying. – ECO CRATES of America
13) Support renewable energy
Whether you rent or own an apartment, anyone can easily reduce their carbon footprint by supporting renewable energy from sources that replenish themselves naturally — like wind, water, sun, or forests. There can be affordable ways to reduce your environmental impact. In states like Maine, you are able to support renewable energy by matching your electricity use with no-emission 100% Maine-made clean energy. – Maine Green Power
Which of these is most eye-opening for you? Is one of your favorite tips missing from the list? Share your feedback in the comments!
]]>
I hear you… “ok, Erin, but after I’ve roasted and frozen them, what do I DO with all these beautiful red peppers?”
Let me introduce you to my FAVORITE fall soup: Roasted Red Pepper Curry Soup. It’s easy to make, gluten free, dairy free, and EVERYONE in my family is happy to eat this meal! This recipe works well with roasted red peppers from a jar if you’re short on time or you could follow steps 1 and 2 below with just 3 or 4 peppers if you want to make a batch of soup today (and skip the freezing all the peppers step).
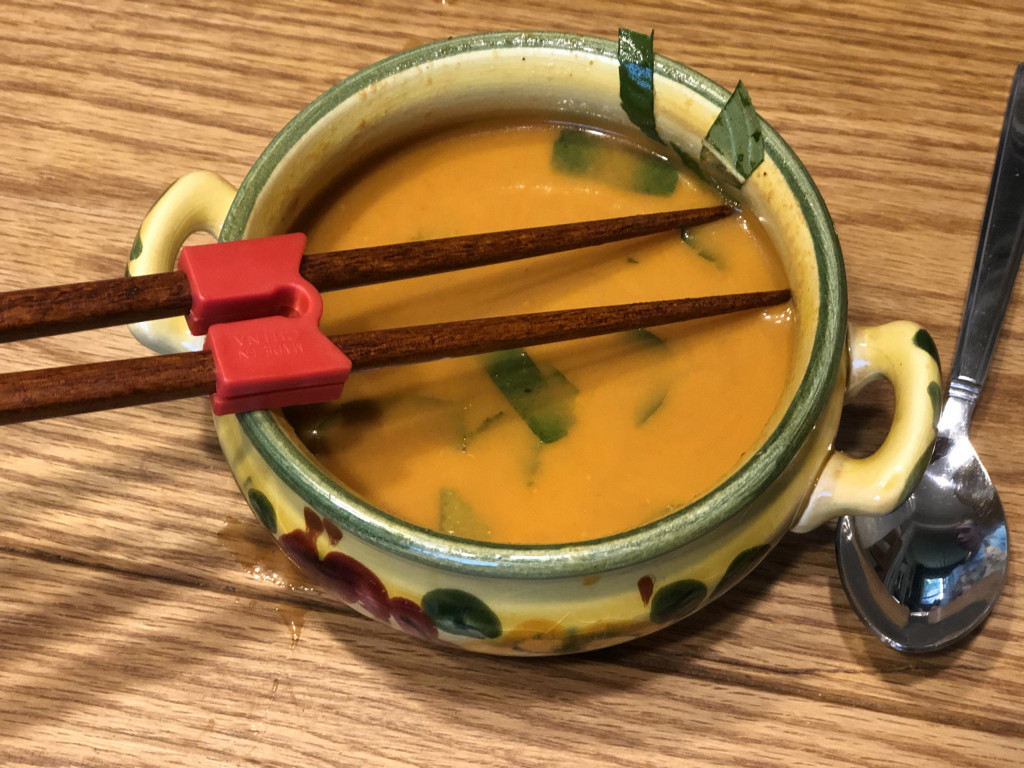
One of the things I love about this recipe, is the ability to customize your bowl with your favorite toppings. In my house, this type of approach is key to finding a dinner everyone loves. Robbie and I love adding thai basil from the garden, a swirl of sriracha, and chopped up pistachios for a little spicy crunch. The kids love fried tofu and rice noodles. The combinations and possibilities feel endless! If you experiment with toppings in your home and find a combo you love, please come back and share it in the comments!

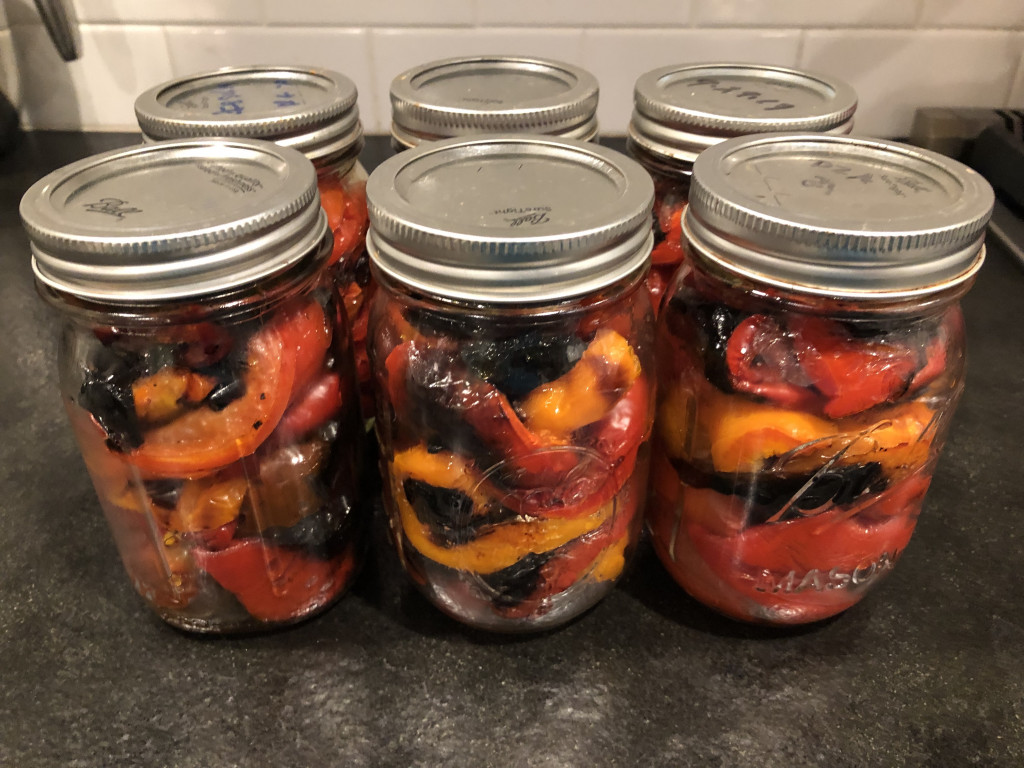
Home-roasted Red Peppers
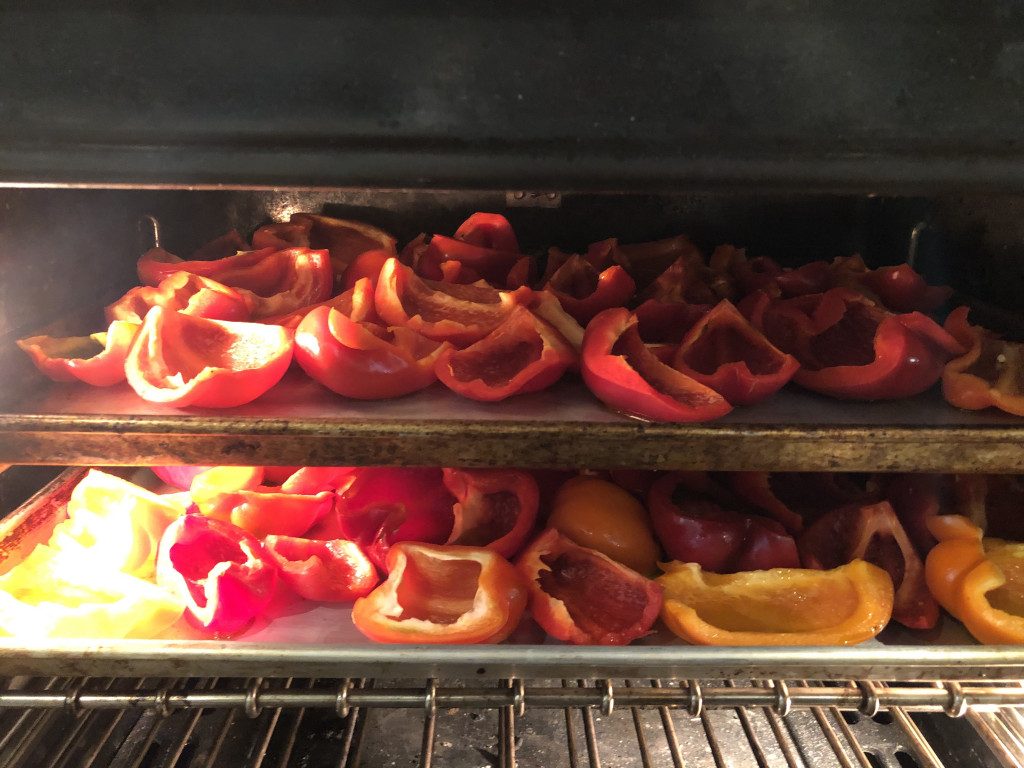
My farmers market and nearby farm stands are overflowing with beautiful red, and even yellow and orange, peppers! Home-roasted red peppers might be the easiest and least time consuming way for you to dip your toe into the home food preservation waters. It’s a simple as 1, 2, 3!
- Wash and cut peppers into quarters, removing the stem, seeds, and inner white ribs
- Place on a baking sheet, drizzle with olive oil and roast at 450F until the skin starts to bubble and slightly blacken.
- Place into pint jars (each one will hold something like 3-5 peppers) and pop them into the freezer
Roasted Red Pepper Curry Soup Recipe
(makes lunch/dinner for four to six people, leftovers are delicious too)
I have no idea where this recipe came from. I wish I could tell you the source, but I wrote it in my “favorite recipes book” and have been making it from there for the past couple of years. Apologies to the original author.
Download a printable PDF of this recipe here
Ingredients
- 2 teaspoons olive oil
- 2 cloves garlic, chopped roughly
- 1 inch ginger root, chopped roughly
- 3-4 red peppers, roasted in the oven as described above
- 1 quart (4 cups) vegetable or chicken stock
- 1 can coconut milk
- 3-4 Tablespoons red curry paste
- 2 Tablespoons soy sauce
- 2 Tablespoons lemon juice (lime would work just fine too)
Optional ingredients for topping (I recommend picking 3 or 4 of these)
- 1/4 cup cilantro, basil, or parsley, chopped
- 1 package of tofu, tossed in corn starch and pan fried in oil
- 1/2 package brown rice noodles (follow instructions on the package to cook)
- 1/2 cup peanuts, pistachios, or other favorite nuts, chopped
- Sriracha or other hot sauce
Instructions
- In a medium pot, saute garlic, ginger, and red peppers in olive oil on med-high heat until soft
- Add stock, coconut milk, curry paste, soy, and lemon juice. Bring to a boil
- Reduce heat to medium and cook for 5 minutes (longer is fine)
- Blend (I’ve used both an immersion blender and a countertop blender. Both work fine here)
- Optional: if you like a smoother soup, I recommend pouring it through a mesh sieve or strainer. If you don’t mind a chunky soup (or don’t have a sieve/strainer), you can skip this step.
- Salt and pepper to taste.
- Add your favorite toppings/stir ins from the options listed above or GET CREATIVE with what you have/love
- ENJOY!
Please share your comments, questions, and favorite toppings for this soup in the questions below! If you want to share gorgeous photos of your dinner, please tag me on Instagram and Facebook @carbonfreefamily. I LOVE seeing your beautiful photos!
]]>
There’s one thing I know for certain: we can’t consume our way to a life that doesn’t destroy the planet, so you won’t find a quick list of things to buy in any of my blog posts. That means my top five is a list of simple ways to change your mindset and habits that will help you tread lightly on the planet. So… after a couple weeks of thoughtful reflection, here’s my list of five great sustainability {mindset} swaps (in order of importance, according to me, which means they’re based on science and anecdotal lessons learned from friends and clients):

1. Drive less, walk or bike more. Take a good hard look at your car before you drive somewhere. Can you walk your kids to school instead of driving them? Can you walk or bike to the grocery store? If your gut reflex is no, I encourage you to think a little more creatively… a backpack is great for carrying groceries home on foot and a bike trailer is your friend when you’re biking. These activities will reduce your impact on the earth (mostly carbon emissions, which are causing global warming) AND make you healthier! Sure, it might take you a little longer than driving, but can you eliminate time at the gym because you’re so much more active during the day? This is an important swap in your daily life and especially important when you’re making big life decisions, like taking a new job or buying a new house. In those big moments, consider driving vs walking/biking as an important factor in your decision.
2. Keep looking at your car and calculate your miles per gallon (mpg) efficiency, if you don’t already know it. This tells you how efficient your engine is at driving you where you need to go per gallon of gas it burns. You want this number to be as high as possible. For example, the average truck, minivan or SUV gets about 17.5 miles per gallon of gas. An average car gets closer to 25 mpg and a motorcycle gets around 45 mpg (the source for all of these numbers is here). When you’re ready to replace your car, buy the most efficient car you can afford (that’s one with the highest mpg rating). I’m a huge fan of electric vehicles (EVs) and purchased a Tesla Model S in February 2020. You can read about my experience in blogs here and here. If you want to talk more about EVs, please leave your questions and comments below!

3. While we’re talking about electricity, do you know where yours comes from? Electricity in the US is generated, on average, from the following resources (all of the following info is from US Energy Information Administration (EIA) which has a lot of great resources if you want to learn more):
- 40% natural gas
- 19% coal
- 20% nuclear
- 20% renewables (like wind, solar, and hydro)
- 1% petroleum
If you want to get more specific to your state or electrical grid, you can learn more here (it’s another great page on the EIA website). Learning more about electricity is great, but my recommended action here is to call your electric utility company and request 100% renewable electricity. Most utilities have a program that lets you pay a little extra (for reference, my monthly bill increased $10 when I made the switch) for 100% renewable electricity. I know… you have lots of questions… like “how can I just buy renewables? Am I actually getting renewable electricity delivered to my house???”
The short answer is this: when you subscribe to green electricity programs like this you’re incentivizing your local utility to invest in more renewable electricity projects. This means they’ll build more solar arrays or install more wind turbines. You’re really buying a renewable electricity credits, which means that an equal amount of “extra” green electricity is being produced on your behalf. No, the utility can’t send this electricity directly to your house, but you are part of the overall move to a greener and more renewable electricity grid and you are voting with your dollars every single month. Still have questions? Drop them in the comments below and I’ll help you find the answer!
4. Embrace minimalism. Do you really need all the stuff in your life? Does it really make you happier? For me, minimalism is a great mindset to truly embrace the Reduce in the decades old mantra “Reduce. Reuse. Recycle.” Yes, recycling is important and you should do that too, but moving beyond recycling and buying less stuff is where the magic happens when trying not to destroy the planet.
Think about it this way: every single thing you own was created from the Earth’s precious resources. These resources were mined, grown or harvested from somewhere, transported to a processing site where they were turned from the raw material into a more usable form, transported to another manufacturing site where they were combined into the thing in your hands, transported to a store or warehouse, and then transported again to you. And that’s probably an oversimplified version of the truth. This happens over and over again for every single object in our lives. With this in mind, I ask again… Do you really need all the stuff in your life? What could you choose to live without? What would actually make you happier NOT to own?
If you’re ready to embrace minimalism, there are TONS of resources out there for you to explore, but some of my favorites include: The Minimalists blog, the book Soulful Simplicity by Courtney Carver, and the Our Minimalist Lifestyle Facebook Group. Please share your favorite resources in the comments!

5. Stop wasting food. Each year, the average American throws away more than 200 pounds of food at a cost of more than $1,600 per family! And if food waste were a country, it would be the third largest emitter of greenhouse gases (GHGs, the major cause of climate change), behind the Unites States and China. Farming of meat animals and food transportation are additional contributors of GHG emissions, so I’ll give bonus points for eating less meat and more local food.
There are lots of great strategies you can use to reduce food waste in your home. Some of my favorites include
- create a weekly meal plan
- buy less during each trip to the grocery store
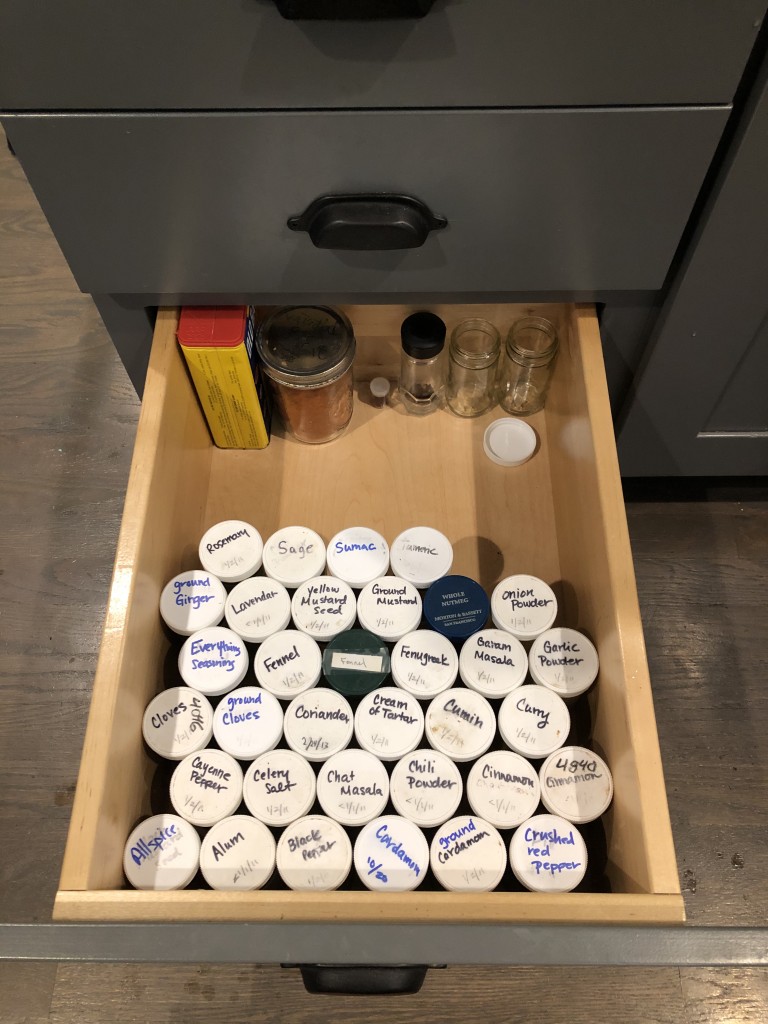
- organize your food storage areas (fridge, pantry, freezer) so you can find your food easier
- learn about best by, use by, and other perishable food labels to avoid spoilage
- freeze leftovers and other perishable items before their expiration date
Here they are, all together once more:
- Drive less, walk and bike more
- Buy the most efficient car you can afford
- Buy renewable electricity
- Embrace minimalism
- Stop wasting food
Do some or all of these recommended {mindset} swaps resonate with you? Share your thoughts and experiences in the comments!
Looking for more? If you’ve already made these swaps and are ready to make deeper change, I highly recommend calculating your ecological footprint and using the results to identify your biggest opportunities.
]]>
In some ways, COVID-19 has forced us all into a more intentional and sustainable life, and it’s worth thinking about how we might incorporate the lessons learned into “normal life,” whenever we return to it. The thing is… “normal” might look a lot different when we get back to it.
However you’re planning to rebuild your normal, I would encourage you to think about the simple and more sustainable aspects of your current lifestyle that you want to keep as you rebuild. To help with this, I’d like to tell you about the 80/20 Principle.
The 80/20 Principle was created by Italian economist, Vilfredo Pareto, and, in short, states that you get 80% of your results from 20% of your effort. This is a powerful model for business, time management, and sustainable living.
I have absolutely applied the 80/20 principle over the years when re-designing my sustainable lifestyle over the past few years. My family and I have chosen to make most of these changes under the notion that sustainability give us more, not less. These are the easy types of lifestyle changes, the 20%.
- We save money by not wasting (heat, electricity, gas, food).
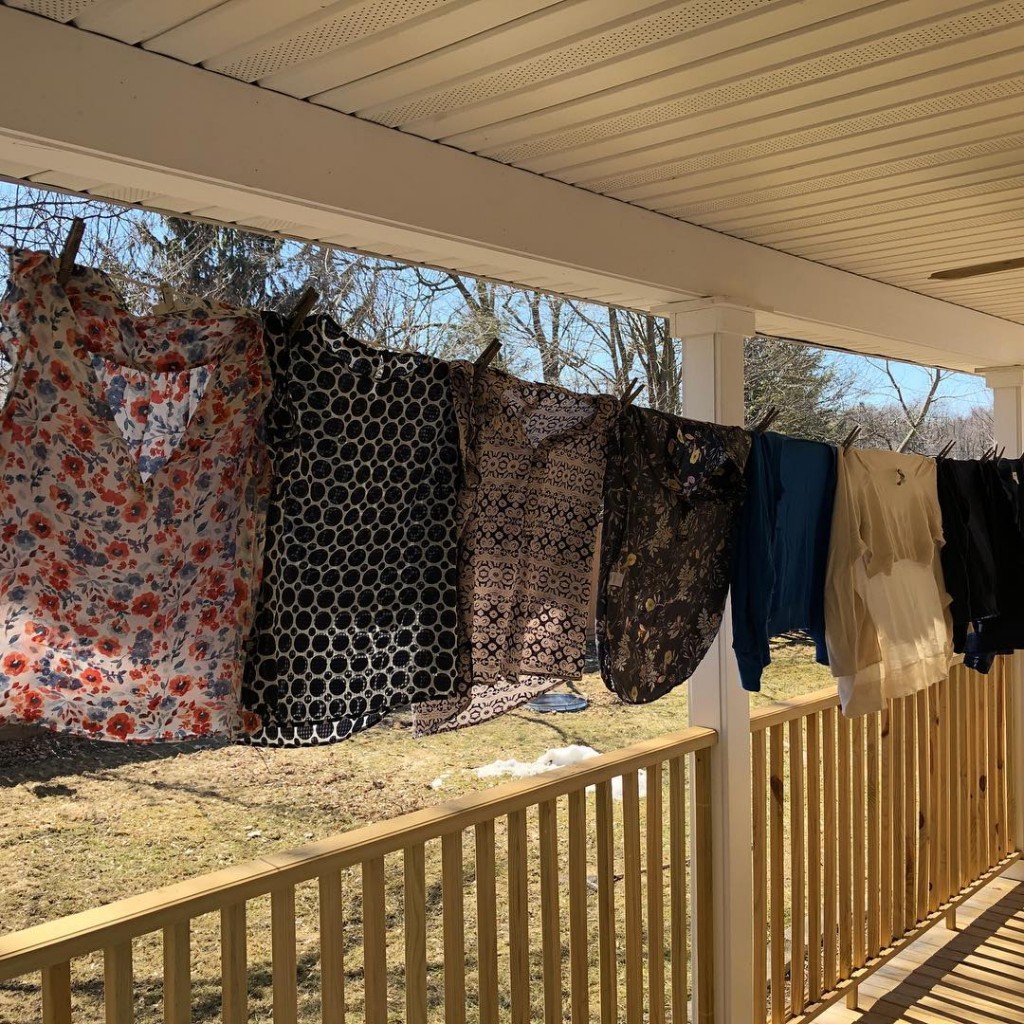
- We ride our bikes more and find that our clothes fit better.
- We find more time to play because we are not shopping as much, so we have fewer things in our home and it stays cleaner longer.
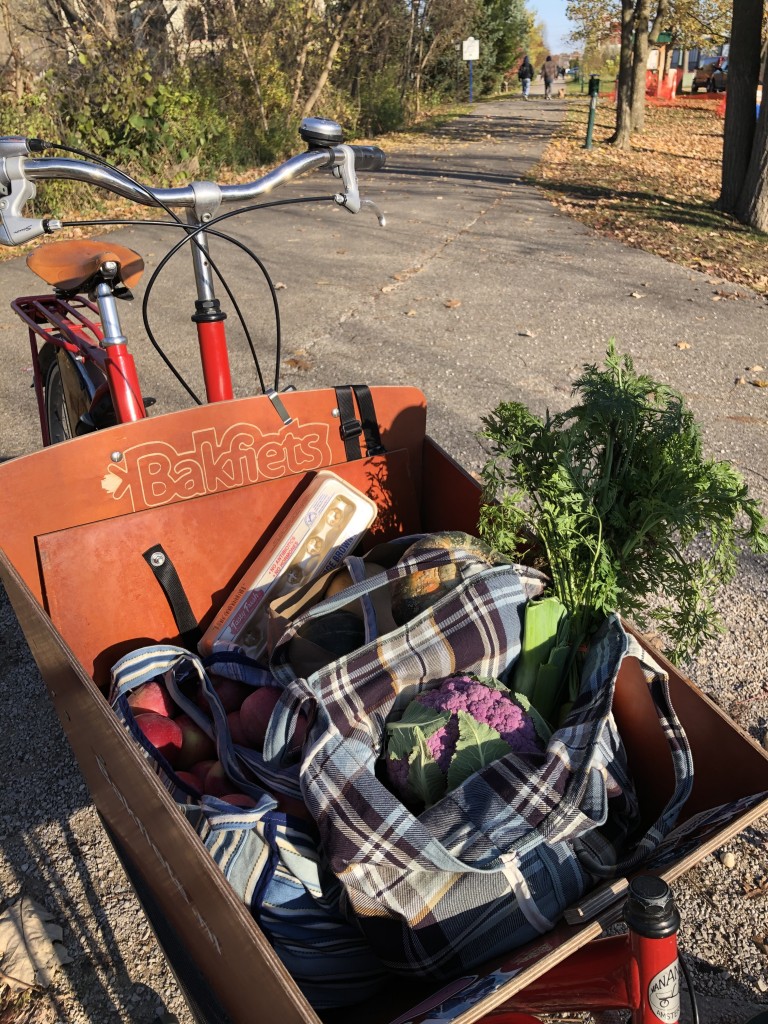
Because of COVID, we grew more vegetables in our backyard garden, shopped even more than usual at our local farmers market this summer, and canned/froze a lot of fresh, healthy, and local food. These activities saved us money, helped us connect as a family, and will improve our health. Next summer, I’m planning to hang on tight to these more sustainable habits, COVID or not, because they make me happy!
We accomplish 80% of our sustainability goals doing what is engaging and interesting to our family. So, here’s my advice for building a more sustainable life: Choose the fun stuff! Think about activities you enjoy most right now and the new habits you’ve created during COVID that are bringing you joy.
Here are a few areas for you to consider when you’re brainstorming about the activities and habits you want to keep.
Drive less, walk and bike more
Most of us aren’t driving to work right now. Most of us are working from home and driving once per week to get groceries. From my home office window, I can see my street in downtown Rockford and I see so many people walking, skateboarding, and biking.
How can you incorporate driving less into your “new normal?”
- Did you realize that you can walk or bike to work, school, or the grocery store?
- Did you learn that you only need to grocery shop once per week (or even less)?
- Did you become really good at combining all of your errands into one trip?
- Did you discover activities, clubs, or events that aren’t actually important (or fun), so you’ll choose to stay home instead?
- Did you find new spaces or activities in your home that will help you maintain a slower life pace even when you are free to ramp back up your normal busyness?
Reduce food waste
I bet we’re all trying to stretch our food a little further these days. There are lots of benefits to this strategy: saving money, spending less time shopping, and throwing away less food, just to name a few.
How can you incorporate a heightened awareness of food waste into your “new normal?”
- Did you become really great at meal planning?
- Did you learn how to better organize your pantry or fridge? How does it feel to be able to find ingredients easily?
- Did you become an “iron chef” contender, learning to creatively use obscure ingredients in meals you (and your family) loved?
- Did you learn about food preservation this summer — canning, freezing, and/or fermenting extra fresh food safely for you to eat weeks or months later?
- Did you start composting in your own yard?
Embrace minimalism
Lots of us are looking at our homes differently these days, noticing clutter in a way we’ve never seen it before. According to Joshua Becker, founder of the Becoming Minimalist blog, “minimalism is intentionally living with only the things I really need—those items that support my purpose. I am removing the distraction of excess possessions so I can focus more on those things that matter most.”
How can you incorporate minimalist principles into your “new normal?”
- Did you purge toys, clothes, or clean your closets to pristine condition?
- How does it feel to have less clutter in your life?
- How can you prevent unwanted things from accumulating again?
- Did you redesign spaces in your home to be more comfortable or better suit your needs?
Please share some of your favorite slow living and sustainable habits that you’ve discovered during this global pandemic in the comments below!
Ps. Local friends, if these words feel familiar to you, they should! The 80/20 Rule parts of this blog were originally written by Robbie for a Rockford Sustainability Committee column in the Rockford Squire. He graciously let me reuse them in this post
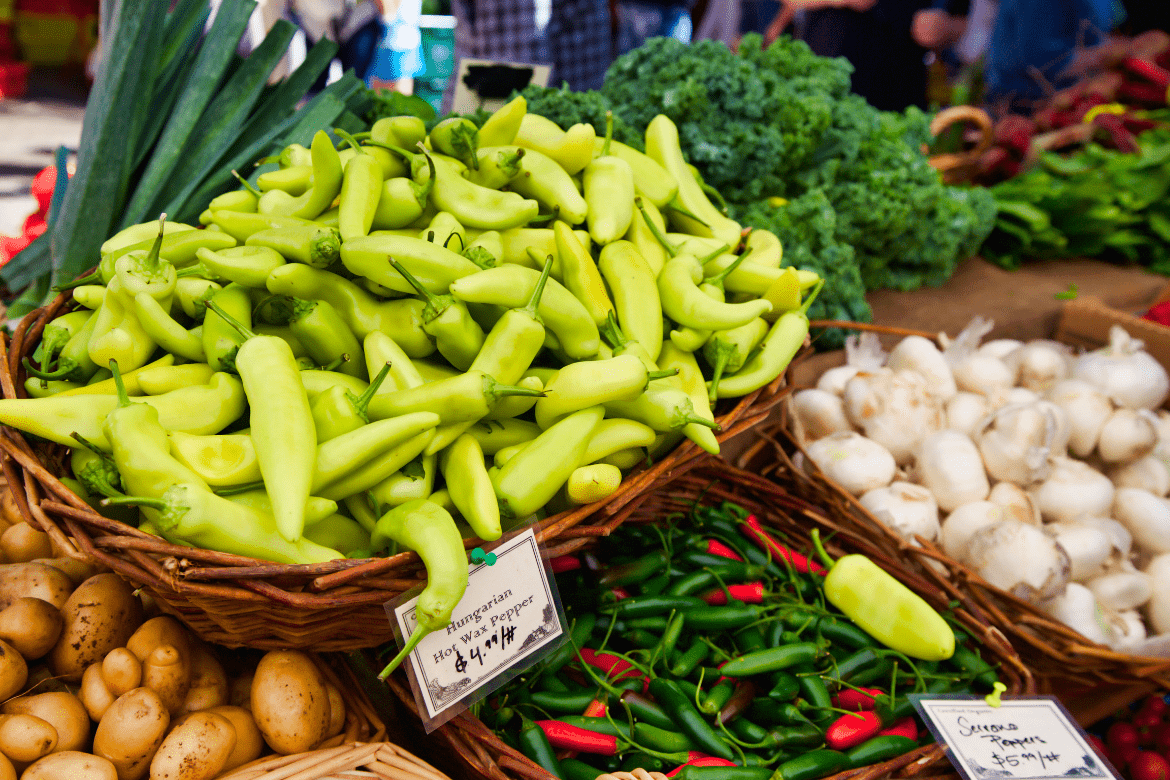
]]>If you don’t have peppers hanging around your house, I recommend you go find some from your local farmers market or roadside stand and make your own shatta.
However you get the peppers… it’s time to Make Your Own Shatta!
I’ve been obsessed with Falastin: A Cookbook by Sami Tamini and Tara Wigley lately and one of my favorite recipes is this shatta. I highly recommend borrowing it from your local public library so you can test out these amazing recipes for yourself!
Ok, Erin, but what the heck is shatta?
Good question! It’s a fermented condiment that, according to Sami and Tara, “is on every Palestinian table, cutting through rich foods or pepping up others.”
I think it tastes kind of like a salsa (at least we happily put it on our homemade tamales last weekend), but with a deeper, more complex flavor. This might be one of these times that I ask you to trust me and spend the 10 minutes to make it for yourself so you can experience the amazingly indescribable taste. After you have, please come back and try to describe it for others in the comments below!
Plus it’s a fermented food! Fermentation makes foods more nutritious, as well as delicious. Microscopic organisms transform food and extend its usefulness. Not only does fermentation preserve foods… fermented foods help people stay healthy! That’s because fermented foods are rich in probiotic bacteria (the good kind of bacteria!). By consuming fermented foods you are adding beneficial bacteria and enzymes to your overall intestinal flora, increasing the health of your gut microbiome and digestive system and enhancing the immune system. If you want to learn more about fermentation and the health benefits of fermented foods, I recommend reading Wild Fermentation by Sandor Katz or exploring his website wildfermentation.com
All this to say that this condiment will keep in the fridge for 6 months! I’m experimenting with making extra now and freezing it for later. I promise to circle back and tell you how this experiment turned out.
Bottom line, this shatta is:
- a delicious condiment
- that will improve your gut bacteria and overall health
- and is a great way to preserve peppers

I like a medium spice level and my kids are about the same. So far I’ve used hungarian wax, poblano, and jalapeno peppers in the recipe below. Each has a unique and delicious taste, so feel free to use whatever peppers you have on hand (or can easily buy locally) that match your preferred spice level.
My favorite (so far) is the hungarian wax. There’s almost no spice and the flavor makes my toes curl (in the possible best way)!
Recipe
This recipe is adapted only slightly from Falastin: A Cookbook by Sami Tamini and Tara Wigley
(makes about 1.5 cups or 1 pint jar)
Ingredients
9oz hot, medium, or mild peppers (the original recipe calls for red or green chilis); about 8-10 peppers, depending on size
1 Tablespoon salt
3 Tablespoons apple cider vinegar
1 Tablespoon lemon juice
olive oil
Instructions
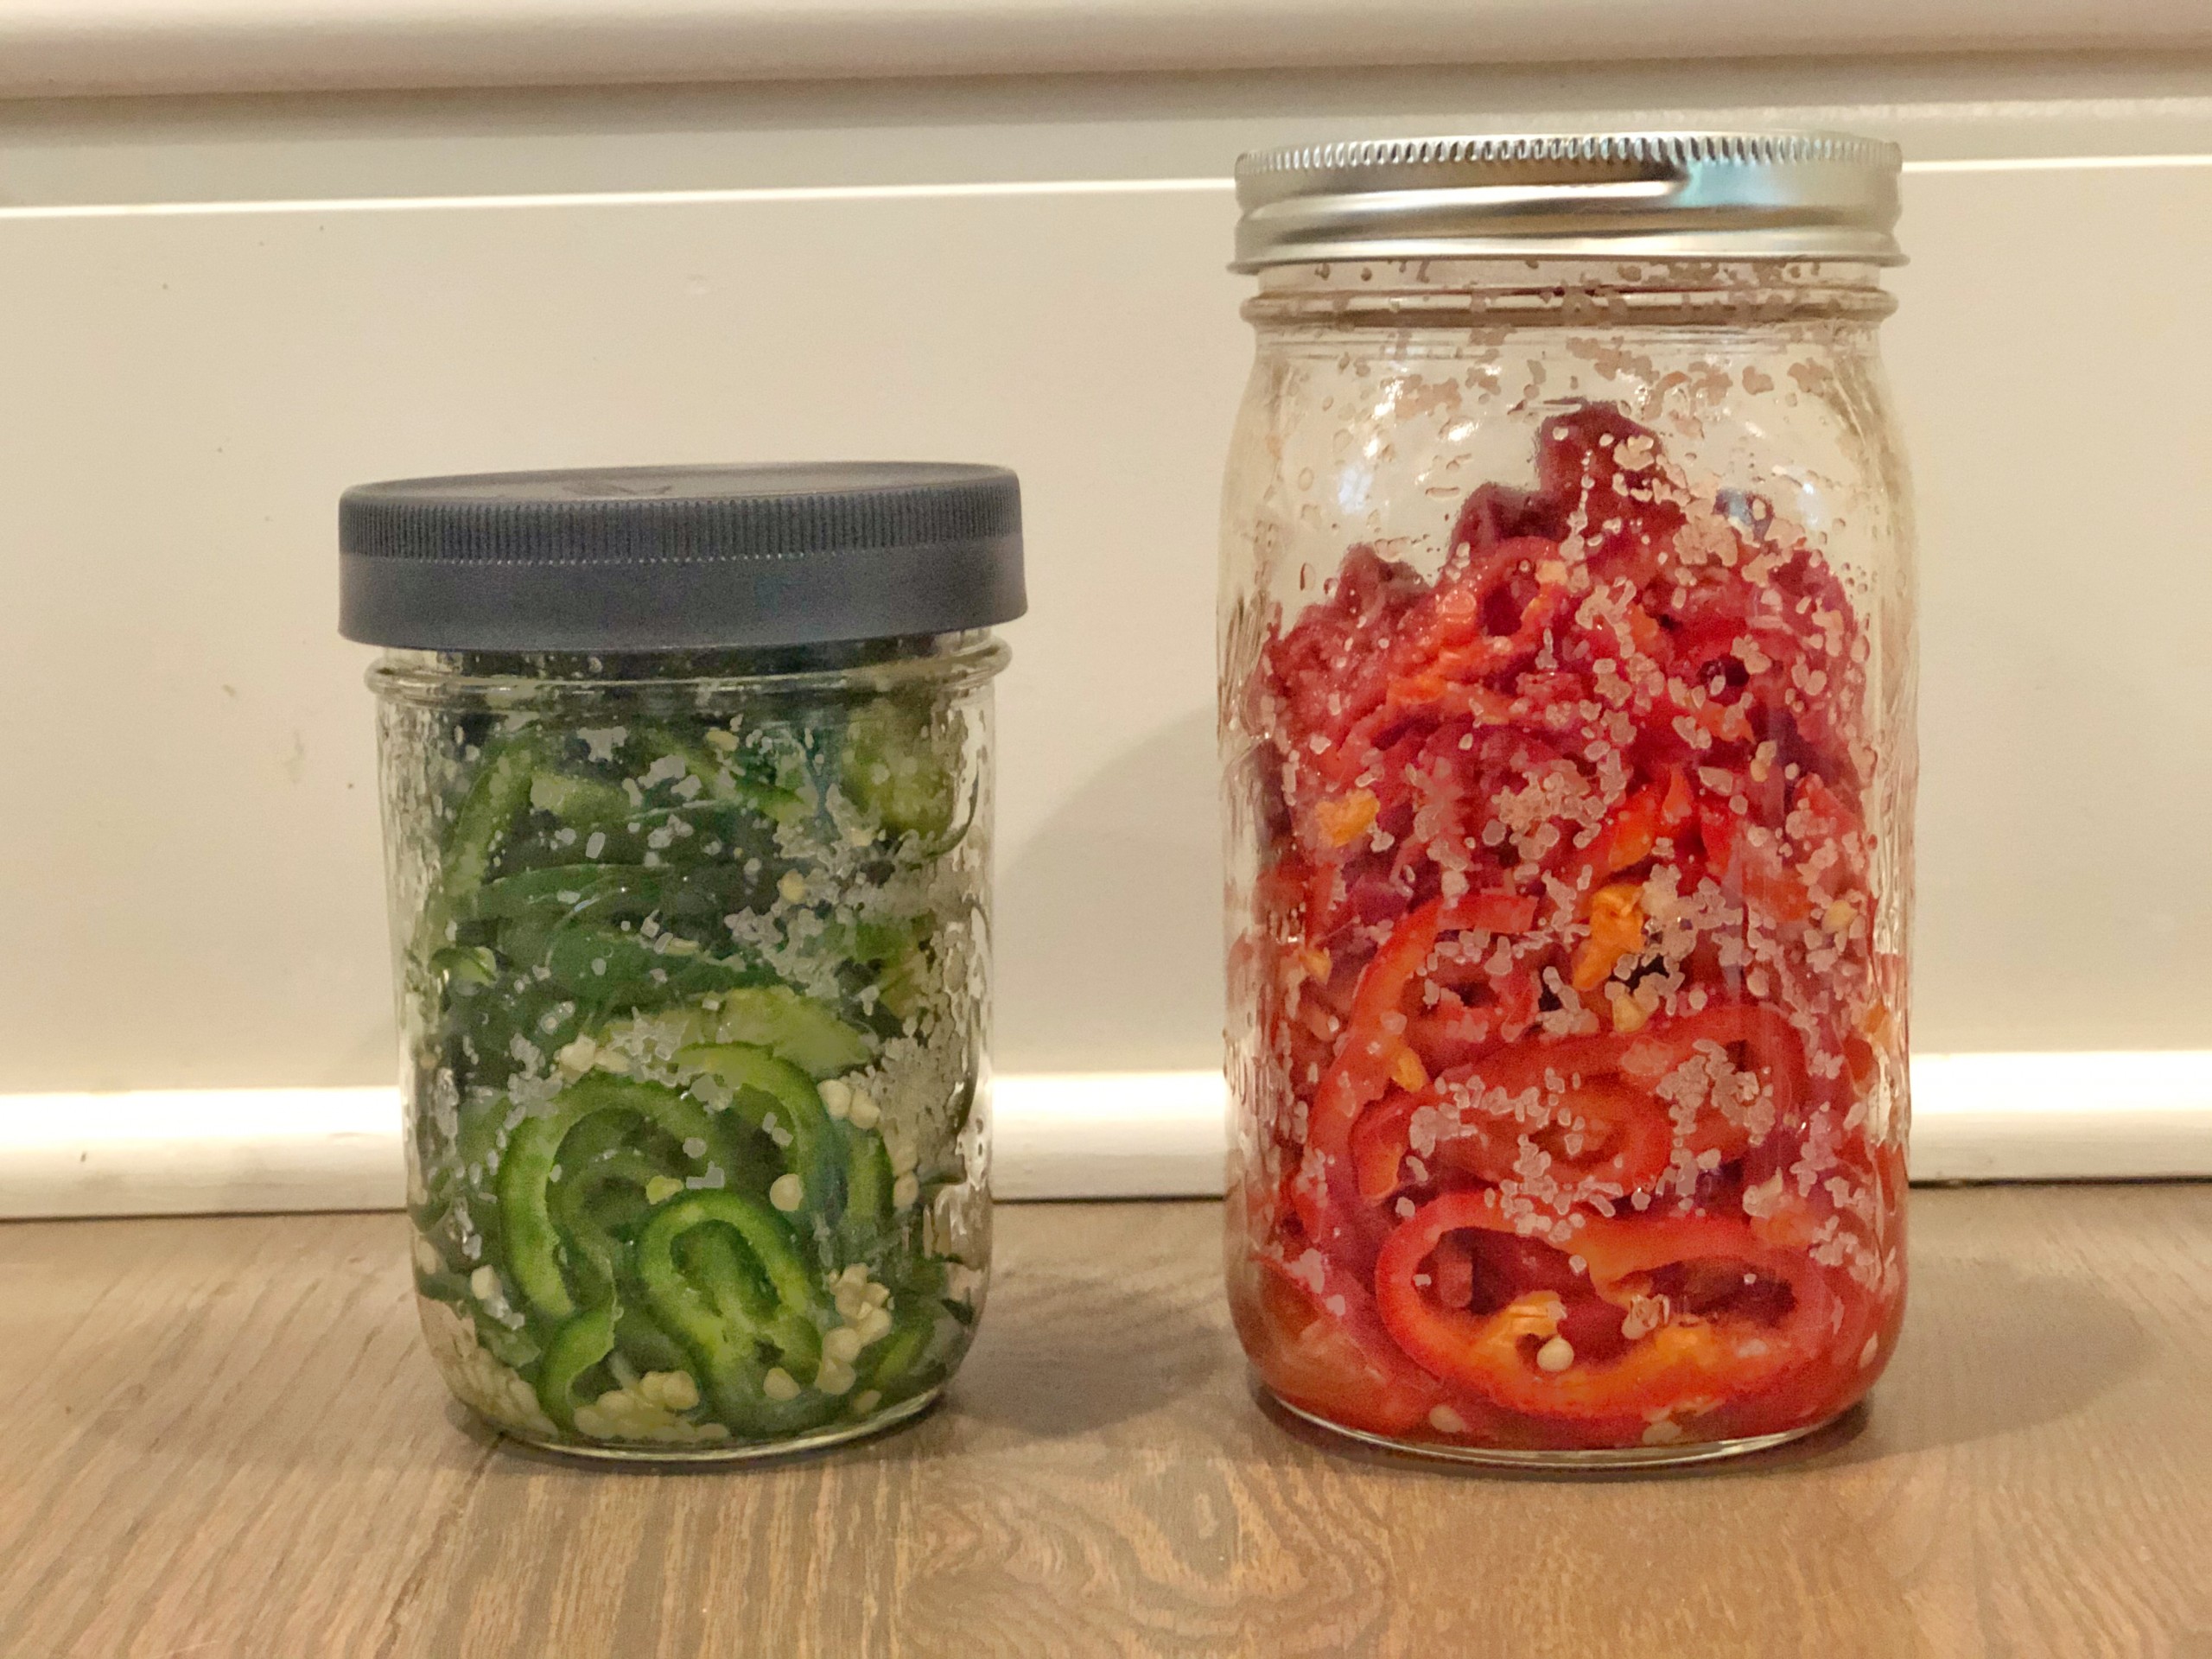
- Thinly slice the pepper. You’ll end up with thin rings. Discard the stem.
- Place the pepper (with seeds) and salt into a pint size sterilized* jar and mix well
- Seal the jar and store in the fridge for 3 days
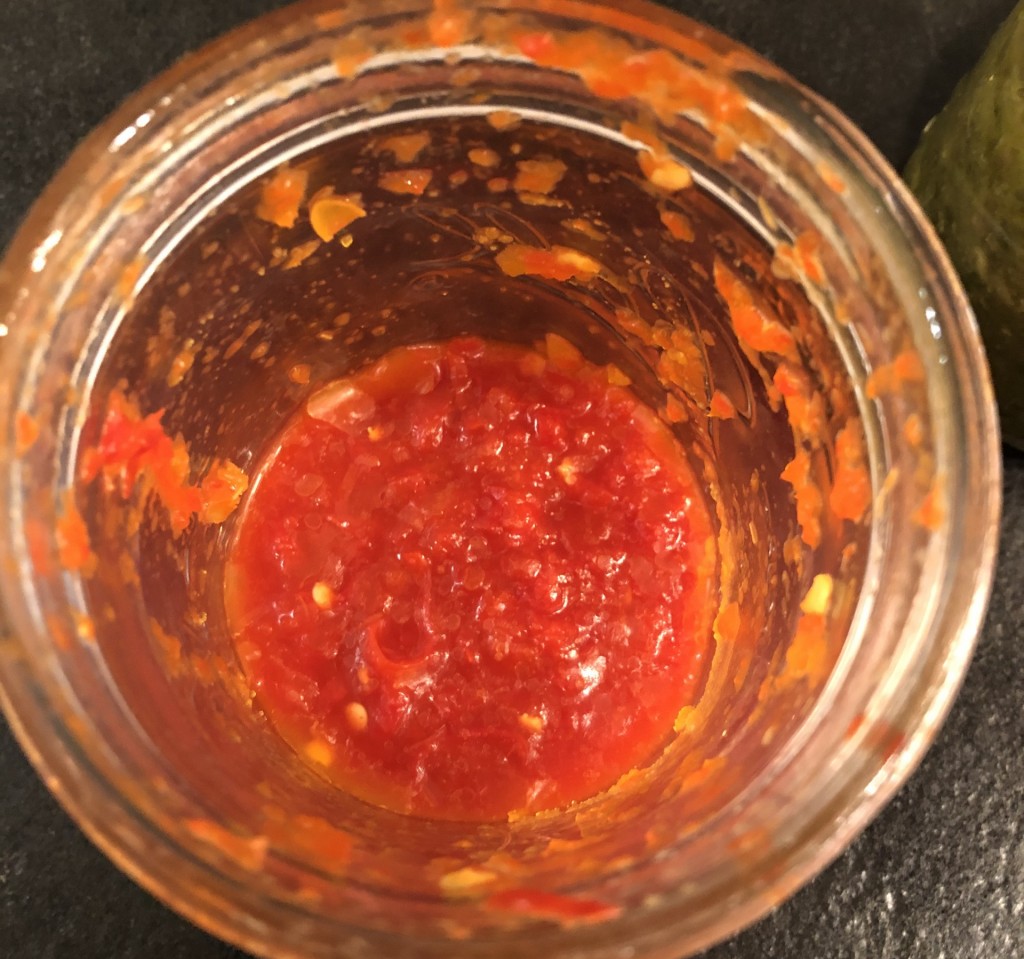
- On the third day, drain the peppers, return them to the jar, and blitz with an immersion blender*. You can choose to blitz well if you like a fine paste or roughly blitz so some texture remains; I prefer texture so I stop when there are still small chunks of pepper.
- Add the vinegar and lemon juice. Mix to combine.
- Pour enough olive oil on top to cover.
- Store in your refrigerator for up to 6 months (if it lasts that long! We’ve almost eaten my entire first batch in three weeks..)
- The oil will firm up and separate from the peppers once it’s in the fridge, so just give it a good stir, for everything to combine, before using.
- Enjoy!
Recipe Notes:
- Since this recipe involves fermenting, the jar you use needs to be properly sterilized. I recommend sterilizing your jar in the dishwasher, but you can also use a hot water bath (just like if you were canning, see my previous post if you want more details on how to set up your hot water bath) and boil the jar for 10 minutes.
- You can also use a food processor to chop up your shatta.
Do you have lots and lots of peppers now, at the tail end of the growing season (for those of us in the Northern Hemisphere)?
Whats your favorite way to preserve peppers?
Please share your favorite recipes! And once you’ve made this, please come back and help me describe the flavor in the comments below.
]]>

Making your own yogurt is a great way to reduce waste (especially if you can find milk in refillable glass bottles… more and more grocery stores are offering this, so I recommend looking and asking at your local grocery store again if it’s been awhile since you’ve looked) and, even more importantly, its a delicious way to make sure you’re getting enough healthy bacteria in your gut!
We use the “cooler method” but there are several different creative ways to manage the process… however you do it, you need to be able to consistently maintain a temperature of 180F and 110F for long periods of time.
We use a “sous vide” which is a fancy cooking tool that was a gift and was on it’s way out of my kitchen (because most sous vide involves cooking in a plastic bag and I’m not keen on the waste and/or potential health risks of heating up plastic bags with food in them) when Robbie realized it is the perfect tool for making yogurt!
If you don’t own a “sous vide”, don’t panic! Lots of people make yogurt using a pot on the stove, a cooler (yes, like the kind you use to keep food cold at a picnic or the beach), and an oven. I’ll provide comments for modifying the process for this alternative method below too!
If you’re just starting to make your own yogurt, you need a culture (much like sourdough starter or a kombucha mother). Look for yogurt that contains “live and active cultures” when shopping at your grocery store. Once you’re making your own yogurt regularly, you have to remember not to eat it all… you’ll always need a couple of tablespoons to start your next batch!

The recipe below is for 1 quart of milk, but it’s scalable for any amount you want to make. We make our yogurt in 1/2 gallon glass jars and can make up to 1 1/2 gallons in our cooler.
Homemade Yogurt
you can download a PDF of this recipe here
Ingredients
1 quart Milk
1 Tablespoon of yogurt per quart of milk (see note above about live and active cultures)
Cooking Instructions
- Bring milk to at least 180F. The point of this step is to kill competing bacteria and improve the texture of the final product. You only need to leave the milk at this temperature for a few minutes.
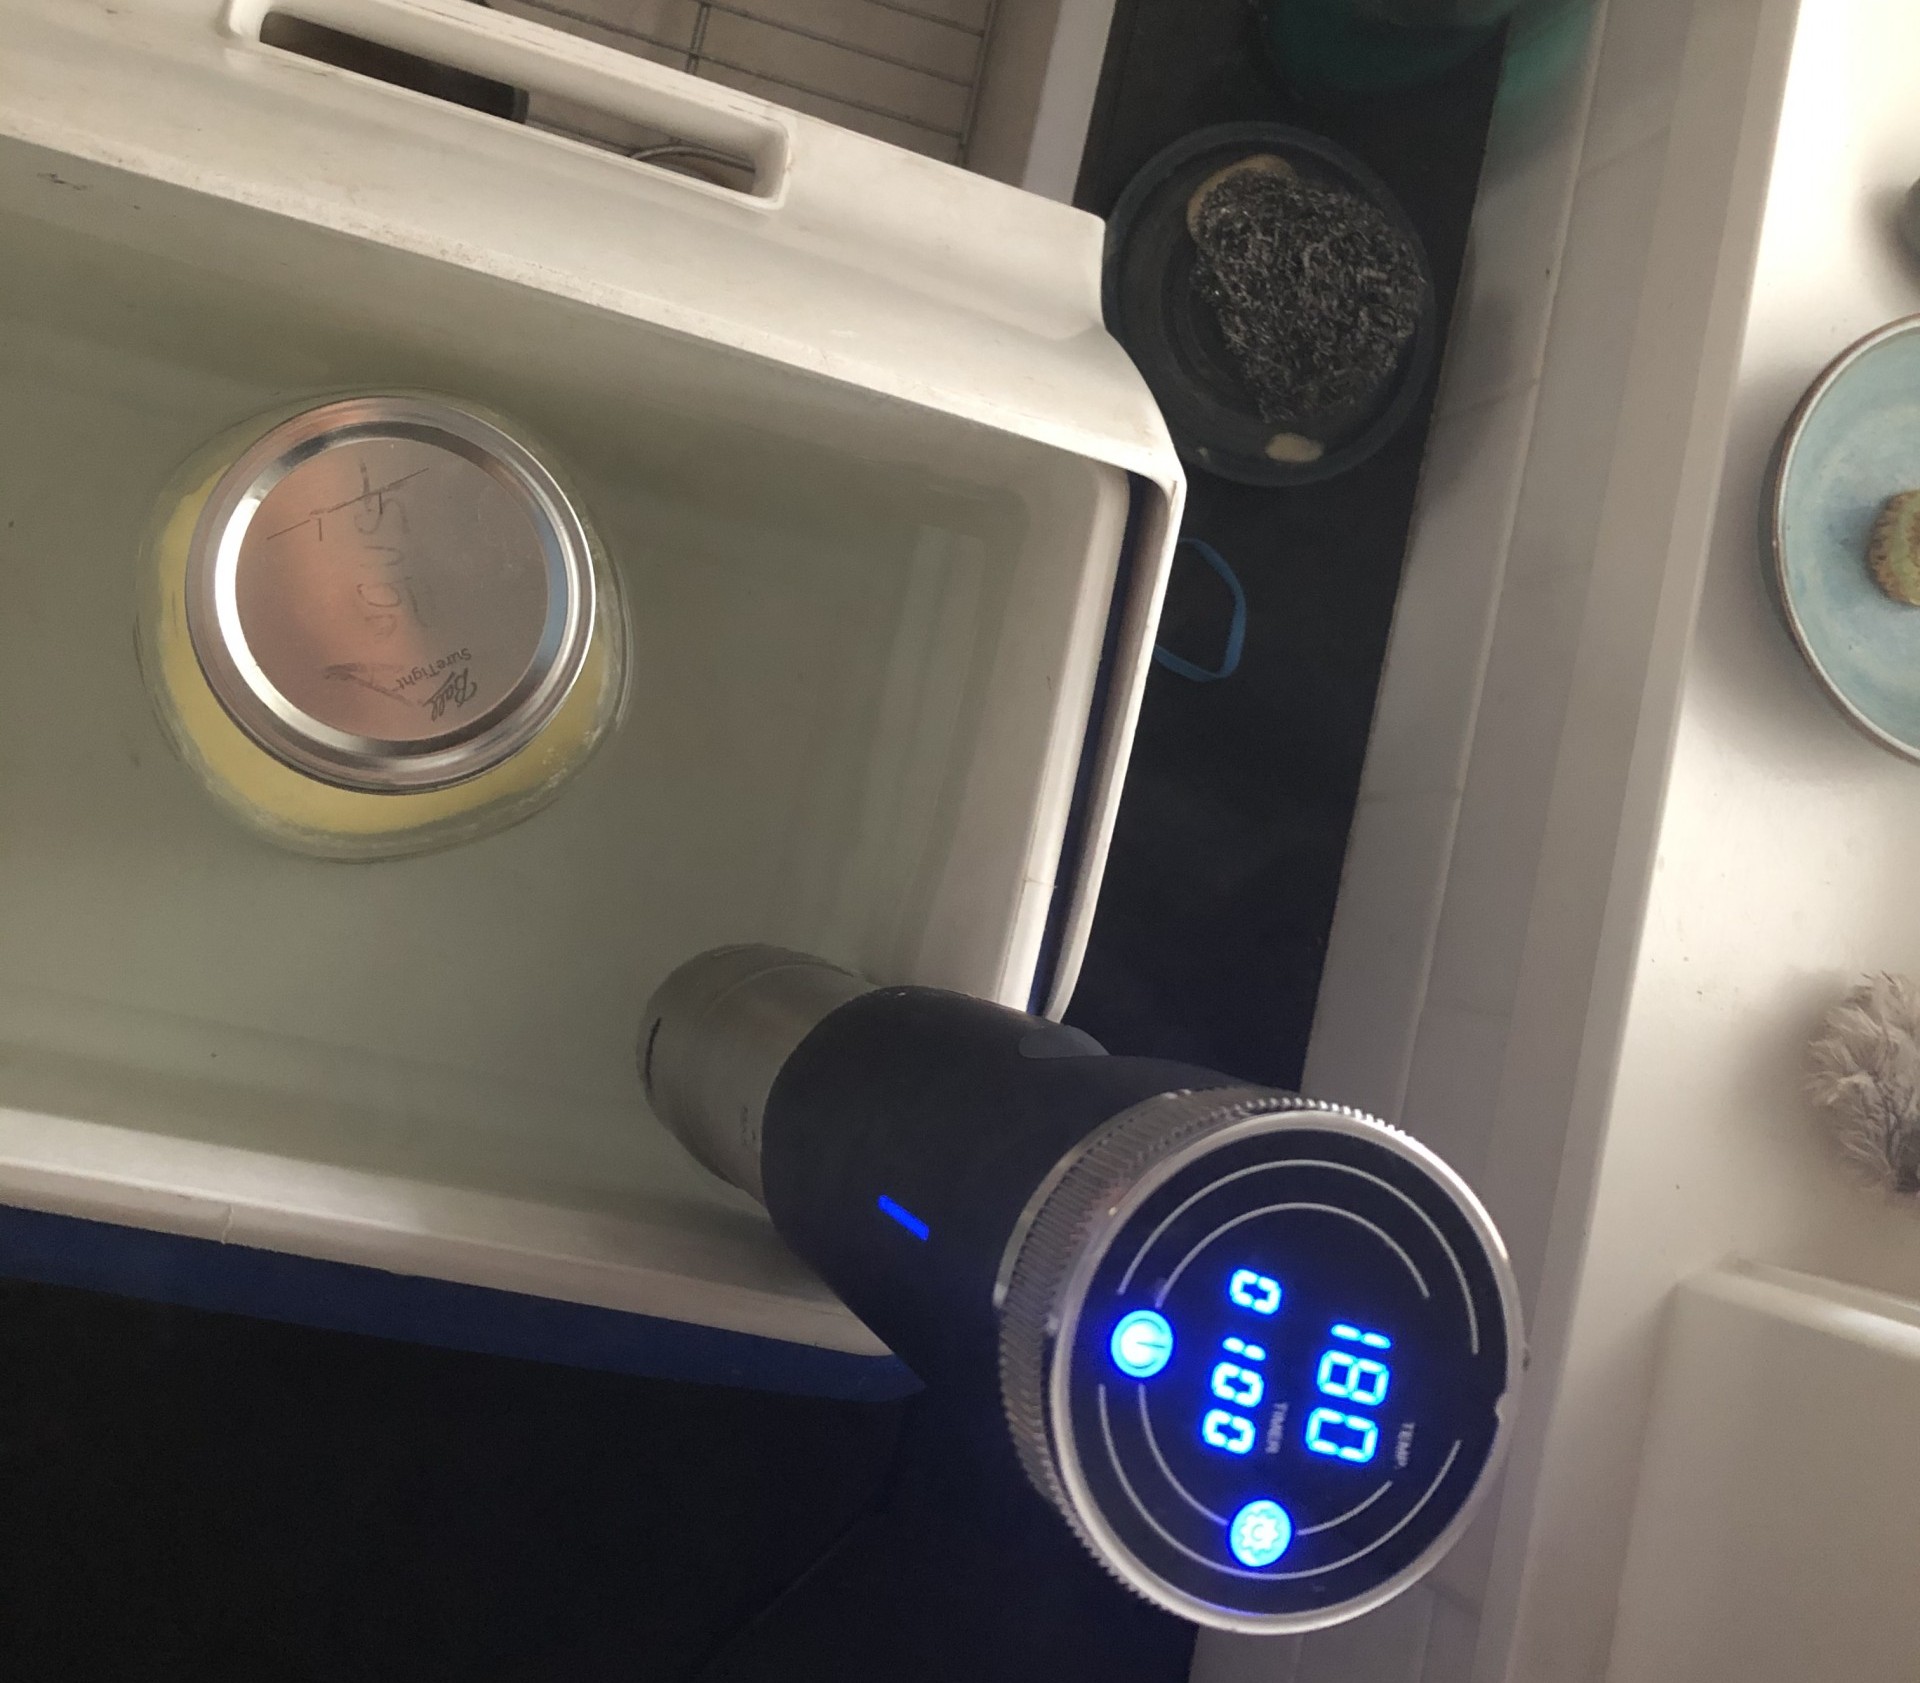
- I fill my cooler 3/4 full with hot tap water (enough to cover most of the jar, but not so much that the jar is completely under water), place my jars of milk in the hot water (lids on, but the water should not be over the lids), set the sous vide to 180F and wait for it to heat the water (and thud the milk) in the cooler to 180F
- If you’re making yogurt without a sous vide, I recommend slowly heating your milk in a pot on the stove to 180F. You want to do this slowly and stir regularly, so you don’t burn the milk on the bottom of your pot. If you have a thermometer, use that to determine when your milk has reached the right temperature. If not, you’ll know its hot enough when the milk starts to simmer and bubbles form around the edge of the pot (different recipes will tell you 180 – 200F, so don’t worry if your temperature creeps above 180)
- Reduce heat to 110F.
- I do this by resetting the temperature on my sous vide to 110F and adding cold water to the cooler. Be careful not to pour the cold water directly onto your glass jars as sometimes they crack.
- If you’re making yogurt without a sous vide, simply take the milk off the stove and let it cool. Again, if you have a thermometer, use it to monitor the temperature, aiming for 110F. If you don’t have a thermometer, 110F will feel pleasantly warm when you stick your pinky into the milk for 10 seconds. You can rush this step by putting your milk into a jar (with a lid) and putting the jar into a bowl/pot of cold water/ice. Do this slowly. Putting a really hot jar into really cold water sometimes causes the jar to crack
- Add yogurt. Stir 1 Tablespoon of active culture yogurt (see note above) into each quart of warm milk.
- Let sit at 110F for 6-12 hours.
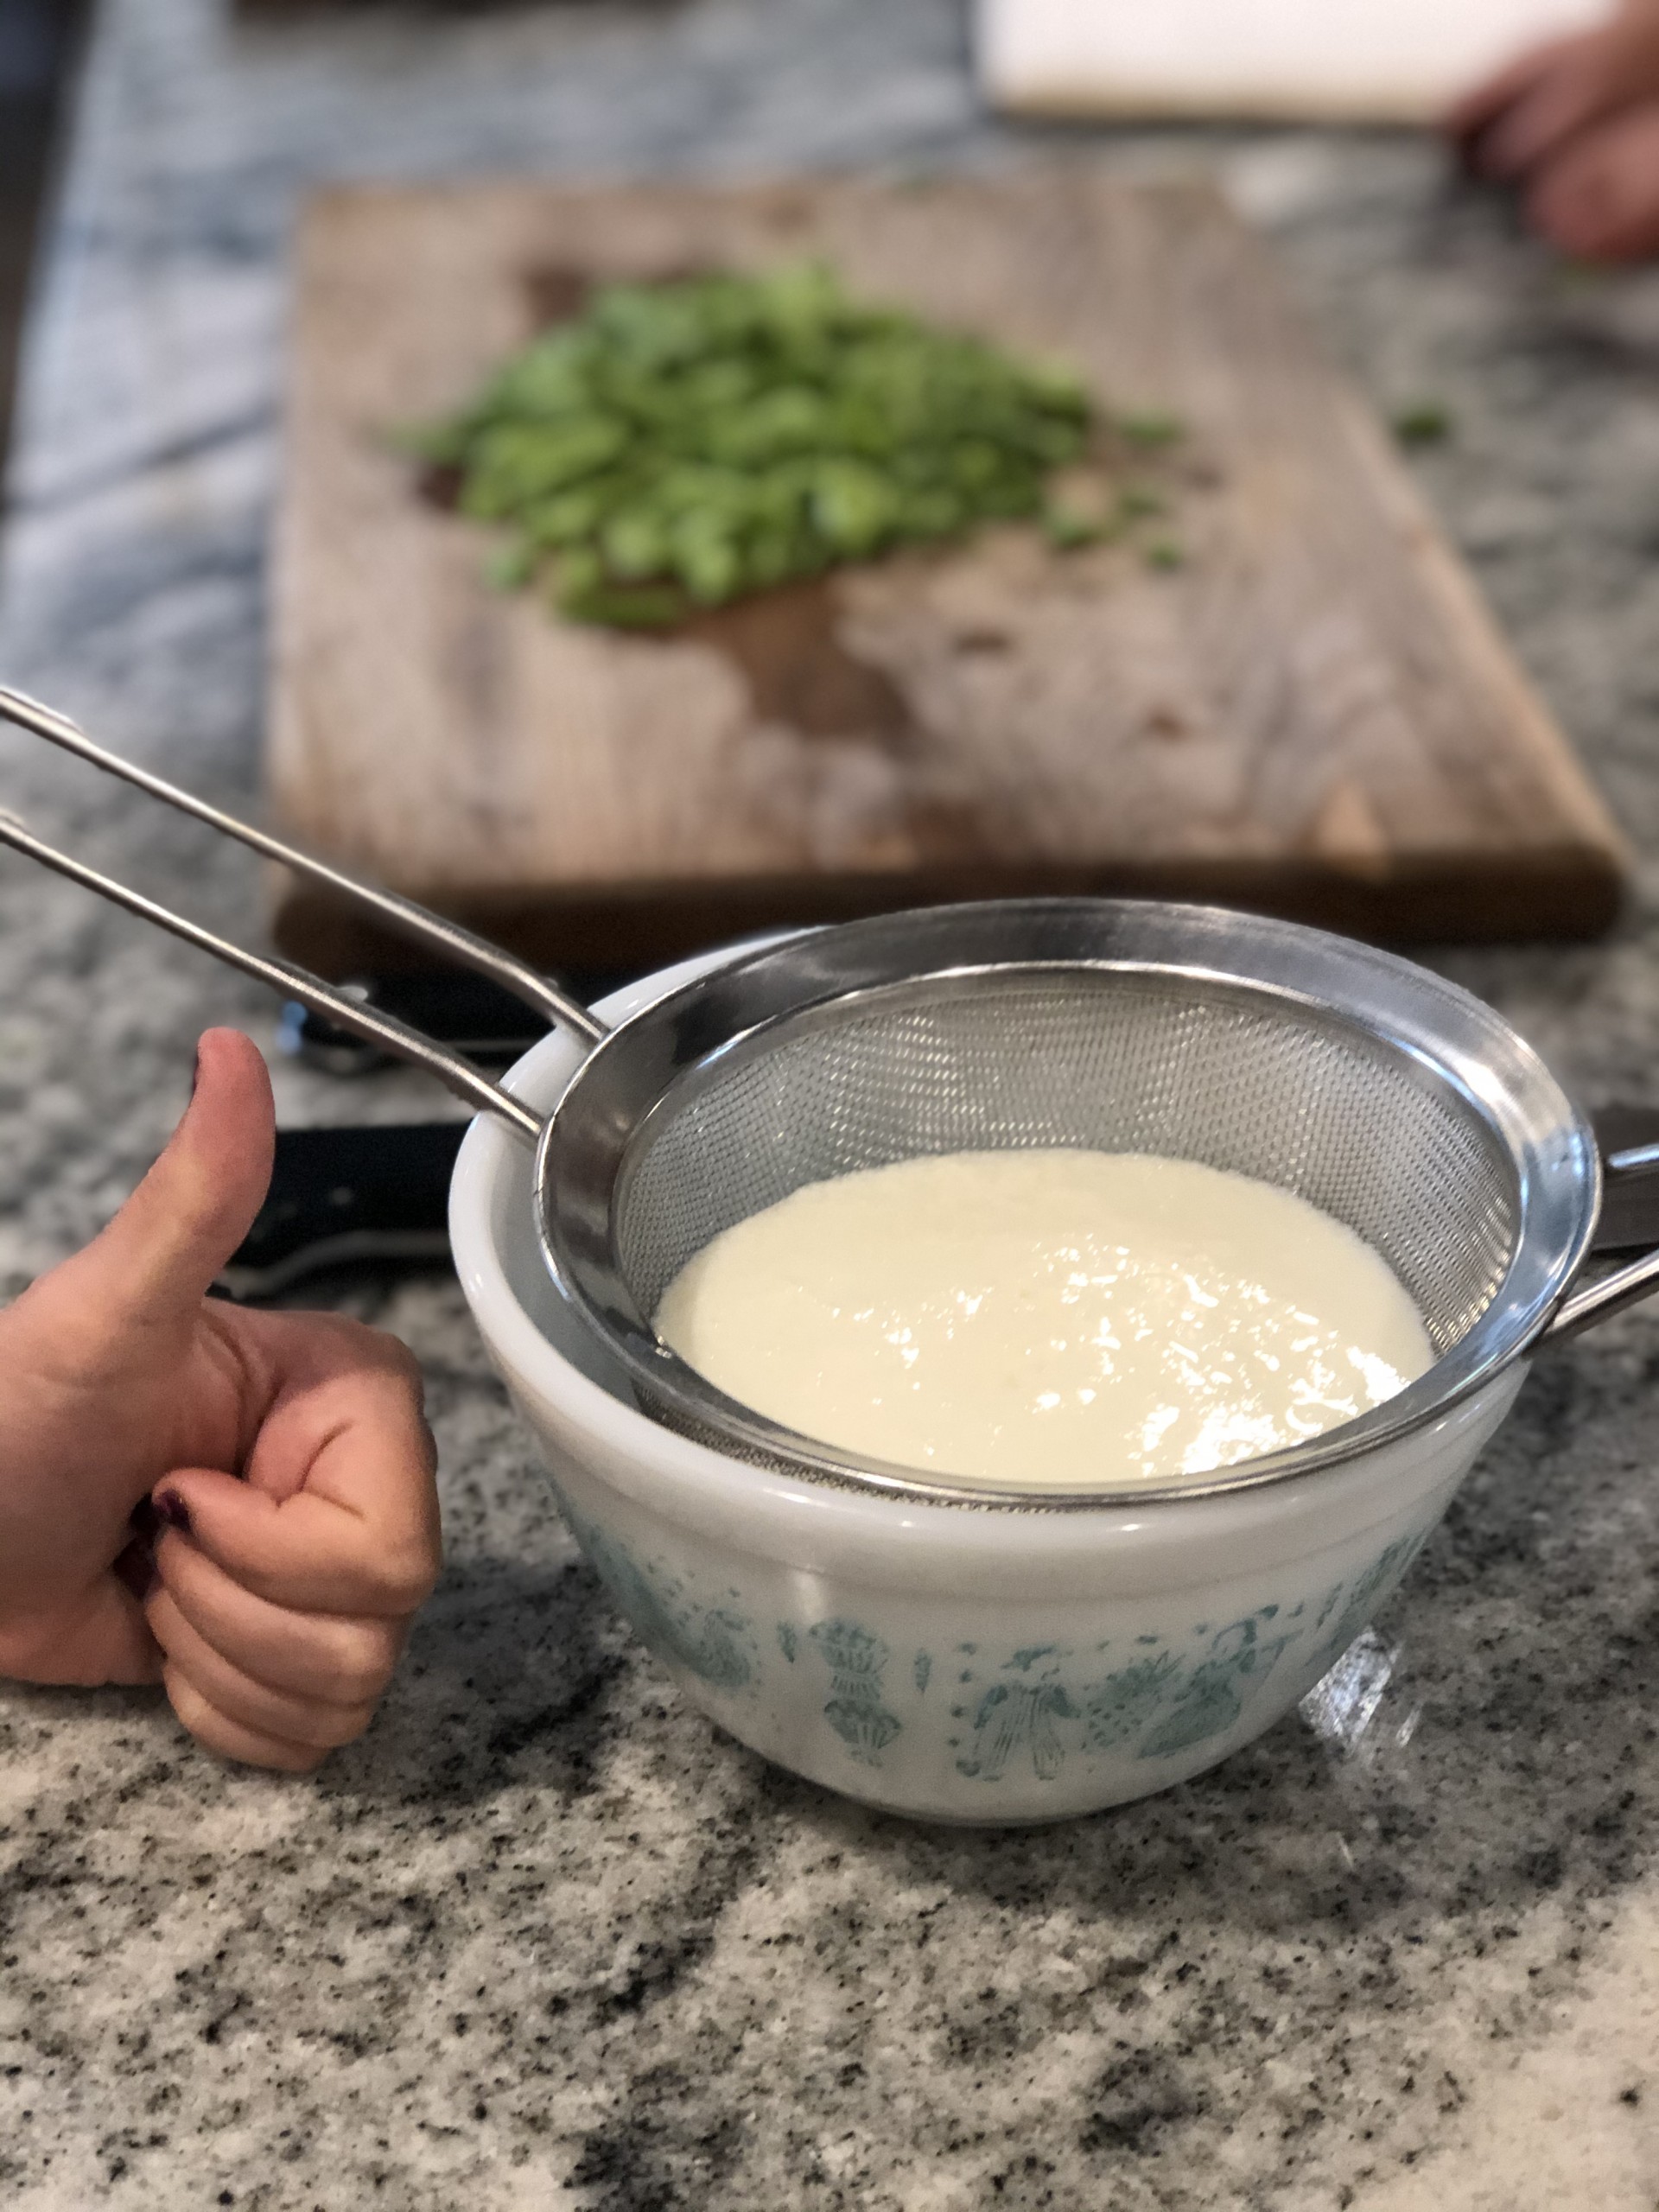
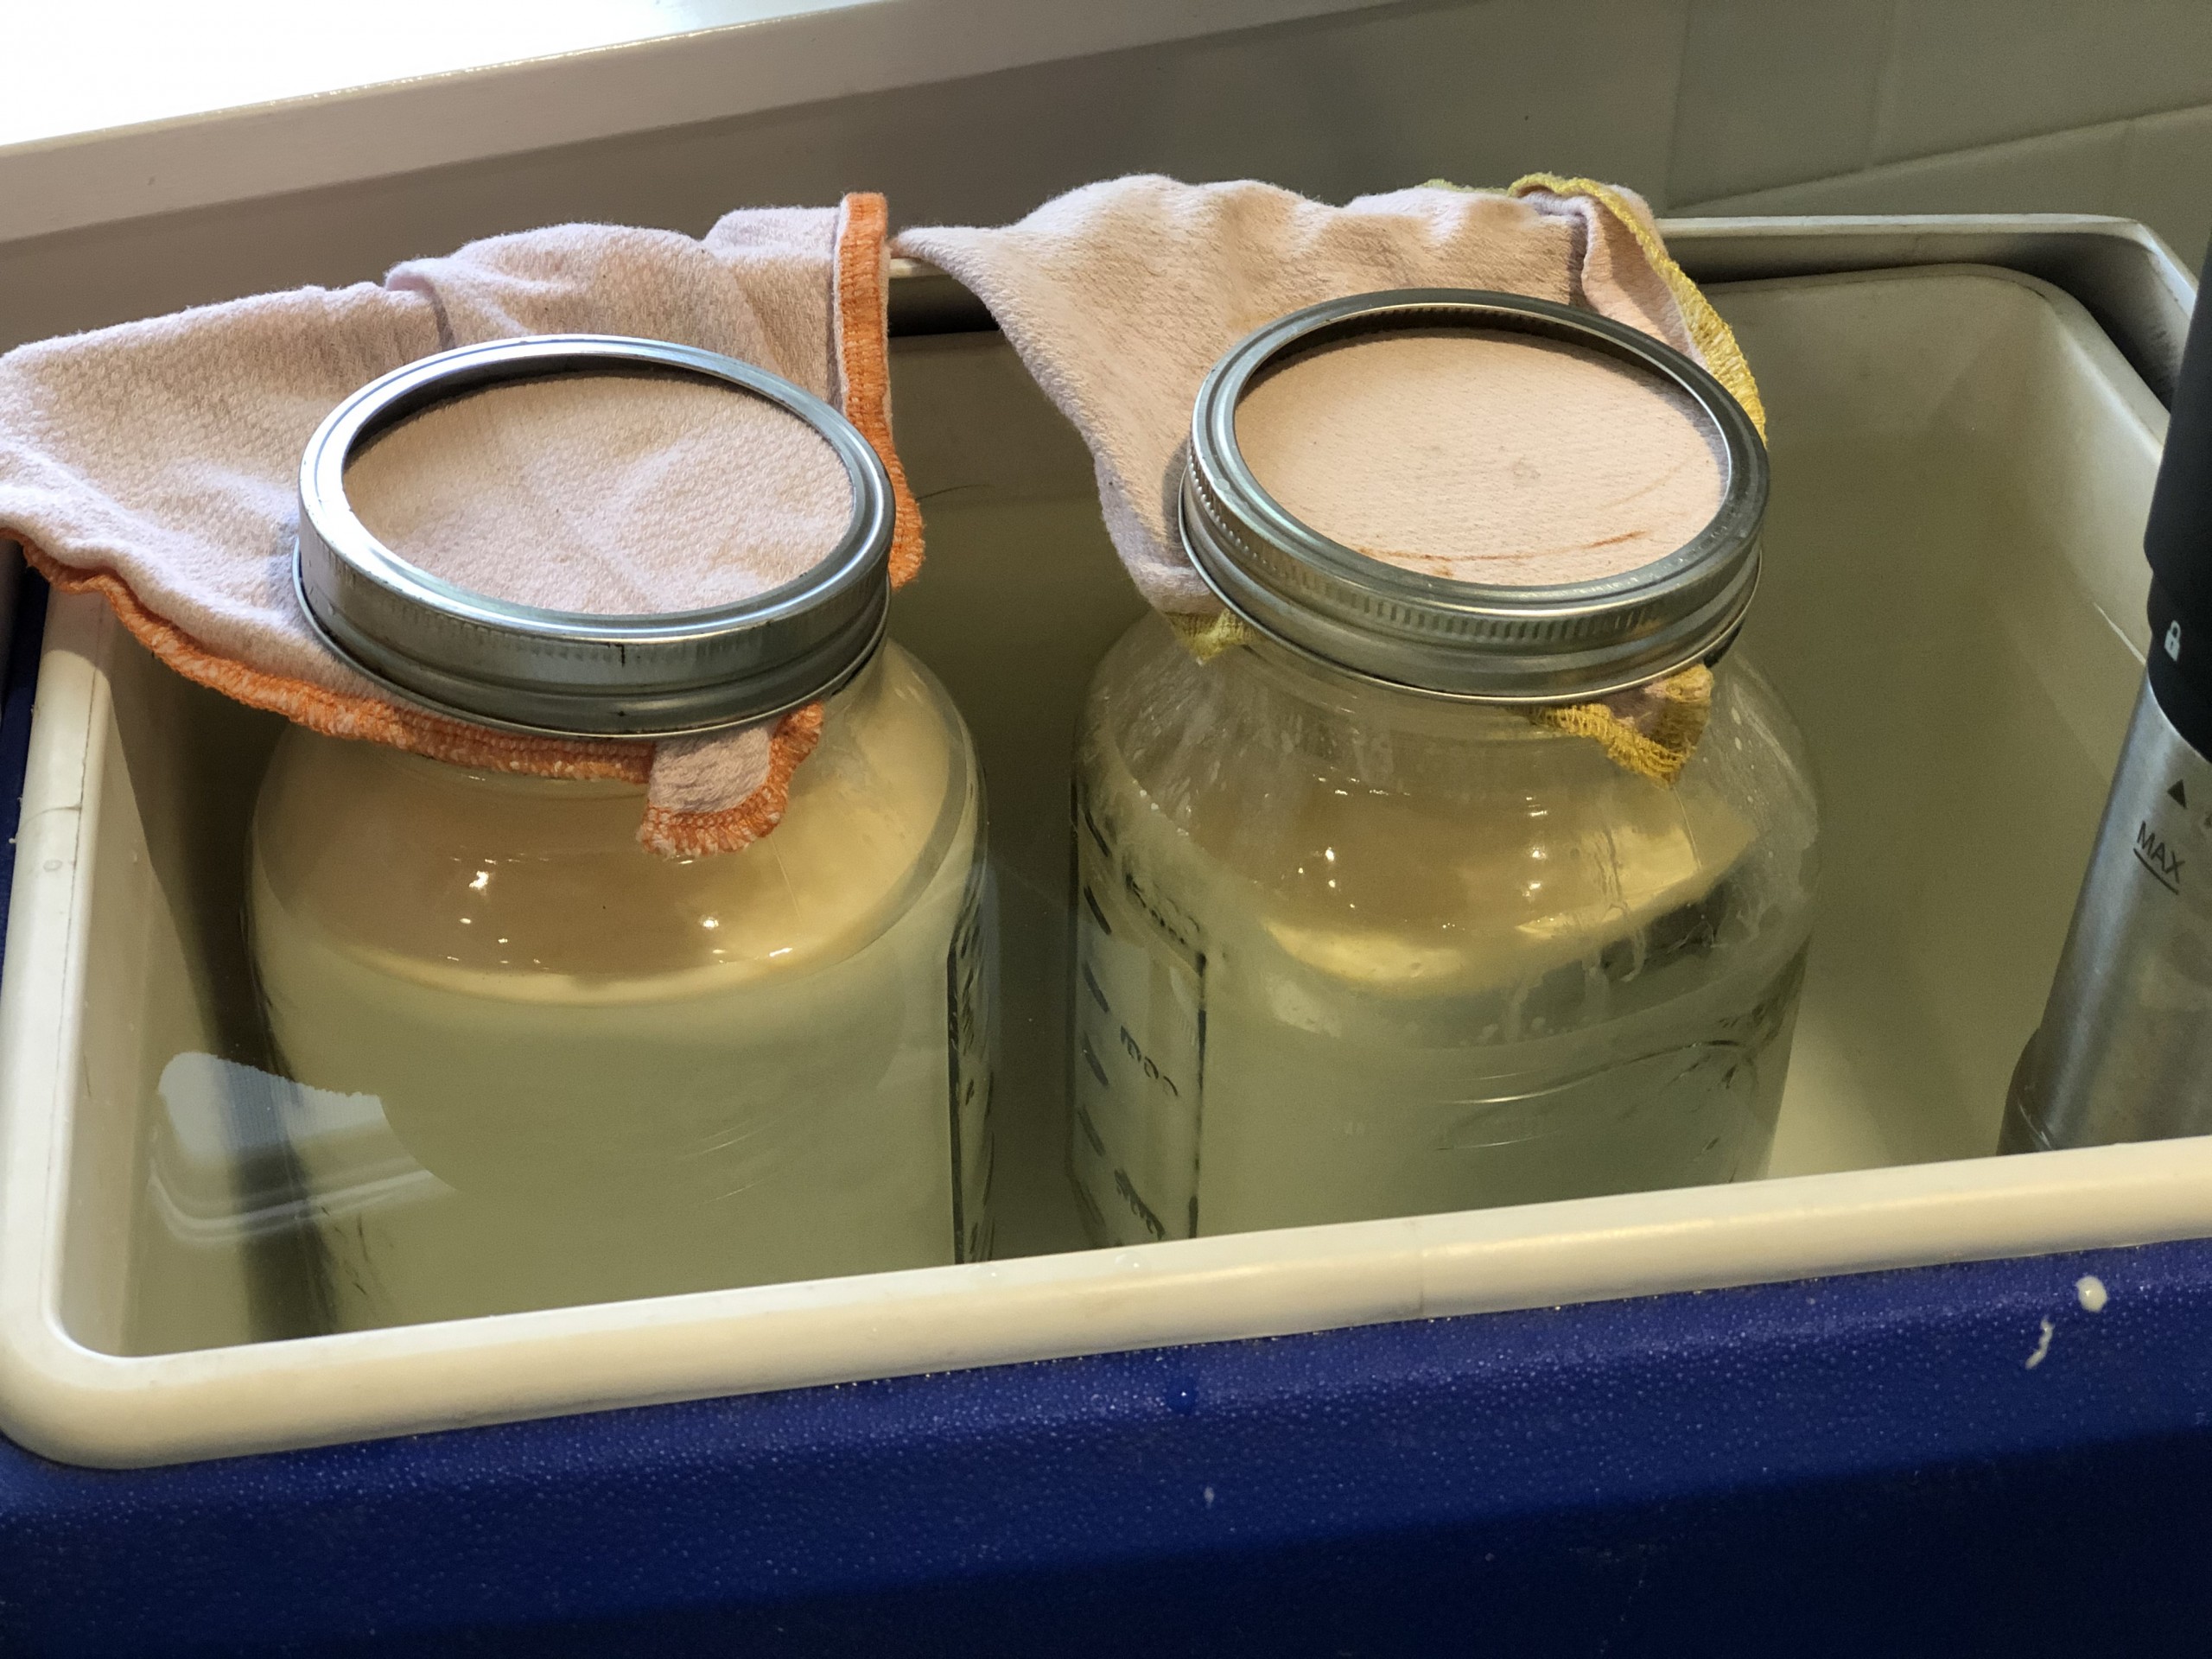
- I do this by leaving the sous vide set to 110F for 8 hours. I take the sealed part of my lid off, cover the jar opening with a clean cloth, and hold it in place with the jar ring (see photo) to give the yogurt a little air flow.
- If you’re making yogurt without a sous vide, you might need to play around with this step to figure out the best way to keep your milk/yogurt at 110F. Here are some common ways:
- Keep the warm milk in the warm pot (with a lid). Wrap it in a towel and leave it on top of the stove, in your oven with the light on, or on top of your refrigerator. You might need the full 12 hours for the yogurt to get thick enough.
- Put the milk/yogurt into jars. Fill a cooler 3/4 full with hot tap water (this should be between 110F and 120F and your water level should be high enough that the jars are mostly submerged, but not so high that they’re under water (see photo)), place jars into this hot water bath and close the lid of your cooler
Enjoy!
You’ll of course want to refrigerate the yogurt after the 6-12 hours. And its worth noting that the yogurt will continue to thicken as it cools completely in the fridge.
Do you make your own yogurt? Do you have recommendations or questions? Please add them in the comments below!
]]>
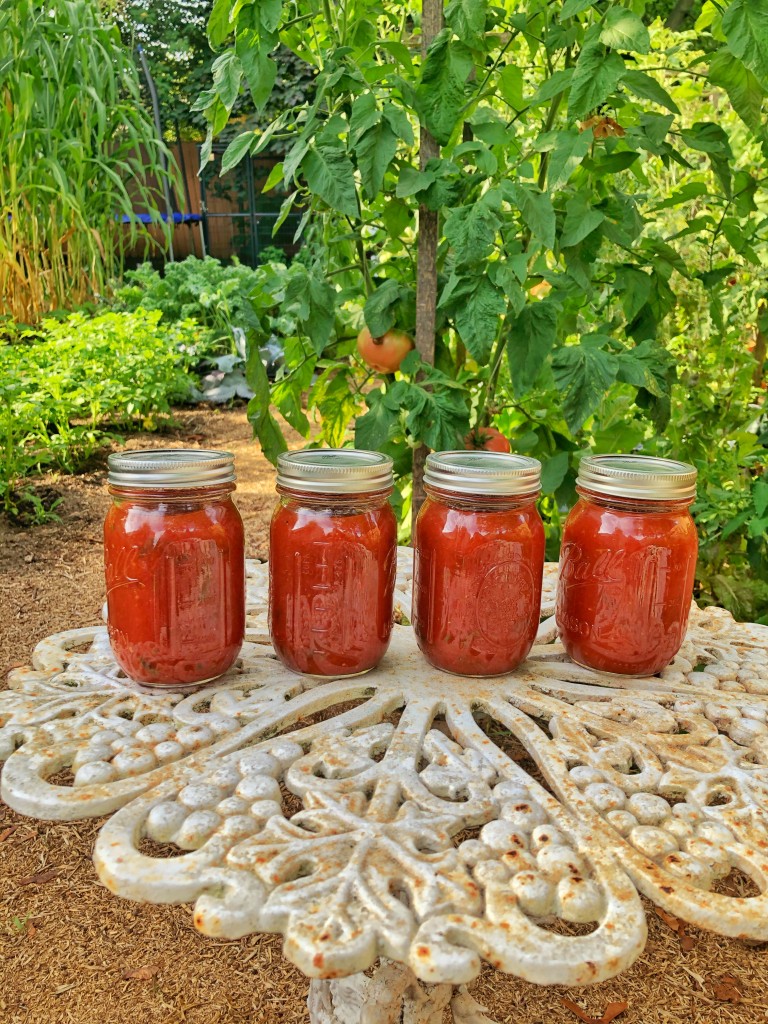
Here’s blog #2 on preserving tomatoes. As I mentioned before, tomatoes are such a favorite for me that I’m devoting several blogs to the various ways of preserving them. There are four lessons on this in the free Preserving Local Food course, including tomato paste and sun dried tomatoes. It’s my hope that these specific examples will demonstrate how you can use the various preserving methods presented in this course in combination to preserve your favorite local foods.
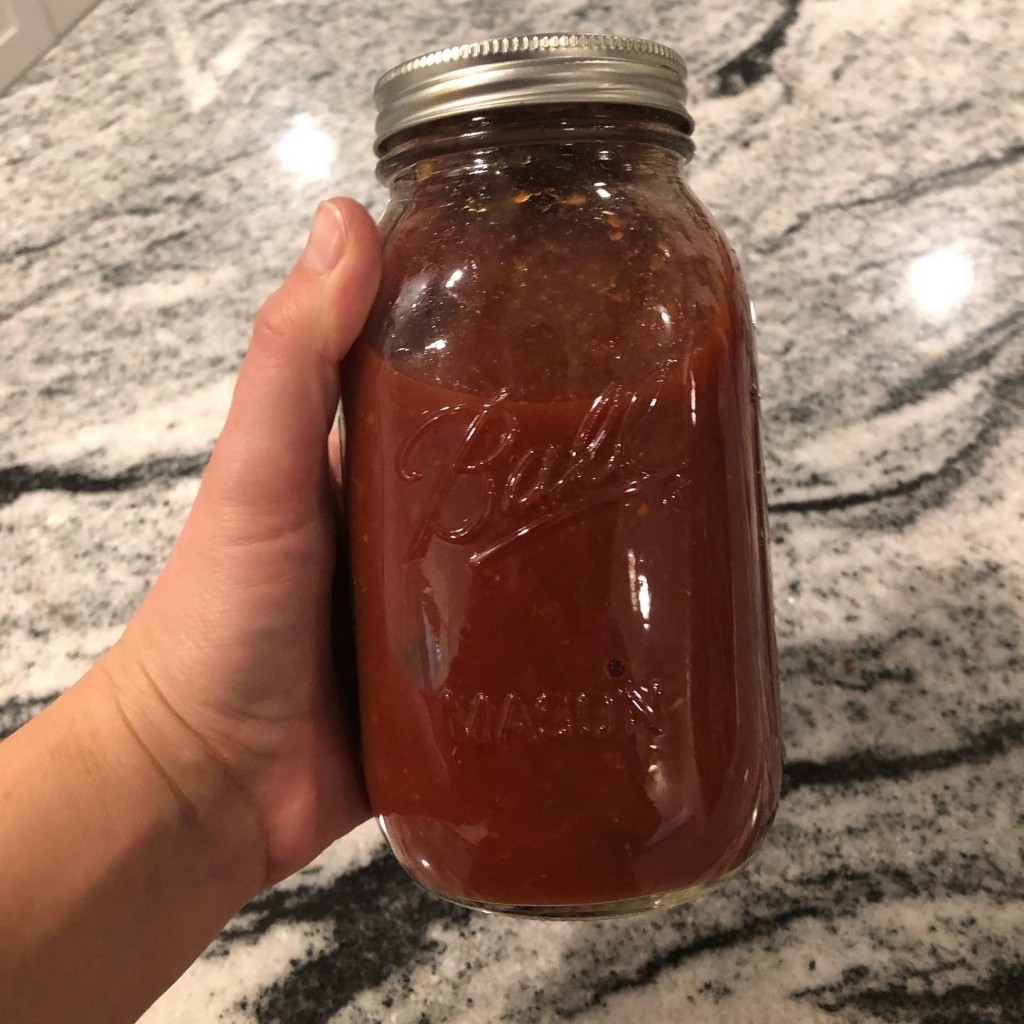
This tomato sauce recipe comes from my mother-in-law. We eat a pint every single week. All year long. We use it in the following ways:
- Pizza sauce
- Pasta sauce
- The best damn tomato soup you’ll ever eat
We chose the hot water bath canning method to preserve this sauce, but you could just as easily freeze it if you make sure to leave lots of head space at the top to allow for expansion when it freezes (see the Freezing lesson for more details).
Supply List
- Baking sheet or other large flat pan for roasting
- 7- to 8-quart stainless steel, enamel, or non-stick heavy pot
- Pint jars and lids (you could use quarts or half pints if you prefer)
- Canning supplies (see the Water Bath Canning lesson for details)
- Common kitchen utensils, such as a wooden spoon, ladle, paring knife, and cutting board
- Fresh, ripe tomatoes (the recipe below calls for 10 pounds, but the quantity is really up to you)
Step-by Step Instructions for Grandma’s Tomato Sauce
(makes 4 pints) download a printable version
Ingredients
10 pounds ripe tomatoes*
1 large or 2 small onions, roughly chopped
1 head garlic, cloves peeled
4 Tablespoons salt
1 Tablespoon balsamic vinegar
1 teaspoon black pepper (freshly ground, if you’ve got that option)
2 cups lightly packed fresh basil leaves, roughly chopped
1/2 cup lightly packed fresh oregano leaves, roughly chopped
1/2 cup lightly packed fresh parsley, roughly chopped
1 Tablespoon crushed red pepper (optional)
6 tablespoons lemon juice (from about 1 1/2 lemons if you want to squeeze it yourself)
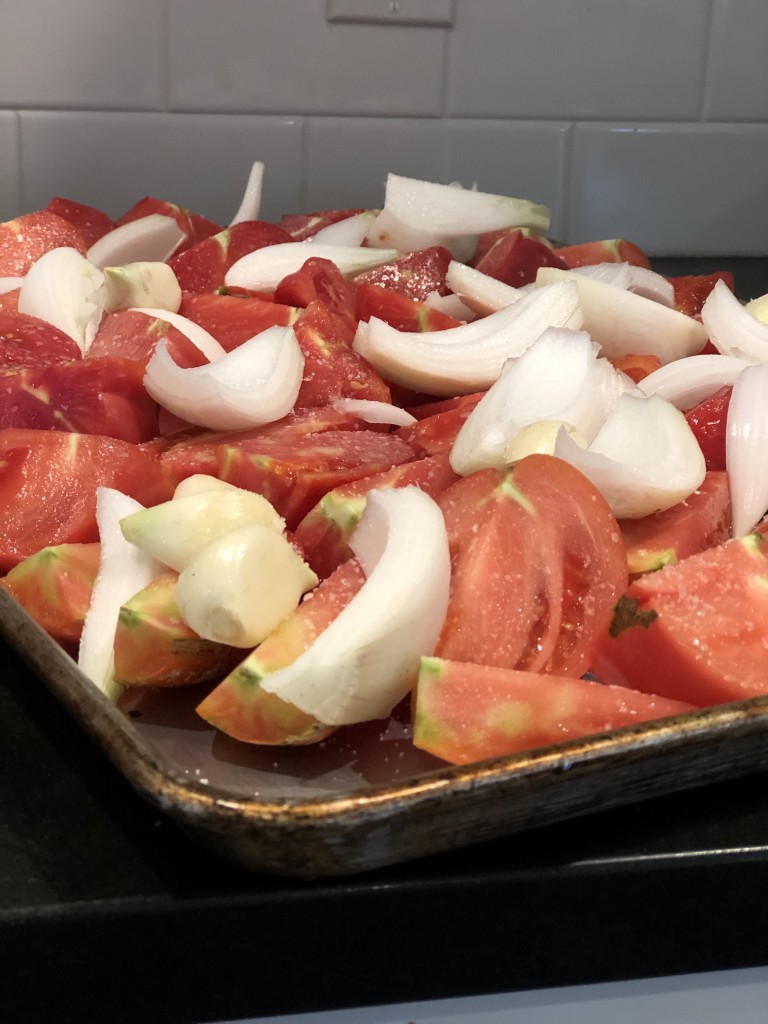
Assembly
- Roast the tomatoes, onions, garlic, and 1 Tablespoon salt in the oven at 350F for 1 to 2 hours; let cool until you can safely handle them
- Process tomatoes, onions, and garlic through the food mill
- Transfer tomato sauce to a pot and add remaining 3 Tablespoons salt, vinegar, and black pepper.
- Bring to a simmer.
- Simmer, uncovered and stirring occasionally, for 70 to 80 minutes or until the mixture reaches desired consistency (you should have about 8 cups at this point)
- Remove from heat; stir in basil, oregano, parsley, and crushed red pepper (optional)
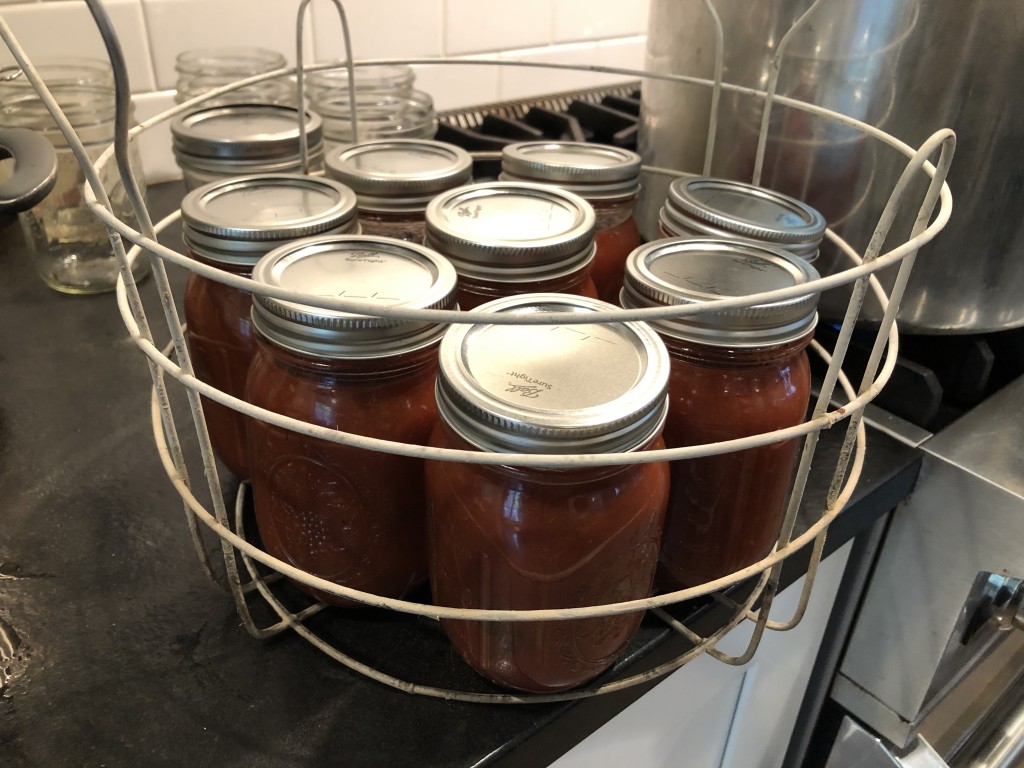
Canning instructions
- Prepare boiling water canner (see the Water Bath Canning lesson for details supplies and the overall canning process). Heat jars in simmering water until ready to use, do not boil. Wash lids in warm soapy water and set aside with bands.
- Add 1 Tablespoon lemon juice to each hot pint jar (or 2 Tablespoons if you’re using quarts).
- Ladle tomato sauce into hot jars, leaving 1/2 inch headspace.
- Wipe jar rim. Center lid on jar and apply band, adjust to fingertip tight. Place jar in boiling water canner. Repeat until all jars are filled.
- Process jars for 35 minutes (for both pints and quarts, adjusting for altitude).
- Turn off heat, remove canner/pot lid, let jars stand 5 minutes.
- Remove jars and cool 12-24 hours. Check lids for seal, they should not flex when center is pressed.
*Recipe Notes:
- We use all kinds of different tomatoes for this sauce… whatever we have on hand, really, which is usually some combination of the following: Roma, Amish Paste, Beefsteak and others.
How much tomato sauce should you make and preserve?
This is a tricky question, but a really important one to discuss. You’ll probably have to experiment over several years to really answer it well, but to get yourself close right now, I recommend asking yourself the following questions:
- How do I plan to cook with my tomato sauce?
- What specific recipes call for it and in what quantities?
- How often do we usually eat these dishes?
- Do I wish to eat more or less this year?
We tend to use one pint of this sauce per week, so we make at least 12 batches of grandma’s sauce to make sure we have enough.
If you’re unsure, I recommend starting with one batch of the recipe above. Alternatively, you can let your tomatoes guide you and make as many batches as you have tomatoes for.
Please share your thoughts, questions, and experience with homemade tomato sauce in the comments! Do you have a favorite recipe? How much tomato sauce do you use each year? Please tell us about it!
]]>
This blog is part of a series about preserving food so you can eat local all year long. I’ve collected them all into a free course that you can access here. The course includes lessons that explain the basic preservation methods of canning, freezing, and dehydrating, and specific examples of how I use these preserving methods in combination to preserve tomatoes and corn on the cob – two of my favorite foods!
Tomatoes are such a favorite for me that I’m devoting several blogs to the various ways of preserving them. There are four lessons on this in the free Preserving Local Food course, including tomato paste and sun dried tomatoes. These specific examples will demonstrate how you can use various preserving methods (canning, freezing, and dehydrating) in combination to preserve your favorite local foods.
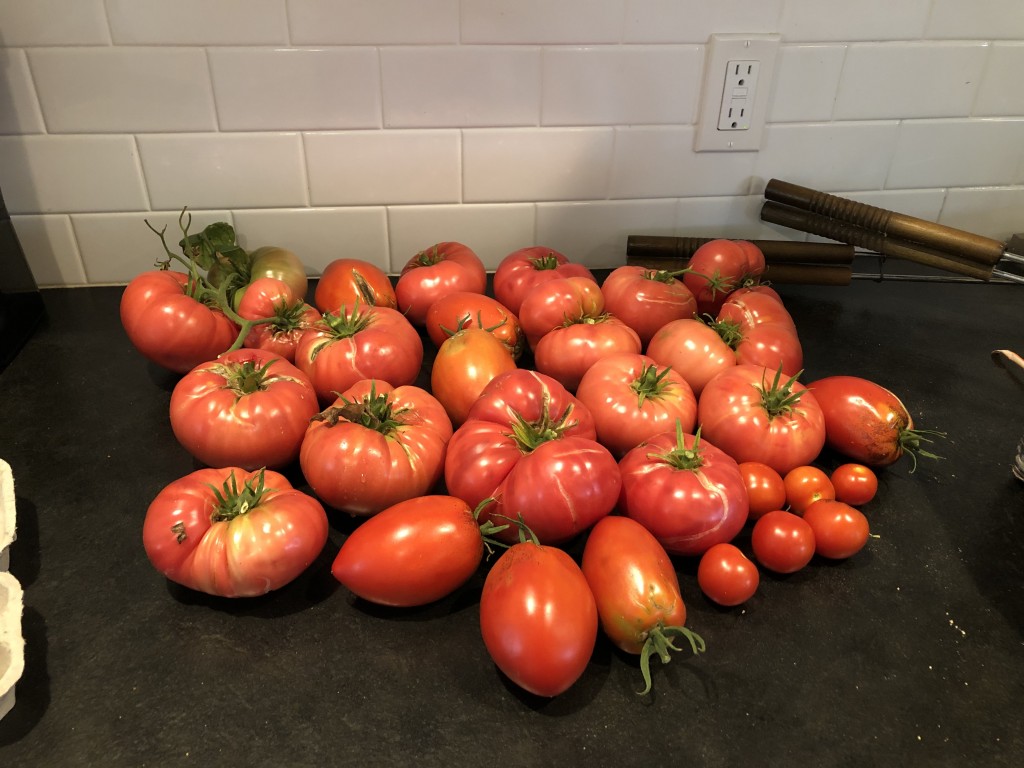
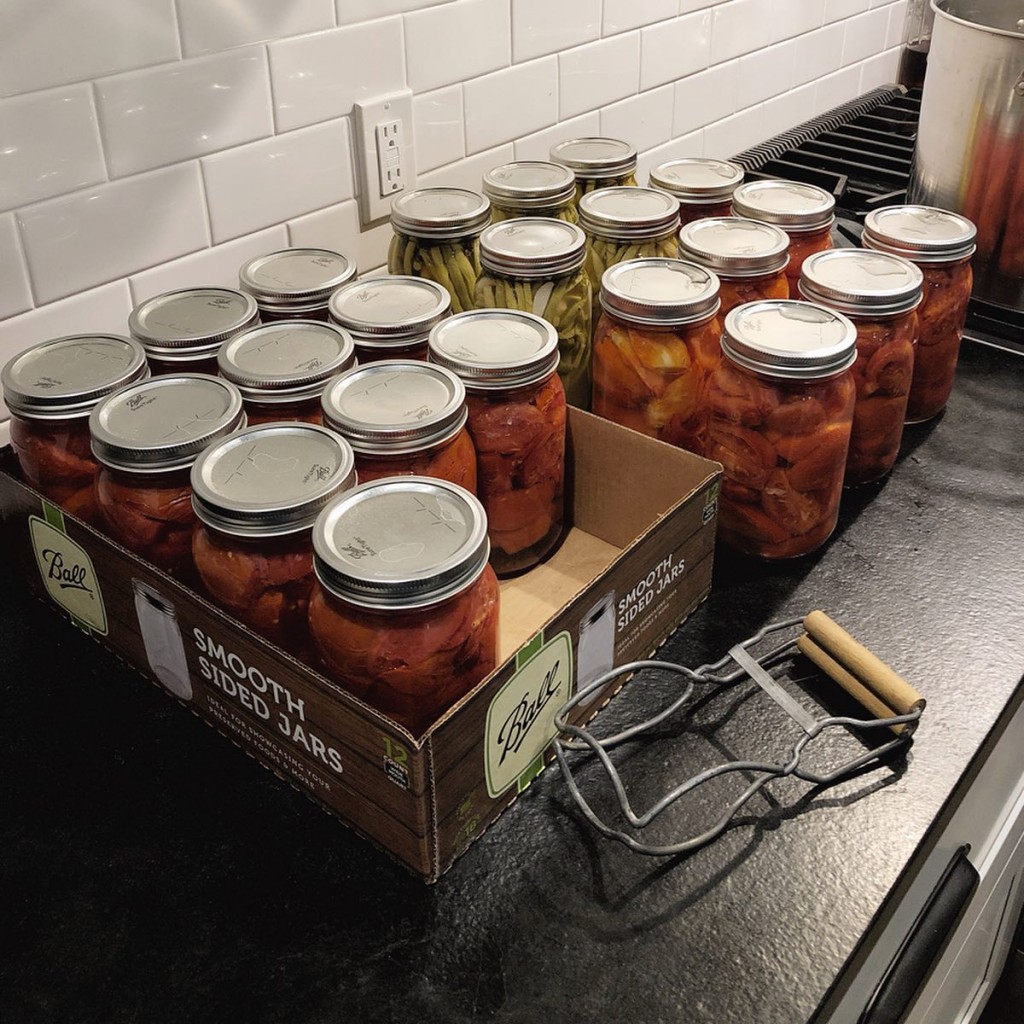
Last year I turned about 30 pounds of fresh Roma tomatoes from my farmers market into 17 quarts of canned tomatoes for year round cooking. These canned tomatoes are great for:
- chili
- other soups and stews
- pasta dishes
- casseroles
- any recipe that calls for canned tomatoes (in which you previously used diced, crushed, or other style canned tomatoes you purchased from the grocery store)
Supply List
- Baking sheet or other large flat pan for roasting
- 7- to 8-quart stainless steel, enamel, or non-stick heavy pot
- Quart jars and lids (you could use pints or another size if you prefer)
- Canning supplies (see the Water Bath Canning lesson for details)
- Common kitchen utensils, such as a wooden spoon, ladle, paring knife, and cutting board
- Fresh, ripe tomatoes (the quantity is up to you; the recipe below works for any amount)
Step-by-step Instructions for Canned Tomatoes
(download a printable version)
Note that the recipe works well for whole, halved, quartered, or diced tomatoes. Feel free to make whichever you tend to cook with the most, or a combination. I recommend referencing this recipe for more information.
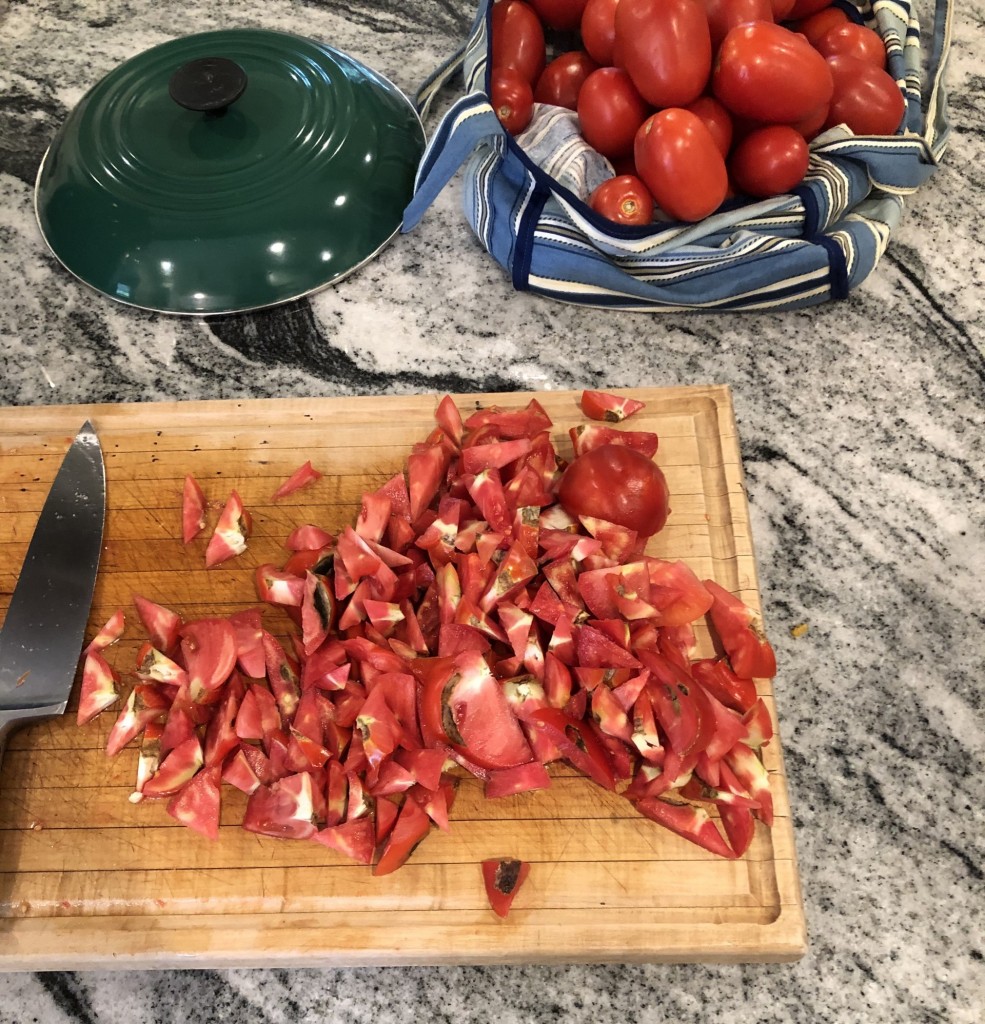
- Cut tomatoes to the desired size and cut out the core/stem.
- I quartered mine, but you can cut yours in half, a smaller dice or leave them whole; however you prefer.
- Also, I chose to leave the skin on since its full of good nutrients.
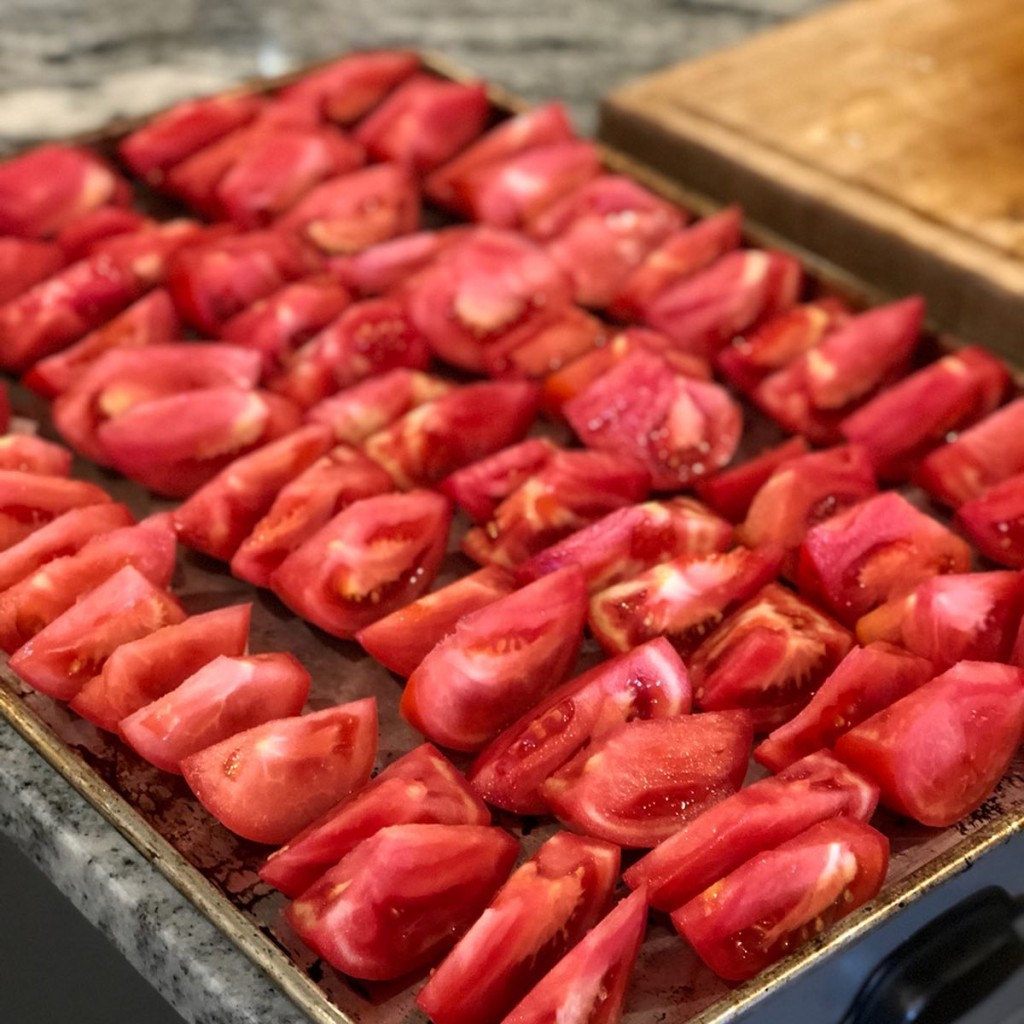
- If you want to remove the skins, I recommend a quick blanch (dip the tomatoes into boiling water for a 30-60 second) to loosen the skins, immediately plunge into cold water, and then slip the skins off with your fingers.
- Following the advice of Anne-Marie Bonneau (AKA Zero Waste Chef) I roasted mine for about 2 hours at 225F to concentrate the flavor just a bit before canning them. This is, of course, an optional step.
- Prepare boiling water canner (see the Water Bath Canning lesson for details supplies and the overall canning process). Heat jars in simmering water until ready to use, do not boil. Wash lids in warm soapy water and set aside with bands.
- Add 2 Tablespoons lemon juice to each hot quart jar (or 1 Tablespoon if you’re using pints).
- Pack tomatoes in hot jars, pressing down, until space between tomatoes fills with juice, leaving 1/2 inch headspace.
- Remove air bubbles. Wipe jar rim. Center lid on jar and apply band, adjust to fingertip tight. Place jar in boiling water canner. Repeat until all jars are filled.
- Process jars 1 hour and 25 minutes (for both pints and quarts, adjusting for altitude).
- Turn off heat, remove canner/pot lid, let jars stand 5 minutes.
- Remove jars and cool 12-24 hours. Check lids for seal, they should not flex when center is pressed.
How many tomatoes should you buy and can?
This is a tricky question, but a really important one to discuss. You’ll probably have to experiment over several years to really answer it well, but to get yourself close right now, I recommend asking yourself the following questions:
- How do I plan to cook with the canned tomatoes?
- What specific recipes call for them and in what quantities?
- How often do we usually eat these dishes?
- Do I wish to eat more or less this year?
Based on your answers to these questions, I recommend this amazing chart to help you decide how many bushels or pounds to buy.
It might also be helpful to approach this from the other direction… to start with one bushel of tomatoes, can them in your favorite style (whole, halved, quartered, or diced) and see how much of the canned tomatoes your family eats. Then you can adjust next year.
For reference, I canned 30 pounds of tomatoes into 17 quarts and we didn’t quite use them up last year. I found that we used canned tomato sauce, frozen tomatoes, and tomato paste much more often than these canned tomatoes (more to come on each of these in the following lessons).
Here’s an example from the Water Bath Canning lesson in case it’s helpful:
Let’s imagine you’re canning tomatoes for making chili, you normally eat chili once per week, and your recipe calls for two 28-ounce cans of diced, crushed, or whole tomatoes.
In this case, I would recommend you can your tomatoes in quart jars. Quart jars are 32 ounces each, so I would recommend planning on 2 quarts per batch of chili. Since there are 52 weeks in the year, I’m going to guess you eat chili once a week for about half the year… thats 26 times per year… and you need 2 quarts per batch, so I would recommend making about 50 quarts of canned tomatoes.
You need about 2.5-3.5 pounds of ripe tomatoes per quart jar. If you buy your tomatoes by the pound, that means you should buy approximately 150 pounds of tomatoes from your farmers market or farm stand.
Most of the time I buy my tomatoes by the bushel, so we need one more conversion. According to this chart (which will help you make this similar calculation for all other fruits and vegetables), one bushel of tomatoes is 53 pounds, so you would need to buy 3 bushels.
Please share your thoughts, questions, and experience canning tomatoes in the comments! How do you slice them (diced, quartered, halved or whole)? How many canned tomatoes do you use each year? Please tell us about it!
]]>
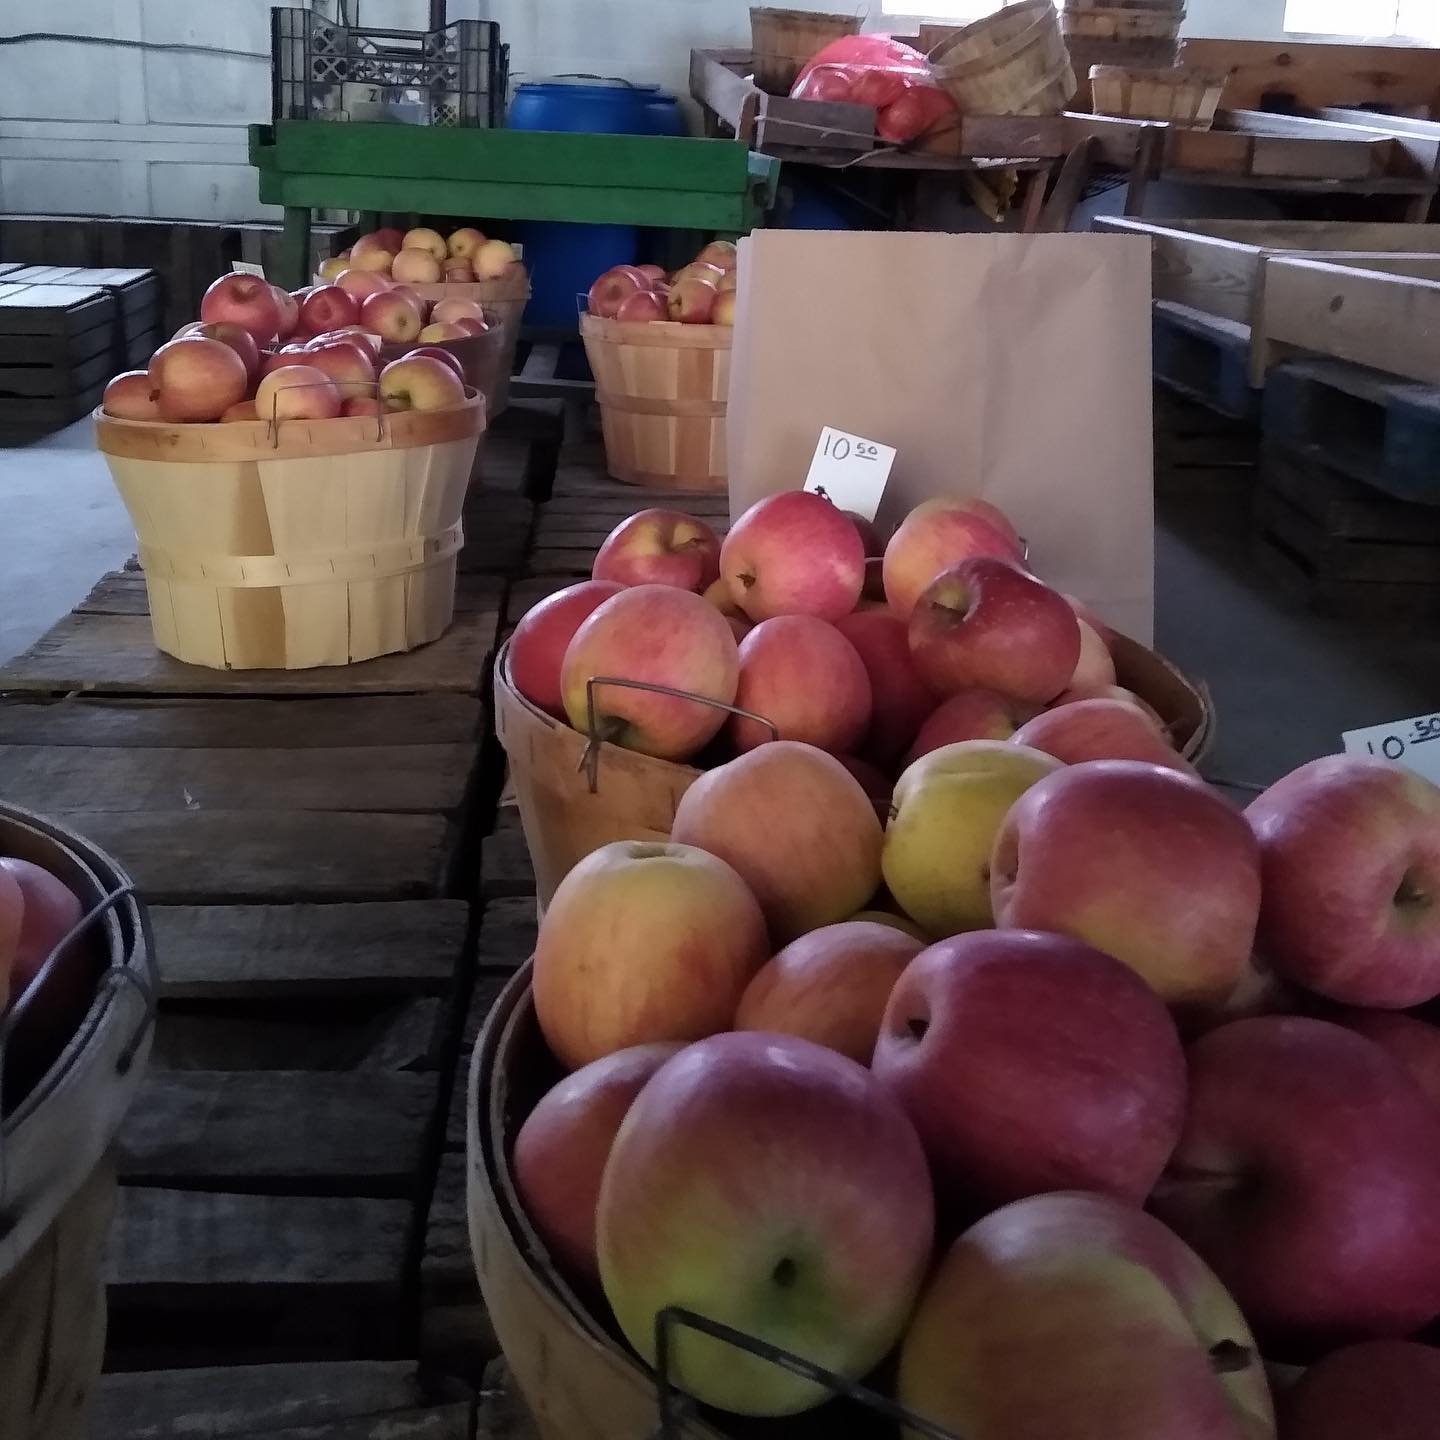
It’s canning season! My backyard garden is starting to overflow with vegetables and I’m starting to see bushels of tomatoes and cucumbers at my farmers market. It’s the most wonderful time of the year!
This blog is part of a series about preserving food so you can eat local all year long. I’ve collected them all into a free course that you can access here. The course includes lessons that explain the basic preservation methods of canning, freezing, and dehydrating, and specific examples of how I use these preserving methods in combination to preserve tomatoes and corn on the cob – two of my favorite foods!
When the most of us think about preserving food, our minds immediately jump to the rows and rows of home-canned goods in our grandparents’ pantry. Canning is a nostalgic process that is an important tool in our modern day preservation toolkit, so it’s a great place to start, but if canning feels overwhelming to you or you’re nervous about it, I recommend skipping ahead to the lesson on freezing. Freezing is an equally good tool that is, in my opinion, underutilized and can sometimes feel a bit more approachable if you’re just starting to think about preserving local food.
Most of the information in this post comes from the makers of Ball and Kerr jars because they’re the experts I’ve relied on for most of my life. I’m going to cover just the basics here. If you’re interested in digging deeper, you can find much more information at https://www.freshpreserving.com/
Getting Started: Explaining the Canning Methods
There are two home canning methods: water bath canning and pressure canning. I’m only going to include water bath canning in this lesson because its the best method for beginners, but if you’re wanting to preserve low-acid foods, including meat, please read learn more about pressure canning.
![]()
Water Bath Canning
A lower-temperature canning process, water bath canning is ideal for high-acid foods and recipes that incorporate the correct measure of acid. The combination of time and temperature destroys mold, yeast, and enzymes that cause spoilage while creating a vacuum seal. This process is recommended for produce and recipes including:
- Fruits and fruit juices
- Jams and jellies
- Salsas
- Tomatoes
- Pickles and relishes
- Chutneys, sauces, pie fillings
- Vinegars
- Condiments
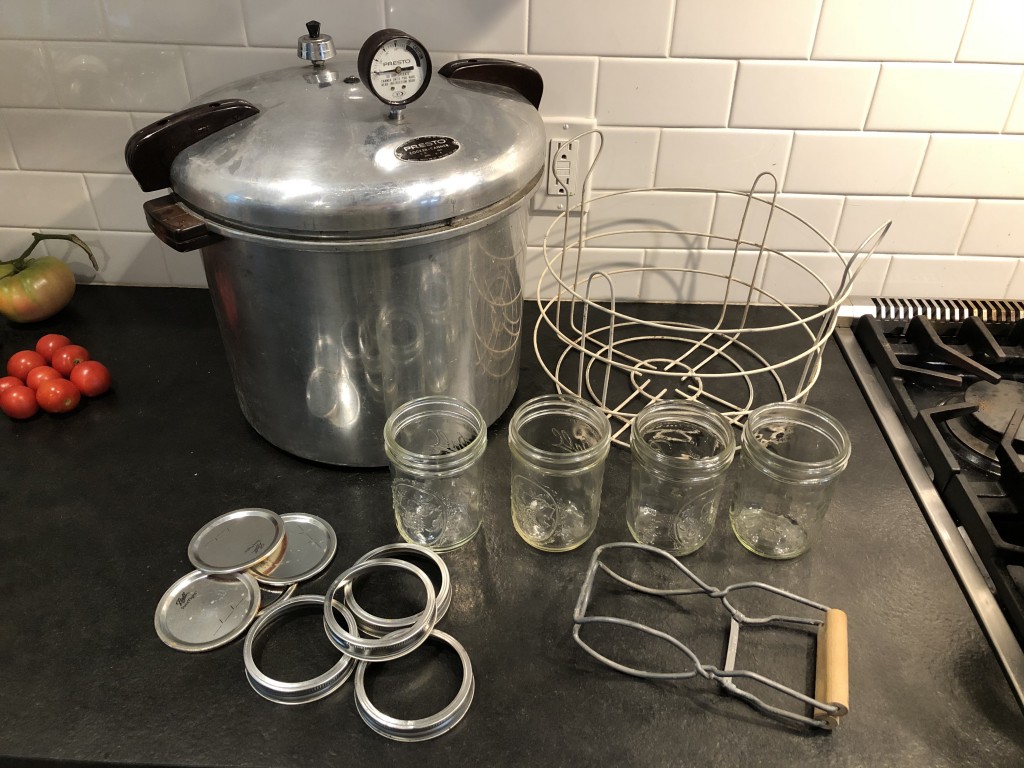
Here’s a basic supply list to get you started:
- Boiling water bath canner or a large, deep saucepot with a lid
- If you don’t have a “water bath canner”, don’t worry!
- A large, deep saucepot equipped with a lid and a rack works well. As long as it is large enough to fully immerse the jars in water by 1-2 inches—and allow the water to boil rapidly when covered—the pot is adequate.
- Canning rack
- I recommend using something to keep your jars off the bottom of the pan because they’re likely to break when sitting directly against the hot bottom, so lets get creative if you don’t have a rack at your finger tips
- Ask a friend/neighbor/relative if you can borrow their canning kit or put a call out on your local Buy Nothing group on Facebook (its a group dedicated to passing on or lending items exactly like this).
- Look around your house for a metal rack that might work. For example, my instant pot came with one. A cake cooling rack works well too.
- Make your own by placing a few chopsticks or butter knives in a grid along the bottom of your pot… you can use just about anything as long as it will provide a stable surface to keep your jars slightly elevated, off the bottom of the pot
- Or you can tie together extra bands (the metal part of the jar lid… the part you touch with your hands to tighten) to cover the bottom of the pot.
- You can always buy a rack. I recommend measuring the diameter (thats the distance straight across the top) of your pot and try to find a rack that is just slightly smaller.
- I recommend using something to keep your jars off the bottom of the pan because they’re likely to break when sitting directly against the hot bottom, so lets get creative if you don’t have a rack at your finger tips
- Jar lifter
- This is another tool that is rather important, so you don’t burn your fingers taking jars into and out of the boiling water, so I recommend the same approach to finding one of these as the canning rack. Maybe you can borrow them from the same friend… or make your own with tongs and rubber bands, using this tutorial from the creative folks at kitchn
- Home canning funnel
- This is a really helpful tool and helps keep your working space clean.
- On the other hand, if you’re just getting started and don’t want to buy a lot of new supplies, this is one of the more optional supplies.
- Glass preserving jars, lids, and bands (the official recommendation is to always start with new lids)
- I recommend using wide mouth jars whenever possible. They’re just so much easier to maneuver food into and out of and they’re better for freezing too, so you can use one jar for all your preserving needs.
- Its also worth thinking a bit about the quantity of a particular vegetable you usually use when grabbing your jars for a project. For example, I can tomatoes, dilly beans, and pickles in quart jars, but prefer pints for jams, jellies, and salsa because I eat those slower and don’t want my hard work to spoil in my fridge after opening.
- Again, if you don’t have a stash of canning jars you can creatively and inexpensively build one using the following sources:
- Buy Nothing groups on Facebook or asking around to see if your friends or family might have extras they’d like to pass on
- Resale shops like Goodwill, Salvation Army, or others that you choose to shop at. I recommend washing all used jars in your dishwasher on hot just to be sure they’re sanitized for your use
- Buying new at your local grocery store or online. I recommend the following (these links are for Amazon because its the easiest, but the Amazon prices are 5x what I pay for these jars locally, so I highly recommend checking your local grocery store first):
- Common kitchen utensils, such as a wooden spoon, ladle, and paring knife
- Quality ingredients (fresh fruits and vegetables)
The Water Bath Canning Process
- Fill water bath canner (or pot) at least half-full with water. Cover and maintain a simmer (180°F) until jars are filled and placed in canner.
- Check jars, lids, and bands for proper functioning. Jars with nicks, cracks, uneven rims, or sharp edges may prevent sealing or cause jar breakage. The underside of lids should not have scratches or uneven or incomplete sealing compound as this may prevent sealing. Bands should fit on jars. Wash all in hot, soapy water and dry well.
- Pre-heat your jars in hot (180°F) water. Keeping jars hot prevents them from breaking when filled with hot food. Leave lids and bands at room temperature for easy handling.
- Prepare the food using a tested high-acid preserving recipe. Ball has lots of online recipes and I’ll share my favorite in the coming lessons.
- Use a Jar Lifter to remove the pre-heated jar.
- Fill jar one at a time with prepared food, leaving headspace recommended in recipe.
- Remove air bubbles, if stated in the recipe, by sliding a rubber spatula between the jar and food to release trapped air. Repeat around jar 2-3 times. For successful sealing, you need to leave the correct amount of space between the food and the rim of the jar.
- Wipe the rim and threads of the jar using a clean, damp cloth to remove any food residue. Center lid on the jar, allowing sealing compound to contact the jar rim. Apply band and adjust until fit is fingertip-tight. Place jar in canner. Repeat steps 5 through 7 until all jars are filled. Ensure water covers jars by 1-2 inches.
- Place lid on water bath canner and bring water to a rolling boil. Begin processing time.
- Process in the boiling water for the time indicated in tested preserving recipe. When complete, shut off heat and remove the lid. Allow jars to rest in canner for 5 minutes to be acclimated to the outside temperature.
- Move jars from canner and set upright on a towel. This will prevent jar breakage that can occur from temperature differences. Leave jars undisturbed for 12 to 24 hours. DO NOT retighten bands as this may interfere with the sealing process.
- Inspect lids for seals. There should be no flex when center is pressed. Remove the bands and attempt to lift lids off with your fingertips. Properly sealed lids will remain attached. If a lid fails to seal within 24 hours, immediately refrigerate the product. Clean canning jars and lids, label and store in a cool, dry, dark place for up to for up 18 months.
I’ve found the water canning method to work well for just about anything I want to can, but if you’re wanting to preserve low-acid foods, including meat, please read learn more about pressure canning.
How much should you buy and can?
This is a tricky question, but a really important one to discuss. You’ll probably have to experiment over several years to really answer it well, but to get yourself close right now, I recommend asking yourself the following questions for each fruit or vegetable you want to can:
- How do I plan to cook with this fruit/vegetable?
- How often do we usually eat this dish?
- Do I wish to eat more or less this year?
For example, let’s imagine you’re canning tomatoes for making chili, you normally eat chili once per week, and your recipe calls for two 28-ounce cans of diced, crushed, or whole tomatoes.
In this case, I would recommend you can your tomatoes in quart jars. Quart jars are 32 ounces each, so I would recommend planning on 2 quarts per batch of chili. Since there are 52 weeks in the year, I’m going to guess you eat chili once a week for about half the year… thats 26 times per year… and you need 2 quarts per batch, so I would recommend making about 50 quarts of canned tomatoes.
You need about 2.5-3.5 pounds of ripe tomatoes per quart jar. If you buy your tomatoes by the pound, that means you should buy approximately 150 pounds of tomatoes from your farmers market or farm stand.
Most of the time I buy my tomatoes by the bushel, so we need one more conversion. According to this amazing chart (which will help you make this similar calculation for all other fruits and vegetables), one bushel of tomatoes is 53 pounds, so you would need to buy 3 bushels.
Please share your thoughts, questions and experiences using the water bath canning method in the comments!
]]>