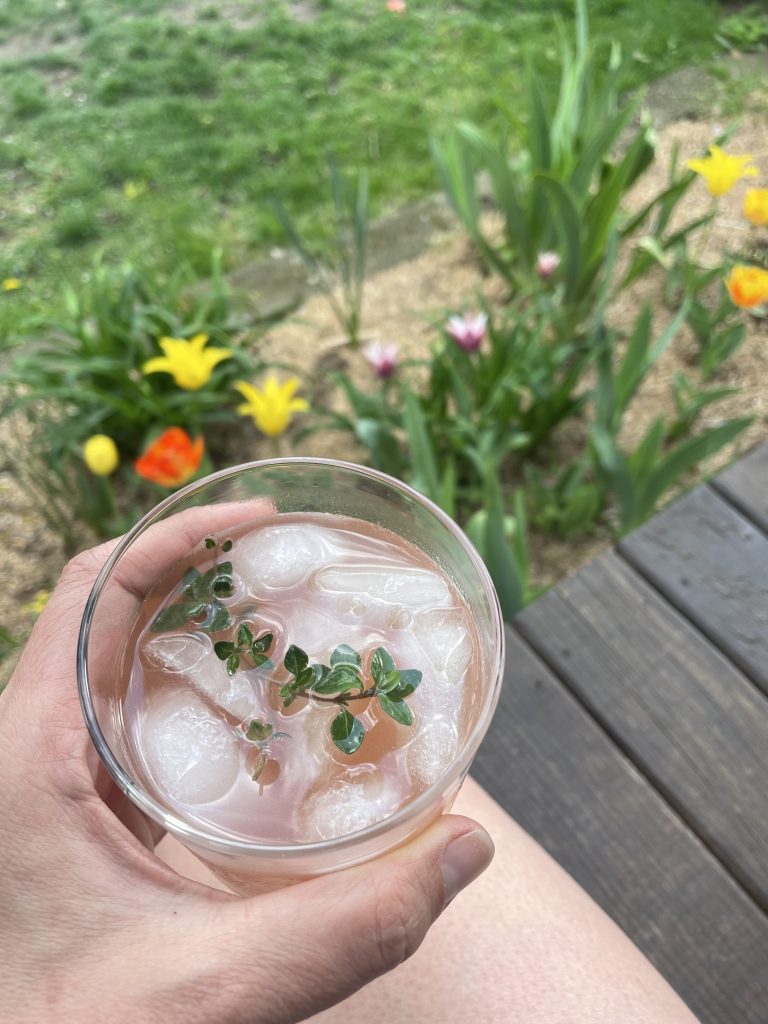
This rhubarb shrub makes a really nice and simple spring cocktail when you mix it with ice, gin, and soda water. I recommend adding a sprig of thyme for extra spring freshness. Rather than talk your ear off about it, I’ll just leave the recipe here, encourage you to give it a try, and walk back to my Saturday afternoon gin drink in the yard…..
Rhubarb Shrub
Makes about 2 cups
Ingredients
1 pound rhubarb (about 4-6 stalks), roughly chopped
1 cup sugar (maple sugar or 1/2 cup maple syrup work great too)
1 cup water
1 cup apple cider vinegar (I hear red wine vinegar or balsamic are good too, but I haven’t tried them)
Instructions
- Bring rhubarb, sugar and water to a boil in small saucepan. Reduce heat to low and simmer 20 minutes.
- Take off the heat and add the apple cider vinegar. Let cool.
- Strain through a fine mesh sieve (you could use a cheese cloth or clean towel if you need a finer mesh)
- Chill and Enjoy!
This should last just fine in the fridge for a month or so, but I dare you to resist drinking it for that long! I like to add a tablespoon or two to each drink, but you might like more or less.
]]>(Note: this post was originally published in February 2022, but I’ve given it a bit of a refresh for this years Super Bowl game and party)
In general, here are my strategies for picking the best (and lowest waste) super bowl (or, erm…. Saturday afternoon or Friday night movie night) snacks:
- Choose homemade snacks – homemade is almost always going to be lower waste than the pre-made alternative (in fact, if you can think of a single example that breaks this rule, tell me in the comments and I’ll figure out some sort of prize!). Think about a bag of potatoes vs frozen tater tots, potato skins or French fries and “naked” avocados, garlic and tomatoes vs the plastic tub of remade guacamole
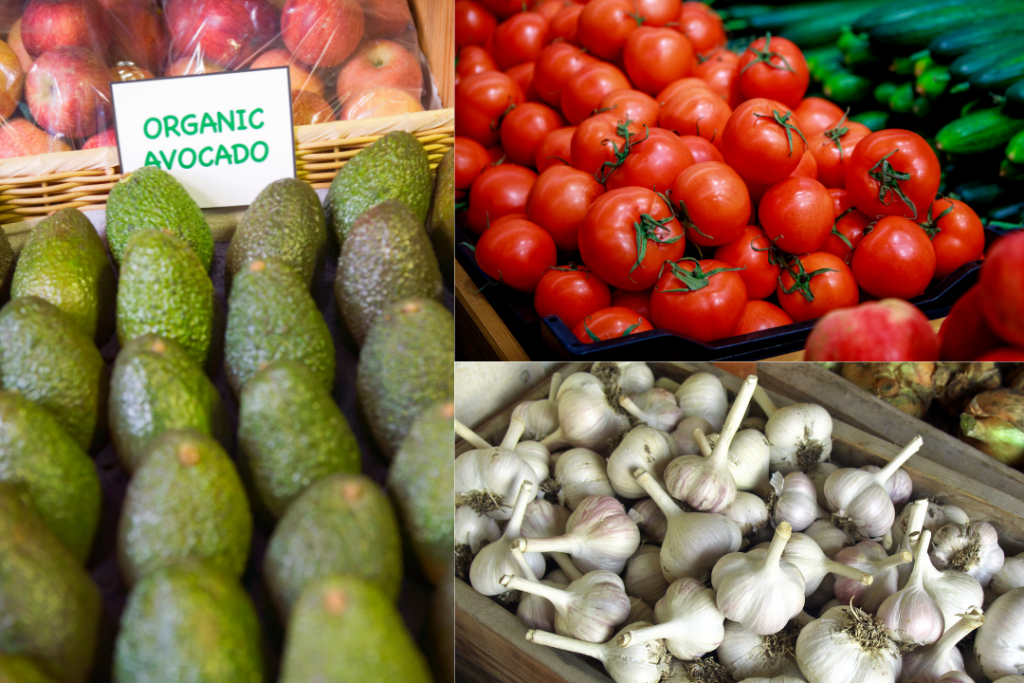
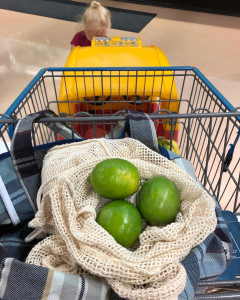
- Look for “naked” ingredients – meaning those you can buy without any packaging. Vegetables and fruits are perfect examples of this. Look for them in bulk bins and DON’T use the plastic bag. You can either bring your own produce bag (see my recommendations here if you want to purchase a few) or just throw them into your cart without a bag… trust me, the cashier will be able to ring them up for you like this just fine!
- Buy local – this is a great opportunity to support your favorite bakery, local farmer, cheese shop, or neighborhood restaurant. Lots of times, businesses like this would be happy to cater your party, make a cheese tray (hint, hint, the Rockford Cheese Shop) or create a large quantity order, but you’d better call ahead… the sooner the better!

 Buy in recyclable packaging – remember that metal and glass can be recycled endlessly (meaning over and over and over and over and… you get the idea), paper 5-7 times, and plastic only 2-3 times. I use this order to guide my packaging selection when I have choices.
- Buy in bulk – More food in the same container slightly reduces the packaging:food ratio. This is my last ditch effort to make a more sustainable choice, but this ONLY WORKS if you EAT ALL THE FOOD! Buying more than you eat (to save on packaging) and then throwing away the excess food COMPLETELY defeats the purpose!
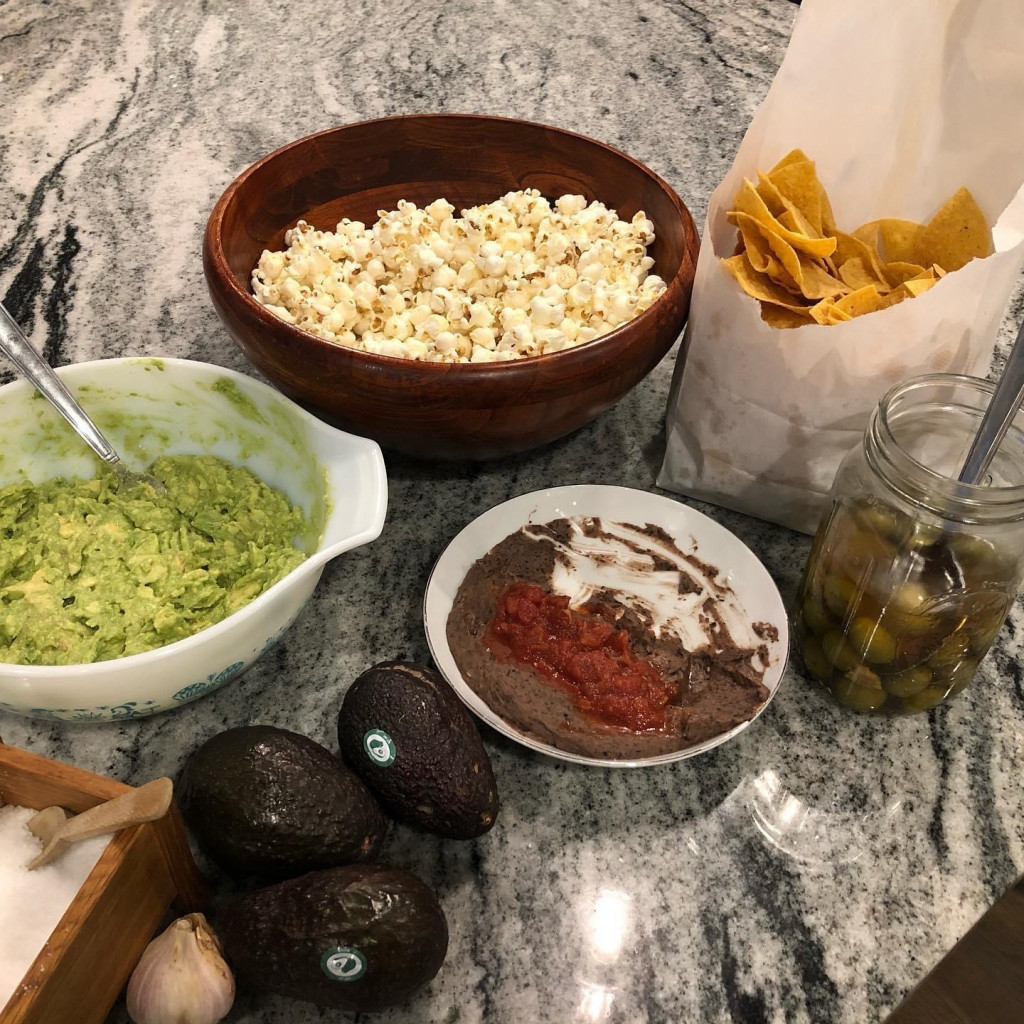
OK, on to our favorite snacks! Here they are, in no particular order…
- Guacamole (my favorite) – we’ve already talked about buying the
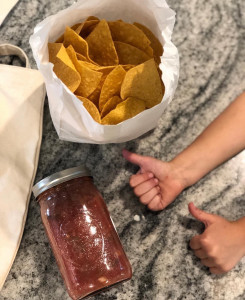
avocados, garlic, and tomatoes “naked” from the grocery store. Bonus points if you’ve grown any of these ingredients yourself. I go the extra mile and walk to the little Mexican restaurant down the road from my house and buy fresh tortilla chips in a paper bag… they’re SO delicious!
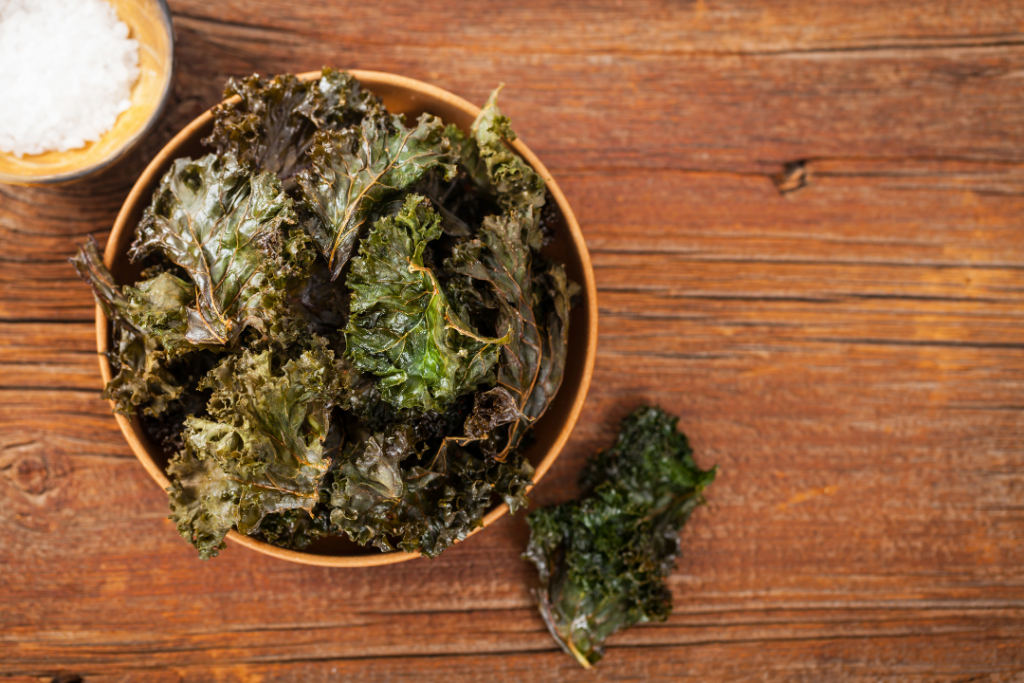
- Kale Chips (my oldest daughter’s favorite) – we’re still getting kale from our winter CSA farm share, so February is the perfect time for kale chips! We use this recipe. Even if you can’t buy it from a local farmer right now, kale is one of those vegetables you can usually find “naked” in the grocery store.
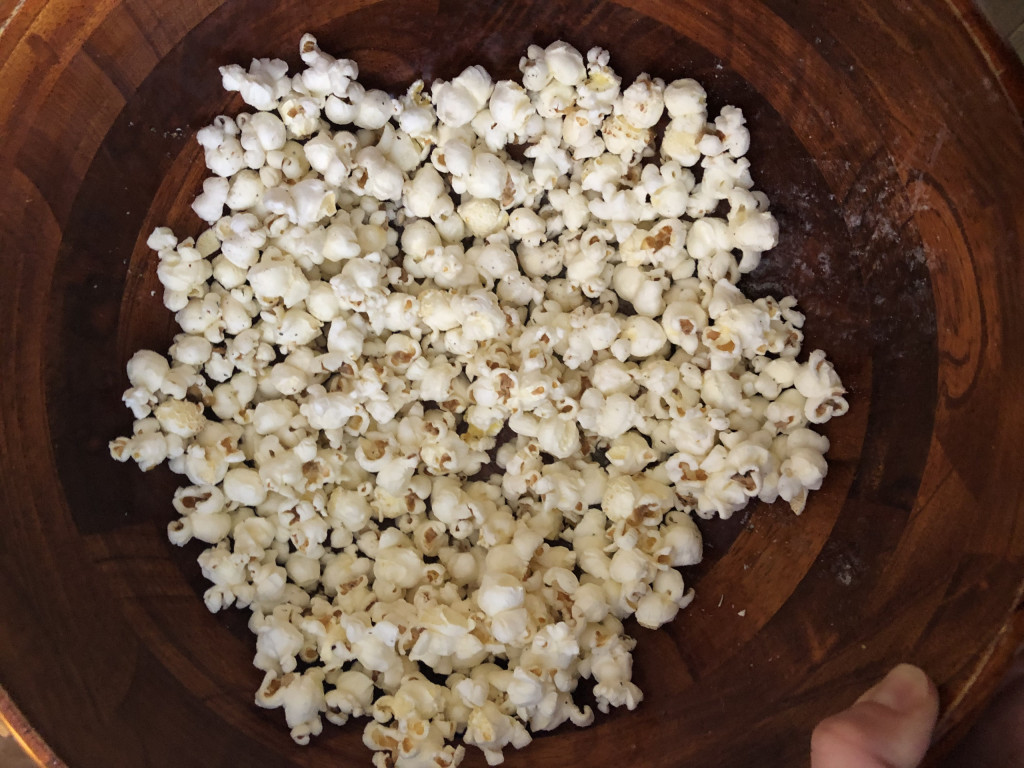
- Popcorn (Robbie’s favorite) – this simple snack is our go to for almost any lazy time around the house. Friday night movie night… is better with popcorn! Thursday night dinner when everyone is too exhausted to cook (or eat a real meal)… popcorn! I make it on the stove and don’t follow a recipe, but this one is pretty close to my routine if you’ve never cooked popcorn before. We buy our popcorn kernels in bulk (25 pound paper bag), but you can usually find kernels in glass jars in the grocery store. I use coconut oil, again purchased in a glass jar, and season with sea salt.
- Bean Dip (my youngest daughter’s favorite) – we nearly always have a batch of cooked black beans in our house (my favorite recipe is from Smitten Kitchen, in her first cookbook The Smitten Kitchen Cookbook, but you can also find the recipe online here) so we can easily whip up a dip with beans + cheddar cheese + sour cream + salsa. I can’t tell you the exact amounts of the ingredients, in part because Robbie always makes this dip and in part because he doesn’t measure, so you’ll have to experiment to find your favorite combo. Again, we eat this with chips from our favorite local restaurant. We buy the beans in bulk (25 pound paper bag) and have a bunch of frozen homemade garden salsa from last summer (but you could buy this in glass), but the cheese and sour cream usually come in plastic.
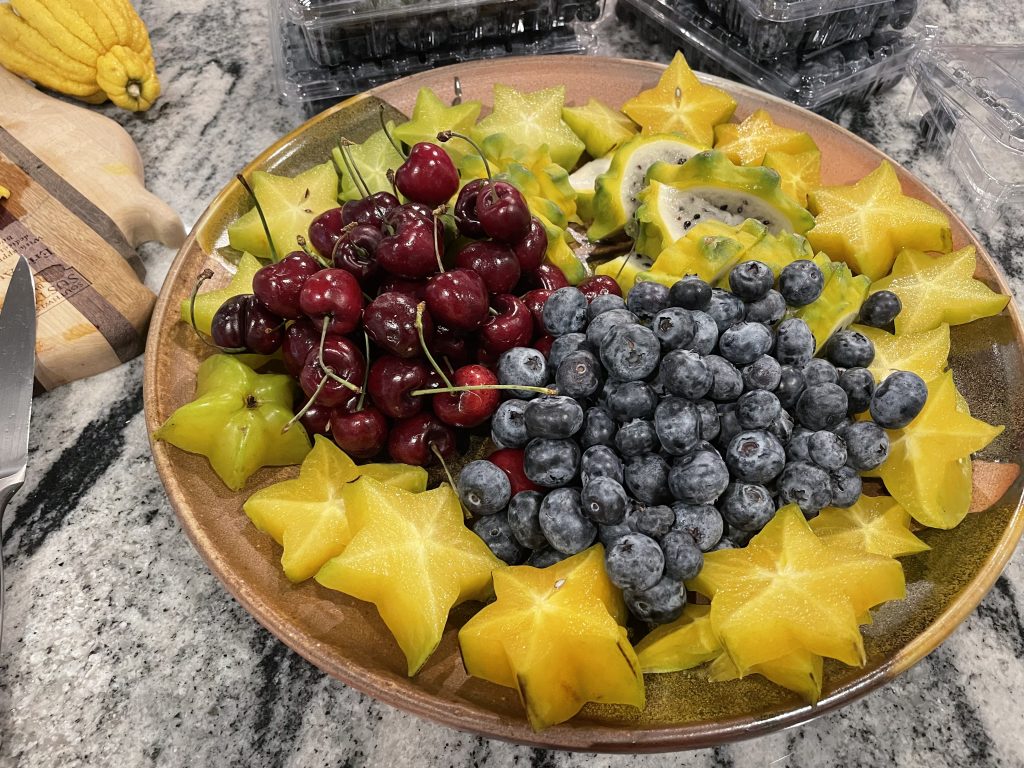
- 2024 UPDATE: “WEIRD FRUIT” – what?!? what is weird fruit, Erin? This has become the most asked for football snack from both my kiddos. They love to go to the grocery store with me and pick out the most weird looking fruits they can find. Dragon fruit, Buddha’s hand, star fruit… that’s pretty much all we can get at our small town grocery store, but they LOVE this tradition, cutting up and arranging these fruits alongside the more traditional favorites (like cherries, blueberries, and strawberries) for a creative (and lower waste) fruit plate.
Please add your favorite waste-free, low waste, local or sustainable snack suggestions in the comments!!
]]>I’m always looking for ways to use the lavender I harvest and dry each year from my herb garden. Hopefully you have a small bundle of lavender hanging around your kitchen or pantry just waiting to be turned into something other than a scented satchel for your underwear drawer (not that those aren’t an amazingly wonderful thing to do with your dried lavender also, but I get excited to have a variety of uses for all that lavender and even better if it involves eating… lavender ice cream is another favorite around here, but I’ll have to come back to that another day).
I wish I knew the original source of this recipe, but it’s been lost and modified over the years, so you’re stuck with the version I like to make best. The current iteration of crust is modified only slightly from this NYT Cooking recipe from Erin Jeanne McDowell.
Chocolate Lavender Tart
Download a printable PDF of this recipe here
Ingredients for the crust
½ cup (1 stick), at room temperature
¼ cup sugar
1 egg, at room temperature
1 teaspoon vanilla extract
1½ cups flour (any kind will work… almond, whole wheat, white)
⅓ cup cocoa powder
½ teaspoon salt
Ingredients for the filling
3/4 cup whipping cream
1/4 cup whole milk
2 teaspoons dried lavender blossoms
12 ounces bittersweet or semisweet chocolate*
1 Tablespoon unsweetened cocoa powder
1 Tablespoon butter
Instructions
- Bring cream, milk, and lavender just to boil in small saucepan. Reduce heat to low and simmer 5 minutes. Turn off the heat and let the lavender steep in the milk/cream while you make the crust.
- Make the crust
- Preheat oven to 350°F.
- In the bowl of a stand mixer fitted with the paddle attachment, cream the butter and sugar on medium-low speed until smooth, 2 to 3 minutes.
- Add the egg and vanilla, and mix on medium speed to combine. Scrape the bowl well.
- Add the flour, cocoa and sea salt, and mix on low speed until dough is smooth.
- Butter a 9-inch tart pan (preferably with a removable base). Press dough into the prepared pan, both the bottom and sides*. Prick the base of the dough a few times with a fork. (The crust is ready to be baked now, or it can be chilled for 30 minutes or up to overnight, if desired.)
- Chill the crust while you heat the oven to 350 degrees and place a rack in the center of the oven. Place the tart pan onto a baking sheet and bake until the crust appears firm and set, 18 to 20 minutes. Cool completely.
- Make the filling
- Place chocolate in medium saucepan. Strain hot cream mixture into saucepan with chocolate. Stir over medium-low heat just until melted and smooth*.
- Add cocoa powder and butter; stir until melted and smooth.
- Pour chocolate mixture over crust in tart pan. Chill at least 45 minutes (chocolate will be slightly soft after 45 minutes and firm after 2 hours). Cut into wedges and serve.
Interesting notes:
*Original recipe says the tart can be made 1 day ahead, but I’ve eaten it three days later and it was still wonderful. Cover and keep chilled. Let stand at room temperature 1 hour before serving.
*Original recipe calls for chocolate chips, but I’ve used both chocolate chips and big chunks of baking chocolate and both have worked well.
*The last time I made the crust with almond flour, it was pretty wet and pressing it into the tart pan was a bit tricky, but I just went for it, sticky crust and all, and it baked up beautifully, so don’t worry too much if your texture isn’t particularly dough-like.
*This works really well in a double boiler if you have one. I usually just put a ceramic bowl over a pot of boiling water. It’s not perfect, but it works in a pinch.
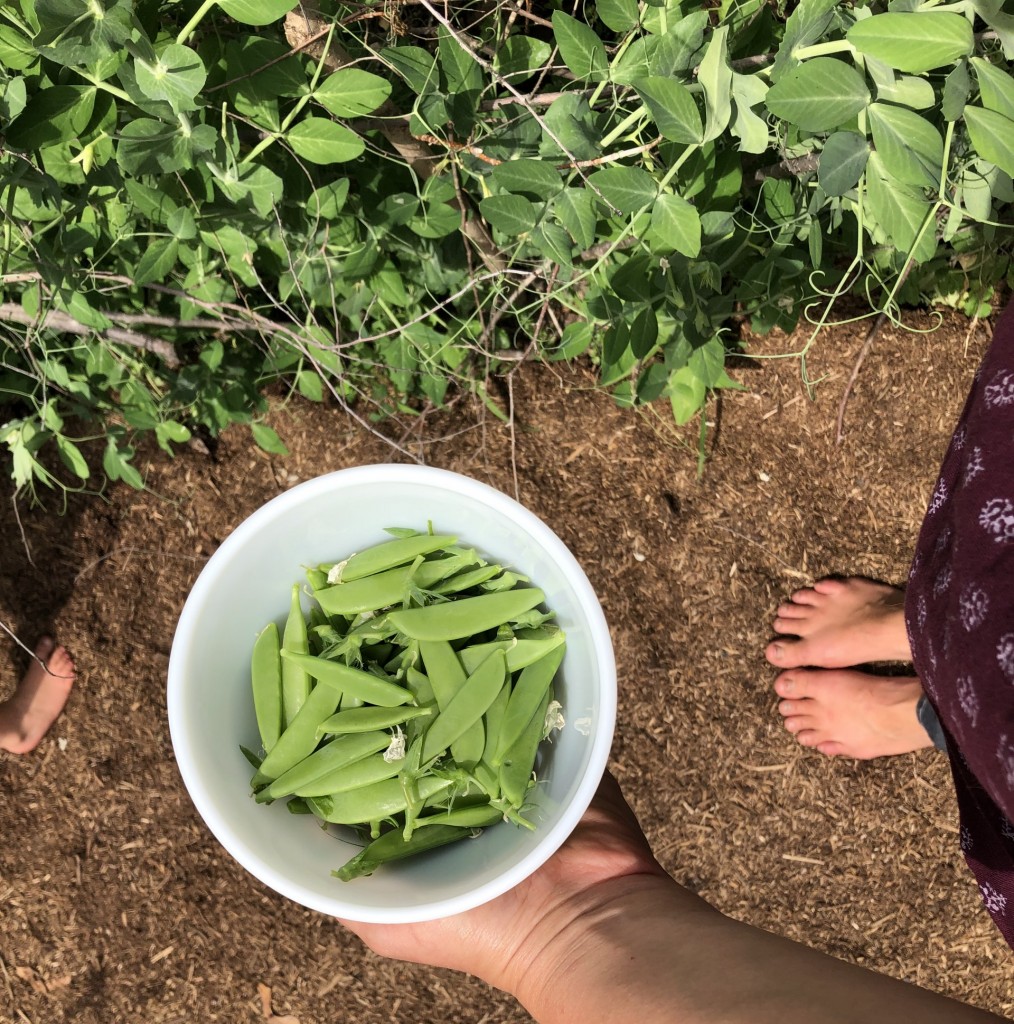
]]>As you know, I’m currently obsessed with sugar snap peas. They’re coming out of my backyard vegetable garden by the pound right now… we’re picking every other day and getting a pound each time! So I’ve had a lot of peas to experiment with. My other favorite recipe is this sugar snap peas salad.
This is our second favorite recipe so far. I love it for two reasons:
- I love any recipe that incorporates my homemade yogurt, especially if its a savory recipe that lets me eat yogurt for dinner!
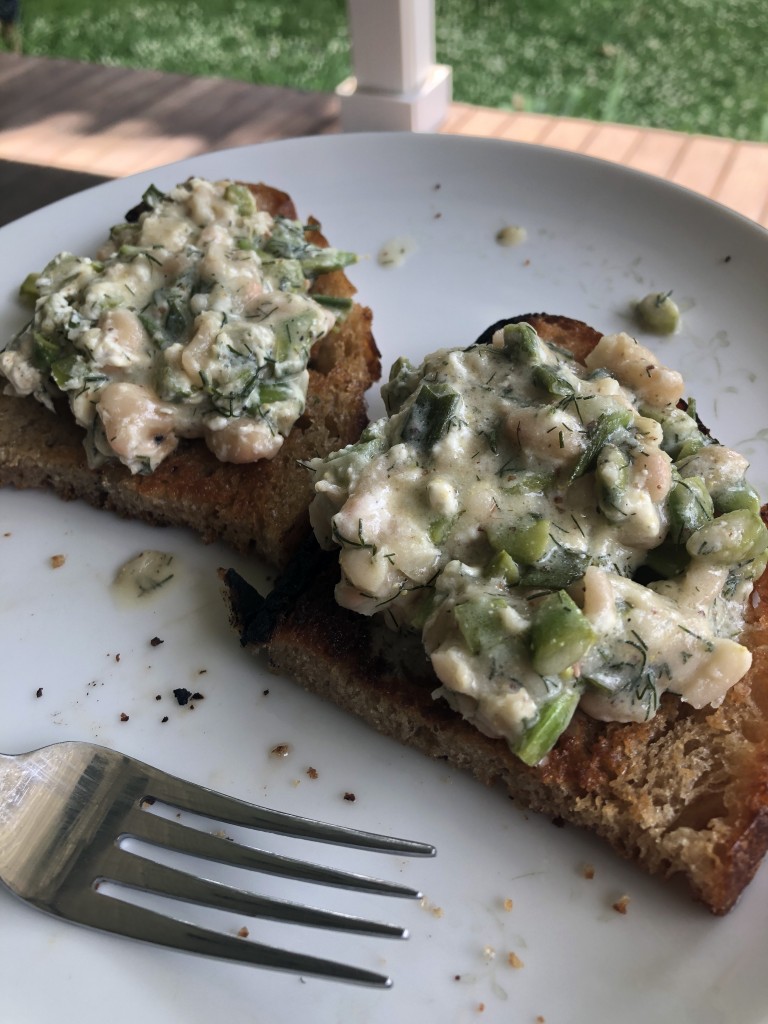
- Similarly, I love to put delicious toppings on garlic toast! The simplicity of a fancy open face sandwich really makes me happy.
Dilly Beans and Sugar Snap Peas on Toast
adapted slightly from Bon Appetit
Ingredients
1½ cups plain, whole-milk yogurt, drained*
1 teaspoon salt
1 lemon, juice and zest
2 Tablespoons apple cider vinegar
2 teaspoons Dijon mustard
1 teaspoon black pepper
1/4 cup olive oil, plus more for toast
4 chives
8 oz. sugar snap peas
1/2 cup dill
1 14.5-oz can cannellini (3/4 cup dried beans)*
4 slices crusty bread
1 garlic clove
Assembly
- Preheat oven to 400F
- Using a fine mesh sieve, drain your yogurt. Once it’s drained, pour it into a bowl, add lemon zest, and stir to combine.
- In a large bowl, whisk lemon juice, vinegar, Dijon mustard, 1 teaspoon salt, and ¾ teaspoon pepper.
- Whisking constantly, slowly stream in ¼ cup olive oil until dressing thickens slightly and no longer looks oily. You want to add the oil gradually so that your mixture will be creamy and emulsified.
- Trim chives and slice thinly crosswise. Add to bowl with dressing and stir to combine.
- Trim ends of peas and cut on a diagonal into ½” pieces (about the size of your beans) and add to bowl.
- Finely chop dill and add to bowl.
- Drain and rinse beans, then add to bowl with dressing.
- Toss until well coated. Taste and adjust seasoning, adding more salt if needed.
- Place bread on a baking sheet, drizzle (both sides) with olive oil. Toast bread in the oven, finishing on broil if needed to make them extra crispy.
- Rub both sides of the bread with garlic clove; season with a little salt.
- Divide yogurt mixture among toasts. Spoon peas and beans over. Don’t leave any vinaigrette behind: Divide any leftovers among toasts.
I’m still on the lookout for great pea recipes, so please tell me how you’re using them and send me your favorite recipes in the comments below!
*Recipe Notes:
- You could use greek yogurt or ricotta instead of draining whole-milk yogurt. The original recipe calls for ricotta, which I never have in my fridge. On the other hand, I make my own yogurt every single week, so I’ve always got plain, whole-milk yogurt.
- I almost always cook dried beans in my instant pot. If you’re like me, you’ll need to cook 3/4 cup dried beans for 40 minutes in the instant pot.
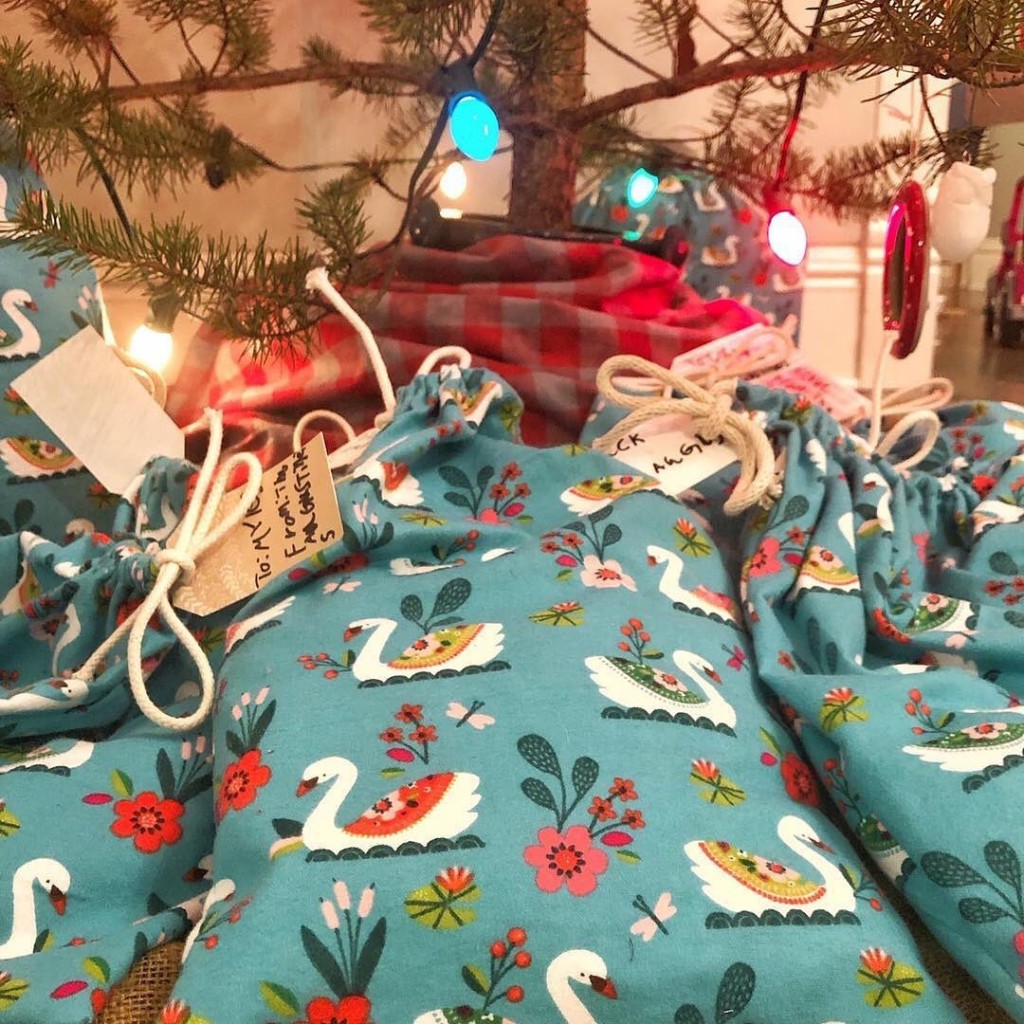
A few years ago, I sewed a bunch of reusable cloth gift bags in cheerful Christmas patterns and they continue to bring me such joy!
I love wrapping presents in these gorgeous bags. I love giving them to people (and am so honored when friends and family want to keep the bag in addition to the gift… in fact, you’ll regularly find me sneaking around and gathering my bags up after gift opening is over at our family gatherings). I love reusing them year after year!
AND they’re super easy to make! I swear, they’re a great project for beginner sewers because it doesn’t matter the size, shape, or even if they’re particularly square. The process is three simple steps: cut, sew, enjoy!
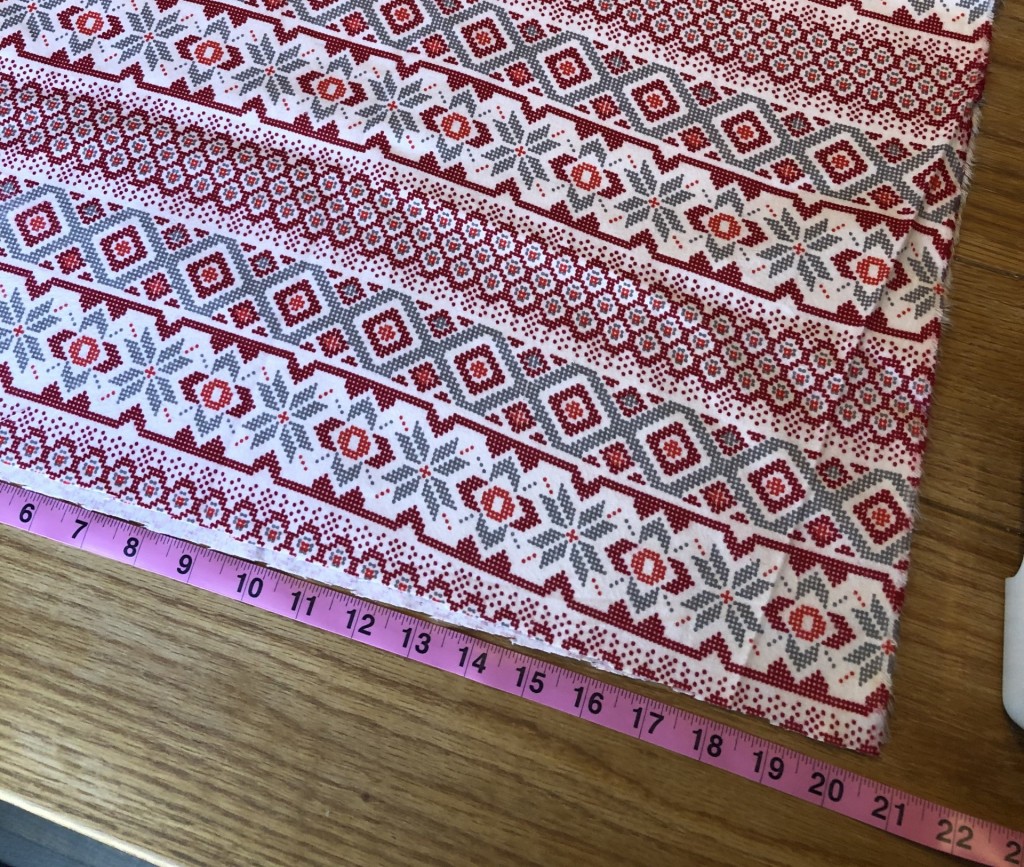
Step 1: Cut your fabric
If the exact size/shape isn’t important to you, I recommend letting your fabric dictate the size.
For example, my fabric is almost 42 inches wide, so I cut it exactly in half and made two 10 inch wide bags. I cut my fabric 15 inches tall and ended up with two 10”x13” gift bags. I love using printed fabric like this because it makes straight cuts easier. I pick a spot in the pattern and cut right along the “line”.
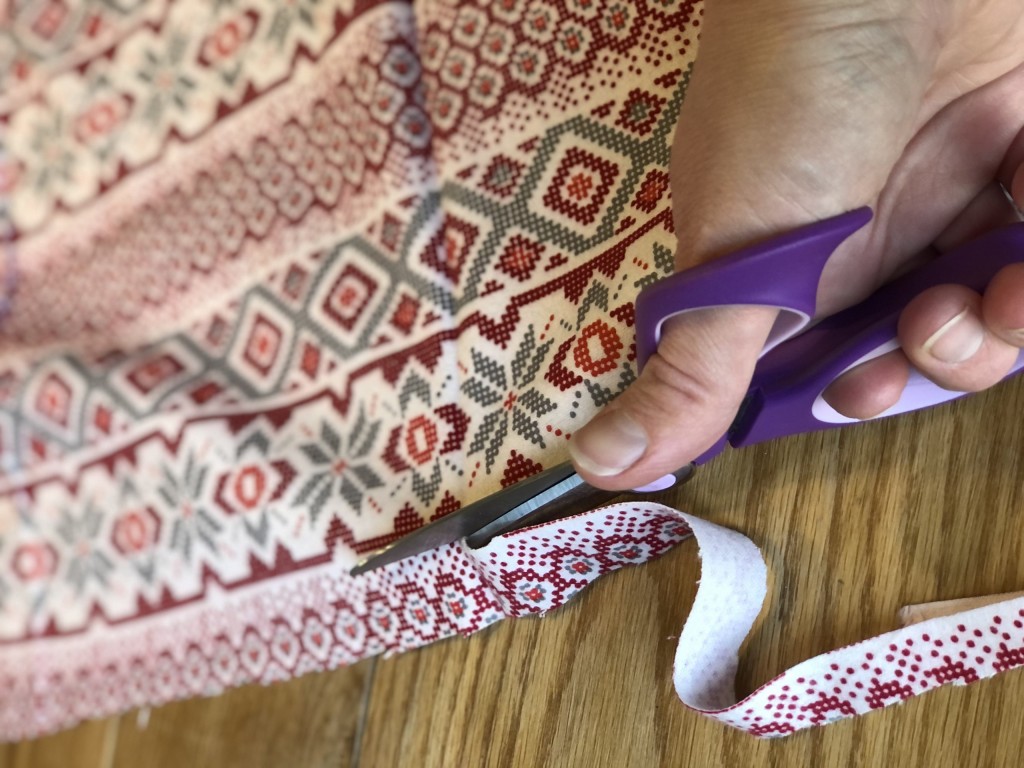
After cutting, my fabric is about 21 inches wide and 15 inches tall.
Step 2: Cut your cord
I used 1/4” cotton cord, but feel free to use bigger or smaller. Choose the top of your bag (based on the pattern) and cut your cord at least 8-10 inches longer than the width of your fabric (it will hang out 4-5 inches on either end when you’re done).
My fabric is 21 inches wide, so I cut my cord about 31 inches long.
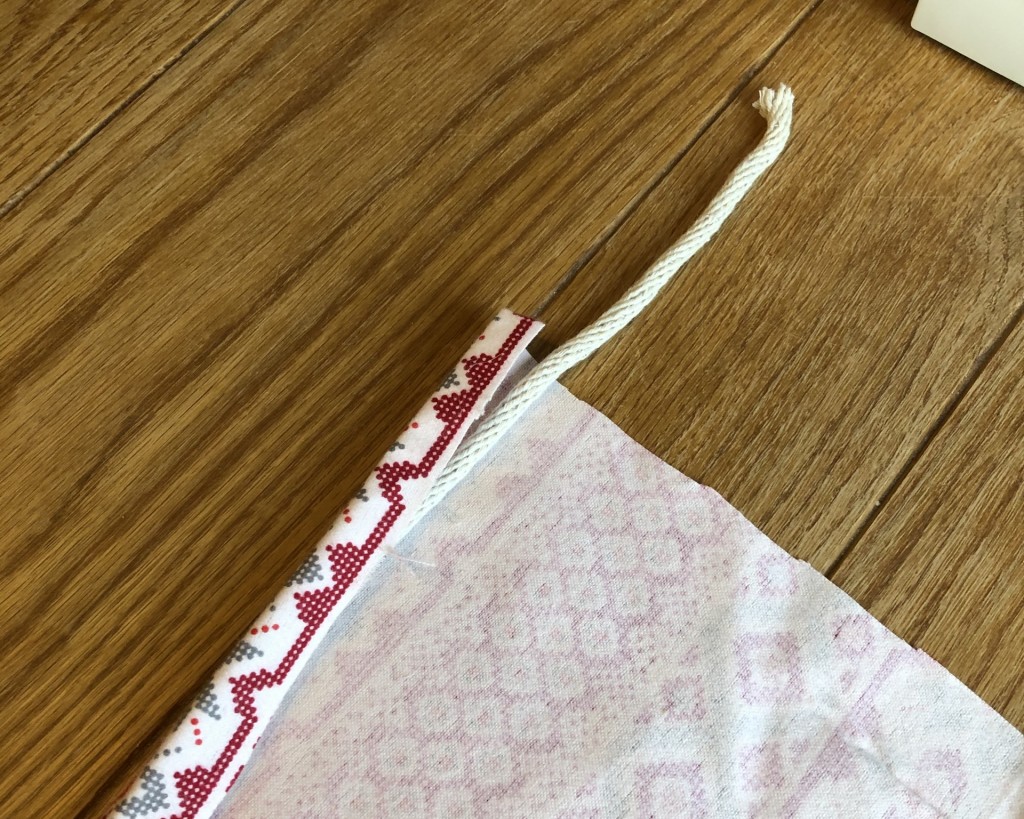
Step 3: Sew your cord into place
Place your fabric with the wrong side up* and the top pointing away from you. Place your cord along the top edge and fold the top of the fabric towards you. You’re going to sew a little pocket for the cord to slide through, so make sure there’s enough fabric that you can run your foot** along the seam without stitching the cord.
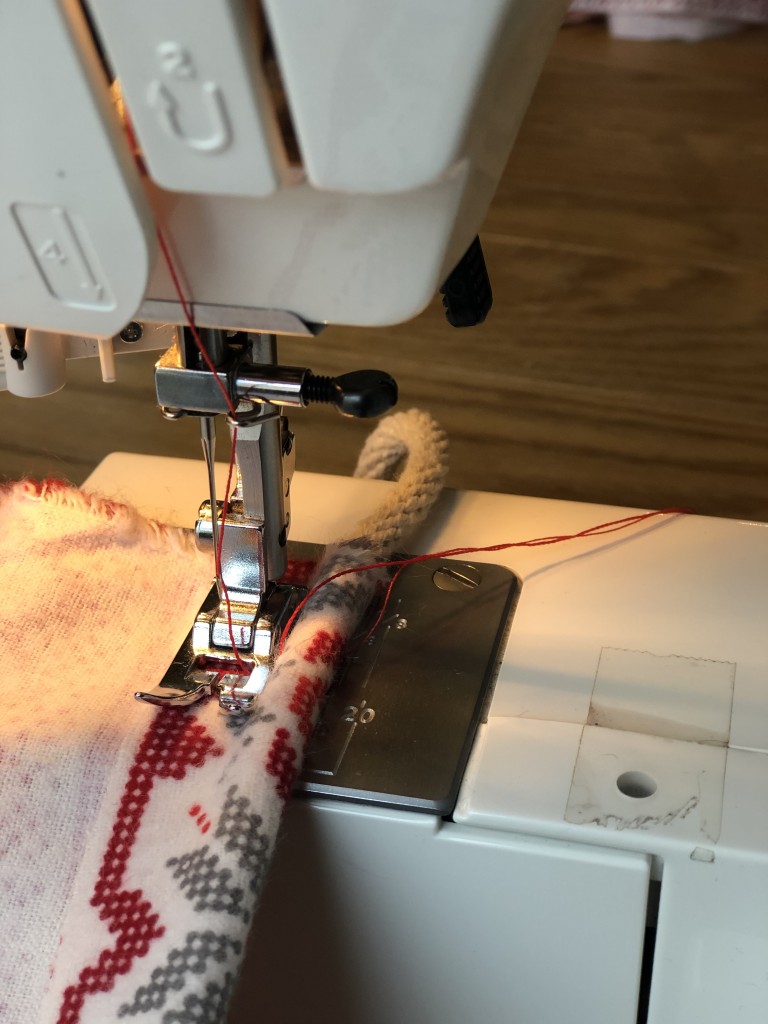
* the “wrong side” is what we call the back of your fabric, the side without the pattern, the side you want on the inside of your bag. ** the “foot” is the mechanism around the needle on your sewing machine as shown in this photo.
Step 4: Sew the other two seams
Keeping the wrong side up, fold your fabric in half. This will be the final shape of your bag, so the cord should be at the top and you should have seams to sew across the bottom and one of the sides. Trim any excess fabric if your edges aren’t lining up.
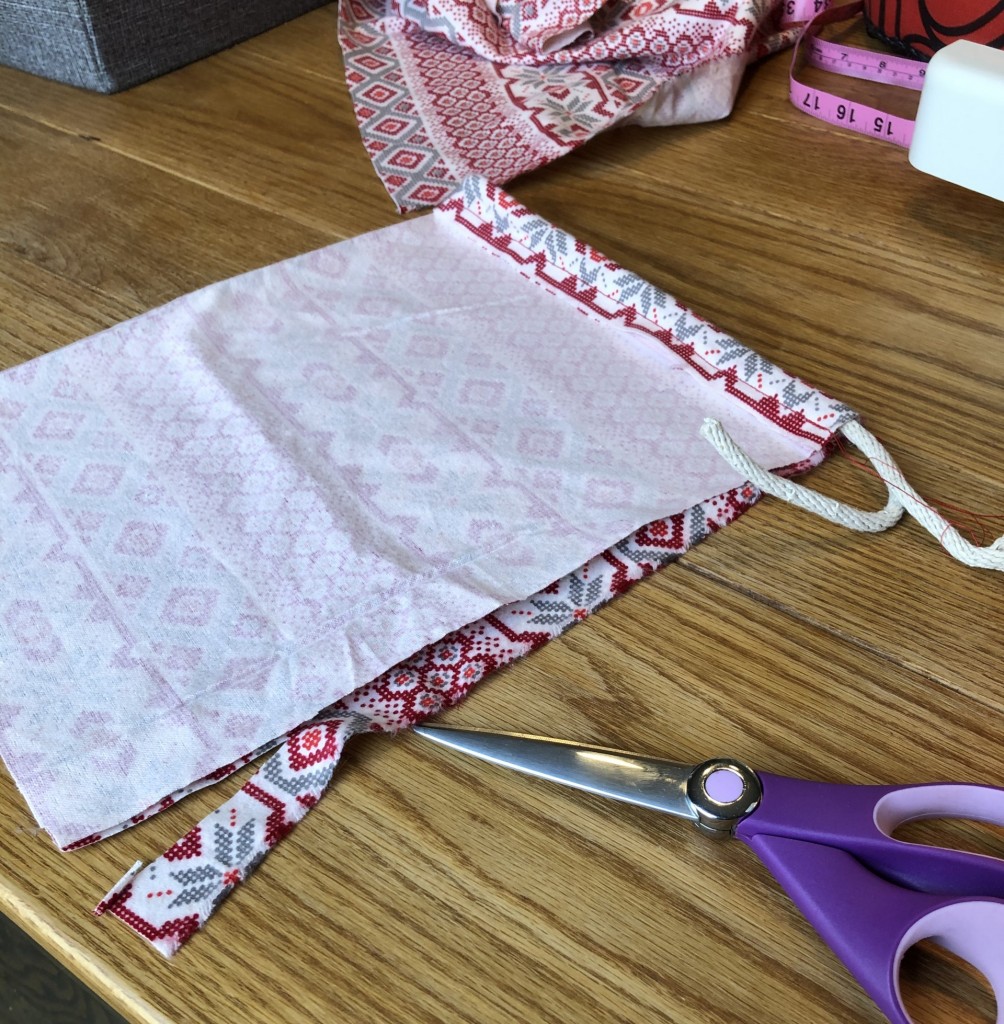
Go ahead and sew these seams. The only tricky part is making sure you don’t sew through the cord/pocket. If you do this, you won’t be able to pull the cord to cinch the bag closed.

Trim extra thread and turn your bag right side out.

Step 5: Tie knots at each end of the cord
This will prevent the cord from accidentally getting pulled into the pocket when someone is opening their gift. Fishing the cord back out is certainly possible, but a royal pain.

You’re done! You can make as many bags as you want, in a myriad of sizes to meet your gift giving needs!
I have about 24 bags total and the “10×13” bag I made today is the “medium” size bag in my collection. I have a bigger size (roughly twice as big) and a smaller size too. Three yards of fabric will yield about 8 medium and 2 large bags. I like to mix and match my colors and patterns, so I’ve purchased different patterns over the years.
Please drop your questions in the comments below. I’m always happy to answer questions!
And comeback to tell me about your experience if you’re making these reusable gift bags for the first time. I can’t wait to hear about your project!
PS. Does this post feel familiar? It should! It was originally posted a couple of years ago. I’ve updated and republished it because it’s one of my favorite posts.
]]>
A few years ago, I bought a bunch of flannel fabric in adorable holiday prints and sewed up a whole pile of reusable gift bags. This year, I’m honored that my tutorial was selected to be included in the winter edition of the Simple Living Collection!
The Simple Living Collection is a digital bundle of resources to help you settle into a slow and intentional life, reconnecting with each other and nature, and embracing this magical wintery time of rest. There are 70+ tutorials, recipes, ebooks, stories and other activities from more than 50 contributors, just like me. It’s on sale for $25 until Monday, December 13th. Available for immediate download, the PDF is yours to keep and revisit year after year for inspiration. If you’re interested, you can buy your copy here!
The Collection is divided into seven different sections to help families build their own slow-living resource binder. Grow, Raise, Create, Nourish, Healthy Home, Wildcraft, and Family. I’m so excited to share a few of my favorites from each section with you!

This is my favorite section, full of seasonal and holiday crafts! Simple ones that will make for a joyful hour with the kiddos and longer projects to sink deeply into on a slow and quiet morning by the fire. My favorites include:
- Salt dough ornaments from Heather Turner @thehomespun.mom
- Felted fingerless gloves from Emma-Lisa McGee @ourhomeonthehill
- Evergreen dish tutorial from Tara Rondinelli @littlepinelearners
- Natural winter village from Naomi Noyes @ninos.and.nature
- Winter solstice garland from Angela Ruggles @the.nature.atelier
- and MY reusable gift bags!
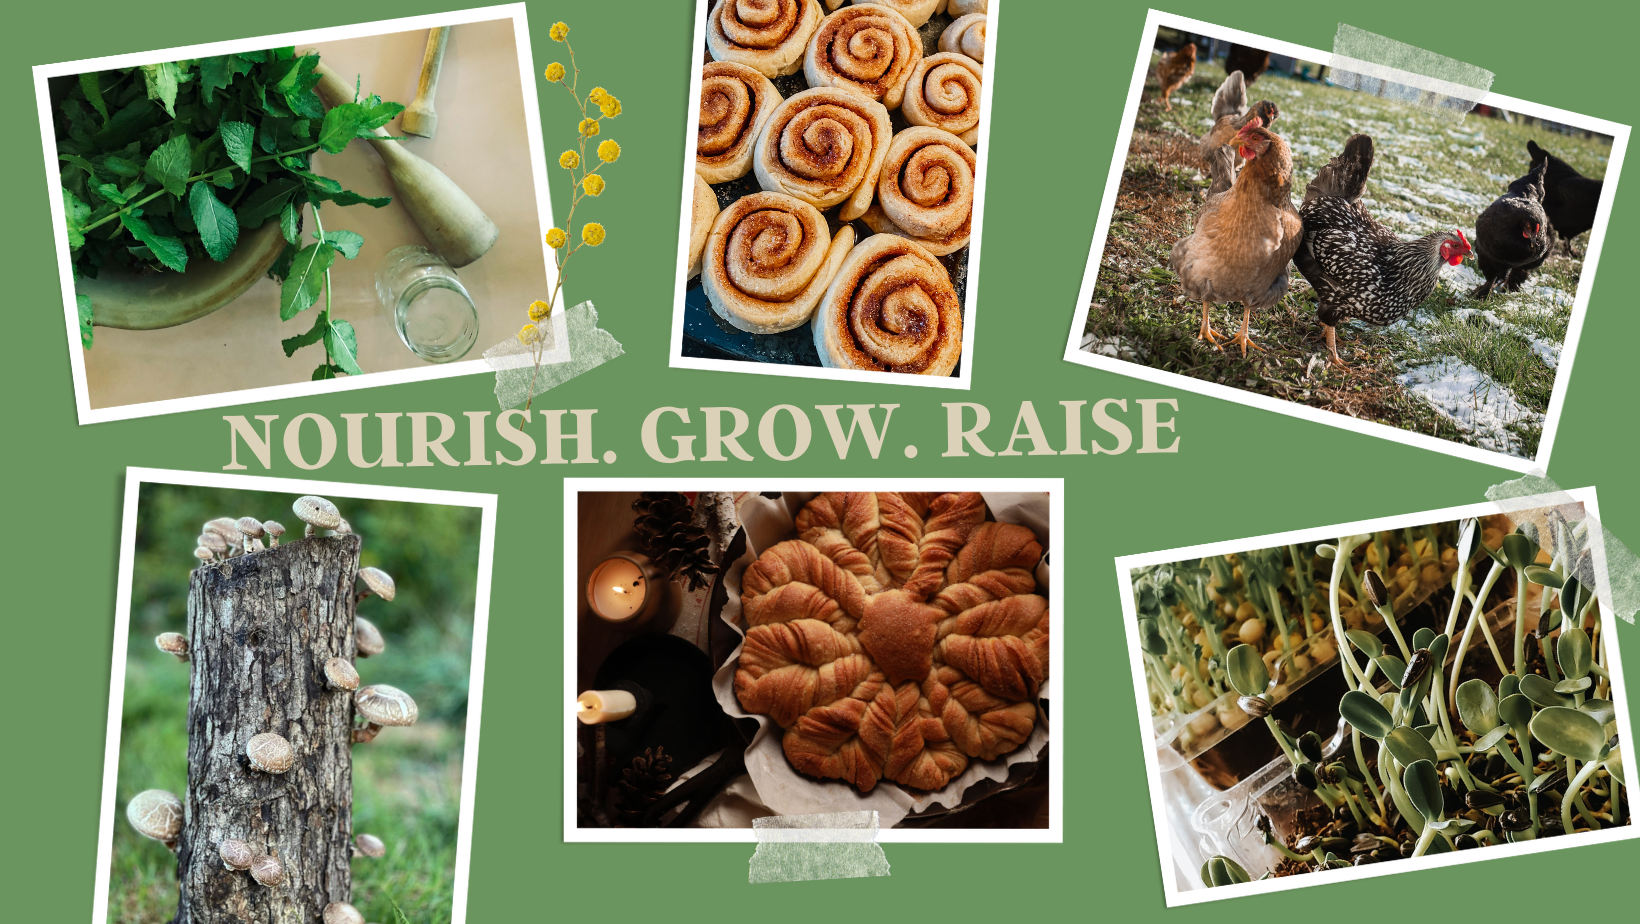
These three sections combine so nicely to help you feed your family with simple healthy food (hello, micro greens! and I think the extracts make perfect gifts) and sweet treats for your holiday special occasions. My favorites include:
- Homemade extracts from Christy Rucker @christyrucker
- Skillet star bread from Cassandra Evans @northwoodsfolk
- Cardamom sourdough cinnamon rolls from Tess Czulinski @naturally_tess_
- Microgreens made easy from Joey Hodlmair @destinationmommy
- Shiitake log tutorial from Roxanne Ahern @happyholistichomestead
- Winter chicken care from Ashley Comer @slowlivinghomestead
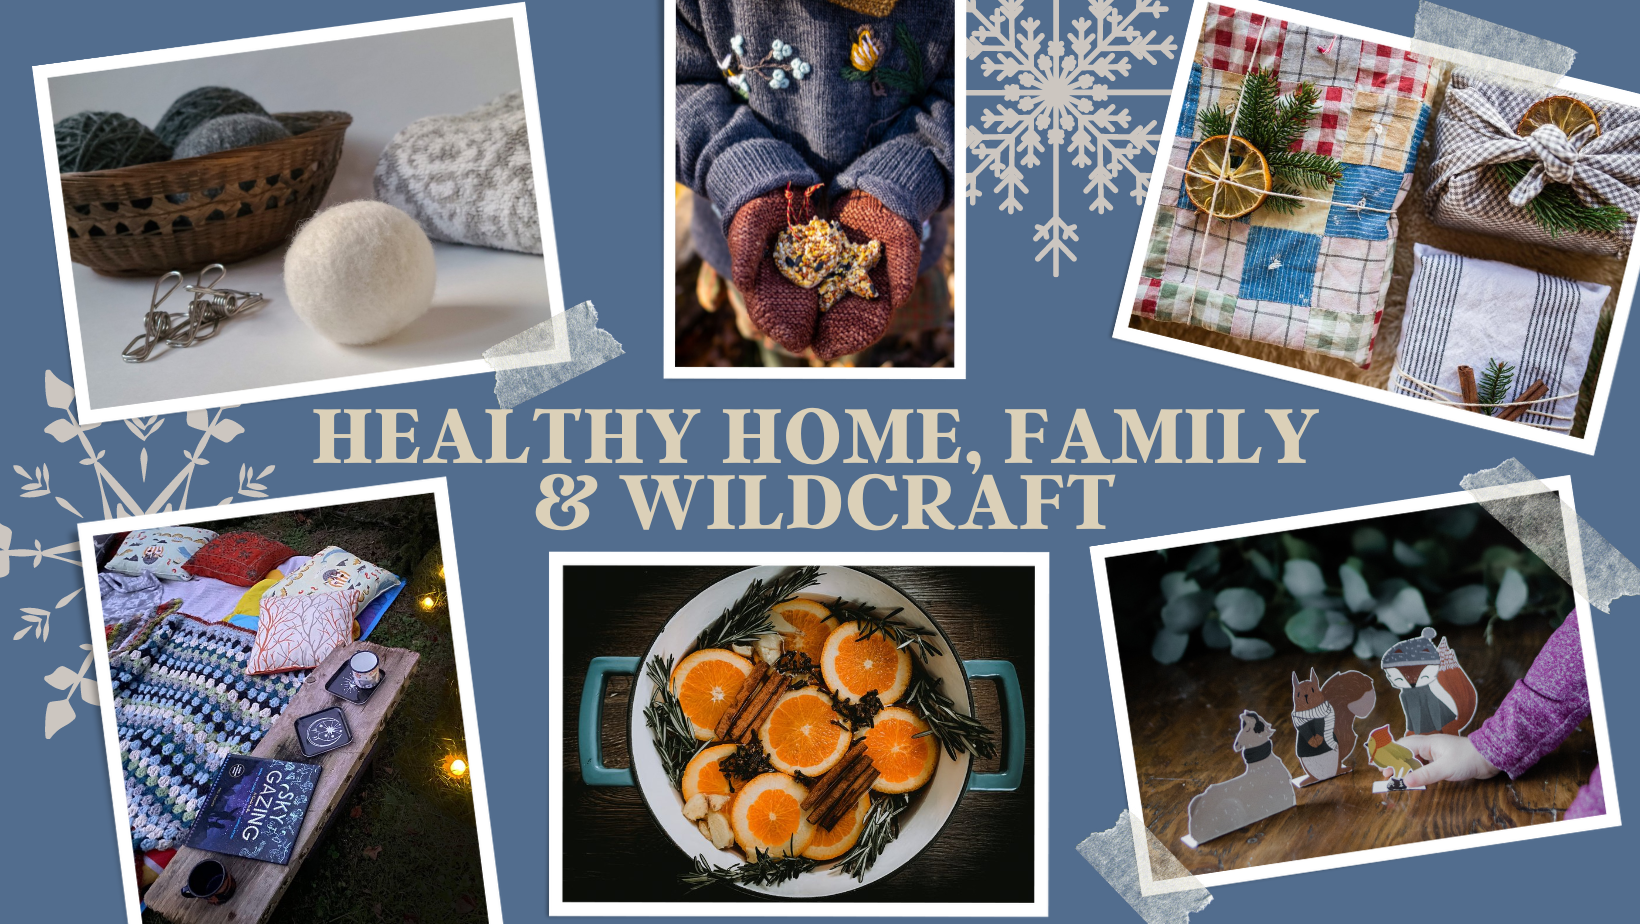
Last, but certainly not least, here are a few of my favorites from the healthy home, family, and wildcraft sections of the Collection. The family section, especially, has lots of fun stories, games, and activities to play with your children, grandchildren, nieces and nephews, or visiting friends with kids during this winter season. There’s plenty here to keep you all entertained!
- Wool dryer balls from Harmonie O’Loughlin @florasfeastbotanicals
- Seasonal simmer pot recipe from Kaila Addis @wildmamarising.ct
- Sustainable gift wrapping (no sewing required!) from Ashley Comer @slowlivinghomestead
- Winter Solstice Guide from Jessie Lehson @wineberryadventurescouts
- Birdseed ornaments from Mari Johnson @bellamartinelli
- Winter puppets from Millie Hernandez @forest.roads
These are only a sampling of the phenomenal work put in by all of the wonderful contributors in this community effort! I’m so excited to be a part of it. The Collection is on sale for $25 until Monday, December 13th and you can get your copy here!
]]>
I hear you… “ok, Erin, but after I’ve roasted and frozen them, what do I DO with all these beautiful red peppers?”
Let me introduce you to my FAVORITE fall soup: Roasted Red Pepper Curry Soup. It’s easy to make, gluten free, dairy free, and EVERYONE in my family is happy to eat this meal! This recipe works well with roasted red peppers from a jar if you’re short on time or you could follow steps 1 and 2 below with just 3 or 4 peppers if you want to make a batch of soup today (and skip the freezing all the peppers step).
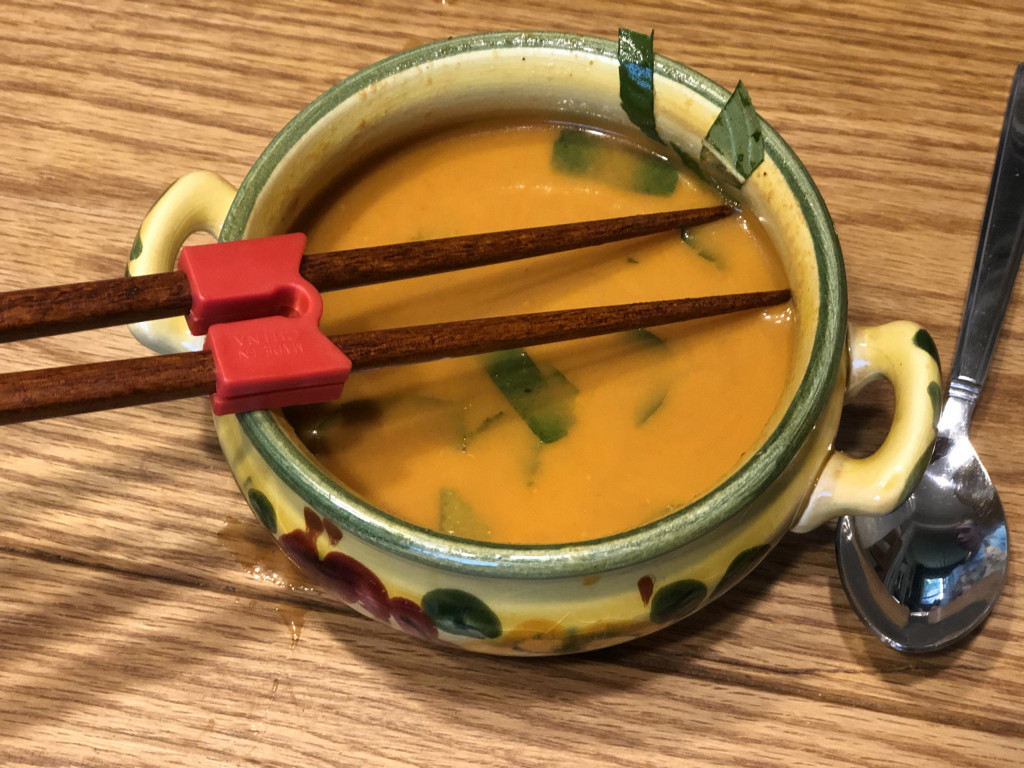
One of the things I love about this recipe, is the ability to customize your bowl with your favorite toppings. In my house, this type of approach is key to finding a dinner everyone loves. Robbie and I love adding thai basil from the garden, a swirl of sriracha, and chopped up pistachios for a little spicy crunch. The kids love fried tofu and rice noodles. The combinations and possibilities feel endless! If you experiment with toppings in your home and find a combo you love, please come back and share it in the comments!
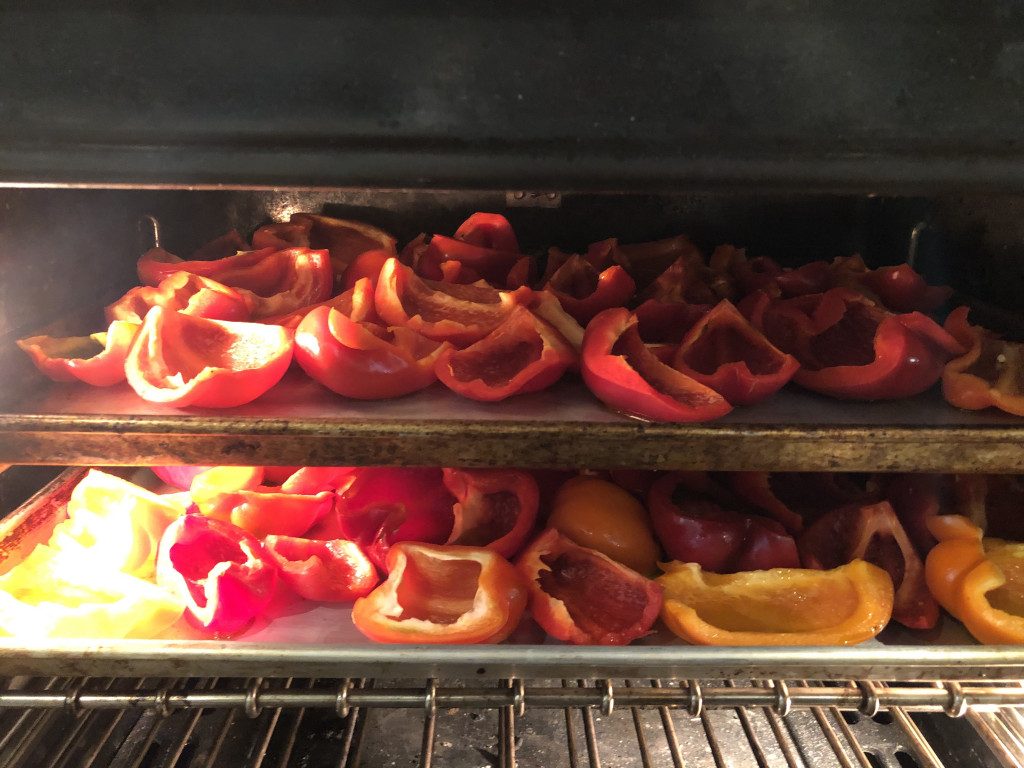

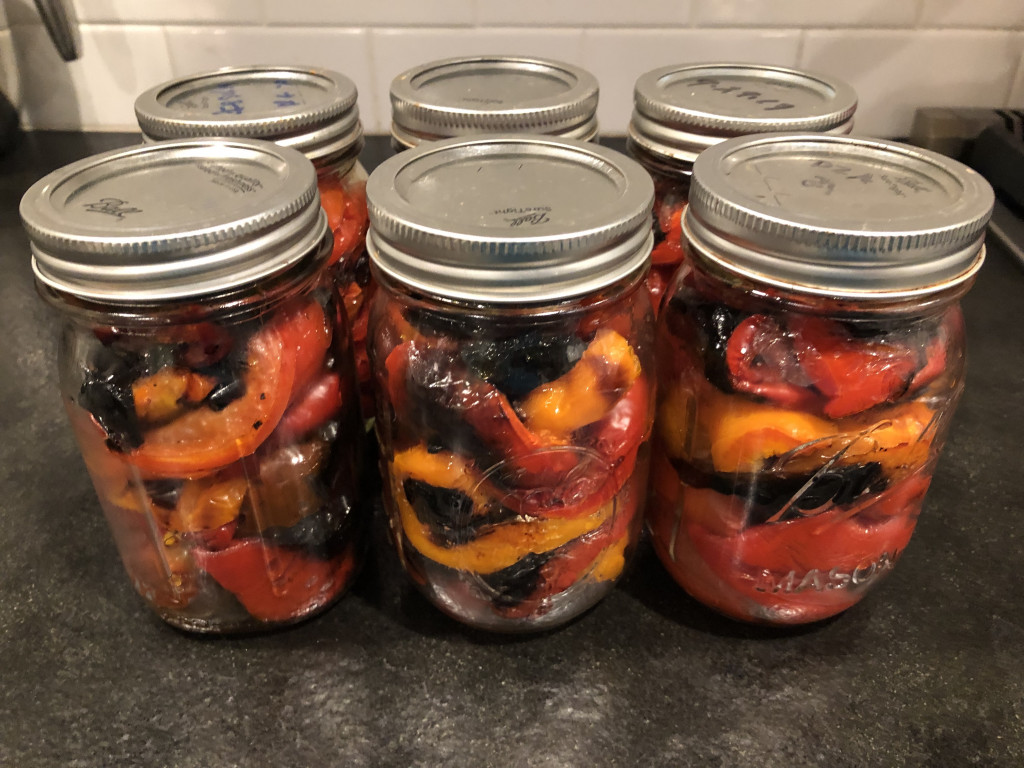
Home-roasted Red Peppers
My farmers market and nearby farm stands are overflowing with beautiful red, and even yellow and orange, peppers! Home-roasted red peppers might be the easiest and least time consuming way for you to dip your toe into the home food preservation waters. It’s a simple as 1, 2, 3!
- Wash and cut peppers into quarters, removing the stem, seeds, and inner white ribs
- Place on a baking sheet, drizzle with olive oil and roast at 450F until the skin starts to bubble and slightly blacken.
- Place into pint jars (each one will hold something like 3-5 peppers) and pop them into the freezer
Roasted Red Pepper Curry Soup Recipe
(makes lunch/dinner for four to six people, leftovers are delicious too)
I have no idea where this recipe came from. I wish I could tell you the source, but I wrote it in my “favorite recipes book” and have been making it from there for the past couple of years. Apologies to the original author.
Download a printable PDF of this recipe here
Ingredients
- 2 teaspoons olive oil
- 2 cloves garlic, chopped roughly
- 1 inch ginger root, chopped roughly
- 3-4 red peppers, roasted in the oven as described above
- 1 quart (4 cups) vegetable or chicken stock
- 1 can coconut milk
- 3-4 Tablespoons red curry paste
- 2 Tablespoons soy sauce
- 2 Tablespoons lemon juice (lime would work just fine too)
Optional ingredients for topping (I recommend picking 3 or 4 of these)
- 1/4 cup cilantro, basil, or parsley, chopped
- 1 package of tofu, tossed in corn starch and pan fried in oil
- 1/2 package brown rice noodles (follow instructions on the package to cook)
- 1/2 cup peanuts, pistachios, or other favorite nuts, chopped
- Sriracha or other hot sauce
Instructions
- In a medium pot, saute garlic, ginger, and red peppers in olive oil on med-high heat until soft
- Add stock, coconut milk, curry paste, soy, and lemon juice. Bring to a boil
- Reduce heat to medium and cook for 5 minutes (longer is fine)
- Blend (I’ve used both an immersion blender and a countertop blender. Both work fine here)
- Optional: if you like a smoother soup, I recommend pouring it through a mesh sieve or strainer. If you don’t mind a chunky soup (or don’t have a sieve/strainer), you can skip this step.
- Salt and pepper to taste.
- Add your favorite toppings/stir ins from the options listed above or GET CREATIVE with what you have/love
- ENJOY!
Please share your comments, questions, and favorite toppings for this soup in the questions below! If you want to share gorgeous photos of your dinner, please tag me on Instagram and Facebook @carbonfreefamily. I LOVE seeing your beautiful photos!
]]>
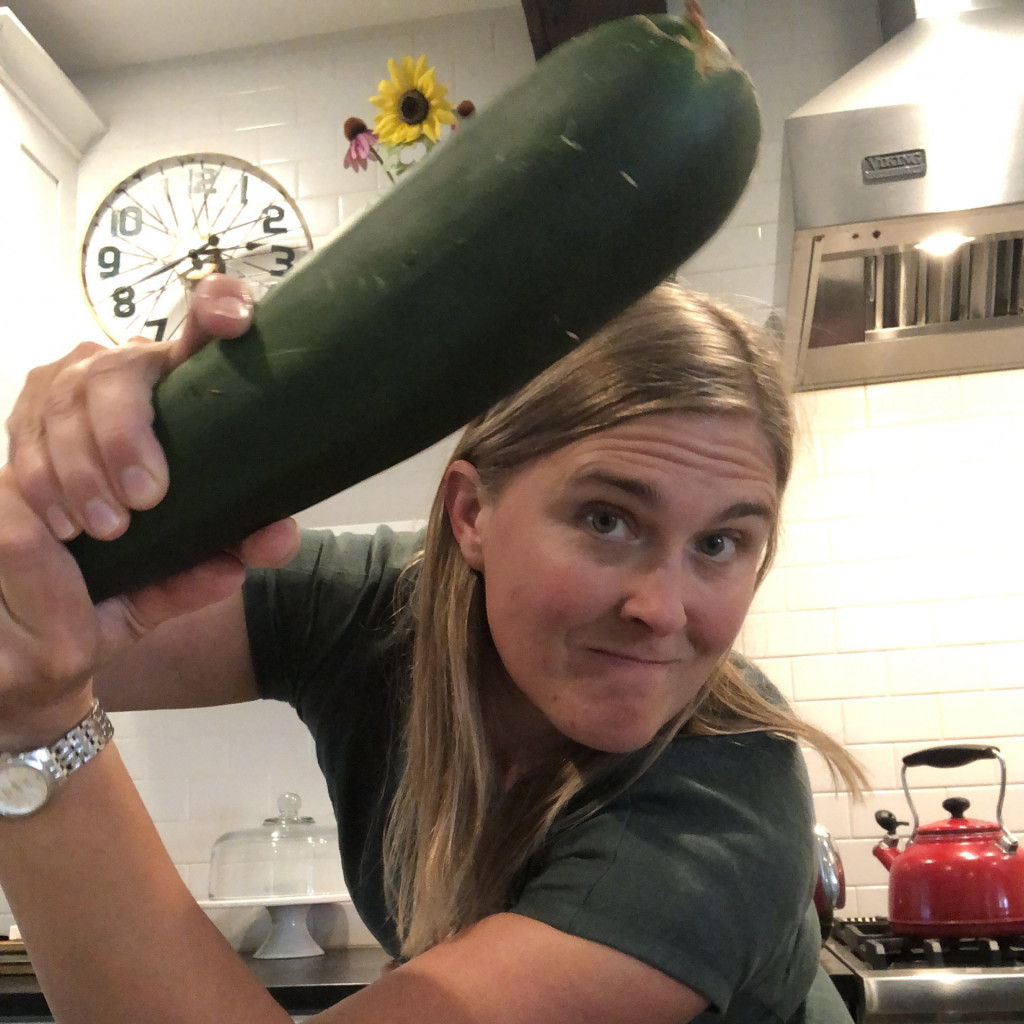
There’s a joke in Michigan (at least in my circles) that you should never leave your car unlocked in the summer… not because someone will steal something out of it, rather because someone will put a pile of zucchini INTO your car and then you’ll be stuck with them! I’ve FINALLY found my zucchini recipe, so go right ahead and drop your extras on my front porch! Just the little one’s please… you can keep your “war clubs” for zucchini bread!
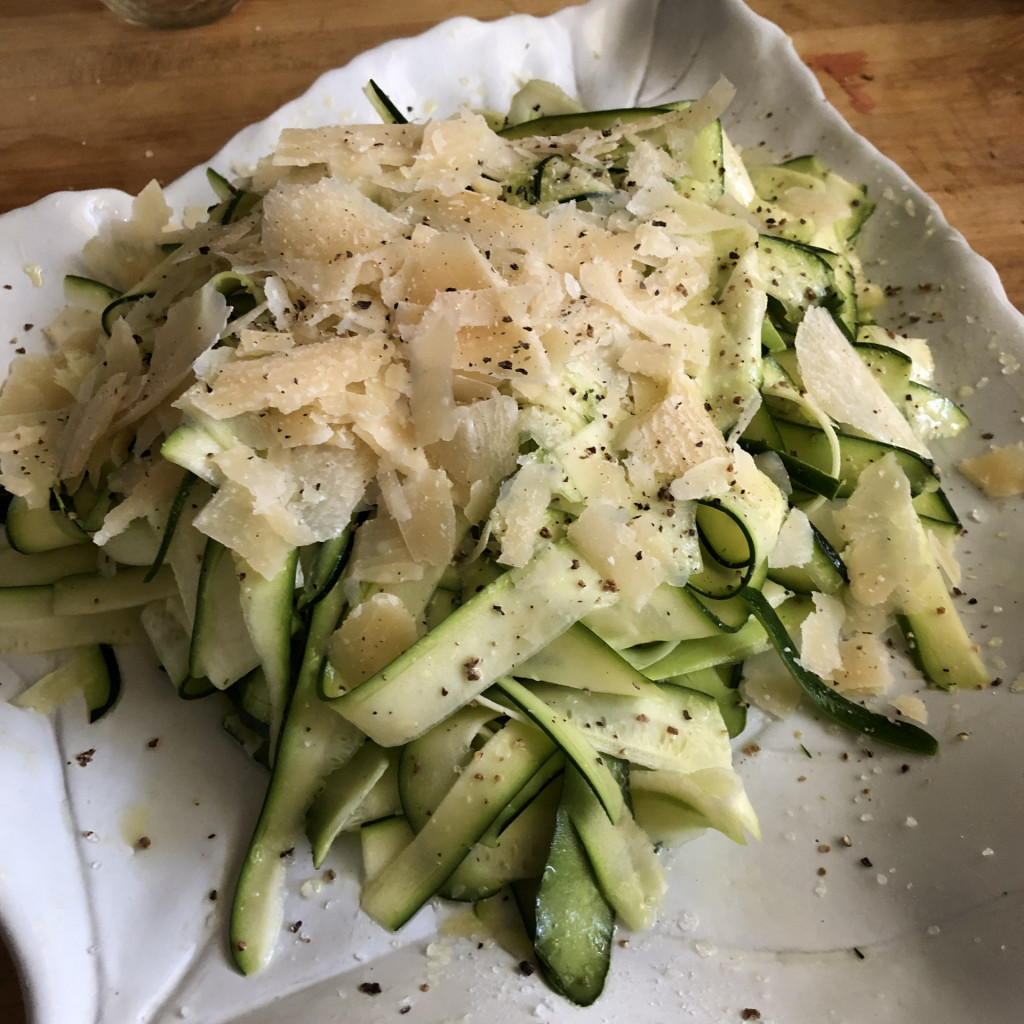
Given that I generally try to avoid both carbohydrates and sugar, I’m not a huge fan of zucchini bread and have been looking for a more healthy way to eat the abundance of zucchini that comes from my backyard vegetable garden each year. This zucchini carpaccio salad from Smitten Kitchen is just the ticket! Tho original recipe includes a bed of arugula, under the zucchini, which I bet would be delicious, but my arugula bolted months ago, so I’ve been making this salad with just zucchini and it’s still delish!
Recipe
(makes lunch/dinner salads for two or three people, more if you’re serving it as a side)
This recipe is adapted from Smitten Kitchen
Download a printable PDF of this recipe here
Ingredients
- 1 1/2 pound zucchini (about 3 small/medium)
- 1 ounce parmesan, coarsely grated or shaved with a vegetable peeler (about 1/2 cup)
- 3 Tablespoons olive oil
- Juice of one lemon
- freshly ground black pepper and salt, to taste
Instructions
- Use a vegetable peeler to create zucchini ribbons*
- Put zucchini in a large bowl. Drizzle with olive oil and lemon juice. Mix to combine (I usually do this with my hands to keep the zucchini ribbons from breaking).
- Sprinkle with parmesan and black pepper.
- ENJOY!
A couple of notes that you might find helpful….
*The original recipe tells you to toss zucchini ribbons with 1 teaspoon salt in a large colander set over a bowl and let drain 20 minutes. Rinse zucchini slices well, then drain, pressing gently on slices to extract any excess liquid. Pat zucchini slices dry with a kitchen towel. I regularly skip this step. Sometimes the salad is a little more liquid-y (technical term, I know) than others, so if you’re creating this dish for an occasion and want to make sure it’s not watery, this step might be useful to you.
*Also, Deb says that she often prepares the zucchini up to this point ahead of time. She says that once drained well, they keep in the fridge for a few days in a container so you can use them here or elsewhere. I haven’t tried this yet, but I have noticed that when I make my salad ahead of time it is more watery (see above), so I bet these steps in combination will solve for that.
Please tell me your favorite zucchini jokes, stories, and recipes! Are you on “team zucchini bread” or do you have another favorite recipe that I should try??
]]>
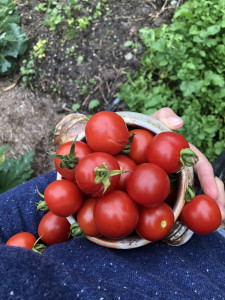
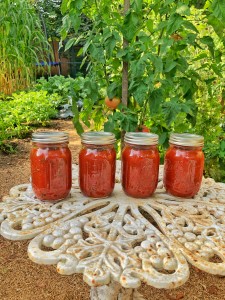
As a child and through my early twenties, I firmly believed that I did NOT like tomatoes. Now that I’m a little older, I’ve come to understand that the tomatoes you can buy in the grocery store in February are a pathetic shell of the locally grown (in my garden or by a local farmer) summer tomato.
These days, I avoid fresh tomatoes like the plague for 10 months of the year until the magical tomato season arrives, right on schedule at the beginning of every August (here in Michigan). In this moment (yes, right now!), I eat ALL THE TOMATOES!
My favorite recipes for fresh tomatoes
This means the Augustine house is eating fresh tomatoes for nearly every meal. Some of my favorite “recipes” aren’t really even recipes at all, but rather a collection of delicious ingredients set near each other on a plate. The key to each of these is REALLY GOOD ingredients. If you haven’t already, now is a great time to seek out the best olive oil and balsamic vinegar you can find. My local favorite is a Spanish olive oil, called Arbiquina, that I can buy in bulk from a local shop called Old World Olive Company (Michigan friends, they have several locations around the state). My absolute favorite balsamic is from a farm in Texas, but we haven’t been able to get it in recent years, so I’m currently using an 18-year traditional balsamic, also from Old World Olive Company. I buy my burrata and fresh mozzarella (and pretty much every other cheese I eat) from my local cheese shop, the Rockford Cheese Shop.
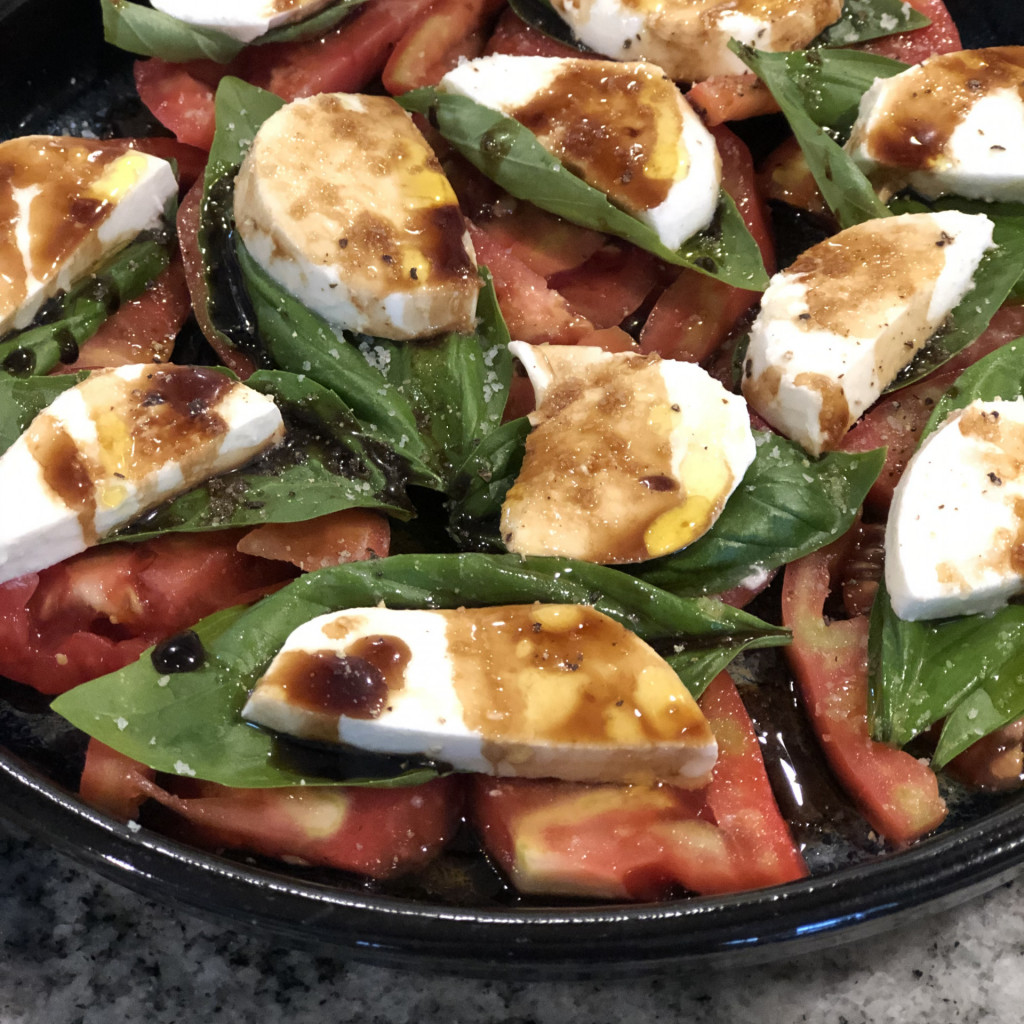
My favorite “new” recipe is this gorgeous five ingredient tomato and burrata salad from Barefoot Contessa. After eating this salad almost every day in the past week (psst… it’s really delicious for breakfast!), my favorite combination is: tomatoes, burrata, olive oil, salt and pepper. Add basil (like in the photo below of the first time I made this yumminess, last weekend) or balsamic (like in the recipe linked above) if you feel like it. Or not. It’s completely up to you!
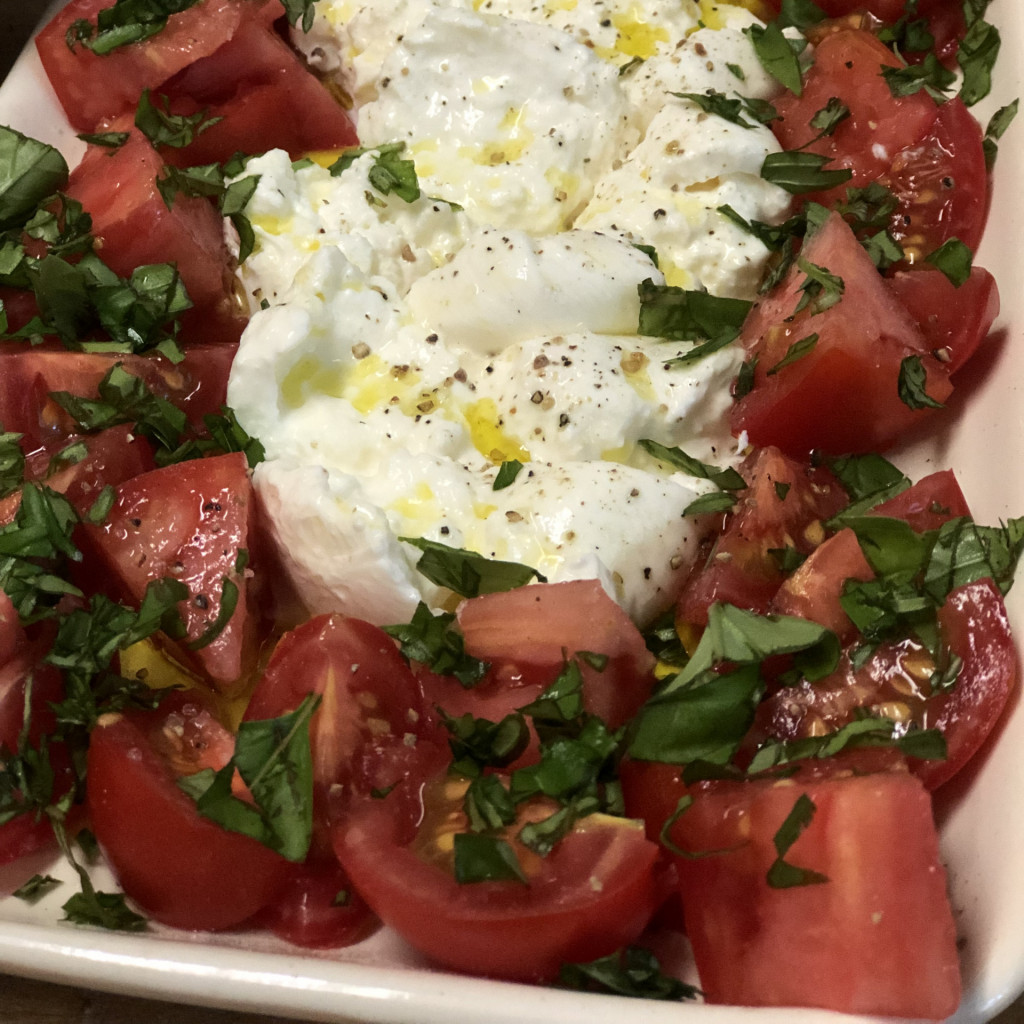
And the gateway Caprese salad (for many of us, including me, this is the first way people begin their love affair with tomatoes). Again, this “recipe” includes just a few fresh and simple ingredients… tomatoes, fresh mozzarella, and basil stacked in beautiful little piles, topped with balsamic vinegar, olive oil, salt, and pepper.
My favorite recipes to preserve tomatoes
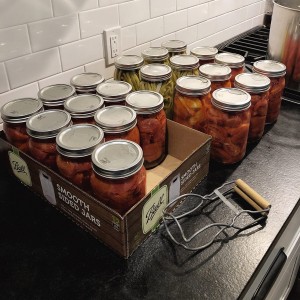
I don’t know about you, but I can only eat so many tomatoes (just me? hmmm. Must be the 26 tomato plants we planted this year in our backyard veggie garden, but we can’t keep up!). Each year, in August and September, we spend countless hours in the kitchen preserving tomatoes so we can eat this delicious local food all year long.
Last year, I created a series of blogs focused on preserving food and collected them all into this free course. The course includes individual lessons that explain the basic preservation methods of canning, freezing, and dehydrating, and specific examples of how I use these preserving methods in combination to preserve tomatoes, corn and all my favorite foods so I can eat them all year long.
Whenever you’re ready, these recipes are here waiting for you. My favorite ways to preserve tomatoes include (follow the links below for more information and recipes):
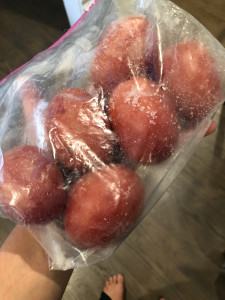
- Freeze them whole (it’s just as simple as it sounds… I put whole tomatoes (no processing) into a ziploc bag and throw them straight into the freezer. These are good for soups and sauces throughout the year, but not slicing because the freezing breaks down the cellular structure, which is a fancy way of saying they’ll be mushy when you defrost them)
- Can them as diced, quartered, halved or whole
- Grandma’s tomato sauce (I can it, but you could just as easily freeze it)
- Sun dried tomatoes (perfect for freezing)
- Tomato paste (perfect for freezing)


All of these recipes are delicious, but I have to tell you that homemade tomato paste changed my life! If you’ve never made your own I have to insist that you put it on your weekend “to do” list right now. This year. Before buying another single can of tomato paste. It’s truly that good. I can honestly say that I hope I never have to use the commercially made paste again.
Please share your thoughts, questions, and favorite recipes in the comments! How do you like to eat fresh tomatoes? How do you preserve them for later?
]]>
I struggled for a few minutes with the fact that the kits come in plastic bags, but like everything else, I’m embracing a #progressnotperfection attitude and looking for ways to eliminate the plastic bag in the future.
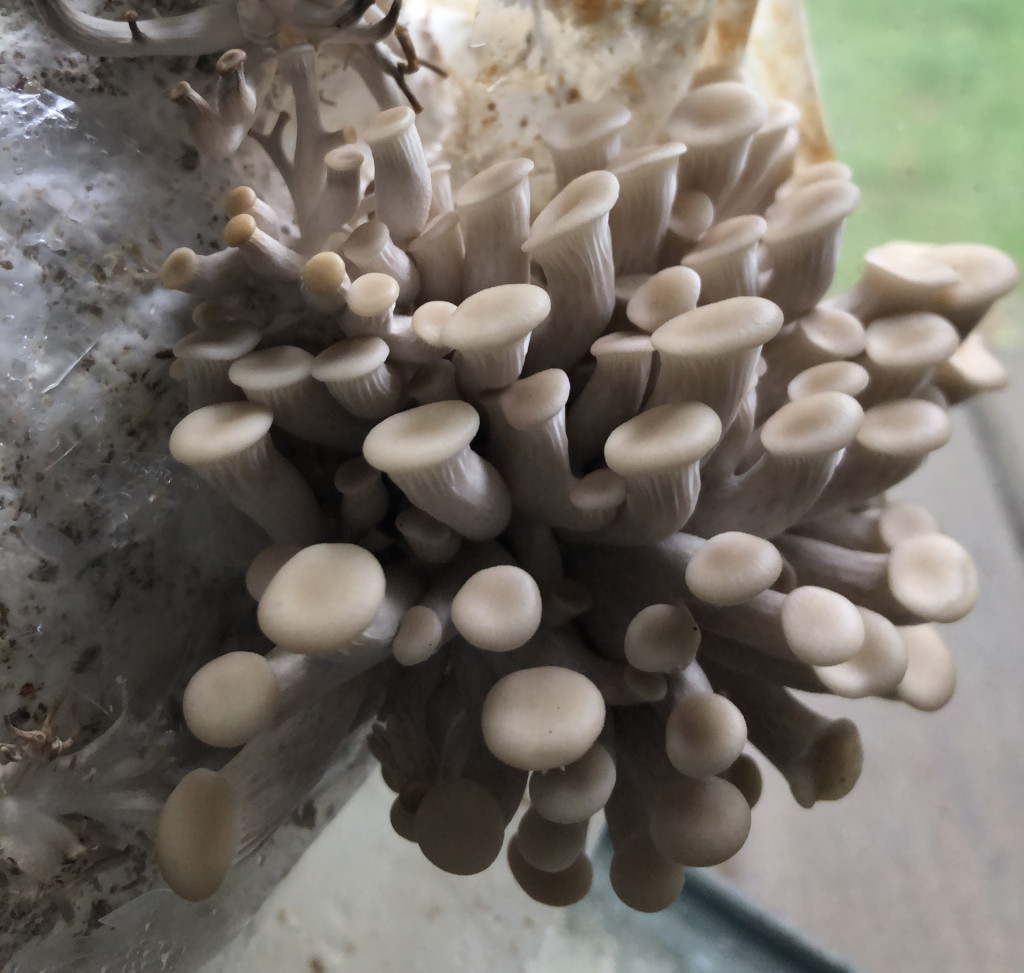
I’m growing oyster mushrooms using a grow kit from Mycophile’s Garden. They’re a mushroom farm located in Southwest Michigan and such a gift! I bought my first kit through West Michigan Farm Link (an awesome source for local food that I discovered this winter as I was trying to buy from more local farmers, even during the Michigan winter), but now they’re at my farmers market (and in Kalamazoo, Fulton Street, Grand Haven, St. Joe and others all over southwest Michigan), so I can easily restock. They also sell mushrooms by the pound, so you can pick some up tomorrow morning and make this salad for lunch!
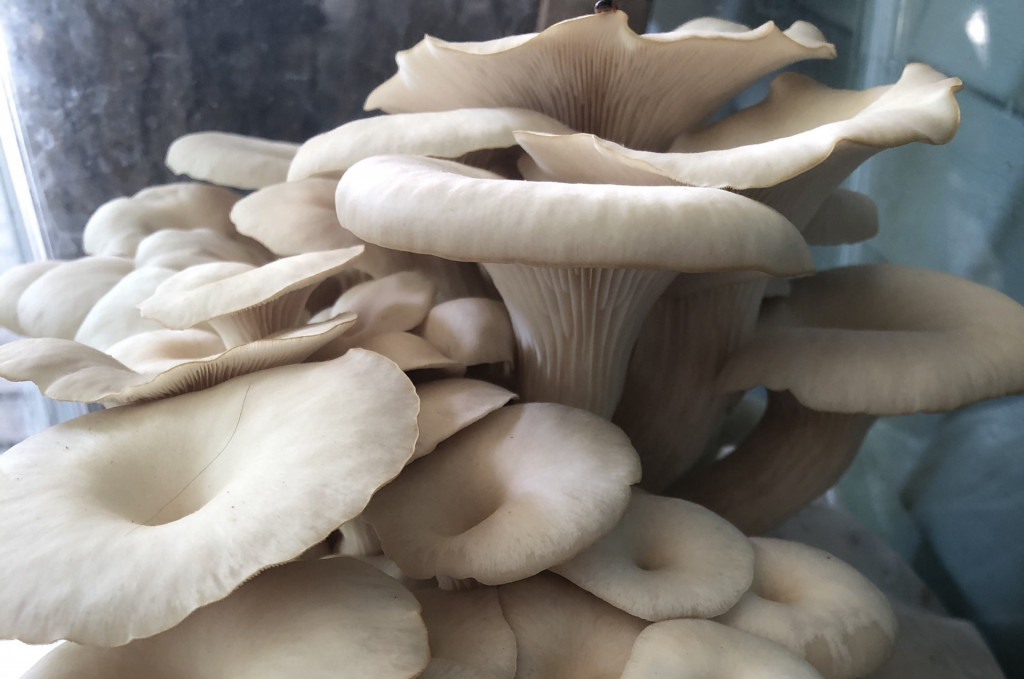
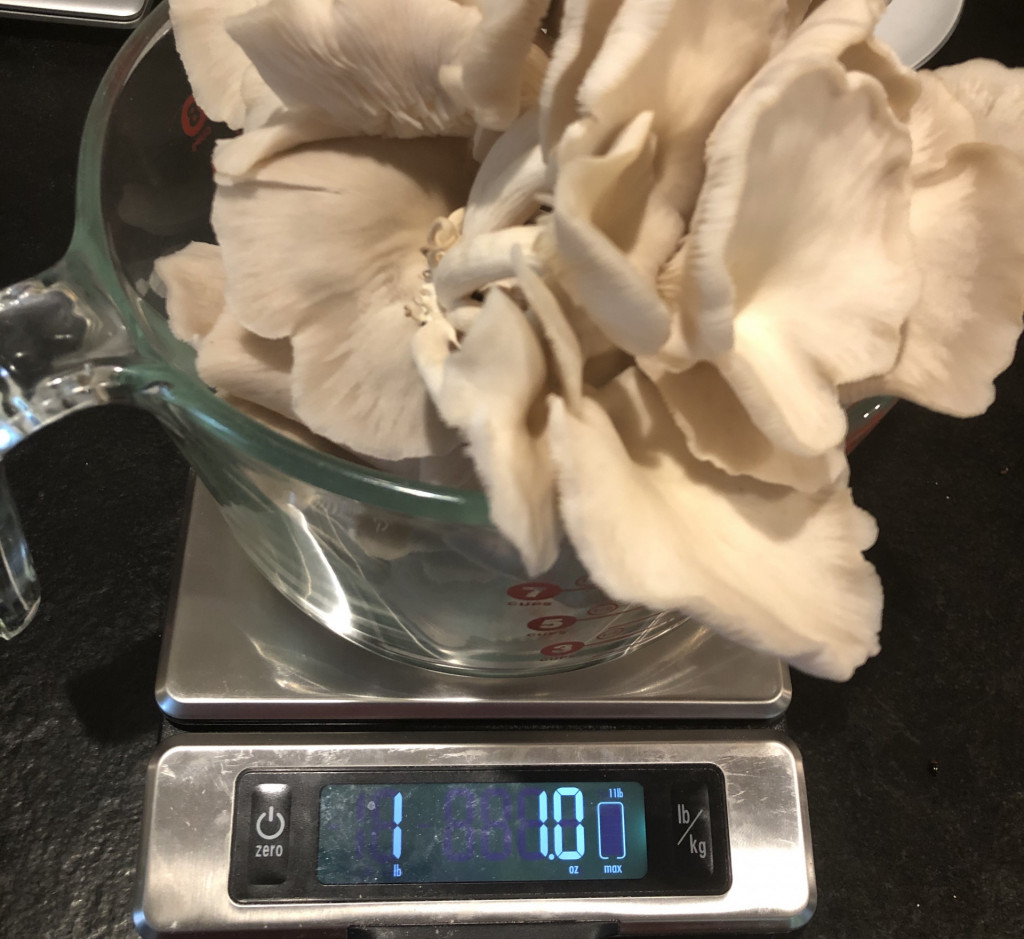
I paid $20 for my oyster mushroom kit and have already harvested 3 pounds of mushrooms! And mine is currently fruiting for the third time right now. It’s the little things like this that bring me so much joy! The kit comes with growing instructions and I’m shocked at how easy it has been to grow these beautiful and delicious oyster mushrooms.
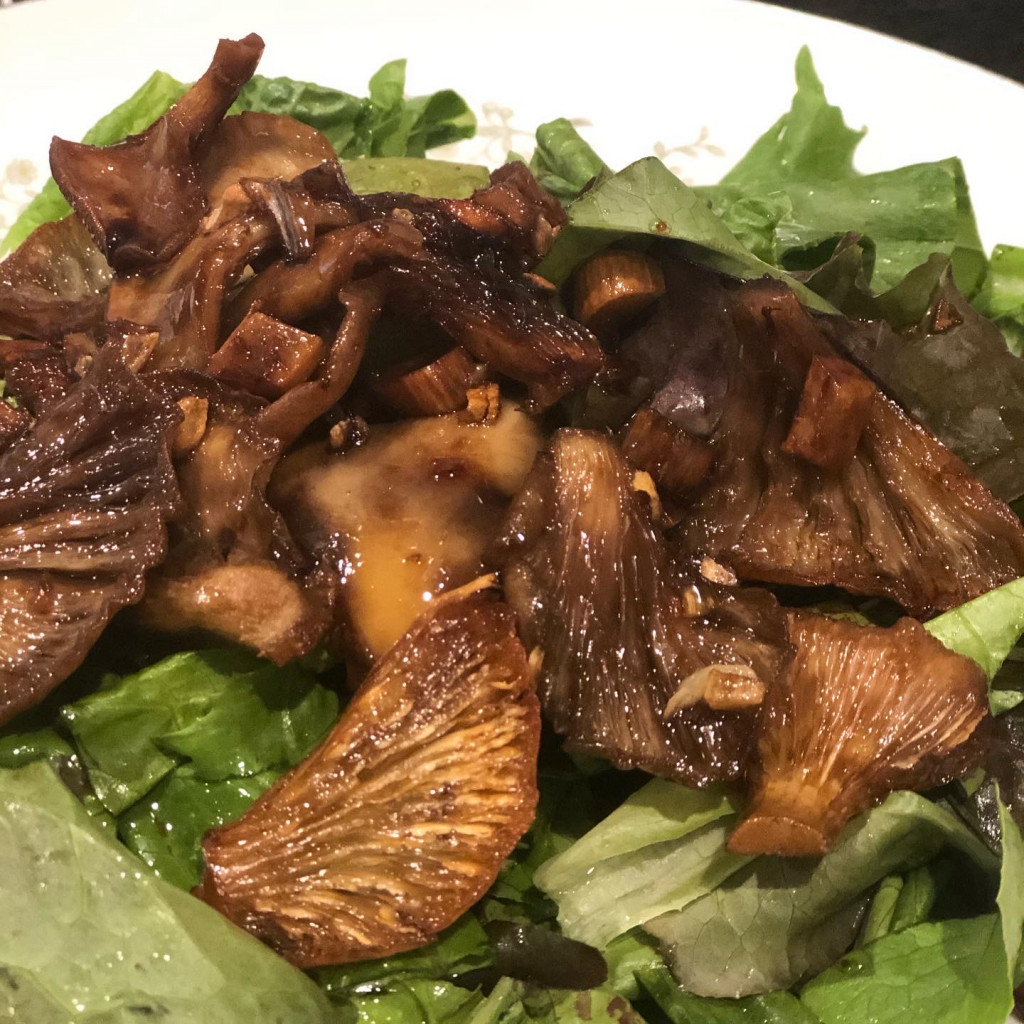
I’m trying to branch out and find new recipes (so please send me your favorites in the comments or by email carbonfreefamily@gmail.com), but it’s hard to try new things when this warm mushroom salad is SO. DAMN. DELICIOUS! I made a disappointing mushroom pizza (with the homegrown oyster mushrooms) a couple of weeks ago and Robbie summed it up well when he said, “I mean this pizza is pretty good, but I’m comparing it to that amazing salad and I want the salad instead.”
I usually make the salad with oyster mushrooms and they’re still my favorite by far, but I’ve tried it with shiitakes and lions mane too and it was pretty good too. If you try it with other varietals, please come back and tell me about it!
Recipe
(makes lunch/dinner salads for two or three people, more if you’re serving it as a side)
This recipe is adapted from Jamie Geller
Download a printable PDF of this recipe here
Ingredients
- 2 Tablespoons olive oil
- 1/2 to 1 pound mushrooms, cleaned and torn into pieces
- 2 garlic cloves, minced
- ¼ cup balsamic vinegar
- 3 cups salad greens (arugula works really nicely)
- salt + pepper
Instructions
- Clean your mushrooms. If they’re wild foraged and dirty, I recommend cleaning them as best you can without water, using a pastry brush, blowing the dirt off with your breath, or dusting it off with your fingers. Water changes the texture of mushrooms in a way thats unpleasant to me
- Tear them into large pieces. I read somewhere that the jagged edge makes them crisp up nicely and I’ve come to love the texture of torn mushrooms. If you have stems, chop them into small pieces.
- Heat olive oil over medium heat in a large saute pan, add mushrooms and cook, stirring occasionally until mushrooms are deep golden brown and have crispy edges, about 10 minutes.
- Add garlic and stir for just another minute to soften garlic a bit. Add balsamic and stir to coat mushrooms.
- Divide lettuce between 2-3 plates, top with warm mushrooms and drizzle with pan juices.
- Serve immediately and enjoy!
I can’t wait for you to come back and tell me how your mushrooms are growing! And if you like this salad! And if you tried it with other kinds of mushrooms!
]]>