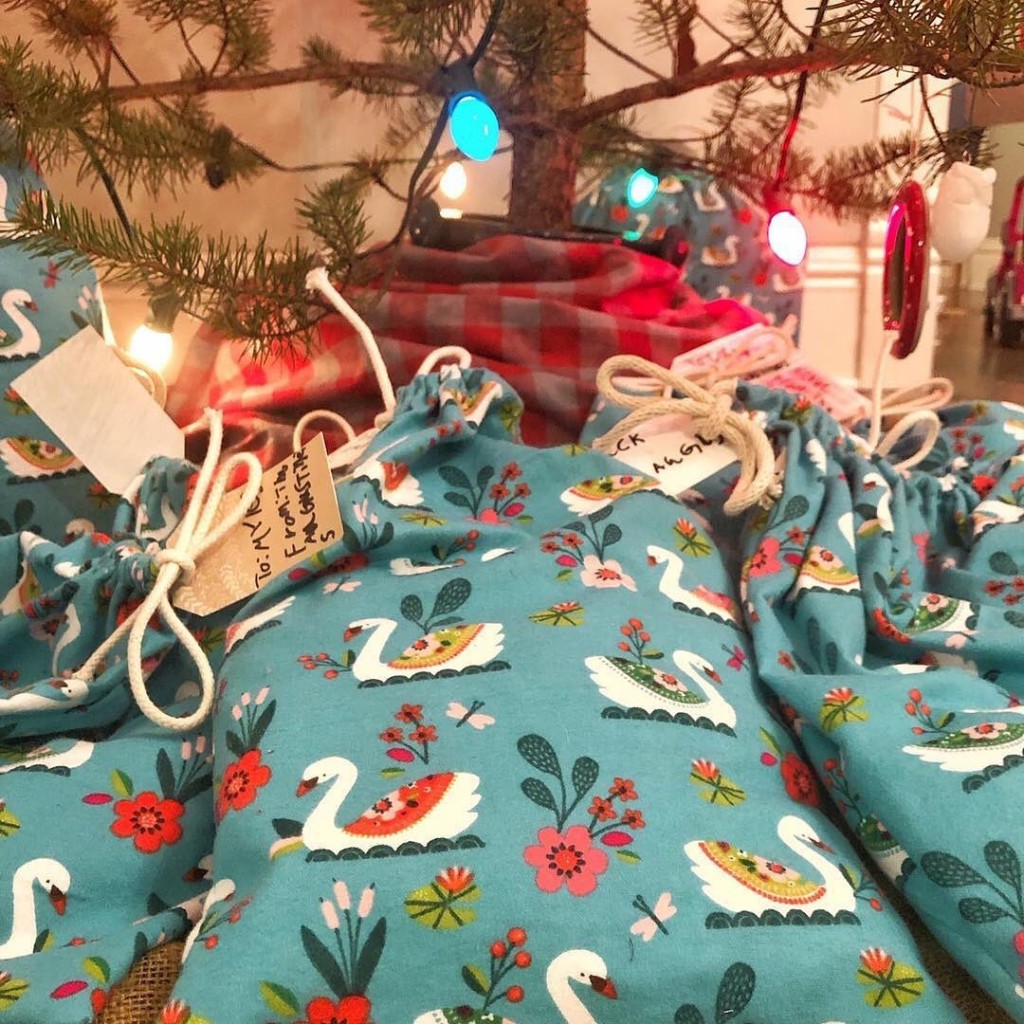
A few years ago, I sewed a bunch of reusable cloth gift bags in cheerful Christmas patterns and they continue to bring me such joy!
I love wrapping presents in these gorgeous bags. I love giving them to people (and am so honored when friends and family want to keep the bag in addition to the gift… in fact, you’ll regularly find me sneaking around and gathering my bags up after gift opening is over at our family gatherings). I love reusing them year after year!
AND they’re super easy to make! I swear, they’re a great project for beginner sewers because it doesn’t matter the size, shape, or even if they’re particularly square. The process is three simple steps: cut, sew, enjoy!
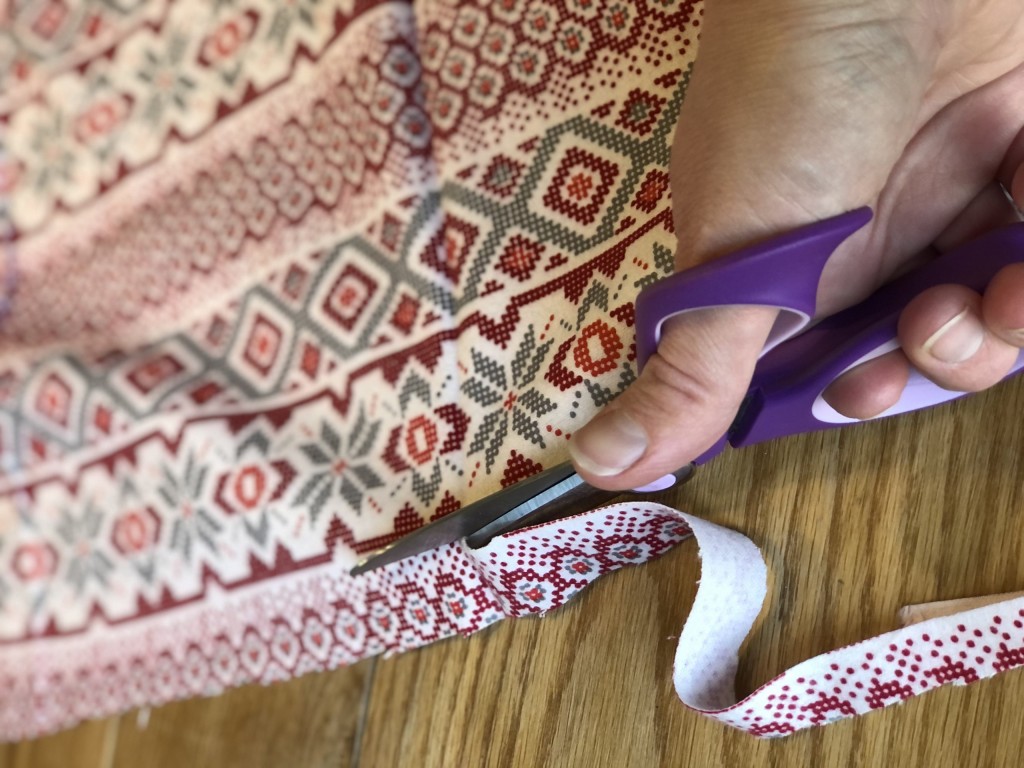
Step 1: Cut your fabric
If the exact size/shape isn’t important to you, I recommend letting your fabric dictate the size.
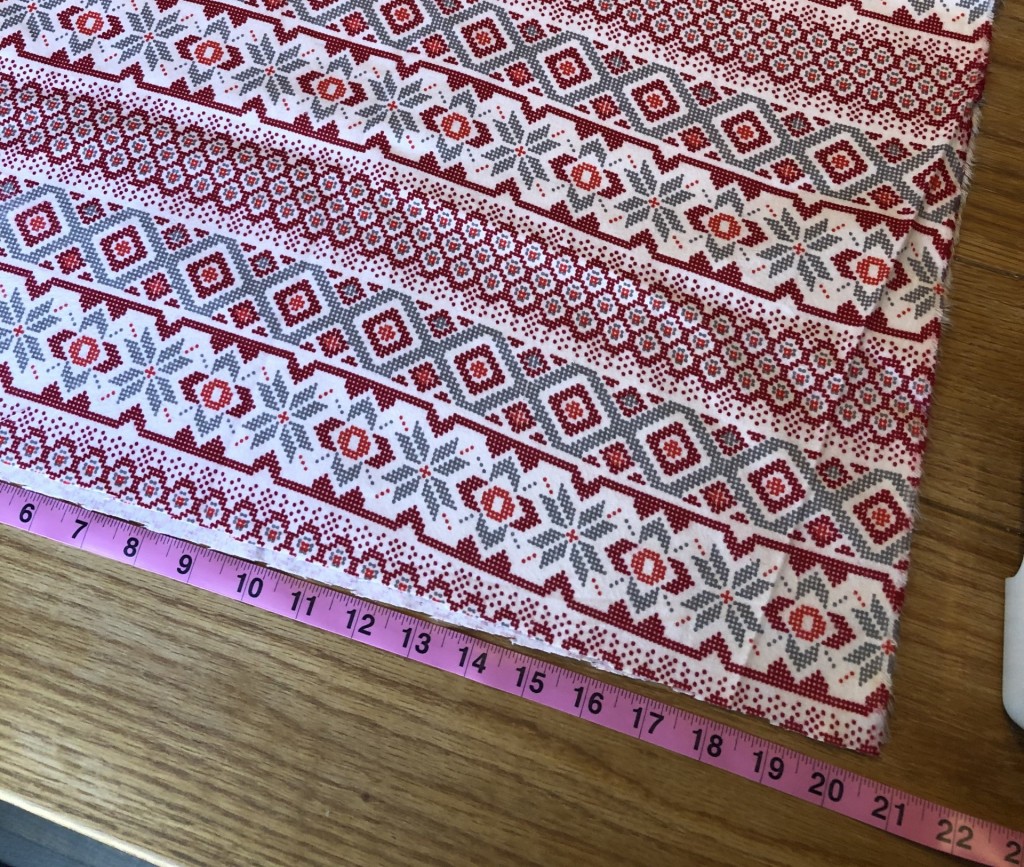
For example, my fabric is almost 42 inches wide, so I cut it exactly in half and made two 10 inch wide bags. I cut my fabric 15 inches tall and ended up with two 10”x13” gift bags. I love using printed fabric like this because it makes straight cuts easier. I pick a spot in the pattern and cut right along the “line”.
After cutting, my fabric is about 21 inches wide and 15 inches tall.
Step 2: Cut your cord
I used 1/4” cotton cord, but feel free to use bigger or smaller. Choose the top of your bag (based on the pattern) and cut your cord at least 8-10 inches longer than the width of your fabric (it will hang out 4-5 inches on either end when you’re done).
My fabric is 21 inches wide, so I cut my cord about 31 inches long.
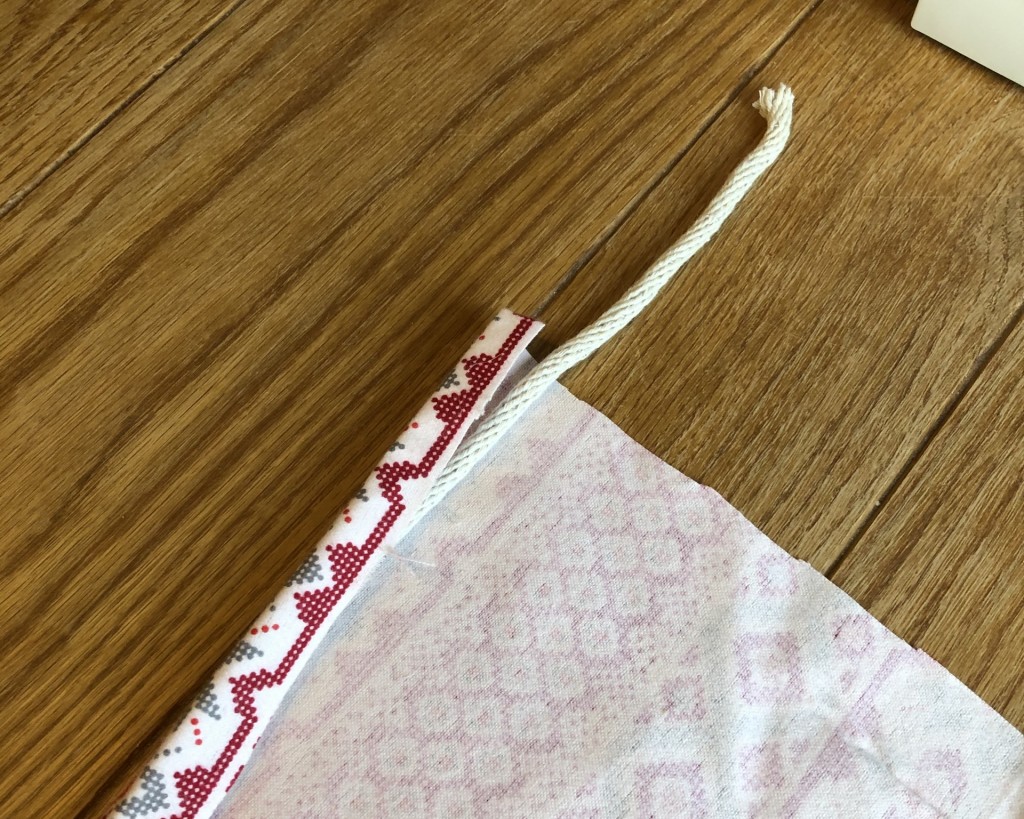
Step 3: Sew your cord into place
Place your fabric with the wrong side up* and the top pointing away from you. Place your cord along the top edge and fold the top of the fabric towards you. You’re going to sew a little pocket for the cord to slide through, so make sure there’s enough fabric that you can run your foot** along the seam without stitching the cord.
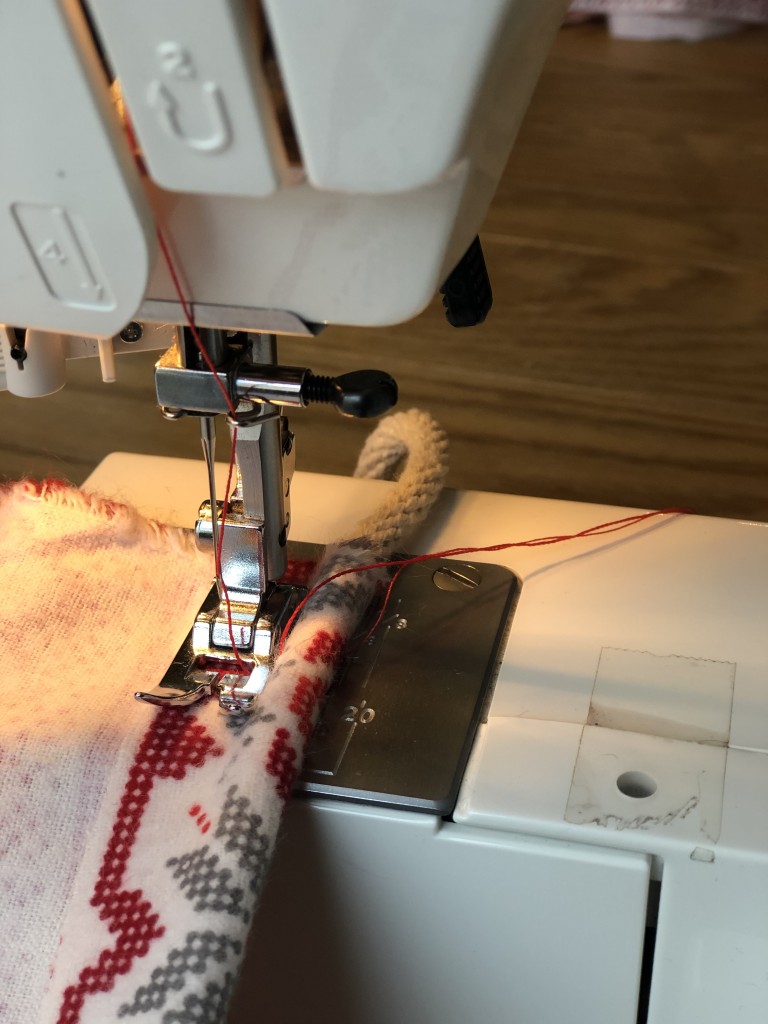
* the “wrong side” is what we call the back of your fabric, the side without the pattern, the side you want on the inside of your bag. ** the “foot” is the mechanism around the needle on your sewing machine as shown in this photo.
Step 4: Sew the other two seams
Keeping the wrong side up, fold your fabric in half. This will be the final shape of your bag, so the cord should be at the top and you should have seams to sew across the bottom and one of the sides. Trim any excess fabric if your edges aren’t lining up.
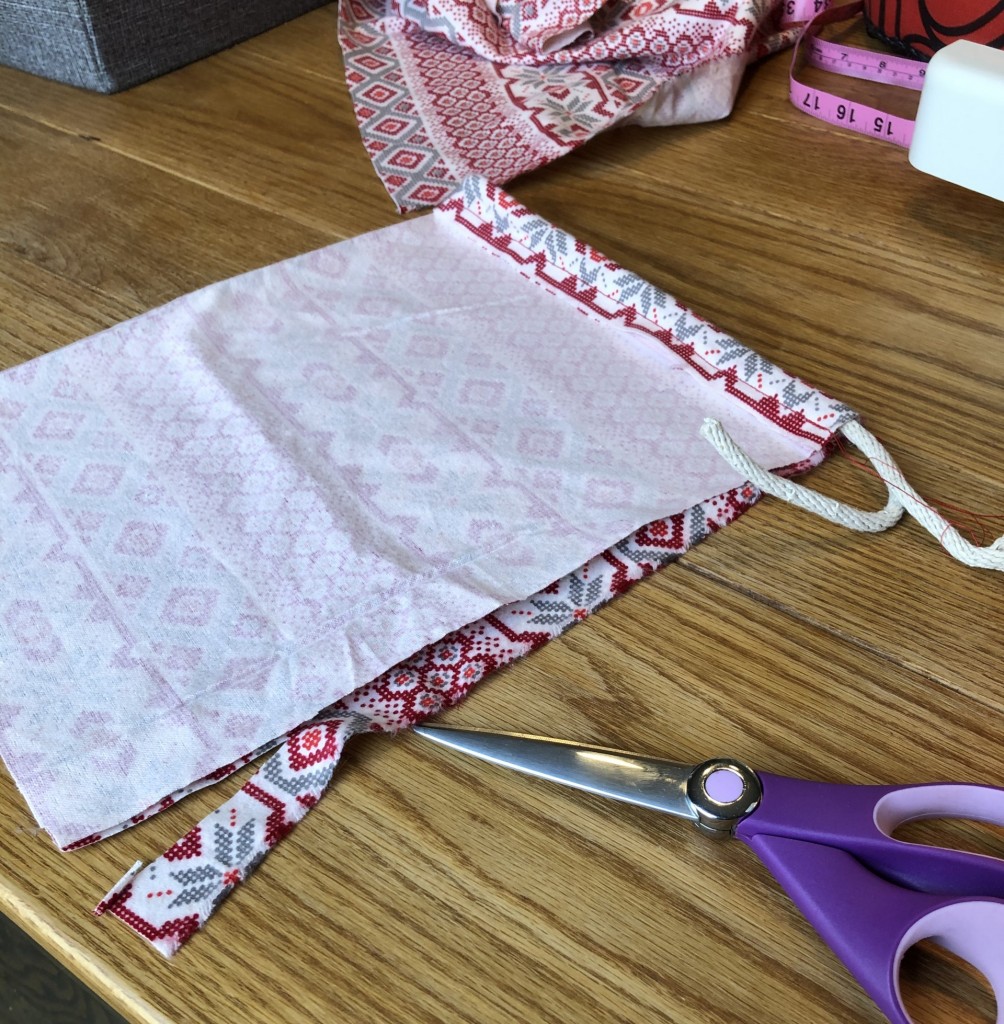
Go ahead and sew these seams. The only tricky part is making sure you don’t sew through the cord/pocket. If you do this, you won’t be able to pull the cord to cinch the bag closed.

Trim extra thread and turn your bag right side out.

Step 5: Tie knots at each end of the cord
This will prevent the cord from accidentally getting pulled into the pocket when someone is opening their gift. Fishing the cord back out is certainly possible, but a royal pain.

You’re done! You can make as many bags as you want, in a myriad of sizes to meet your gift giving needs!
I have about 24 bags total and the “10×13” bag I made today is the “medium” size bag in my collection. I have a bigger size (roughly twice as big) and a smaller size too. Three yards of fabric will yield about 8 medium and 2 large bags. I like to mix and match my colors and patterns, so I’ve purchased different patterns over the years.
Please drop your questions in the comments below. I’m always happy to answer questions!
And comeback to tell me about your experience if you’re making these reusable gift bags for the first time. I can’t wait to hear about your project!
PS. Does this post feel familiar? It should! It was originally posted a couple of years ago. I’ve updated and republished it because it’s one of my favorite posts.
]]>Most of us firmly believe that one is “better” than the other, but there’s a really interesting debate about the sustainability aspects of this tradition. Here are a few pros and cons to consider when choosing the type of tree you use to celebrate the holidays.
Natural Trees
PROS
- The trees provide many benefits to the environment as they grow, cleaning the air and providing watersheds and habitats for wildlife.
- They are a renewable resource and replanted after being cut.
- They grow best on rolling hills that are often unsuitable for other crops.
- When you buy a tree from a local farmer, you’re supporting the people who live in your community.
- Trees are biodegradable and can be composted, mulched, or burned.
- The British Carbon trust estimates the average carbon footprint of a natural tree is 3.5kg of CO2 when composted, mulched or burned.
CONS
- Buying a tree every year can get very expensive. According to Consumer Reports, the average cost of a natural Christmas tree in 2020 was $81.
- Not everyone has access to local Christmas trees and transportation contributes to the environmental impact of your tree. If you drive more than 10 miles to get your tree, it might be more environmentally friendly to purchase an artificial one.
- Not everyone has access to tree recycling programs. In the UK, an estimated 7 million Christmas trees are landfilled each year.
- The British Carbon trust estimates the average carbon footprint of a natural tree is 16kg of CO2 when composted, mulched or burned.

Artificial Trees
PROS
- The average artificial tree costs $107, making it the economical choice in the long run.
- Caring for your tree and extending its use beyond the average seven years will certainly reduce the environmental impact.
- Reselling, gifting, or donating your tree when you’re done with it will help extend the life.
- If you use your tree for 12 years or more, you might actually have less of a carbon footprint than a natural tree.
CONS
- Most of the artificial trees on the market are made of PVC and steel in China and shipped to the United States.
- Artificial trees are used for an average of 7 years before it is disposed of. If a tree is displayed for 1 month/year, it will have served as a Christmas tree a total of 7 months.
- Most artificial trees cannot be recycled at the end of their life.
- The British Carbon trust estimates the average carbon footprint of an artificial tree at 40kg.
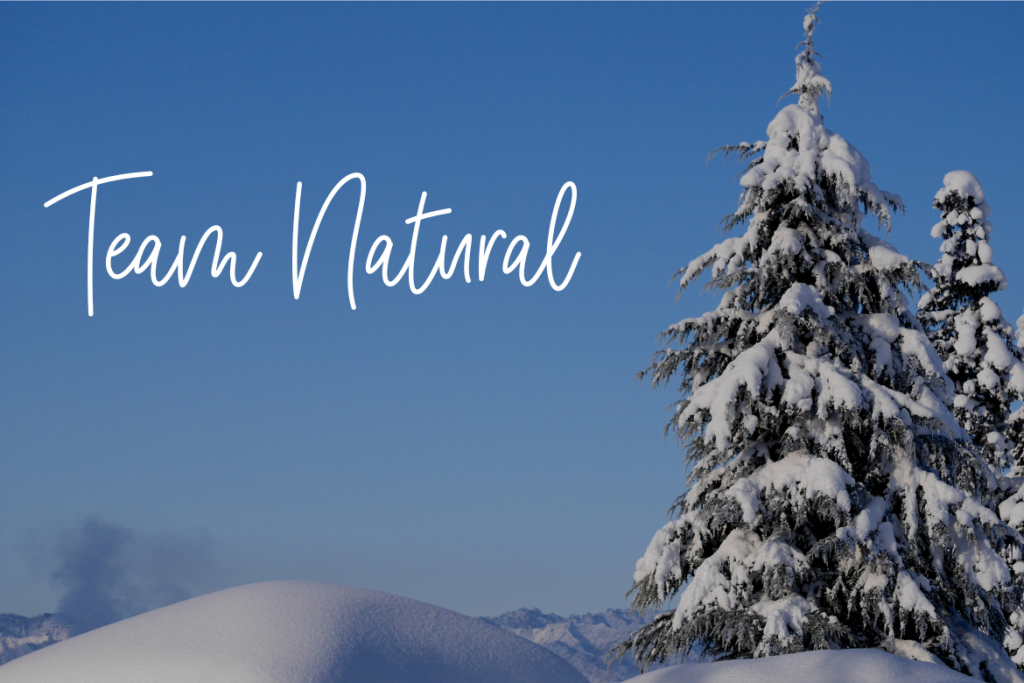
My vote? Team Natural!
My family sits squarely on Team Natural. In fact, we choose to hunt for our Christmas tree in the National Forest each year and it’s one of my favorite family holiday traditions! We love the adventure of wandering through the wild forest, foraging for the “perfect” Christmas tree.
Did you know you can harvest a Christmas tree from the National Forest? You can! And in Michigan, the permit is only $5. Read more about my tips and recommendations for a successful Christmas tree hunt in the national forest here, in this updated blog post.

Let’s Recap
If you’re going to buy a natural tree, buy local from a tree farm or retailer (preferably less than 10 miles from your home) and don’t throw your tree in the trash after the holiday.
Lots of municipalities have specific days for curbside recycling of Christmas trees. Alternatively, you can put it in your yard waste container, drop it off at a local recycling center, or let it naturally biodegrade on your own property if you have the space.
Birds and small mammals love the extra shelter and you’ll be shocked how quickly the tree decomposes. Usually, your county/city will share this information right after Christmas. Please feel free to share a link to your county/city tree recycling program in the comments. I’m sure your co-workers will appreciate it!
If you’re going to buy an artificial tree, buy the most durable one you can find (look for warranties) and keep it as long as possible.
For all this debate, it’s worth maintaining the perspective that no matter which you choose, your tree has a climate impact equivalent to driving roughly between 10-20 miles. So, bike to work a few days a year, and you’ve already offset your tree, no matter which type it is.
What about you?
Are you on Team Natural? Feel free to share your favorite local tree farms in the comments.
Are you on Team Artificial? Who’s had their artificial tree the longest? Anyone over 10 years? 20 years? What’s the sturdiest model available?
Here are links to my sources if you’re interested in digging deeper.
https://www.sightline.org/2015/12/21/your-christmas-trees-carbon-footprint/
https://www.nytimes.com/2018/11/26/business/energy-environment/fake-christmas-tree-vs-real-tree.html
https://www.independent.co.uk/environment/christmas-trees-recycling-environment-sustainability-plastic-a8705081.html
https://www.carbontrust.com/news/2013/01/christmas-tree-disposal-advice/
https://www.in.gov/dnr/forestry/7561.htm?fbclid=IwAR3PlYxqOFDnWILG7ej8_BPRSsCPhO2LjGq2L9dZ3gXqwh7NKeu55LX53eY
https://www.thinkstep.com/content/study-comparative-life-cycle-assessment-artificial-and-natural-christmas-tree
]]>
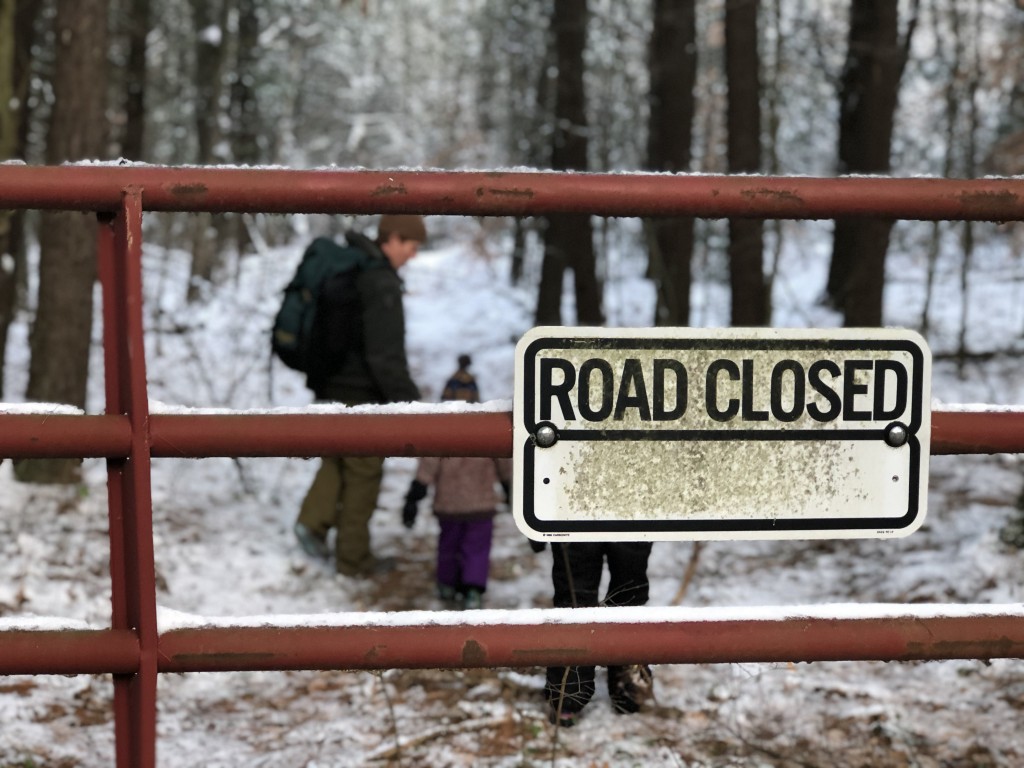
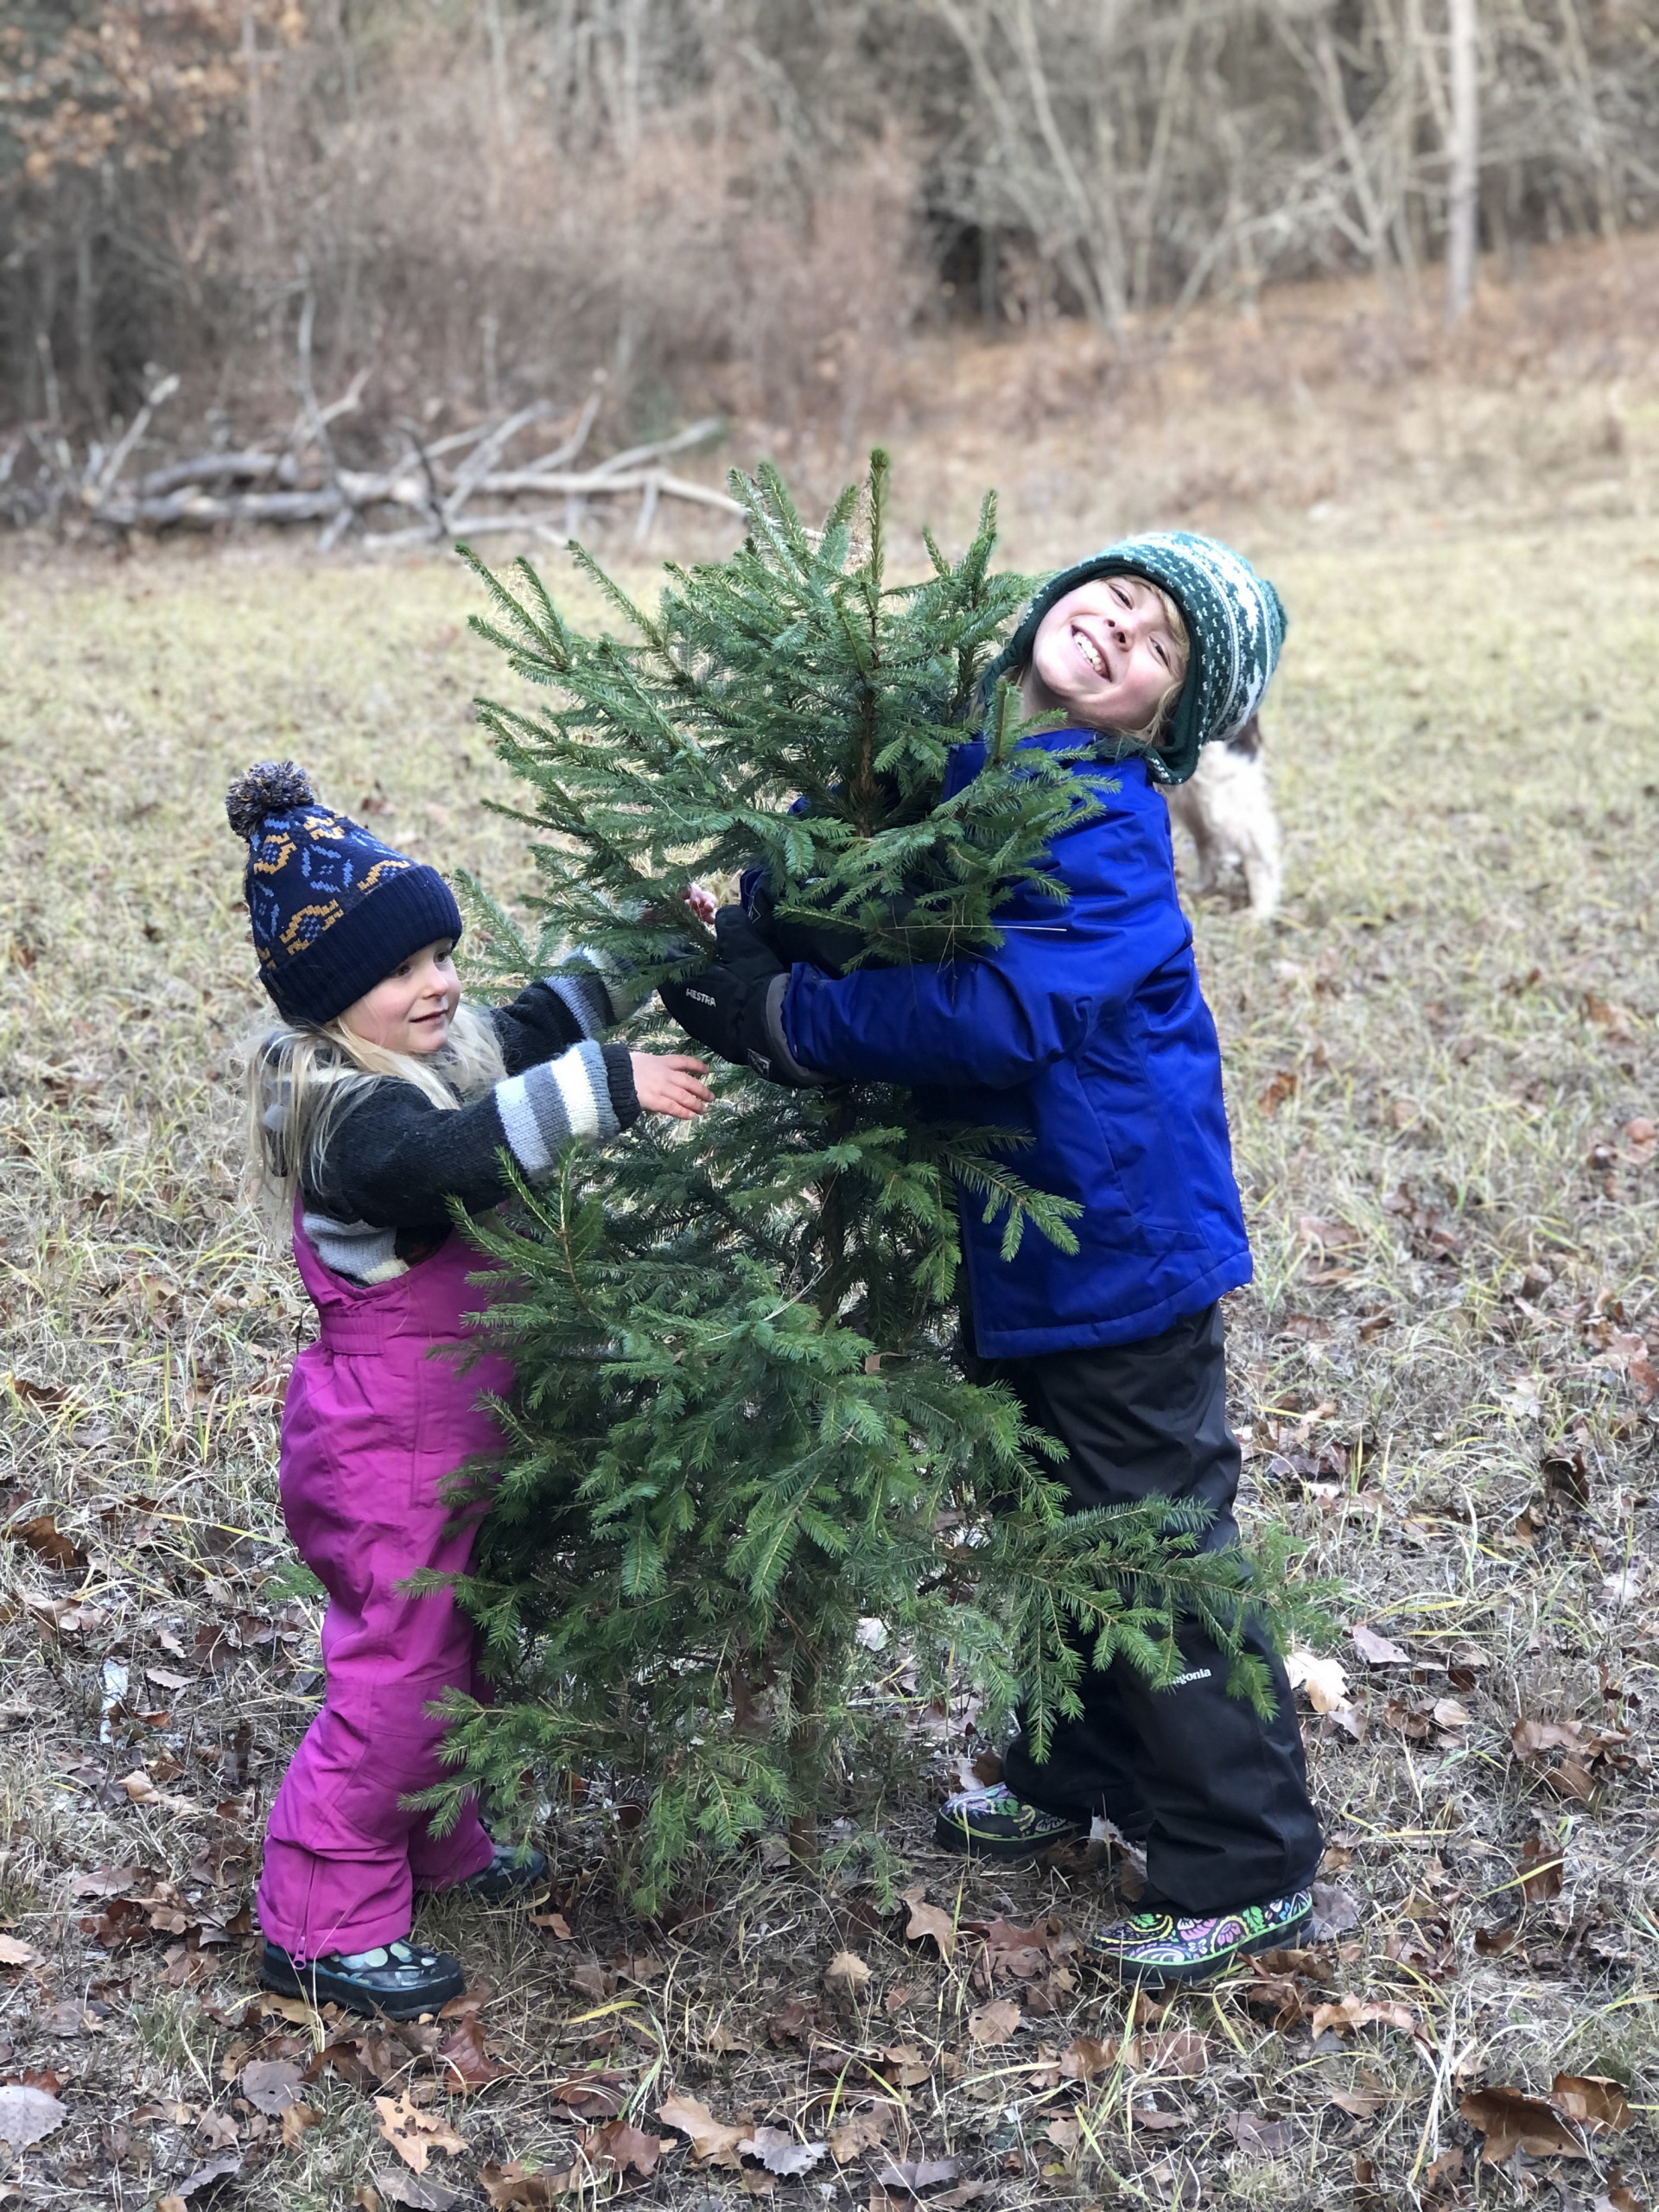
This is one of my FAVORITE family holiday traditions! We love the adventure of hunting for our Christmas tree in the natural woods! We pack hot chocolate and marshmallows, and make an afternoon out of it!
To be clear, my Christmas tree does NOT look like the $50 version many of us are used to buying from a tree lot. It’s hard to find a small, bushy tree (remember, we’re talking about a natural forest here), but I LOVE the entire experience and wouldn’t trade it for the world.
By harvesting a tree from the National Forest, I’m contributing to the overall forest health. As highlighted on recreation.gov, “Christmas tree permits are a unique opportunity for citizens to help thin densely populated stands of small-diameter trees – the perfect size for a Christmas tree.”
Ready to plan your hunt?
For a great day of family fun while hunting for a Christmas tree hunt in a National Forest near you, I recommend the following preparations:
- Plan to spend the whole day, don’t rush. One year, we tried to cram our Christmas tree hunt into an afternoon and ended up hunting well into twilight and hauling our tree out of the woods in the dark! Don’t get me wrong, we still had an amazing time, but I would have enjoyed it even more if we’d had more time for our fireside picnic. And, especially if this is your first time… it will take longer than you think.
- Pack a picnic. We love to bring snacks, hot cocoa, and s’mores supplies. Especially if it’s cold, we sometimes build a little campfire to warm our fingers and toes (of course, we make sure to build it in a safe spot and extinguish the fire completely before we leave). We try to move slowly through the adventure, making time to enjoy the woods before cutting our tree and coming home.
- Review the maps provided by your local organization to make sure you know where you are, and more importantly are not allowed to cut a tree. Be a good citizen and pay attention to private property signs. In Michigan, small parcels of private property and National Forest land are often intermingled. It’s also helpful to review aerial maps (on google) ahead of time to look for heavily forested areas and to identify areas with conifers.
- Take some printed maps along on your adventure. Sometimes our day proceeds exactly according to plan, but more often than not we have to adjust our plans along the way. We regularly find ourselves without cell service at various points during our hunt and are always grateful to have printed maps. We have an atlas that covers the whole of southern Michigan. We also print maps from recreation.gov to make sure we have the most updated information. If you live in Michigan, here are some additional maps to reference:
https://www.fs.usda.gov/Internet/FSE_DOCUMENTS/fseprd536815.pdf
https://www.fs.usda.gov/Internet/FSE_DOCUMENTS/fseprd536816.pdf
- Brush up on your tree identification skills. Your National Forest may limit the specific types of trees you’re allowed to harvest for your Christmas tree. If you’re not 100% confident in your tree identification skills, bring a book along with you!
- Consider buying two permits. If you have enough space in your home, think about buying a second permit so the kids can select and bring home their own tree. Crafting a love of the forest and outdoor adventures is a key point to this adventure for Robbie and me. You should see the pride in my girls’ faces as the find the perfect tiny tree for their bedroom. They name the tree, they carefully carry her to the car, place her in their shared room, decorate her with their favorite ornaments (she’s so small, it really only takes a few lights/ornaments and you could easily use paper chains and other homemade decorations if you don’t have extras), and water her every day. I said “no” to a second tree for years and I’m so happy I finally realized how much extra fun it could add to our adventure.
- Get ready for a fun family adventure!
![]()
Ready to buy your permit? It’s a quick and easy process! Here are a few tips:
Visit Recreation.gov for more information and to buy your permit online. It’s really quite easy! The website will help you through the following steps.

Choose Your Forest
Determine which participating forest works best for your Christmas tree outing. Each forest will have specific guidelines and season dates for cutting a holiday tree.

Get the Details
Be safe and prepared. Carefully read the details and rules of your permit, and follow the Need to Know suggestions to prepare for your visit.

Buy a Permit
Purchase and print your permit so you’re ready to find your perfect holiday tree.
I can’t wait to hear about your experience harvesting a Christmas tree from a National Forest near you! Please share your experience, stories, and recommendations!
PS. Does this post feel familiar? It should! It was originally posted a couple of years ago. I’ve updated and republished it because it’s one of my favorite posts.
]]>